
Putty is an open-source and free terminal emulator, serial console, and network file transfer application. Putty supports many variations on the secure remote Terminal. Also, several network protocols are supported by Putty such as SCP, SSH, Telnet, rlogin, and raw socket connection. Putty is able to be connected to a serial port. Putty was originally written for Microsoft Windows, but it has been ported to various other Operating Systems. In this article, you will study the Tutorial Setup SSH Tunnel with Putty. To experience a new generation of quality and support try Eldernode Linux VPS and Windows VPS and stay professional.
Table of Contents
How to Setup SSH Tunnel With Putty
PuTTY is a freely available SSH and Telnet client for Windows. Join us to learn about setting up SSH Tunnel with PuTTY in a new easy way. Review the following steps and finish this guide successfully.
Setup SSH Tunneling With Putty
How to load the gateway
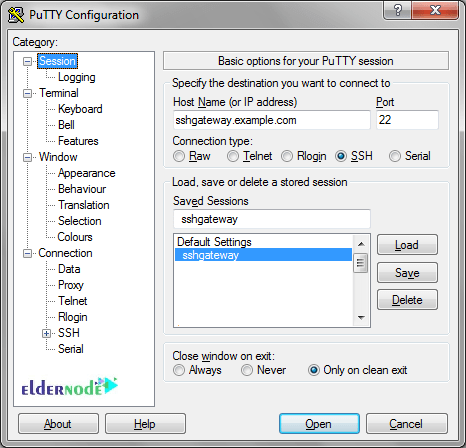
If you have not done it before, you need to create and save the SSH gateway server. Then, select it from the Saved Session list and click ”Load”.
How to configure the Tunnel
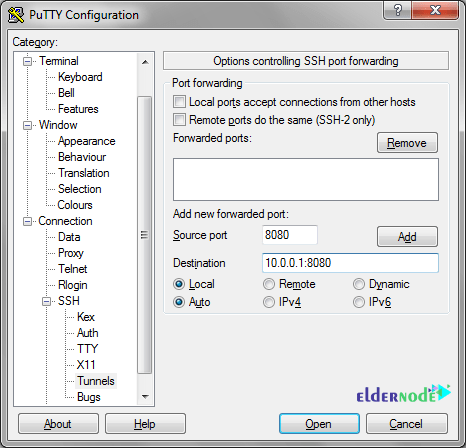
Now, you must click Connection in the left-hand side vav tree, then on SSH, and on Tunnels. Next, enter the port that you want to connect to locally under ”Source port”. Then supply the destination address.
Note: The server that is available from your SSH gateway, but not from your local machines as ”Destination”
How to create an SSH tunnel with Putty
To connect to your gateway, click ”Open” and log in. As long as you leave that SSH terminal window open, all traffic to the Source Port on your local host will be forwarded on the Destination.
How to create a new SSH tunnel
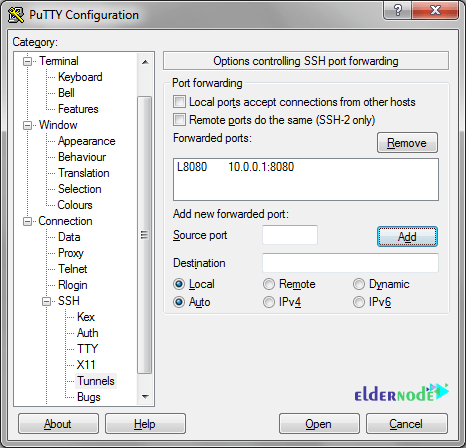
You need to add a port number into the ”source port” filed to add a tunnel. That will be the port on the local machine you will connect to. Then, you must enter the destination IP address, following by a colon then the port number. Next, click the ”Add” button and it will be added to the list of tunnels.
When you are connecting to the SSH server, connecting to 127.0.0.1 on port 1435 will actually connect to 10.10.1.143 port 143 via the SSH server.
Note: The source port needs to available on your local machine and the destination must be accessible from the SSH server for this to work.
How to remove an existing SSH tunnel
Any time you need to remove an existing SSH tunnel, you can simply click it in the list of forwarded ports and the ”Remove” button.
How to create multiple SSH tunnels
You can also create multiple SSH tunnels. You must ensure being uniqueness of each source port.
Conclusion
In this article, the Tutorial Setup SSH Tunnel With Putty was presented to you. SSH tunneling or SSH port forwarding is used for creating an encrypted SSH connection between a client and a server machine. In case you are interested in learning more, find our related article on Tutorial connect to ssh on Linux Server.