Sometimes you need one or more servers to launch a new application. You may be worried that the new software will interface with your previous software and you may want to separate their servers and provide a Dedicated Server. You have to pay to purchase new servers, but the Technology world has provided virtualization to solve such a problem, and by using the virtualization method, you will be able to install the software or application without buying new hardware and servers. VMware is one of these virtual machine software. In this article, we will Setup VMware ESXi on Dedicated Server. If you want to buy a Dedicated Server, you can check out the packages offered on the Eldernode website.
Table of Contents
How to Setup VMware ESXi on Dedicated Server
What is VMware?
VMware is a virtual machine software that provides a platform for cloud computing and virtualization and supports multiple operating systems running on Windows or Linux PC. It is a Californian company founded in 1998 to provide a platform for IT infrastructure virtualization. The company is known worldwide as the vSphere VMware Hypervisor. VMware has grown significantly since 1998. The company was acquired by EMC in 2004. This virtual machine enables multiple versions of an operating system, or there may be several different operating systems that can run simultaneously on an x86-based device.
With VMware Server Virtualization, a Hypervisor can install on a physical server that allows multiple virtual machines to run on the same physical server. Each virtual machine can run its own operating system, meaning that multiple operating systems can run on a single physical server.
In the rest of this article, we are going to teach you step by step how to Setup VMware ESXi On Dedicated Server.
VMware Features
– Support for Kubernetes Containers
– Improved Resource Management with Distributed Resource Scheduler
– Centralized Lifecycle Management
– Enhanced Security
– Business Continuity
Installing VMware ESXi on Dedicated Server
First, you should go to VMware’s official website and create an account. After creating the account, download the ESXI ISO file from the VMware official website for free. You should have the ESXi installer.
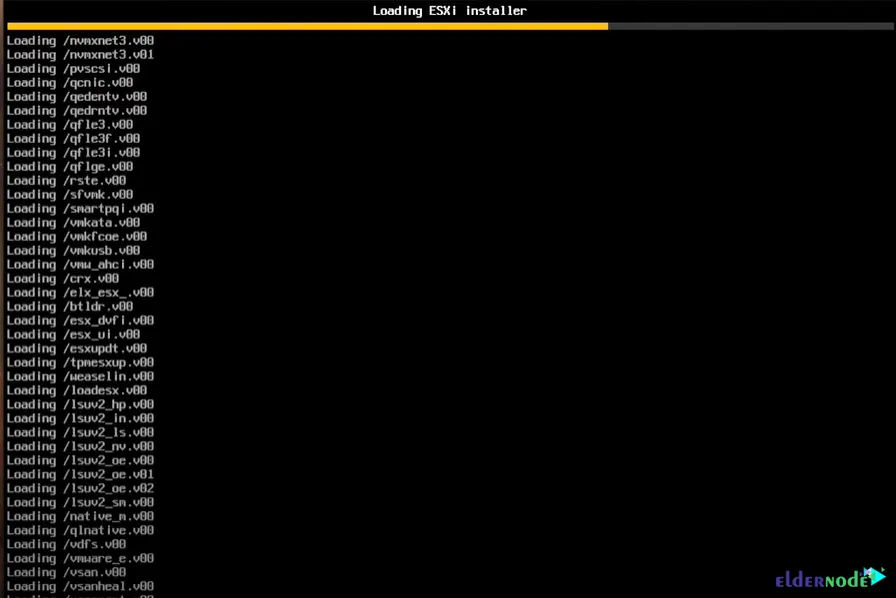
You can use a bootable USB stick or loaded onto a CD or DVD or whatever it may be. Then, you need to boot in ESXi before installing it.
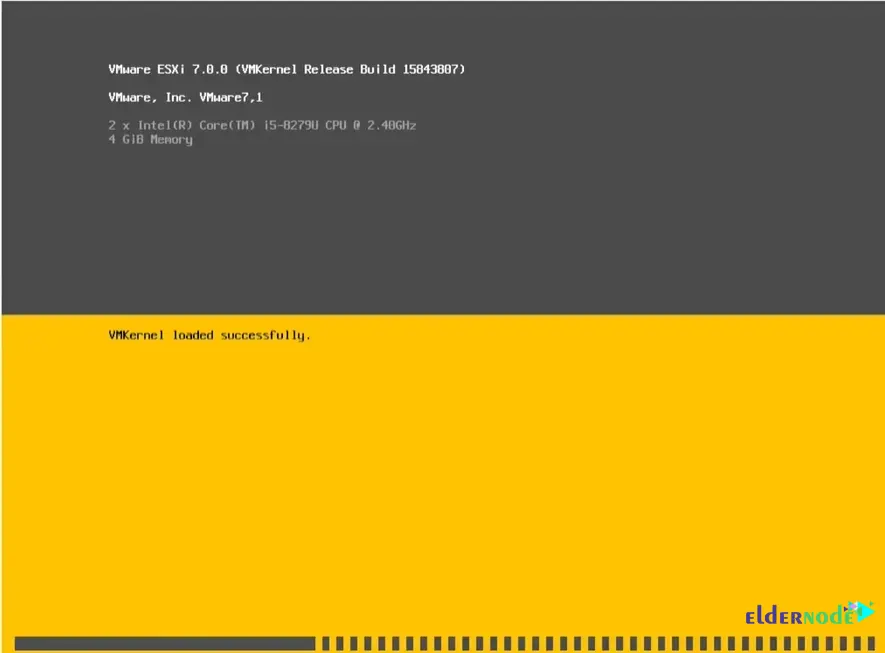
The installer will list the boot and the actual installer is going to commence. All the files needed to build the ESXi environment will be loaded:
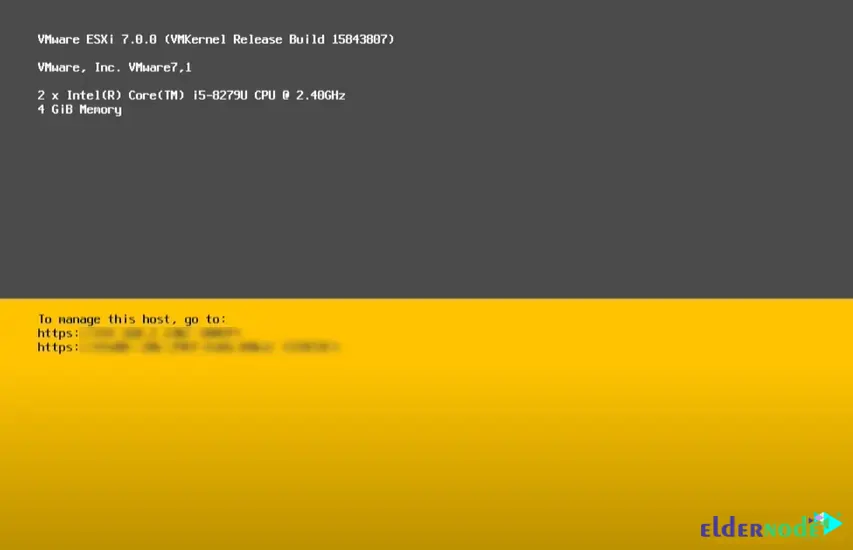
You have got ESXi and all the spaces of the actual resources that have been allocated which includes the CPU type and gig of memory that has been allocated:
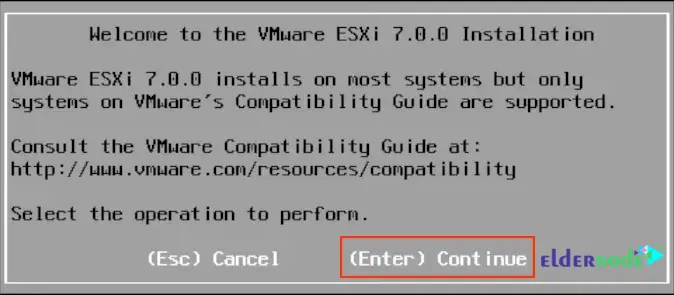
Now you should see the Welcome screen. Press Enter to continue:
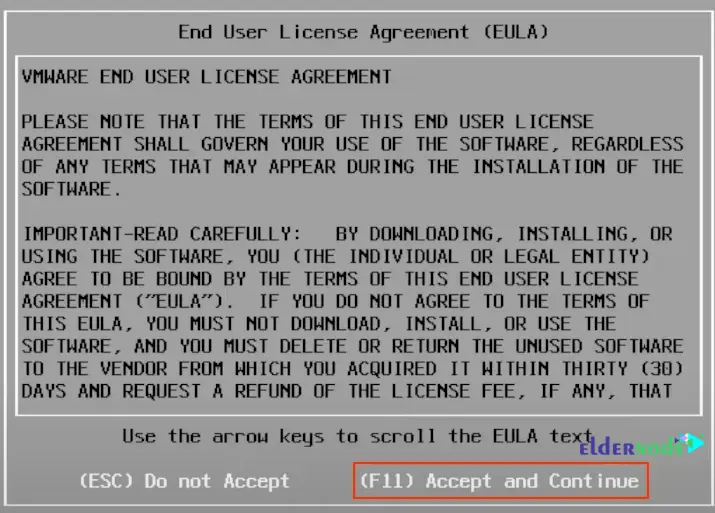
In the next step, you will see the VMware End User License Agreement page. If you accept the terms and conditions just press F11:
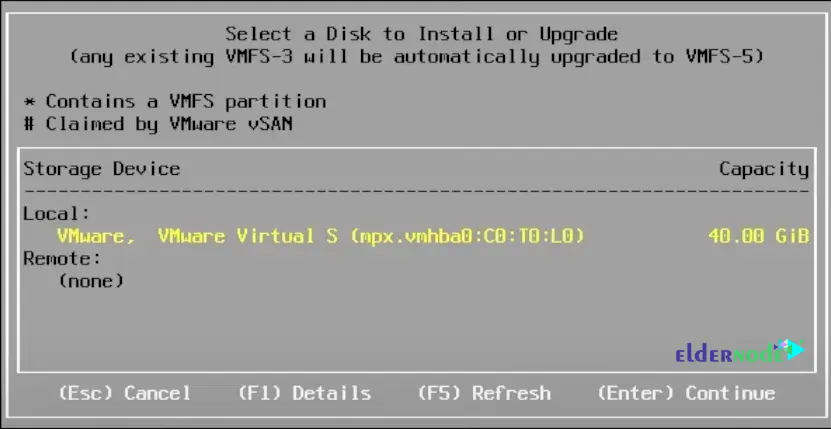
Then it will scan for available devices:

Now you should select a Disk to install. The hard drive you choose can be any size that is assigned or available to you when installing ESXi.
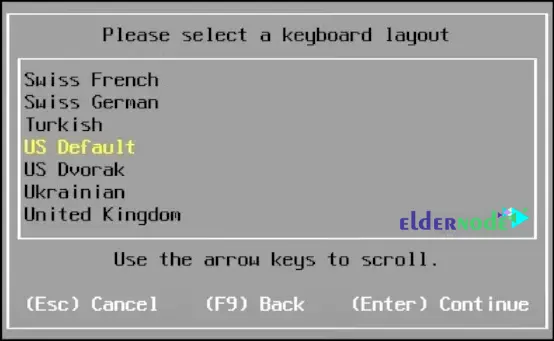
Then select your location and press Enter:
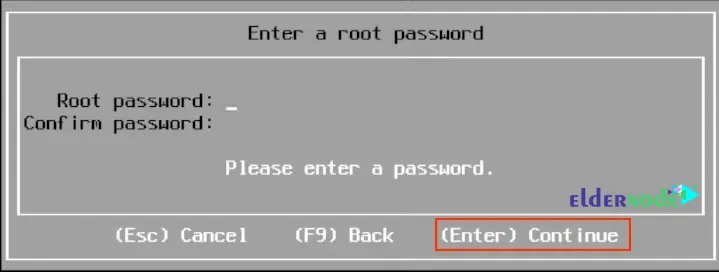
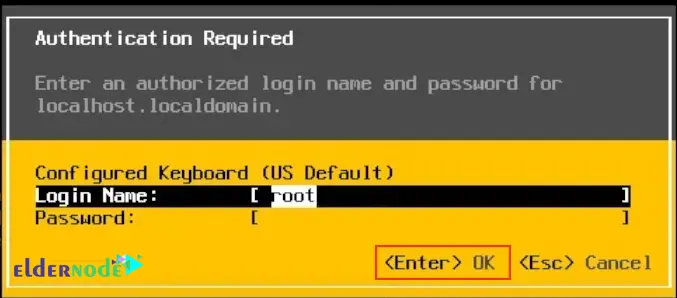
Next, you need to enter your root password which is the master password for your ESXi. Remember that when you are logging in to the ESXi host, it will ask you for your root credentials:
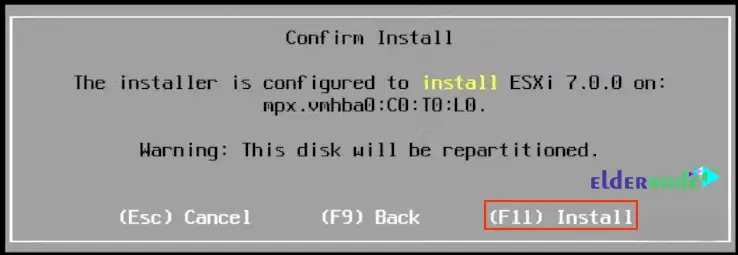
This step is time to configure the installation in the desired location. You will receive the partitioning warning again. Just press F11 to start the installation:
The installation will begin. Wait a while for the installation to complete.
After the installation is complete, reboot your server. You can remove the Installation Media before restarting:
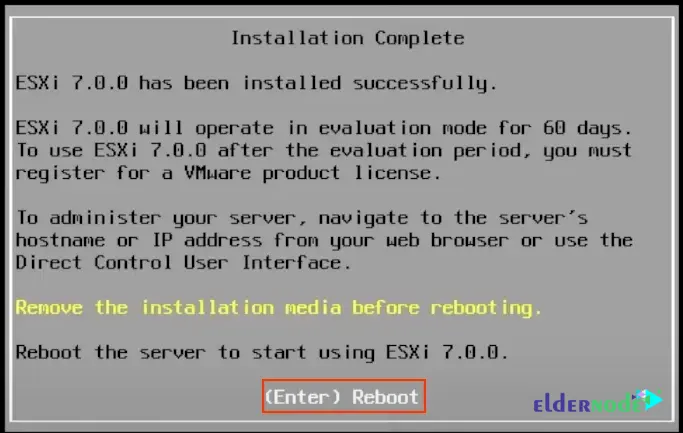
That’s it! The VMware ESXi is installed and it is ready to use.
Setup VMware ESXi on Dedicated Server
The IP address you see below is automatically assigned to you through DHCP. It is best to set a static IP address for your ESXi host. Press F2 to customize the system and view logs:
Then you have to re-enter your root password:
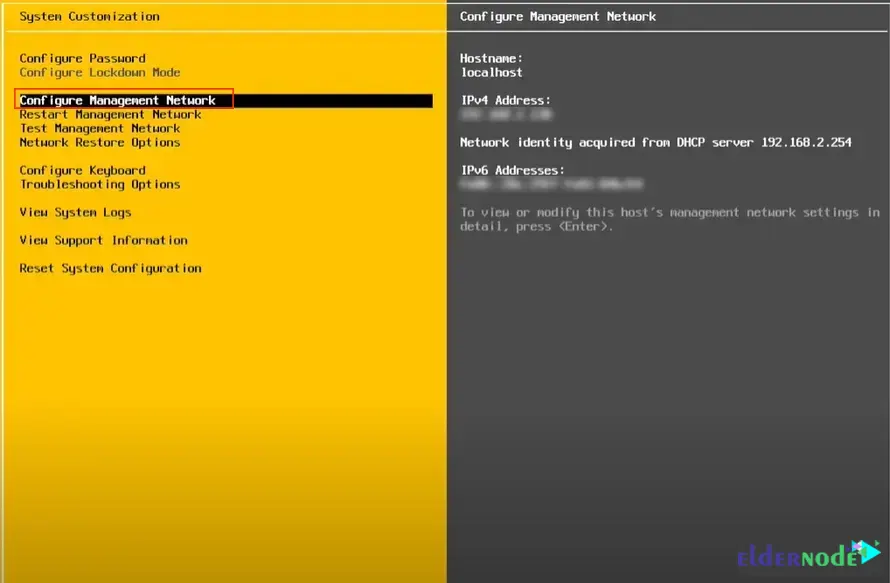
In this step, there are some system configurations where you can configure your password and configure Management Network, test your Management Configurations, Configure your keyboard, or troubleshooting Options if you want to go into the ESXi shell. select Configure Management Network and press Enter:
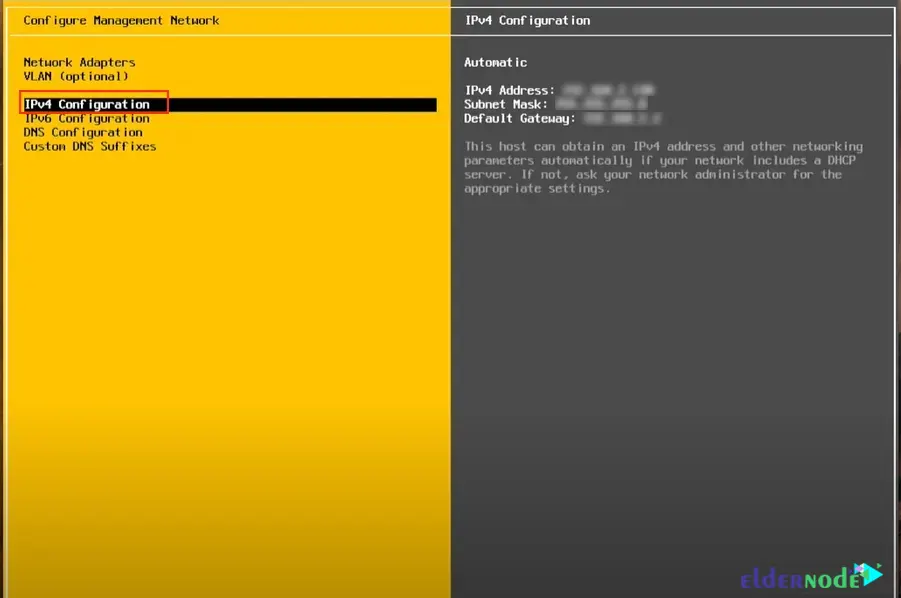
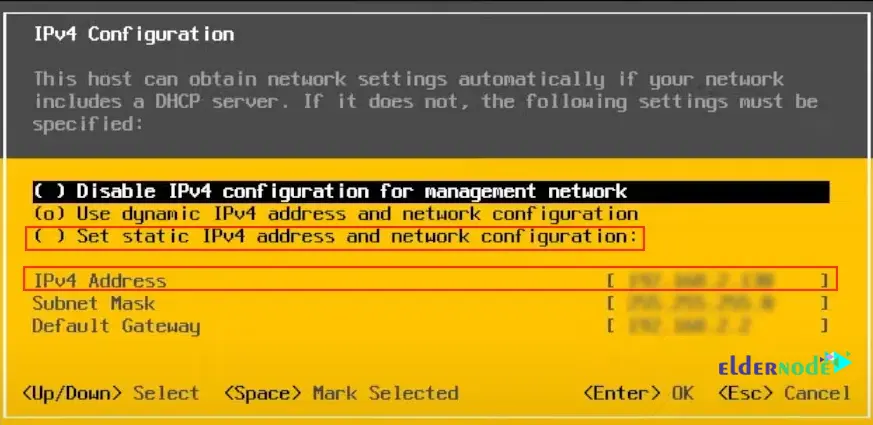
Now you should select IPv4 Configuration and again press Enter. You can also change your Network Adapters if you have more than one Network Adapter or setup a VLAN if you want to use virtual LANs:
You need to select Set static IPv4 address and network configuration and press Spacebar. Then come down and select IPv4 Address. You are actually making something that is static, something that is used as part of your environment:
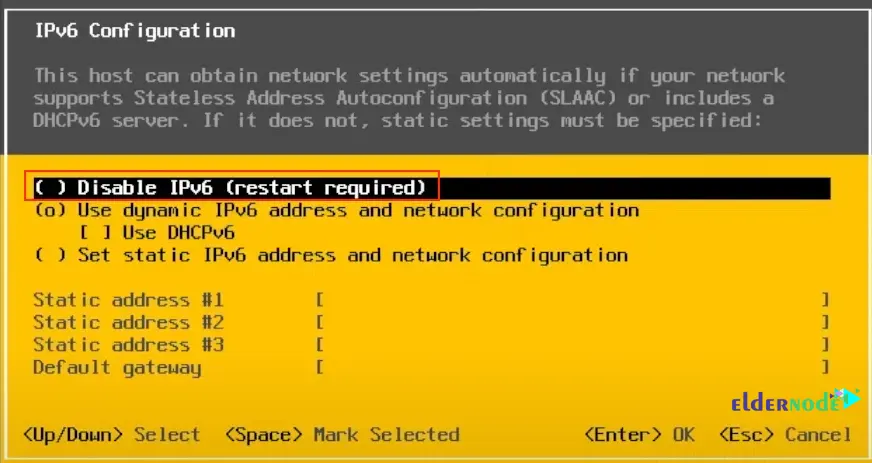
Now go back to the page below and select IPv6 Configuration this time. Also, you can put your DNS settings in the DNS Configuration section:

If you will not be using it, select Disable IPv6 (restart required):
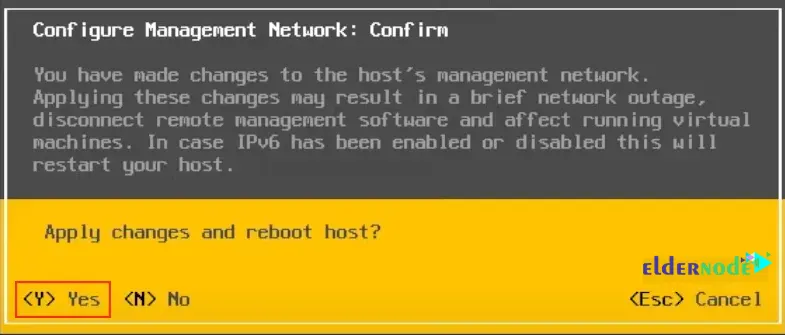
Next press Esc to exit. You will be asked to reboot your host to apply the changes, so press Y:
After the system restarts, you will return to F2 and you should enter your password again.
The basic setup for the ESXi backend is now complete.
How to Access VMWare on Dedicated Server
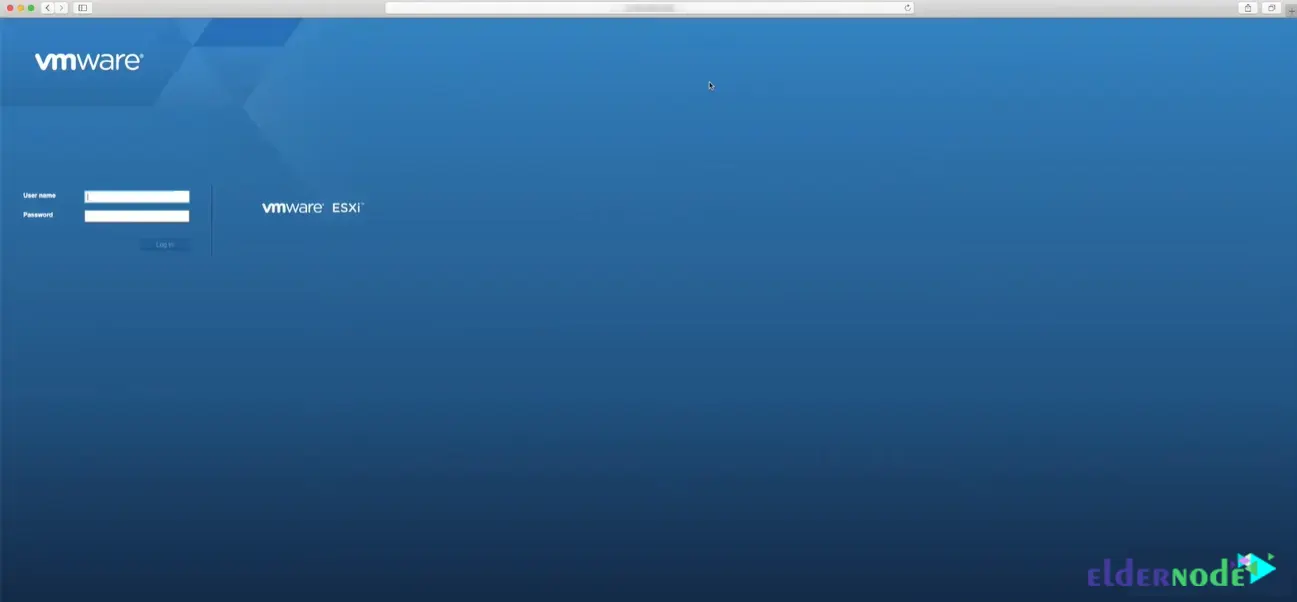
In the next step, you should open up a web browser to navigate to the ESXi host from the front end. It does not matter what your computer is because they can see the network on which your new ESXi host is installed.
Now navigate to the ESXi host IP address. To do this, put your IP in the address bar and press Enter. After entering the IP address, you will see that This Connection is not Private. Because it doesn’t have an SSL certificate as the site you now assigned to it. Click on Show Details and visit the site anyway depending on the browser that you are using.
You should visit the website. You will see the login screen to VM. This login page shows you, The computer has successfully established a connection to the ESXi host. Log in with a root credential again.
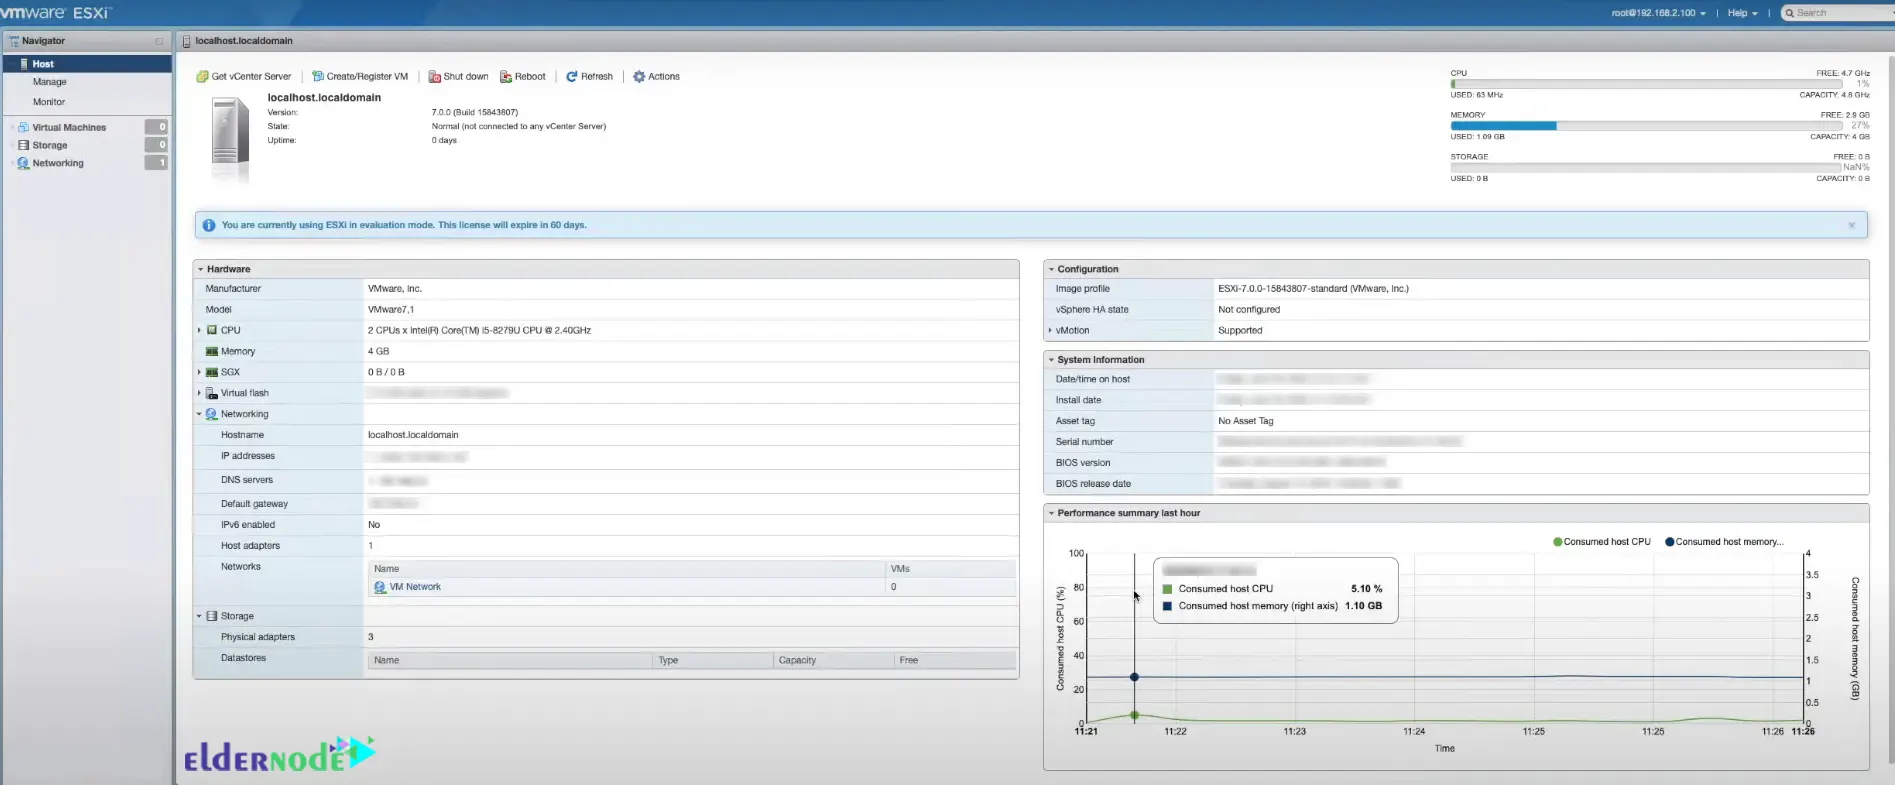
After you log in, you will see the page below that have all the information about your configuration. It means the VMware ESXi installation has created a host that is a server and has some information, including information about your host, about the amount of RAM or CPU allocated.
You can go to the Manage section and do various customization settings or go to the Virtual Machines and create and manage VMs. The Storage section is your data store. You can build data groups of disks together and have and have your VMs sitting within data stores. The Networking section is your networking configuration or virtual next virtual switches that are providing network connectivity to your VMware environment:
Conclusion
VMware ESXi is based on the VMkernel operating system and it interfaces with agents that run on the top of it. ESXi runs directly on system hardware without the need for an operating system. In this article, we taught you how to install and setup VMware ESXi on Dedicated Server. I hope this article was useful for you. If you have any questions, you can contact us in the Comments section.