When it comes to network security, most security testing tools are very sophisticated. Nessus is a vulnerability scanner that simplifies this process. It is very easy to use, works fast, and can quickly provide you with a network security report at the click of a button. This article will introduce you to 5 Steps to Run Vulnerability Scan Using Nessus. If you intend to buy your own VPS server, you can check out the packages offered on the Eldernode website.
Table of Contents
How to Run Vulnerability Scan Using Nessus
Nessus is an open-source proprietary network vulnerability scanner developed by Tenable that employs the NASL. This language describes individual threats and potential attacks. It tests each port on a computer, determines what service it is running, and tests this service to ensure there are no vulnerabilities in it. This scanner uses the Common Vulnerabilities and Exposures architecture for easy cross-linking between compliant security tools.
Step One: Installing Nessus and Creating Scan
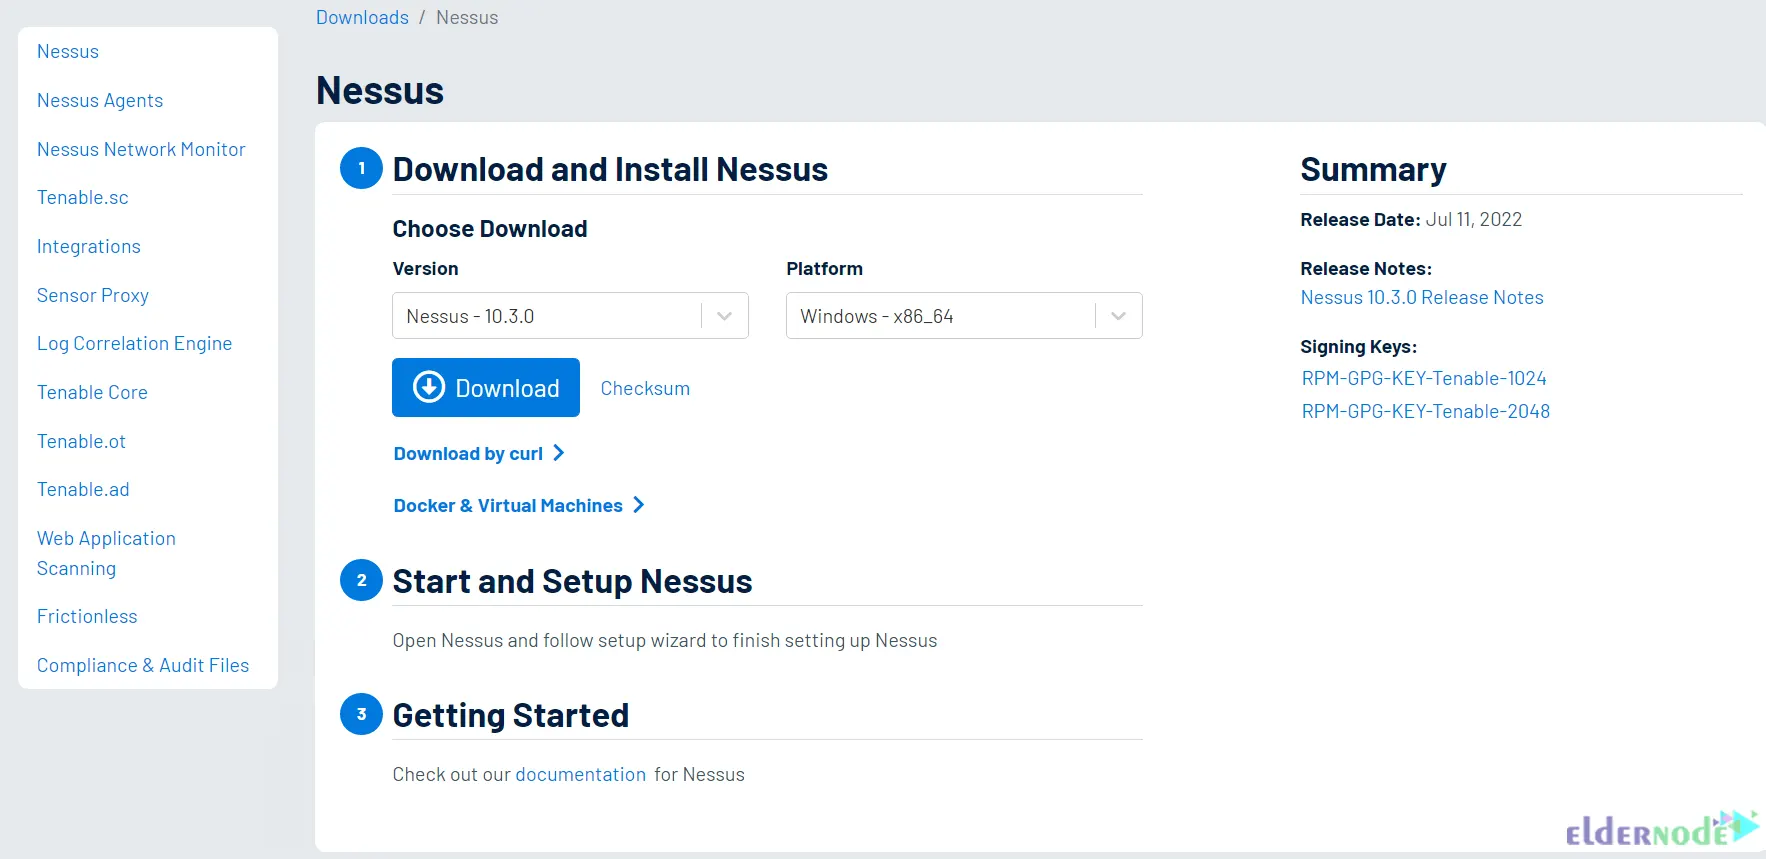
In the first step, go to the Nessus official page and choose desired version and platform. Then click on Download:
To install Nessus on Windows operating system, you can use the How to Install and Configure Nessus on Windows post.
But if you want to install Nessus on Linux operating system, just run the command below specific to your operating system.
RedHat:
rpm -ivh Nessus-<version number>-es6.x86_64.rpmDebian:
dpkg -i Nessus-<version number>-debian6_amd64.debFreeBSD:
pkg add Nessus-<version number>-fbsd10-amd64.txzNow start the Nessus daemon using the following command.
Red Hat, CentOS, Oracle Linux, Fedora, SUSE, FreeBSD:
service nessusd startDebian, Kali, and Ubuntu:
systemctl start nessusdNow it’s time to create a scan and start scanning. To do this you should go to the Scans >> My Scans >> New Scan path:
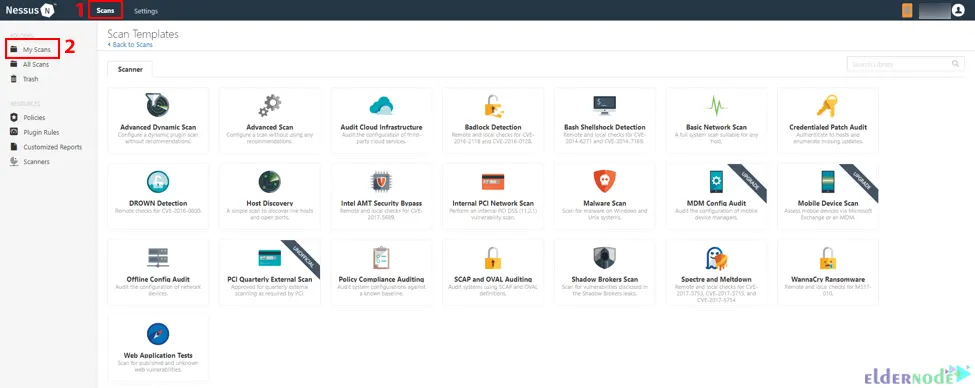
Step Two: Selecting a Scan pattern
Now select your desired scan template. The scan template defines configurable settings and explains how to set them.
A scan policy is a set of predefined configuration options related to performing a scan. Once you have created the policy, the scan policy can be chosen as a template in the User Defined tab while creating a scan.
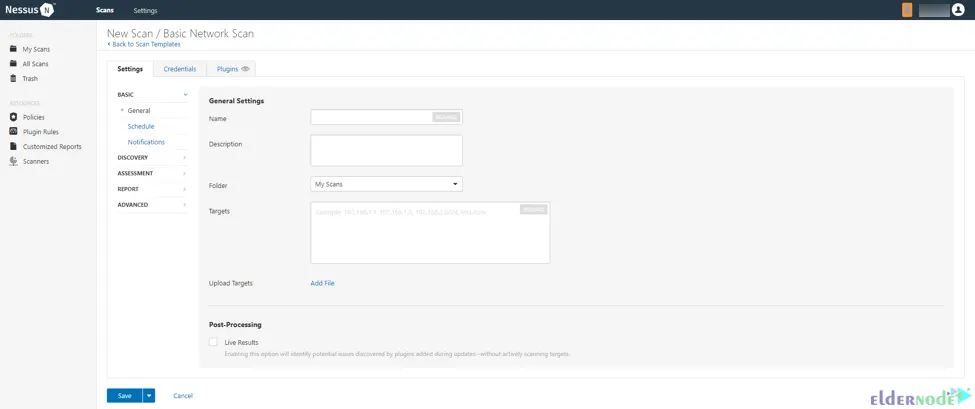
Step Three: Configuring Scan settings
Firstly, you need to configure the available settings for your chosen template and thus prepare your scan.
Now, go to the Basic Settings section and configure the settings. The basic settings are as follows:
–> Name: The name of the scan or policy that will display in the Nessus interface.
–> Description: Describes the scan or policy (Optional).
–> Folder: The folder where the scan appears after being saved.
–> Targets: It specifies targets to be scanned.
You can leave the rest of the settings in the pre-configured default mode, but it is better to check the Discovery, Assessment, Report, and Advanced settings.
The Configure Credentials step is also optional, it allows validation scans to be run. This option can provide much more complete results and a more accurate assessment of vulnerabilities in your environment.
Lastly, you can launch the scan by clicking the Save button. To run the scan immediately, click on the down button next to Save and choose Launch. The scan may take some time to run, please wait to complete it.
Step Four: Checking your Scan Results
To understand the security status and vulnerabilities of your organization, check the scan results. You can tailor how you view your scan data with the help of color-coded indicators and customizable viewing options.
The view options to check scan results are as follows:
–> Hosts: Displays all scanned targets
–> History: Displays list of scans including Start Time, End Time, and the Scan Statuses
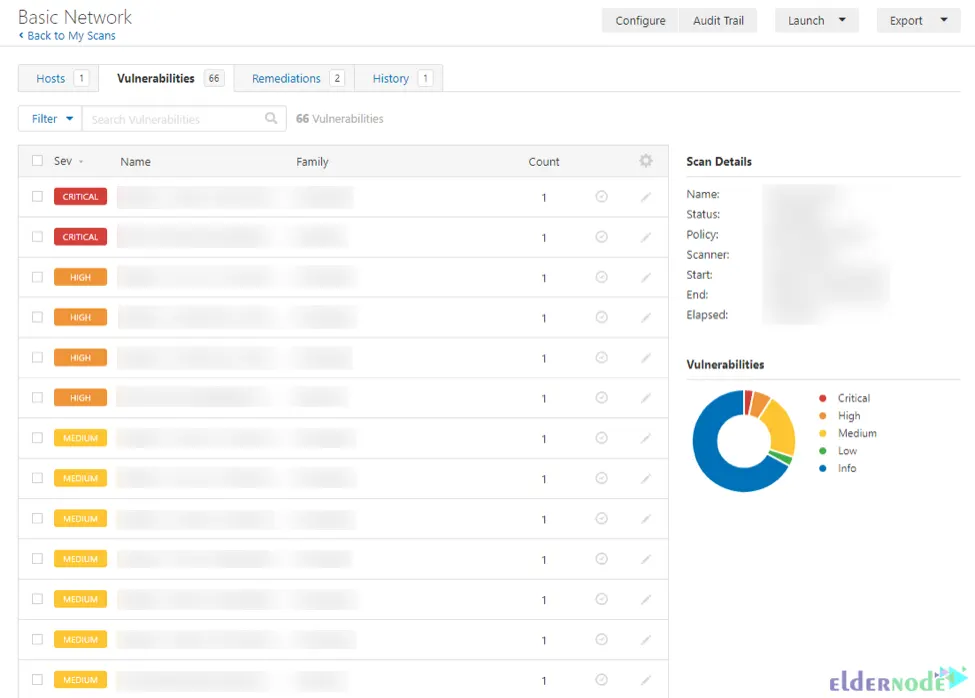
–> Vulnerabilities: List of identified vulnerabilities
–> Notes: Displays additional information about the scan and the result of the scan
–> Remediations: Displays all remediations details, sorted by the number of vulnerabilities
Example of scan results based on vulnerabilities:
Additionally, you can check vulnerabilities by going to the Scans section in the top navigation bar and choosing the scan you want to view results.
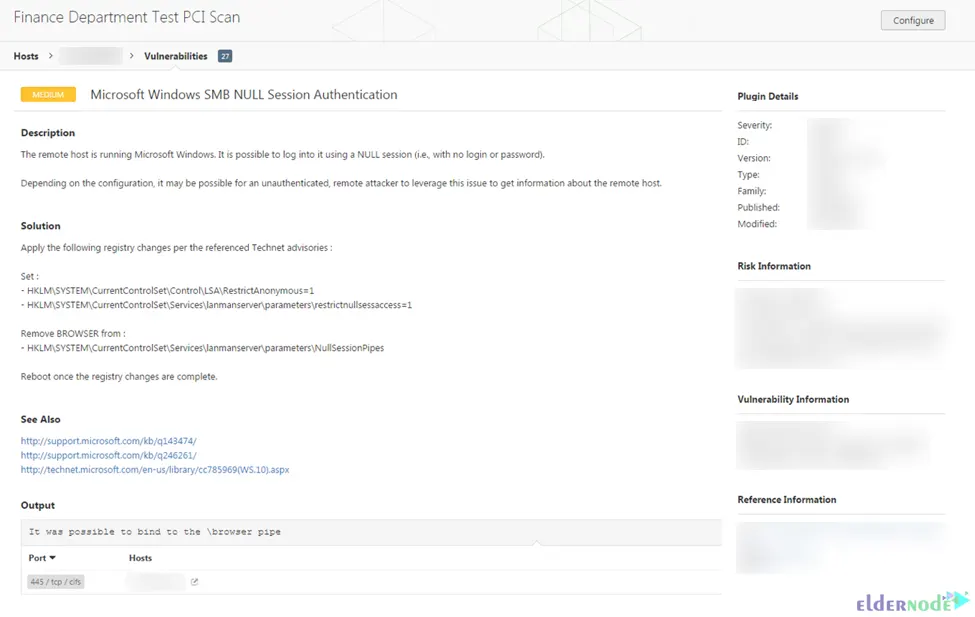
Also, to view all vulnerabilities, click the Vulnerabilities tab, and to view vulnerabilities found on that host, click a specific host.
Generally, to open the vulnerability details page, just click on the vulnerability row. Once it opened, plugin information and output for each instance on a host will display.
Step Five: Reporting Scan Results
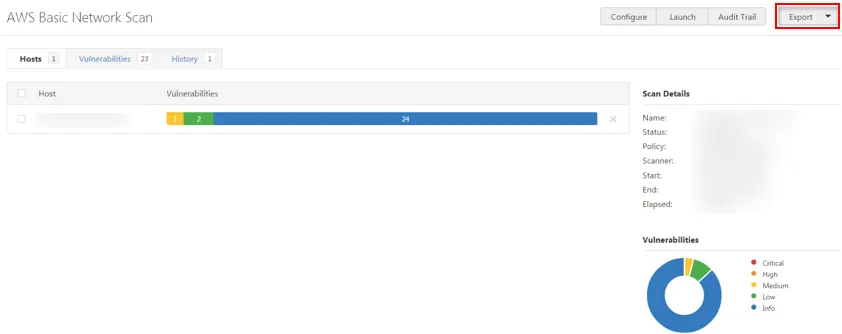
You can export scan results in several file formats. Some report formats are designed to be imported into a program or product such as Tenable, while some others are customizable. Lastly, you should export a scan report. To do this, go to the result page of the scan and click on Export. Then choose the format you want to export the scan results and click Export again to download the report:
Conclusion
Nessus is used during vulnerability assessments and penetration testing engagements. In this article, we explained 5 steps to run a vulnerability scan using Nessus. I hope this tutorial helps you to run a vulnerability scan with Nessus. If you have any problems or suggestions, you can contact us in the Comments section.