WireGuard is a modern Virtual Private Network technology with advanced encryption. WireGuard technology is faster than other similar methods, such as IPsec and Open VPN. It also has easier configuration and better performance. The platform runs on almost all systems, including Linux, Windows, Android, and macOS. WireGuard works by creating a network on each device that acts as a tunnel. It should be noted that VPN traffic transfer in WireGuard is UDP. In this article, we are going to teach you How to Install WireGuard on Windows 10 RDP. You can visit the packages available in Eldernode to purchase the Windows 10 RDP server.
Table of Contents
Tutorial Install WireGuard on Windows 10 RDP
WireGuard is an open-source VPN protocol that is faster and easier than commercially available models. While speed in traditional VPNs often comes at the cost of sacrificing security, WireGuard offers high-speed, high-security Internet access. WireGuard is known for its weight and cryptography compared to other VPN protocols and applications. Interestingly, WireGuard has about 4,000 lines of code compared to other applications with more than 60,000 lines of code. Having less code means that the software is much easier to use and allows for efficient and accurate debugging and updates and changes. Something that requires more time and effort for larger applications.
Follow us in this article to see how to install WireGuard on Windows 10 RDP.
How WireGuard works
On Linux, WireGuard works exclusively in the kernel space, so it performs much better than OpenVPN, which lives in the userspace. Many WireGuard metrics, including performance and connection speed, are four times better than OpenVPN. They also show better speeds than IPsec-based VPNs on the same hardware.
However, the WireGuard implementation for Android, iOS, macOS, OpenBSD, and Windows is written in a Go memory-free programming language. Aside from some community-supported Android OS projects that integrate the WireGuard core module, non-Linux WireGuard implementations run in the userspace. Interestingly, WireGuard performs even better than OpenVPN in running userspace.
In the rest of this article, we will explain step by step how to install WireGuard on Windows 10 RDP. Stay with us.
Install WireGuard on Windows 10 RDP step by step
In this section, we are going to teach you how to install WireGuard on Windows 10 RDP. To do this, just go to the installation page of the WireGuard website in the first step. Then you have to click on Download Windows Installer on the opened page. Doing so will start the download.

Go to the place where you downloaded the installation file.

Then double-click to run it.

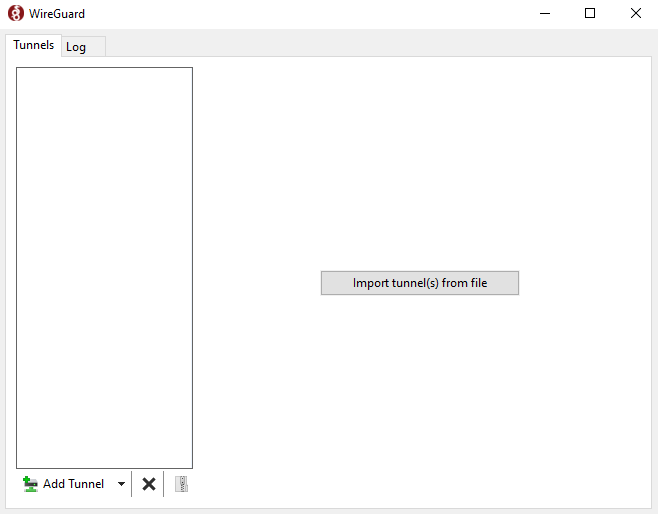
In the image below you can see the WireGuard environment.
How to Configure and Use WireGuard on Windows 10
After running WireGuard, you must add the configuration file. Click on Add Tunnel and then Add empty tunnel.

What’s interesting about this is that the GUI automatically generates a public-private key. Note that our work is not over yet. So let’s provide it to connect to your server.
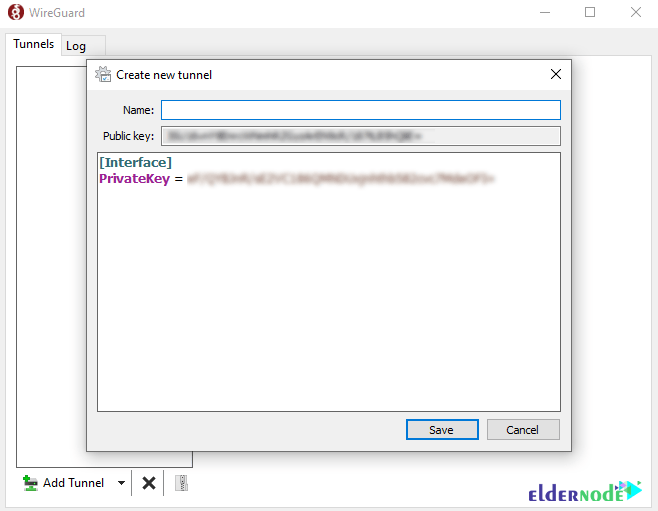
Note: For security reasons, it is best to never share a private key.
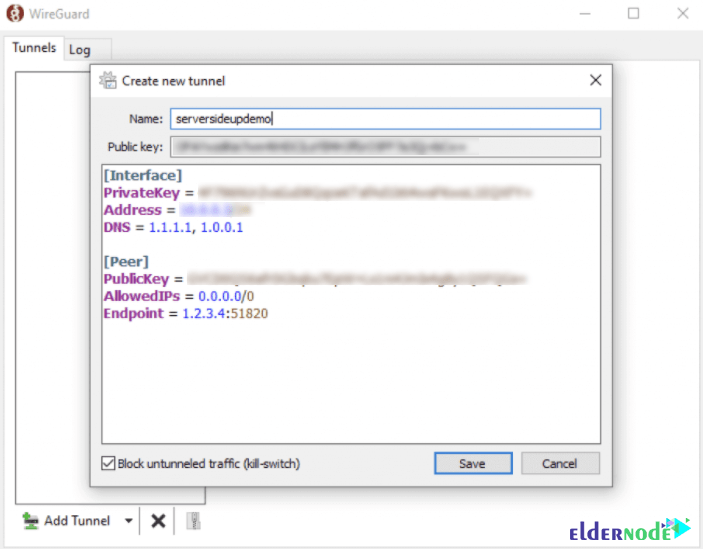
In the next step, it is necessary to update the configuration file to look like the image below:
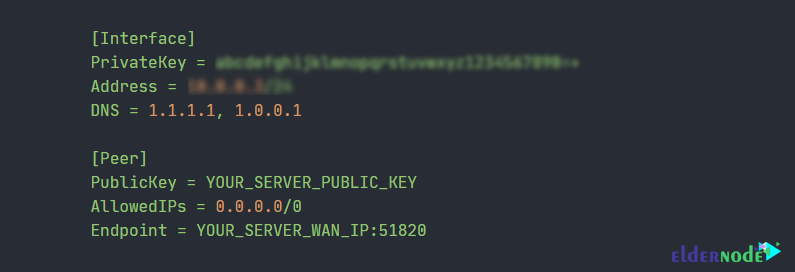
Make sure you also set your address to a unique IP address on your VPN. Checking Block Untunneled traffic will make sure that all of our traffic is being routed through our VPN.
How to Add client key to the Server
If you press Activate at this point, it will not connect. Because your server needs to know who you are. So you have to add your client’s public key to the server. It should note that the easiest way to add a key to the server is to use the Wg set command. Therefore, you need to run the following command on your server:
sudo wg set wg0 peer YOUR_CLIENT_PUBLIC_KEY allowed-ips YOUR_CLIENT_VPN_IPHow to Test the WireGuard Connection
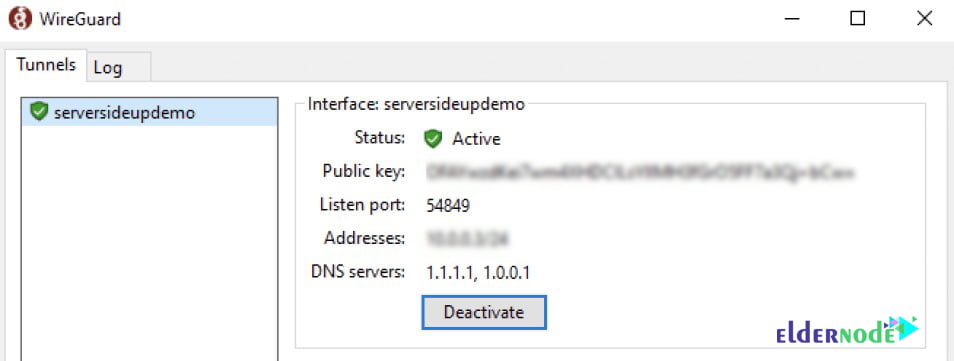
After successfully completing the previous steps, you can now press the Activate button on your Windows 10 RDP device. By doing this you should see that a successful connection has been established:
Conclusion
WireGuard is an open-source communication software and protocol that uses VPN solutions to establish point-to-point connections. In this article, we tried to teach you to step by step how to Install WireGuard on Windows 10 RDP.