If you want to protect your online privacy or encrypt your information on the web so that it does not fall into the hands of hackers; you should use a VPN. The main element of any VPN is the VPN protocol used by it. In this article, we will teach you how to install OpenVpn on Windows Server 2019. Most VPNs support several protocols such as IKEv2, L2TP, and SSTP, but the OpenVPN protocol is known as the most popular and best VPN protocol in the world. In this article, we will teach you How to Setup OpenVPN On Windows Server 2019. If you want to purchase your own RDP, you can check out the packages offered on the Eldernode website.
Table of Contents
Tutorial Setup OpenVPN On Windows Server 2019
What is OpenVPN?
Openvpn is currently the most popular and widely used protocol as a VPN. Unlike other IPSec-based tunneling protocols (such as L2tp), Openvpn relies on SSL / TLS for authentication and data encryption. This standard security technology is for making secure, remote connections from one place to another or from one point to another. The use of SSL to protect financial transactions, data transfers, emails, and other things is very popular.
OpenVPN is compatible with all major operating systems such as Windows, Android, iOS, Mac, and Linux. It is open source and supports up to 256-bit encryption.
Available OpenVPNs is as follows:
–> OpenVPN Community Edition: It is an open-source and free version and doesn’t have user limitations.
–> OpenVPN Access Server: It is based on the Community Edition but provides additional paid and proprietary features such as Easy Management Admin Portal, LDAP integration and etc.
–> OpenVPN-as-a-Service: It is a solution that eliminates the need for VPN server installation. You can connect to your hosted service with regions around the world simply by purchasing OpenVPN Cloud.
In this step from the Windows training tag, you will learn how to install OpenVPN on Windows Server 2019.
Prerequisites
– Access to port 1194 to connect to the same network
– Windows Server 2019
You can do this by allowing UDP traffic on port 1194 by adding a rule to your Firewall.
How to Install OpenVPN on Windows Server 2019
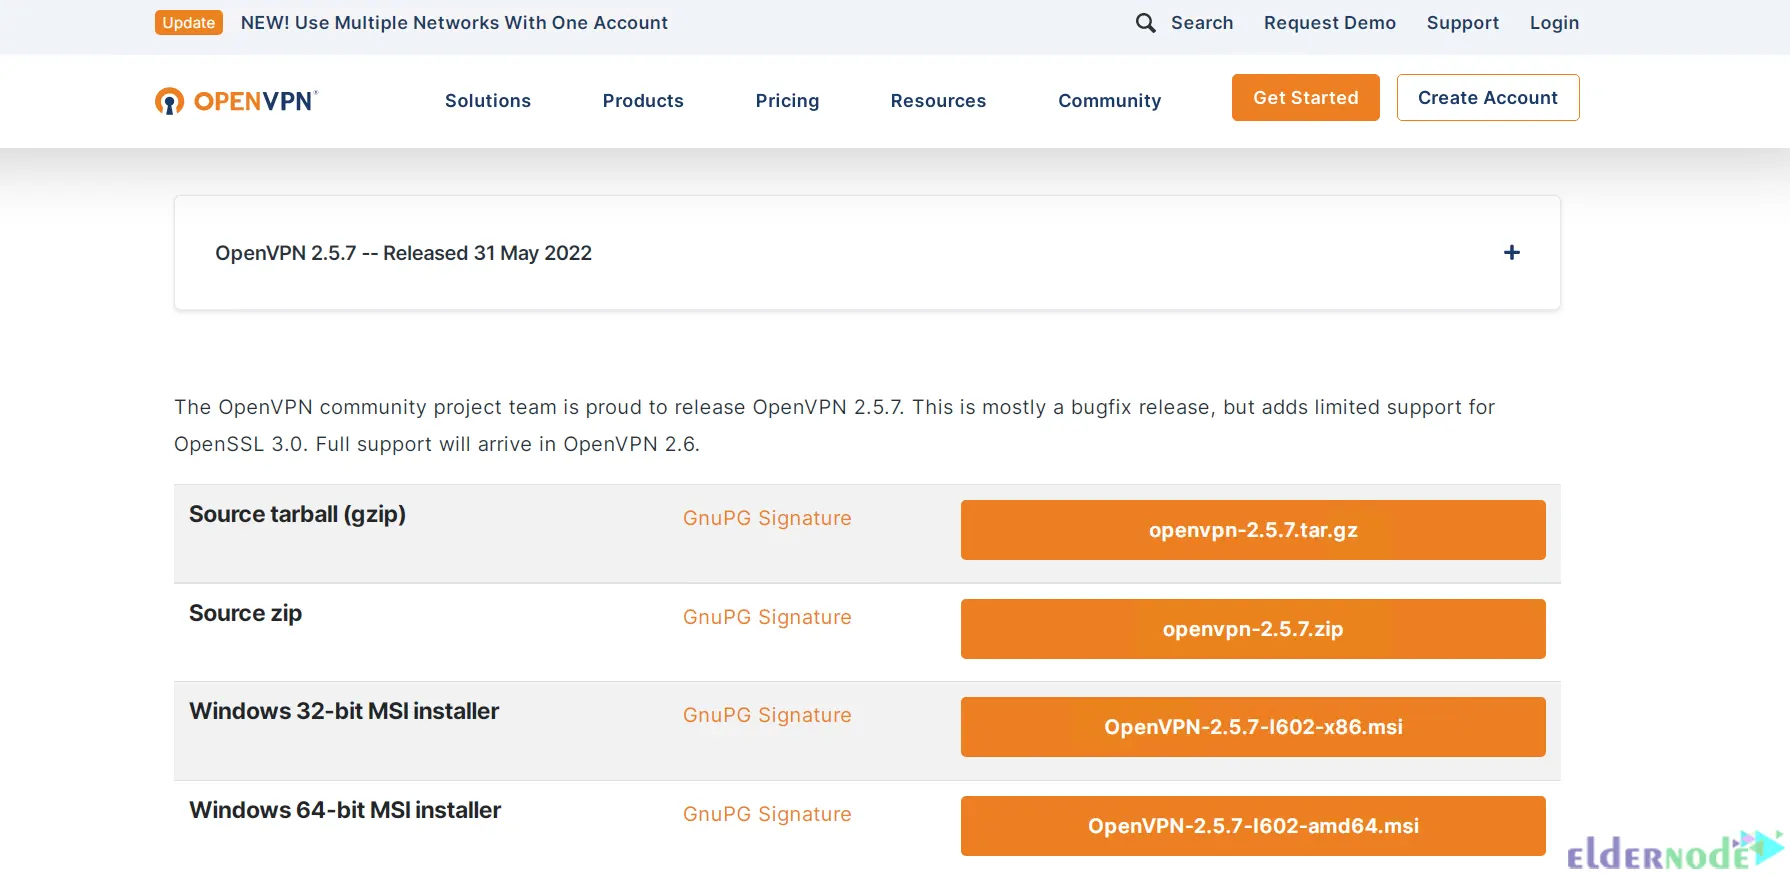
Go to the official OpenVPN Website to download the latest Windows 64-bit MSI installer for the OpenVPN Community edition:
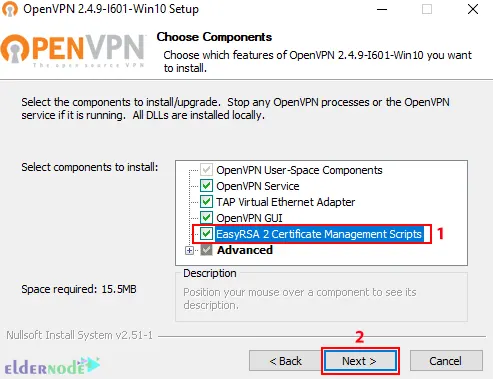
After the download is completed, go to the downloaded file and double-click on it. Click on the icon next to desired features to choose them. Check the ”EasyRSA 2 Certificate Management Scripts” and click on Next:
Once the installation is completed, you should generate the certificates and keys to access the VPN. To do this, open the terminal by typing cmd on the Start menu and right-click on the Command Prompt icon. Choose ”Run as Administrator”:

Go to the following path:
C:\Program Files\OpenVPN\easy-rsaNow you can start configuring OpenVPN:
init-configIn this step, you need to open the vars.bat file in the text editor:
notepad vars.batEdit the subsequent lines by switching The ”US”, ”CA” etc with your business’s data:
set KEY_COUNTRY=US set KEY_PROVINCE=CA set KEY_CITY=SanFrancisco set KEY_ORG=OpenVPN set [email protected]–> KEY_CN and KEY_NAME: They will be unique for each build request and refer to the common name field and the name of the certificate.
–> KEY_OU: They refer to an ”Organizational Unit” and can be set to whatever if there isn’t a requirement for it.
–> PKCS11_values: They refer to settings used for Hardware Security Modules and Smart Cards if you use them.
Save the text editor file and exit it.
To apply the changes, enter the following command:
varsclean allBuilding Certificates and Keys
In order to create the Certificate Authority (CA) certificate and key, we need to run the following command:
build-caThis will prompt you to enter your country, state, and city. These options will also have default values, which appear within brackets:
Certificate Authority "OpenVPN-CA": Country Name (2 letter code) [US]: State or Province Name (full name) [CA]: Locality Name (eg, city) [SanFrancisco]: Organization Name (eg, company) [OpenVPN]: Organizational Unit Name (eg, section) []: Common Name (eg, your name or your server's hostname) []:OpenVPN-CA Email Address [[email protected]]:Using the following command, we initiate the server’s certificate and key:
build-key-server serverWhen prompted to sign the certificate and commit, enter ”y” and enter the ”Common Name” as a server.
Server Certificates and Keys
C:\Program Files\OpenVPN\easy-rsa>build-key-server.bat Generating a RSA private key ..............................................................................................................................................................................................................................................++++ ................................++++ writing new private key to 'keys\.key' ----- You are about to be asked to enter information that will be incorporated into your certificate request. What you are about to enter is what is called a Distinguished Name or a DN. There are quite a few fields but you can leave some blank For some fields there will be a default value, If you enter '.', the field will be left blank. ----- Country Name (2 letter code) [US]:US State or Province Name (full name) [MI]: Locality Name (eg, city) [Lansing]: Organization Name (eg, company) [OpenVPN]: Organizational Unit Name (eg, section) [changeme]: Common Name (eg, your name or your server's hostname) [changeme]:Server Name [changeme]: Email Address [[email protected]]: Please enter the following 'extra' attributes to be sent with your certificate request A challenge password []:XXXXXXXXXXXXXXXX An optional company name []: Using configuration from openssl-1.0.0.cnf Can't open keys/index.txt.attr for reading, No such file or directory 1832:error:02001002:system library:fopen:No such file or directory:crypto/bio/bss_file.c:74:fopen('keys/index.txt.attr','r') 1832:error:2006D080:BIO routines:BIO_new_file:no such file:crypto/bio/bss_file.c:81: Check that the request matches the signature Signature ok The Subject's Distinguished Name is as follows countryName :PRINTABLE:'US' stateOrProvinceName :PRINTABLE:'MI' localityName :PRINTABLE:'Lansing' organizationName :PRINTABLE:'OpenVPN' organizationalUnitName:PRINTABLE:'changeme' commonName :PRINTABLE:'Server' name :PRINTABLE:'changeme' emailAddress :IA5STRING:'[email protected]' Certificate is to be certified until Dec 24 19:01:08 2029 GMT (3650 days) Sign the certificate? [y/n]:y 1 out of 1 certificate requests certified, commit? [y/n]y Write out database with 1 new entries Data Base Updated C:\Program Files\OpenVPN\easy-rsa>Client Certificates and Keys
For each client that will be connecting to the server, you should choose a unique name to identify that user’s computer, such as ”Michael-PC” in the following example.
When prompted, enter the Common Name as the name you have chosen for the client’s cert/key. You will repeat this step for every client computer that is going to connect to the VPN.
C:\Program Files\OpenVPN\easy-rsa>build-key Michael-PC Generating a RSA private key .............................................................................................................................................................................++++ ..............................................................................++++ writing new private key to 'keys\Michael-PC.key' ----- You are about to be asked to enter information that will be incorporated into your certificate request. What you are about to enter is what is called a Distinguished Name or a DN. There are quite a few fields but you can leave some blank For some fields there will be a default value, If you enter '.', the field will be left blank. ----- Country Name (2 letter code) [US]: State or Province Name (full name) [MI]: Locality Name (eg, city) [Lansing]: Organization Name (eg, company) [OpenVPN]: Organizational Unit Name (eg, section) [changeme]: Common Name (eg, your name or your server's hostname) [changeme]:Michael-PC Name [changeme]: Michael Jordan Email Address [[email protected]]: Please enter the following 'extra' attributes to be sent with your certificate request A challenge password []:XXXXXXXXXXXXXXXX An optional company name []: Using configuration from openssl-1.0.0.cnf Check that the request matches the signature Signature ok The Subject's Distinguished Name is as follows countryName :PRINTABLE:'US' stateOrProvinceName :PRINTABLE:'MI' localityName :PRINTABLE:'Lansing' organizationName :PRINTABLE:'OpenVPN' organizationalUnitName:PRINTABLE:'changeme' commonName :PRINTABLE:'Michael-PC' name :PRINTABLE:'Michael Jordan' emailAddress :IA5STRING:'[email protected]' Certificate is to be certified until Dec 24 19:06:10 2029 GMT (3650 days) Sign the certificate? [y/n]:y 1 out of 1 certificate requests certified, commit? [y/n]y Write out database with 1 new entries Data Base Updated C:\Program Files\OpenVPN\easy-rsa>In this part, you need to generate the ”Diffie Hellman” parameters using thebuild-dh command. This step is necessary in order to set up the encryption model.
C:\Program Files\OpenVPN\easy-rsa>build-dh.bat Generating DH parameters, 2048 bit long safe prime, generator 2 This is going to take a long time .................................+......................................................................................................+.............................................................................................+..................................................................................+......................................................... .............................................................................+............................+..........+........+............................................+..............................................+....++*++*++*++* C:\Program Files\OpenVPN\easy-rsa>Generate a shared secret key (which is required when using tls-auth):
"C:\Program Files\OpenVPN\bin\openvpn.exe" --genkey --secret "C:\Program Files\OpenVPN\easy-rsa\keys\ta.key"Configuration Files
OpenVPN provides sample configuration data which can easily be found using the start menu.
Open the Start menu, and click on All Programs. Then select OpenVPN Sample Configuration Files from the OpenVPN options.
Server Config File
Copy the sample ”server configuration” file over to the easy-rsa folder. This command and its output are as follows:
copy "C:\Program Files\OpenVPN\sample-config\server.ovpn" "C:\Program Files\OpenVPN\easy-rsa\keys\server.ovpn" C:\Program Files\OpenVPN\easy-rsa>"C:\Program Files\OpenVPN\bin\openvpn.exe" --genkey --secret "C:\Program Files\OpenVPN\easy-rsa\keys\ta.key" C:\Program Files\OpenVPN\easy-rsa>copy "C:\Program Files\OpenVPN\sample-config\server.ovpn" "C:\Program Files\OpenVPN\easy-rsa\keys\server.ovpn" 1 file(s) copied. C:\Program Files\OpenVPN\easy-rsa>Now edit the server.ovpn file:
notepad "C:\Program Files\OpenVPN\easy-rsa\keys\server.ovpn"Locate the following lines within the file:
ca ca.crt cert server.crt key server.key dh dh2048.pemThen edit them as follows:
ca "C:\\Program Files\\OpenVPN\\config\\ca.crt" cert "C:\\Program Files\\OpenVPN\\config\\server.crt" key "C:\\Program Files\\OpenVPN\\config\\server.key" dh "C:\\Program Files\\OpenVPN\\config\\dh2048.pem"Finally, save and close the file.
Client Config Files
The client file modification is very similar to the server configuration changes.
Copy the sample server configuration file to the easy-rsa folder with the client’s Common Name as the file name.
Remember: Each client will need to have a unique filename.
copy "C:\Program Files\OpenVPN\sample-config\client.ovpn" "C:\Program Files\OpenVPN\easy-rsa\keys\Michael-PC.ovpn" C:\Program Files\OpenVPN\easy-rsa>copy "C:\Program Files\OpenVPN\sample-config\client.ovpn" "C:\Program Files\OpenVPN\easy-rsa\keys\Michael-PC.ovpn" 1 file(s) copied. C:\Program Files\OpenVPN\easy-rsa> Edit the client’s config file.
notepad "C:\Program Files\OpenVPN\easy-rsa\keys\Michael-PC.ovpn" Locate the following settings in the file and edit them as follows:
ca ca.crt cert client.crt key client.key to ca "C:\\Program Files\\OpenVPN\\config\\ca.crt" cert "C:\\Program Files\\OpenVPN\\config\\Michael-PC.crt" key "C:\\Program Files\\OpenVPN\\config\\Michael-PC.key" Next, we will edit the line “my-server-1“, replacing it with the server’s public IP Address or Domain Name.
remote my-server-1 1194 # The hostname/IP and port of the server. # You can have multiple remote entries # to load balance between the servers. remote my-server-1 69.16.236.167 ;remote my-server-2 1194 Save and close the file.
Copying the Client and Server Files to Their Pertinent Directories
Now you can copy these files from C:\Program Files\OpenVPN\easy-rsa\keys\ to C:\Program Files\OpenVPN\config\ on the server using the robocopy command:
- ca.crt
- ta.key
- dh2048.pem
- server.crt
- server.key
- server.ovpn
robocopy "C:\Program Files\OpenVPN\easy-rsa\keys\ " "C:\Program Files\OpenVPN\config\ " ca.crt ta.key dh2048.pem server.crt server.key server.ovpn
C:\Program Files\OpenVPN\easy-rsa>robocopy "C:\Program Files\OpenVPN\easy-rsa\keys\ " "C:\Program Files\OpenVPN\config\ " ca.crt ta.key dh2048.pem server.crt server.key server.ovpn ------------------------------------------------------------------------------- ROBOCOPY :: Robust File Copy for Windows ------------------------------------------------------------------------------- Started : Friday, December 27, 2019 12:16:02 PM Source : C:\Program Files\OpenVPN\easy-rsa\keys\ Dest : C:\Program Files\OpenVPN\config\ Files : ca.crt ta.key dh2048.pem server.crt server.key server.ovpn Options : /DCOPY:DA /COPY:DAT /R:1000000 /W:30 ------------------------------------------------------------------------------ 4 C:\Program Files\OpenVPN\easy-rsa\keys\ 100% New File 2482 ca.crt 100% New File 432 dh2048.pem 100% New File 10901 server.ovpn 100% New File 657 ta.key ------------------------------------------------------------------------------ Total Copied Skipped Mismatch FAILED Extras Dirs : 1 0 1 0 0 0 Files : 4 4 0 0 0 0 Bytes : 14.1 k 14.1 k 0 0 0 0 Times : 0:00:00 0:00:00 0:00:00 0:00:00 Speed : 452250 Bytes/sec. Speed : 25.877 MegaBytes/min. Ended : Thursday, July 16, 2020 12:16:02 PM C:\Program Files\OpenVPN\easy-rsa>
You can copy the following files from C:\Program Files\OpenVPN\easy-rsa\keys\ on the server to C:\Program Files\OpenVPN\config\ for each client that will be using the VPN (e.g., Michael-PC, in this example)
- ca.crt
- ta.key
- Michael-PC.crt
- Michael-PC.key
- Michael-PC.ovpn
Firewall Settings
If you have any connection difficulties, ensure you set up a rule on the server’s firewall allowing incoming UDP traffic on port 1194. (Win+R “wf.msc”)
Conclusion
We hope you would enjoy this tutorial, you can ask questions about this training in the comments section, or to solve other problems in the field of Eldernode training, refer to the Ask page section and raise your problem in it as soon as possible. In this article, we taught you how to install OpenVPN on Windows Server 2019.