The task of a network manager is not designed and constructed, but website management and how it is available. Each website consists of files, which are designed to deliver to the server that IIS is installed. So after receiving files, you need to put them in the drive on your web. After copying files in the drive on the webserver, you can follow the following training. In this article, we intend to teach you How to Build Site on IIS on Windows VPS. You can visit the Windows VPS server from packages available in Eldernode.
Table of Contents
Tutorial Build Site on IIS on Windows VPS
Introduction to IIS
IIS stands for Internet Information Services. The Microsoft Web server is installed on the Windows operating system. After installing this web server, including web protocols such as HTTP and HTTPS (Web Display Protocol) FTP and FTPS (file transfer protocol), and SMTP, the use of Server Side programming languages such as ASP Classis, ASP.NET and PHP allow users to use databases such as MS SQL and MySQL and many other features.
Some features such as Microsoft Programming Protocols and Languages (ASP.NET) are in the default program after installing this web server. It should be noted that features such as databases and PHP programming languages should be installed on it after installing the webserver.
Continue with us to teach you how to create a website on IIS on windows VPS step by step.
How to Create WebSite on IIS on Windows VPS
In this section, we want to teach you step by step how to Build a Site on IIS on Windows VPS. To do this, just follow the steps below.
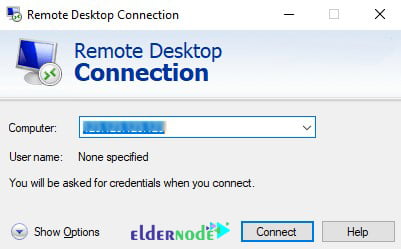
The first step is to log in to the Windows VPS server. So in your Windows, from the Start menu, search for Remote Desktop Connection and then open it. In the window that opens, enter the IP of the server and click on Connect. You will see that you successfully enter the server environment.
The first step is to open Internet Information Services (IIS) by typing “IIS” in the search field.

Then you have to right-click on the Sites in your directory list and then select Add Website.
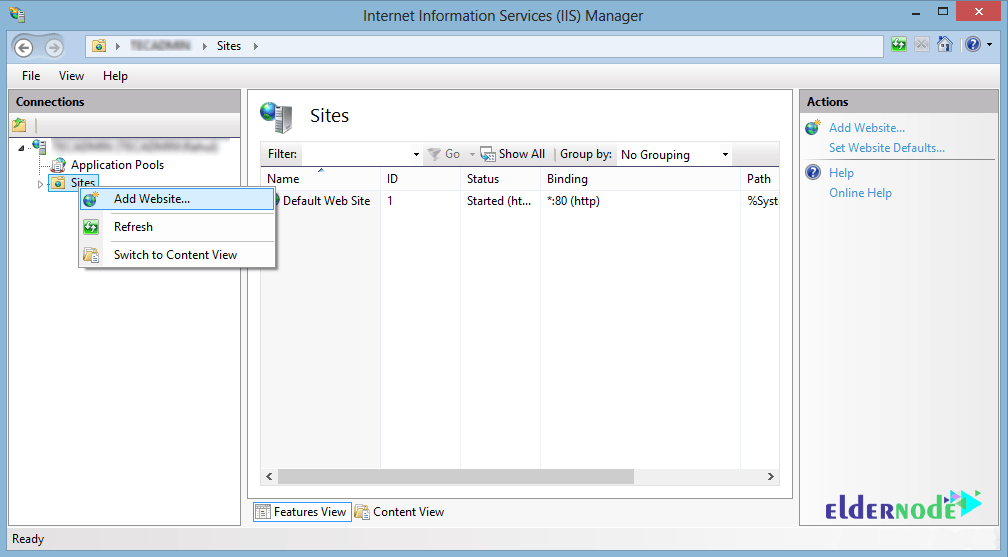
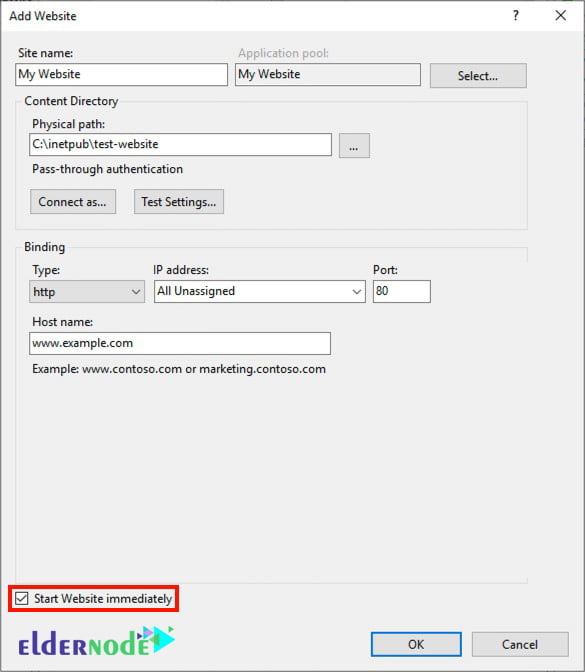
Now in the window that opens, you must first add a name for the website in the Site name field.
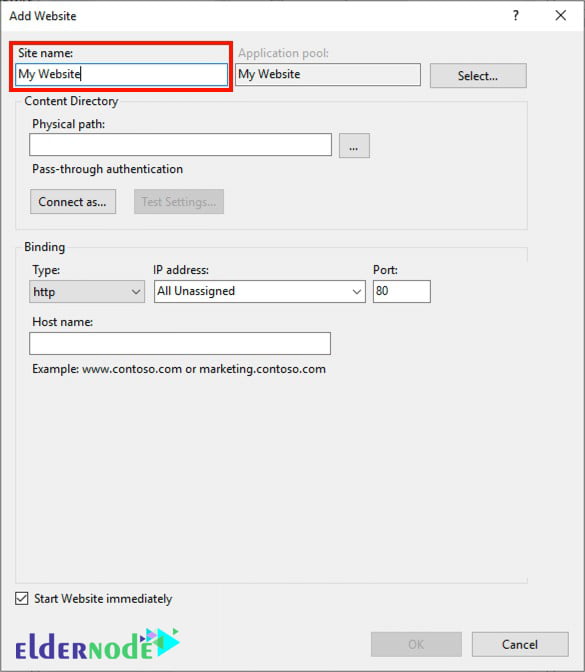
In the physical path field, you must specify a directory for your website files.
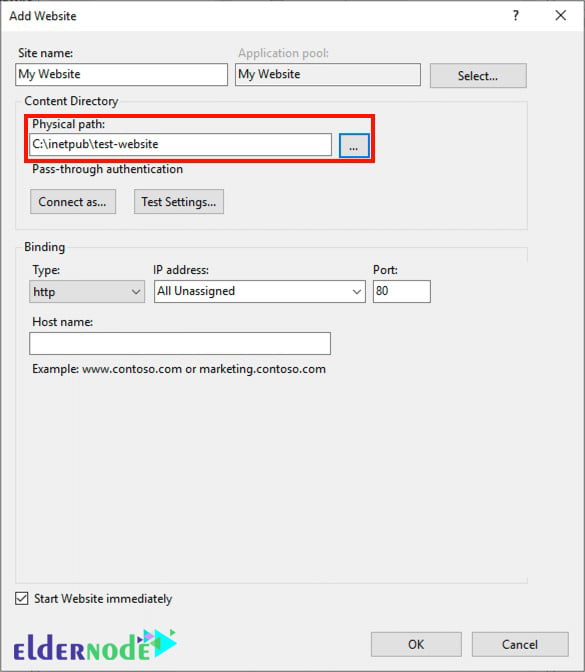
In the Binding section, you must select the Type (HTTP or HTTPS), IP address, Port, and Hostname as shown below.
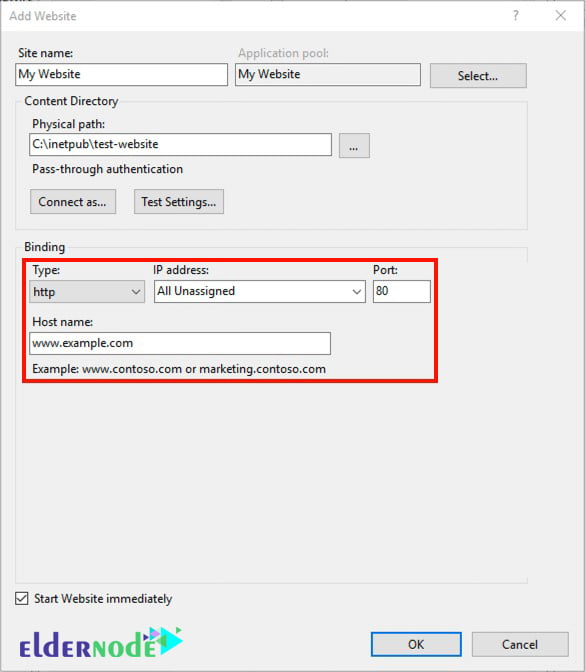
The important thing to consider when setting up or not launching a website. Note that if you want to launch the website immediately, you must select the Start Website immediately check box. Otherwise, uncheck it.
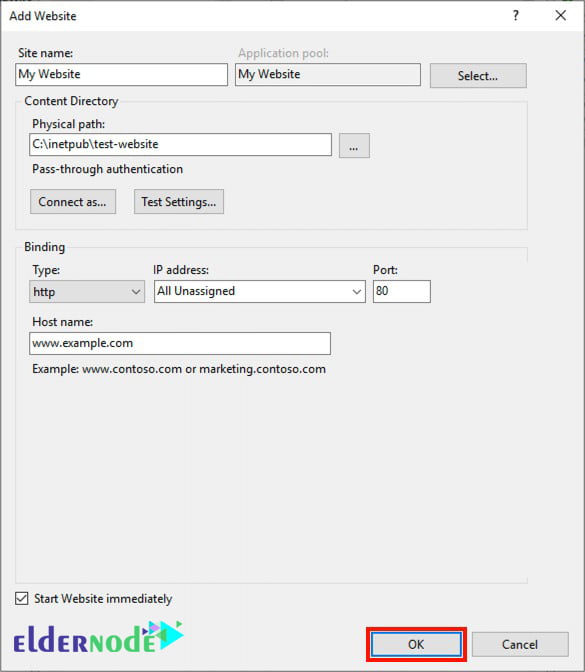
Finally, by clicking on the Ok, the website construction process is completed.
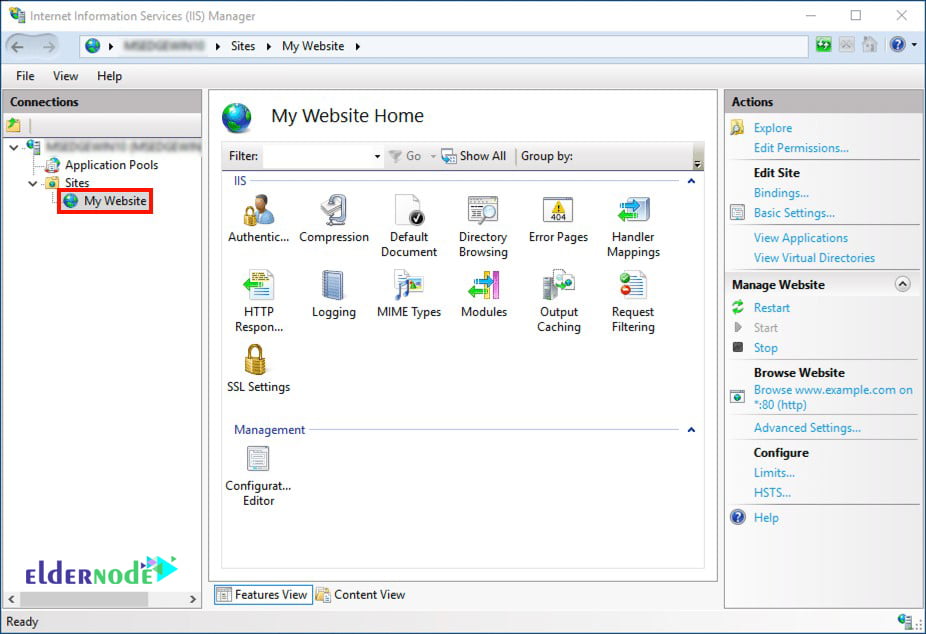
After you have successfully completed all the above steps and after the Add Website window closes, you will see your new website in the list of sites.
How to Add Website Alias
After learning how to create a webSite on IIS on Windows VPS in the previous section, we now want to teach you how to Binding. If you want to add website aliases like “www.eldernode.com” you can select your site and click on Bindings in the right column as shown below.
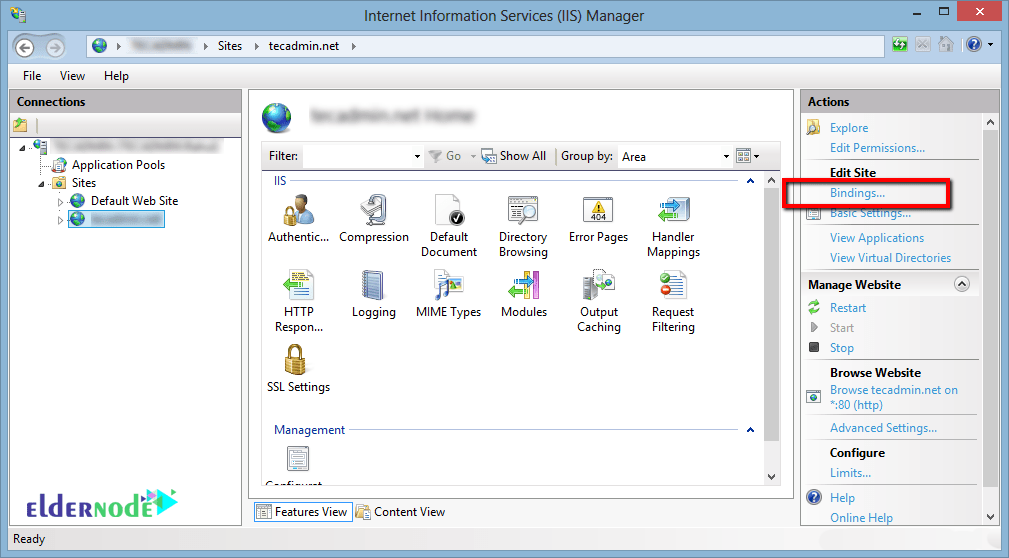
In the window that opens, click Add to open the site binding box.
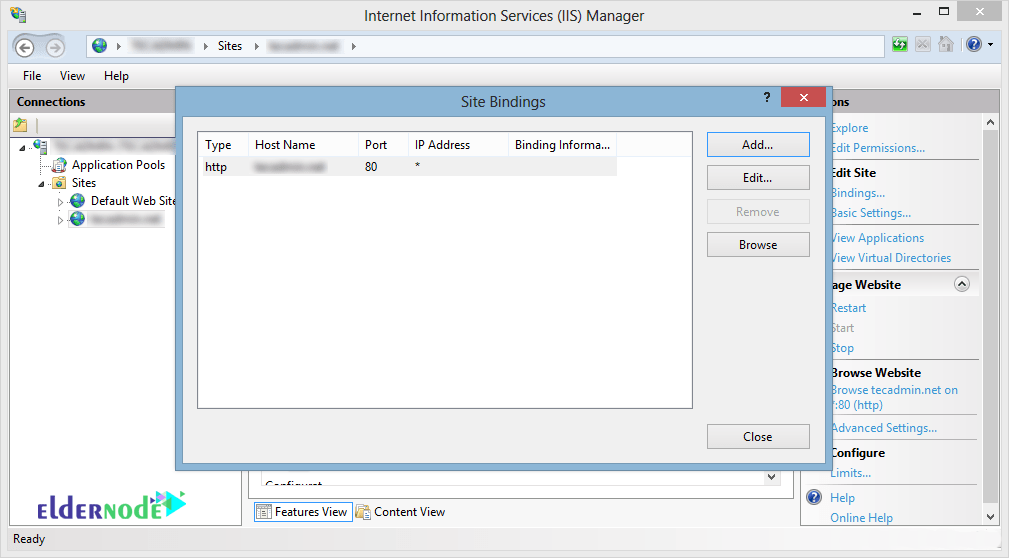
As you can see in the Hostname field, you can enter your site aliases such as demo.eldernode.com and so on. Finally, click Ok.

Conclusion
For users to access a website, it is necessary for the website to be hosted on some kind of web server. If you want to create a website or web application using ASP.NET, you may want to install Internet Information Services (IIS) on your local device for development and testing. In this article, we tried to teach you to step by step how to Build a Site on IIS on Windows VPS after introducing IIS.
