How to Install Yarn on Windows. Yarn is a Package Manager for Node.js that replaces NPM. Yarn has been developed and expanded by companies and developers to improve the problems that exist in NPM. Due to Yarn’s good features, the project’s Github stars are now almost double the number of NPMs. In this article, we will teach you how to install Yarn in Windows.
Windows Virtual Private Server
Table of Contents
What is a Package Manager?
Package Manager is a tool that installs, updates and manages the software packages you need. With the help of such tools, you can always have the latest version of the libraries you need with your software. You can also think only of developing the core of your software without having to search for packages and their peripherals.
Yarn uses the NPM repository and is highly compatible with this tool, so migrating from NPM to Yarn is easy. In comparison with npm, Yarn is considered to be a better alternative and surpasses NPM in the following parameters:
- more speed
- More security
- Simultaneous installation of libraries
- More integration
- Offline installation requirements (also added in the new NPM version)
Note: Node.js must be installed before installing Yarn.
MSI Installation
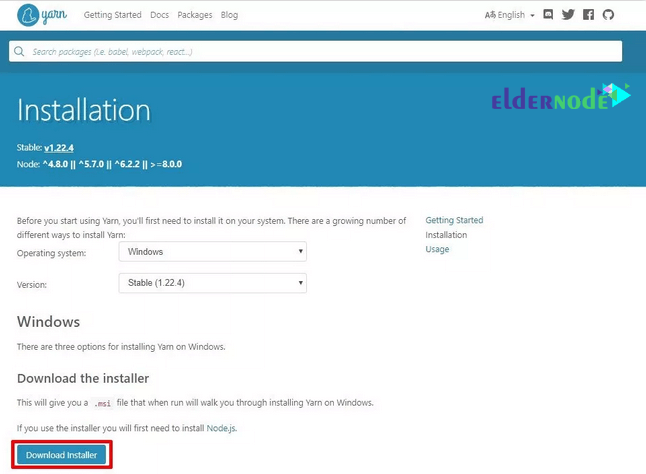
To install Yarn, you must first download the Yarn .msi installer from the official Yarn website. Once downloaded, install it on your local computer.
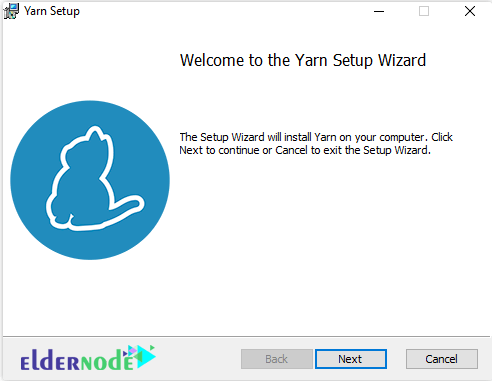
Next, you will run the .msi installer.
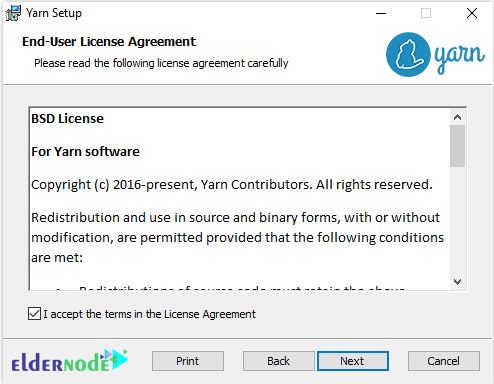
accept the license agreement.
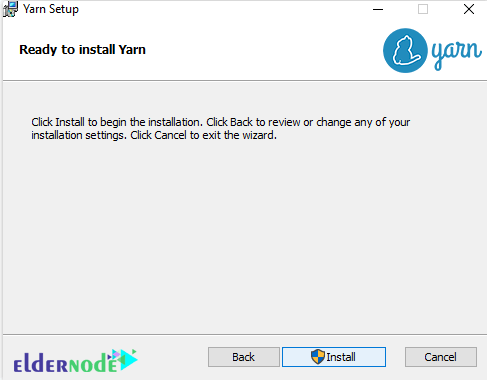
Then, click Install.
And finally, click on the Finish button.
Now, you can verify Yarn was installed using the following CLI commands:
C:\Windows\system32>yarn --version 1.22.4 C:\Windows\system32>
Chocolatey Installation
Another way to install Yarn is by using the Chocolatey package manager for Windows. This method is convenient because Chocolatey will determine whether node.js is already installed and if not, it will automatically install it for us. It is important to do everything as an administrator.
Once Chocolatey is set up, you can install Yarn using the following command:
C:\Windows\system32>choco install yarn Chocolatey v0.10.15 Installing the following packages: yarn By installing you accept licenses for the packages. yarn v1.22.4 [Approved] yarn package files install completed. Performing other installation steps. The package yarn wants to run 'chocolateyinstall.ps1'. Note: If you don't run this script, the installation will fail. Note: To confirm automatically next time, use '-y' or consider: choco feature enable -n allowGlobalConfirmation Do you want to run the script?([Y]es/[A]ll - yes to all/[N]o/[P]rint): Y Downloading yarn from 'https://yarnpkg.com/downloads/1.22.4/yarn-1.22.4.msi' Progress: 100% - Completed download of C:\Users\Dmitry\AppData\Local\Temp\chocolatey\yarn\1.22.4\yarn-1.22.4.msi (1.57 MB). Download of yarn-1.22.4.msi (1.57 MB) completed. Hashes match. Installing yarn... yarn has been installed. #< CLIXML <Objs Version="1.1.0.1" xmlns="http://schemas.microsoft.com/powershell/2004/04"><Obj S="progress" RefId="0"><TN RefId="0"><T>System.Management.Automation.PSCustomObject</T><T>System.Object</T></TN><MS><I64 N="SourceId">1</I64><PR N="Record"><AV>Preparing modules for first use.</AV><AI>0</AI><Nil /><PI>-1</PI><PC>-1</PC><T>Completed</T><SR>-1</SR><SD> </SD></PR></MS></Obj><Obj S="progress" RefId="1"><TNRef RefId="0" /><MS><I64 N="SourceId">1</I64><PR N="Record"><AV>Preparing modules for first use.</AV><AI>0</AI><Nil /><PI>-1</PI><PC>-1</PC><T>Completed</T><SR>-1</SR><SD> </SD></PR></MS></Obj><S S="debug">Host version is 5.1.18362.752, PowerShell Version is '5.1.18362.752' and CLR Version is '4.0.30319.42000'.</S><S S="verbose">Exporting function 'Format-FileSize'.</S><S S="verbose">Exporting function 'Get-ChecksumValid'.</S><S S="verbose">Exporting function 'Get-ChocolateyUnzip'.</S><S S="verbose">Exporting function 'Get-ChocolateyWebFile'.</S><S S="verbose">Exporting function 'Get-EnvironmentVariable'.</S><S S="verbose">Exporting function 'Get-EnvironmentVariableNames'.</S><S S="verbose">Exporting function 'Get-FtpFile'.</S><S S="verbose">Exporting function 'Get-OSArchitectureWidth'.</S><S S="verbose">Exporting function 'Get-PackageParameters'.</S><S S="verbose">Exporting function 'Get-PackageParametersBuiltIn'.</S><S S="verbose">Exporting function 'Get-ToolsLocation'.</S><S S="verbose">Exporting function 'Get-UACEnabled'.</S><S S="verbose">Exporting function 'Get-UninstallRegistryKey'.</S><S S="verbose">Exporting function 'Get-VirusCheckValid'.</S><S S="verbose">Exporting function 'Get-WebFile'.</S><S S="verbose">Exporting function 'Get-WebFileName'.</S><S S="verbose">Exporting function 'Get-WebHeaders'.</S><S S="verbose">Exporting function 'Install-BinFile'.</S><S S="verbose">Exporting function 'Install-ChocolateyDesktopLink'.</S><S S="verbose">Exporting function 'Install-ChocolateyEnvironmentVariable'.</S><S S="verbose">Exporting function 'Install-ChocolateyExplorerMenuItem'.</S><S S="verbose">Exporting function 'Install-ChocolateyFileAssociation'.</S><S S="verbose">Exporting function 'Install-ChocolateyInstallPackage'.</S><S S="verbose">Exporting function 'Install-ChocolateyPackage'.</S><S S="verbose">Exporting function 'Install-ChocolateyPath'.</S><S S="verbose">Exporting function 'Install-ChocolateyPinnedTaskBarItem'.</S><S S="verbose">Exporting function 'Install-ChocolateyPowershellCommand'.</S><S S="verbose">Exporting function 'Install-ChocolateyShortcut'.</S><S S="verbose">Exporting function 'Install-ChocolateyVsixPackage'.</S><S S="verbose">Exporting function 'Install-ChocolateyZipPackage'.</S><S S="verbose">Exporting function 'Install-Vsix'.</S><S S="verbose">Exporting function 'Set-EnvironmentVariable'.</S><S S="verbose">Exporting function 'Set-PowerShellExitCode'.</S><S S="verbose">Exporting function 'Start-ChocolateyProcessAsAdmin'.</S><S S="verbose">Exporting function 'Test-ProcessAdminRights'.</S><S S="verbose">Exporting function 'Uninstall-BinFile'.</S><S S="verbose">Exporting function 'Uninstall-ChocolateyEnvironmentVariable'.</S><S S="verbose">Exporting function 'Uninstall-ChocolateyPackage'.</S><S S="verbose">Exporting function 'Uninstall-ChocolateyZipPackage'.</S><S S="verbose">Exporting function 'Update-SessionEnvironment'.</S><S S="verbose">Exporting function 'Write-ChocolateyFailure'.</S><S S="verbose">Exporting function 'Write-ChocolateySuccess'.</S><S S="verbose">Exporting function 'Write-FileUpdateLog'.</S><S S="verbose">Exporting function 'Write-FunctionCallLogMessage'.</S><S S="verbose">Exporting alias 'Get-ProcessorBits'.</S><S S="verbose">Exporting alias 'Get-OSBitness'.</S><S S="verbose">Exporting alias 'Get-InstallRegistryKey'.</S><S S="verbose">Exporting alias 'Generate-BinFile'.</S><S S="verbose">Exporting alias 'Add-BinFile'.</S><S S="verbose">Exporting alias 'Start-ChocolateyProcess'.</S><S S="verbose">Exporting alias 'Invoke-ChocolateyProcess'.</S><S S="verbose">Exporting alias 'Remove-BinFile'.</S><S S="verbose">Exporting alias 'refreshenv'.</S><S S="verbose">Exporting function 'Format-FileSize'.</S><S S="verbose">Exporting function 'Get-ChecksumValid'.</S><S S="verbose">Exporting function 'Get-ChocolateyUnzip'.</S><S S="verbose">Exporting function 'Get-ChocolateyWebFile'.</S><S S="verbose">Exporting function 'Get-EnvironmentVariable'.</S><S S="verbose">Exporting function 'Get-EnvironmentVariableNames'.</S><S S="verbose">Exporting function 'Get-FtpFile'.</S><S S="verbose">Exporting function 'Get-OSArchitectureWidth'.</S><S S="verbose">Exporting function 'Get-PackageParameters'.</S><S S="verbose">Exporting function 'Get-PackageParametersBuiltIn'.</S><S S="verbose">Exporting function 'Get-ToolsLocation'.</S><S S="verbose">Exporting function 'Get-UACEnabled'.</S><S S="verbose">Exporting function 'Get-UninstallRegistryKey'.</S><S S="verbose">Exporting function 'Get-VirusCheckValid'.</S><S S="verbose">Exporting function 'Get-WebFile'.</S><S S="verbose">Exporting function 'Get-WebFileName'.</S><S S="verbose">Exporting function 'Get-WebHeaders'.</S><S S="verbose">Exporting function 'Install-BinFile'.</S><S S="verbose">Exporting function 'Install-ChocolateyDesktopLink'.</S><S S="verbose">Exporting function 'Install-ChocolateyEnvironmentVariable'.</S><S S="verbose">Exporting function 'Install-ChocolateyExplorerMenuItem'.</S><S S="verbose">Exporting function 'Install-ChocolateyFileAssociation'.</S><S S="verbose">Exporting function 'Install-ChocolateyInstallPackage'.</S><S S="verbose">Exporting function 'Install-ChocolateyPackage'.</S><S S="verbose">Exporting function 'Install-ChocolateyPath'.</S><S S="verbose">Exporting function 'Install-ChocolateyPinnedTaskBarItem'.</S><S S="verbose">Exporting function 'Install-ChocolateyPowershellCommand'.</S><S S="verbose">Exporting function 'Install-ChocolateyShortcut'.</S><S S="verbose">Exporting function 'Install-ChocolateyVsixPackage'.</S><S S="verbose">Exporting function 'Install-ChocolateyZipPackage'.</S><S S="verbose">Exporting function 'Install-Vsix'.</S><S S="verbose">Exporting function 'Set-EnvironmentVariable'.</S><S S="verbose">Exporting function 'Set-PowerShellExitCode'.</S><S S="verbose">Exporting function 'Start-ChocolateyProcessAsAdmin'.</S><S S="verbose">Exporting function 'Test-ProcessAdminRights'.</S><S S="verbose">Exporting function 'Uninstall-BinFile'.</S><S S="verbose">Exporting function 'Uninstall-ChocolateyEnvironmentVariable'.</S><S S="verbose">Exporting function 'Uninstall-ChocolateyPackage'.</S><S S="verbose">Exporting function 'Uninstall-ChocolateyZipPackage'.</S><S S="verbose">Exporting function 'Update-SessionEnvironment'.</S><S S="verbose">Exporting function 'Write-ChocolateyFailure'.</S><S S="verbose">Exporting function 'Write-ChocolateySuccess'.</S><S S="verbose">Exporting function 'Write-FileUpdateLog'.</S><S S="verbose">Exporting function 'Write-FunctionCallLogMessage'.</S><S S="verbose">Exporting alias 'Get-ProcessorBits'.</S><S S="verbose">Exporting alias 'Get-OSBitness'.</S><S S="verbose">Exporting alias 'Get-InstallRegistryKey'.</S><S S="verbose">Exporting alias 'Generate-BinFile'.</S><S S="verbose">Exporting alias 'Add-BinFile'.</S><S S="verbose">Exporting alias 'Start-ChocolateyProcess'.</S><S S="verbose">Exporting alias 'Invoke-ChocolateyProcess'.</S><S S="verbose">Exporting alias 'Remove-BinFile'.</S><S S="verbose">Exporting alias 'refreshenv'.</S></Objs> 0 Only an exit code of non-zero will fail the package by default. Set `--failonstderr` if you want error messages to also fail a script. See `choco -h` for details. The install of yarn was successful. Software installed as 'msi', install location is likely default. Chocolatey installed 1/1 packages. See the log for details (C:\ProgramData\chocolatey\logs\chocolatey.log). C:\Windows\system32>
You can verify your installation of yarn using the following command:
C:\Windows\system32>yarn --version 1.22.4 C:\Windows\system32>
Scoop Installation
The third method of installing Yarn is by using the Scoop command line installer for Windows.
Scoop has functionality that is similar to Chocolatey, but the main difference being that Chocolatey will install node.js if we do not already have it installed but scoop will not.
Scoop can be installed using the information found at the scoop website. To install node.js using scoop, run the following command:
scoop install nodejsNext, you can install yarn using following command:
scoop install yarnd
The best method to review many of the Yarn commands is to run the help command:
yarn help
Start a New Project
To create a new project, run the following command:
yarn init
Installing Dependencies
Use one of the two following commands, to install all the dependencies for a project:
yarn yarn install
To add a dependency to a project, use one of the following command formats:
yarn add [package] yarn add [package]@[version] yarn add [package]@[tag]
To add dependencies to a specific category, you can use one of the following three options:
1) dev Dependencies
2) peer Dependencies
3) optional Dependencies
yarn add [package] --dev # dev-dependency yarn add [package] --peer # peer-dependency yarn add [package] --optimal # optimal-dependency
To upgrade an existing dependency, you can use the yarn up command.
yarn up [packagename] yarn up [packagename]@[version] yarn up [packagename]@[tag]
To remove an existing dependency, you should use the following command:
yarn remove [package]Upgrade Yarn
To upgrade Yarn to the latest version, run one of the following commands:
yarn set version latest yarn set version from sources
Dear user, we hope you would enjoy this tutorial, you can ask questions about this training in the comments section, or to solve other problems in the field of Eldernode training, refer to the Ask page section and raise your problem in it as soon as possible. Make time for other users and experts to answer your questions.
Goodluck.