Nessus is an open-source remote security scanning tool that is trusted by more than 30,000 organizations worldwide as one of the most widely deployed security technologies on the planet. As an administrator, you may work with one or a group of computers connected to the internet. Using Nessus as a vulnerability scanner allows you to keep your domains free of the easy vulnerabilities that hackers and viruses commonly look to exploit. Although Nessus is one small part of a good security strategy, it is not a complete security solution. This article presents the Tutorial Setup And Configure Nessus On Ubuntu 20.10. If you wish to prepare your own Ubuntu VPS, count on our technical team and register your order on Eldernode.
Table of Contents
Setup And Configure Nessus On Ubuntu 20.10
The Nessus Project was started by Renaud Deraison in 1998. It seems to be ideal for consultants, Pen Testers and Security Practitioners. It can report the scan results in various formats, such as plain text, XML, HTML, and LaTeX. Nessus comes in two parts, a server called nessusd and a client, which can by any of several options. The server is the part of Nessus that actually runs the tests, and the client is used to tell the server what tests to run on what computers.
The server exists only for Unix/Linux platforms, but there are clients available for Unix/Linux, Windows, and Mac. Therefore, once the server is set up and running, an administrator can run regularly scheduled Nessus tests using a client written for almost any platform. Join us with this article to learn more about Nessus and finally review the process of setup and configure it on Ubuntu 20.10.
Nessus Features
Nessus scans cover a wide range of technologies including operating systems, network devices, hypervisors, databases, web servers, and critical infrastructure. Let’s see the main features of Nessus below:
1- Unlimited assessments
2- Compatibility with computers and servers of all sizes
3- Configuration assessment
4- Live Results
5- Configurable Reports
6- Community Support
7- Advanced Support available with a subscription
8- Detection of security holes in local or remote hosts
9- Simulated attacks to pinpoint vulnerabilities
10- Cost-effective for companies of all sizes
11- Use anywhere, annual subscription
12- Easy-to-Use
13- Free for 7 days
14- Accurate visibility into your Networks
15- Execution of security tests in a contained environment
16- Scheduled security audits
17- 32 IPs Per Scanner
18- Detection of missing security updates and patches
Prerequisites to Install Nessus on Ubuntu 20.10
To let this tutorial work better, please consider the below Prerequisity:
_ A non-root user with Sudo privileges.
How to Install Nessus on Ubuntu 20.10
Nessus detects malware and scans embedded devices. To secure your Ubuntu 20.10 and hardening your Infrastructure and Applications from the “bad guys” install it by following the below steps.
Step 1:
Nessus Scanner packages are available on the Nessus Downloads page. First, download the current stable release as of this writing and continue. Also, you can download Nessus 8.13.1 Ubuntu installer by running the command below:
curl -o Nessus-8.13.1-Ubuntu1110_amd64.deb "https://www.tenable.com/downloads/api/v1/public/pages/nessus/downloads/12207/download?i_agree_to_tenable_license_agreement=true&file_path=Nessus-8.13.1-Ubuntu1110_amd64.deb"Then, you can calculate the checksum hash of the downloaded file and compare it with the checksum hash as provided on the downloads page. To do this, run:
md5sum Nessus-8.13.1-Ubuntu1110_amd64.debeeff7141132f064f879bd11835e76901 Nessus-8.13.1-Ubuntu1110_amd64.debBefore starting the installation process, make sure that the hashes match.
Step 2:
Use the following command install Nessus on your Ubuntu 20.10:
apt install ./Nessus-8.13.1-Ubuntu1110_amd64.debThen, to start and enable Nessus service to run on system boot, type:
systemctl enable --now nessusdTo start and stop Nessus, use the following commands:
/etc/init.d/nessusd start/etc/init.d/nessusd stopFinally, you can check the status by running the command below:
systemctl status nessusdHow to setup and configure Nessus on Ubuntu 20.10
Once the installation is finished, you are ready to set up and activate Nessus on Ubuntu 20.10. So, log in to UI, using the URL as shown in the installation output: HTTPS://<your-hostname-or-IP>:8834/.
To allow external access, open port 8834/TCP. We assume UFW is running:
ufw allow 8834/tcpNow, you can access Nessus from the browser to finalize the setup. If you faced the SSL warning, accept it (an exception) and proceed.
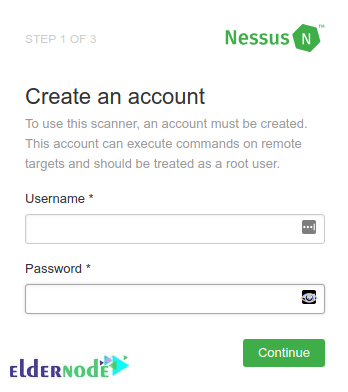
First, create a Nessus administrator account on the first page:
To start using Nessus, you need to provide an activation code. To do this, visit the tenable website.
When you received the License key in your email, you can use it for signup and register your Nessus scanner with emailed activation code:
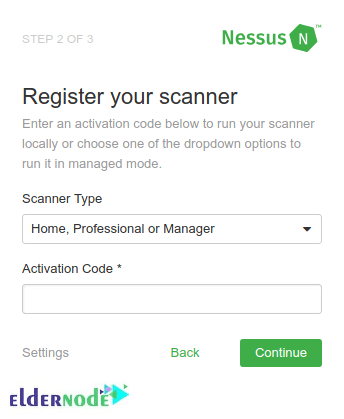
You just need to choose the Nessus type to run, since you will be prompted to choose the Nessus you wish to deploy. Once you enter the required information, the initializing process will start:

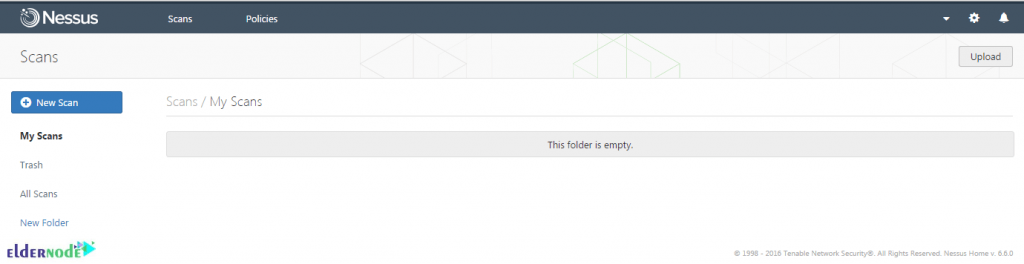
Wait till Nessus download Plugins and prepare the files needed to scan your assets. Then, you can log in with the created admin account:

If you pass all required steps correctly and have successful credentials, you will be directed to the Nessus Vulnerability scanner’s dashboard where you will be able to manage your scan jobs.
Conclusion
In this article, you learned How to Setup And Configure Nessus On Ubuntu 20.10. If you are interested in learning more, refer to How to install and use Metasploit on Ubuntu 20.04.