In the world of communications and with the advancement of information technology, it makes sense to keep in touch with clients. Nowadays, correspondence inside the network and even outside the network is mostly done electronically. You can setup your own email server on a Windows system to send E-mails using your specific organization domain. Join us to review the Tutorial Setup And Configure Mail Server On RDP. Stay with us to review setup an SMTP server on your remote desktop protocol. Various packages of windows 10 Remote Desktop is available on Eldernode. To purchase your own RDP Admin, order what you need.
Table of Contents
How to Setup And Configure Mail Server On RDP
This guide helps you to be able to control your emails, manage and store them. Also, a Mail server is commonly using when local applications need to send email notifications. In the following, you will review how to configure an SMTP server to setup a mail client. It is not complicated at all. Just follow the required steps and make sure you are doing it correctly.
Setup an internal SMTP Service on RDP
In this section, we guide you through setting up and configuring an SMTP server on windows server remote desktop. SMTP server is the server we use to build an enterprise email network. Follow the below steps to enable an SMTP service that is built into the core operating system for RDP.
Step 1:
First of all, connect to your server via RDP.
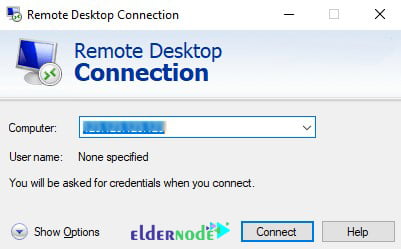
Then open Server Manager from the search section.

Step 2:
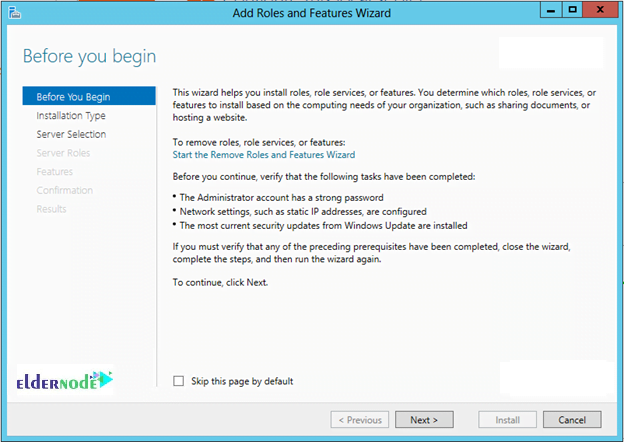
From the Dashboard, click Add Roles and Features. As shown below, the Add Roles and Features Wizard will begin. Click Next on to continue.
Step 3:
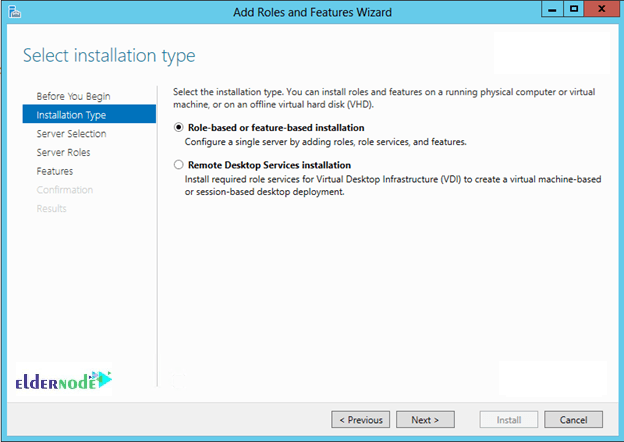
On the Installation type, select the ”Role-based or feature-based installation” option.
Step 4:
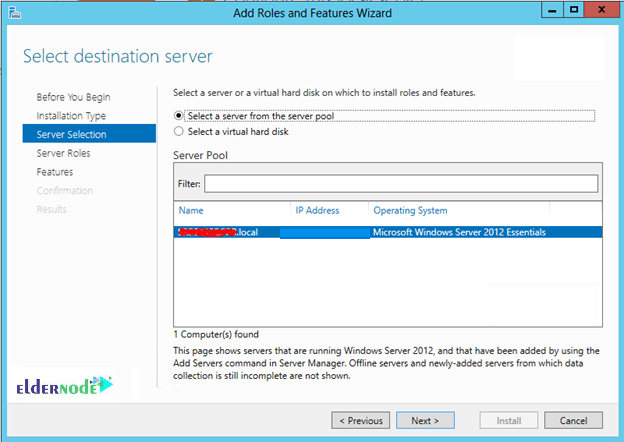
In this step, you should select a server or a virtual hard disk. Select the Essential Server and click on Next.
Step 5:
Now, to bypass the Roles selections, click Next and continue.
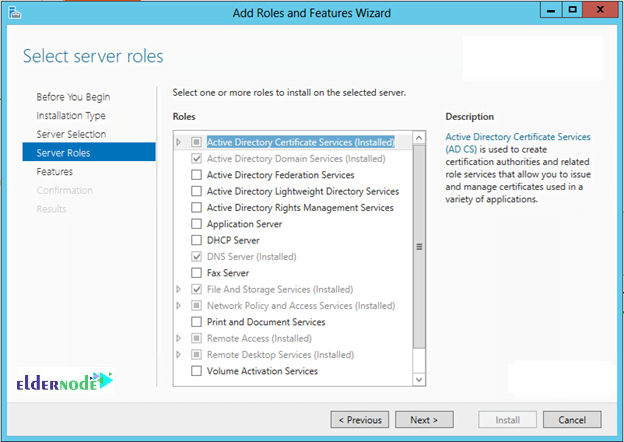
Step 6:
To find and the SMTP Server, scroll down the feature list. Tick the box and continue.
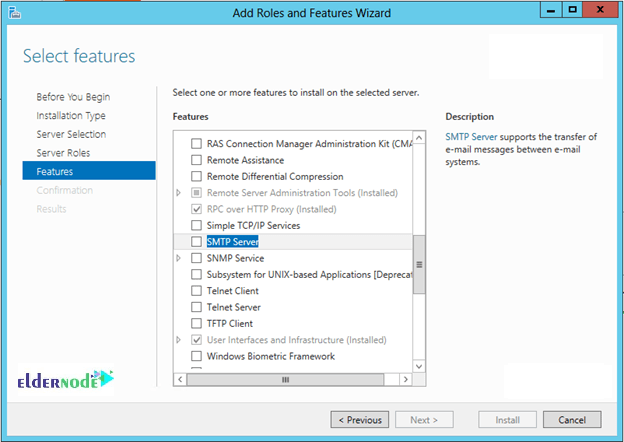
Step 7:
In this step, you will be informed by a popup window. It says that some other services will also be installed. To confirm and continue, click Add Features.

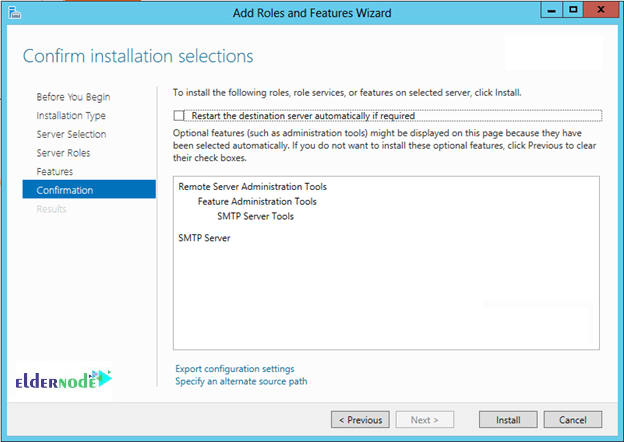
Step 8:
To complete the installation, click Install.
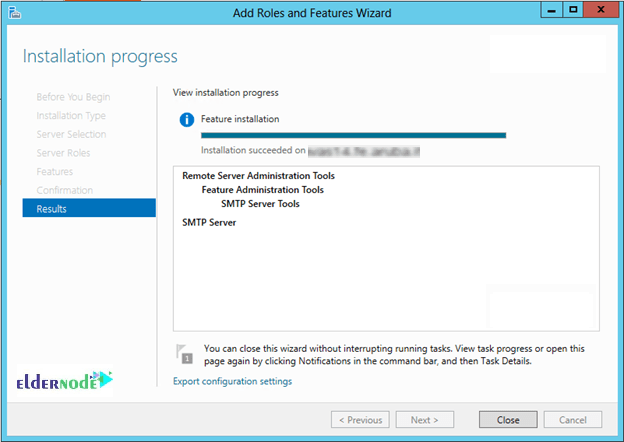
Step 9:
Once the feature installation progress is completed, click Close.
How to Configure Mail Server on RDP Server 2012
After a successful setup, you need to configure the SMTP server to only allow emails from the local server. When you finish the configuration, you can ensure that spammers will not be able to use your SMTP server to send spam. So, stay with us and go through the required steps of configuration.
Step 1:
From the Search charm, type IIS and run the Internet Information Services (IIS) 6.0 Manager.

Step 2:
To make changes on your computer, click Yes.
Step 3:
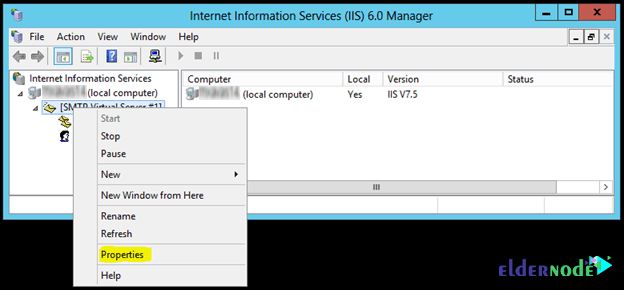
Now, expand to SMTP Virtual Server #1 and select Properties.
Step 4:
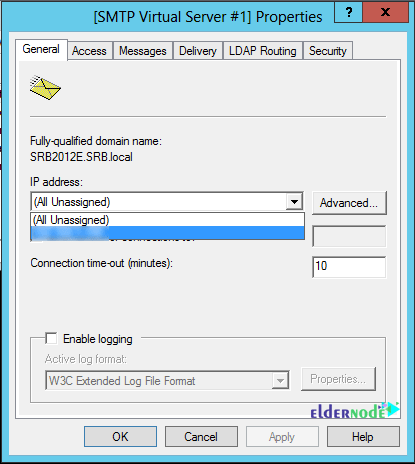
In the General Tab, set the IP Address to the server’s IP address and tick Enable Logging.
Step 5:
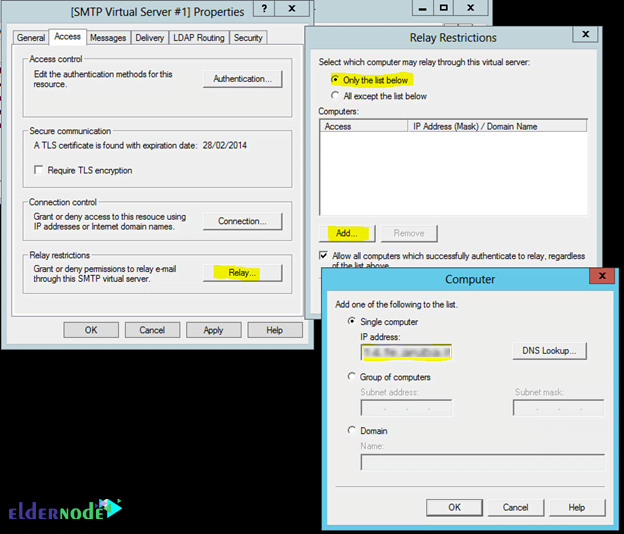
And in the Access Tab, set the IP for the internal devices in the connection button. Then, add the same IP to the Relay list.
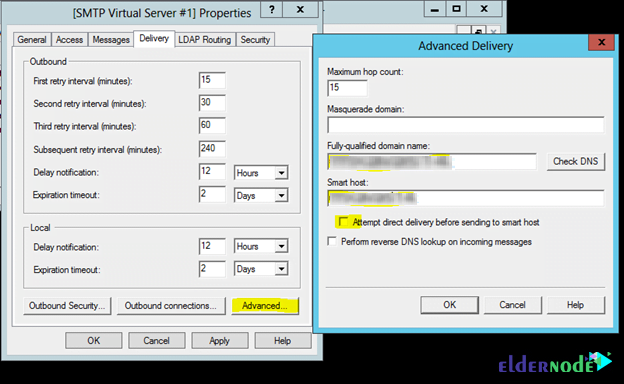
Step 6:
It is time to set an external domain. In the Delivery Tab, you can do this. There, you can either use the free customized domain from Microsoft or optionally add a Smart host, if required. Tick the Attempt direct delivery box if you want the server to attempt to directly deliver the email before trying the Smart host.
Step 7:
Again, from the Search charm, type Firewall can locate and run the Windows Firewall with the Advanced Security console.

Step 8:
Add a new Inbound Rule. (Right Click on Inbound Rule, and select New Rule)
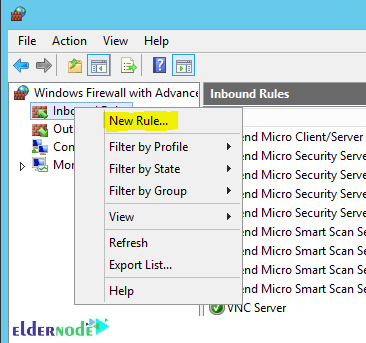
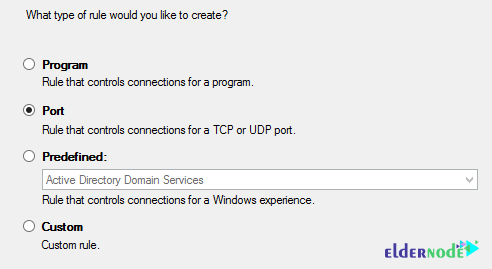
Step 9:
Then, select Port.
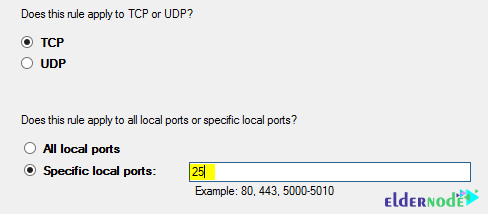
Step 10:
Now, type in 25 as the local port.
Step 11:
Click Next (Allow the Connection)

Step 12:
As shown below, uncheck Public. (Prevents external access to the server)
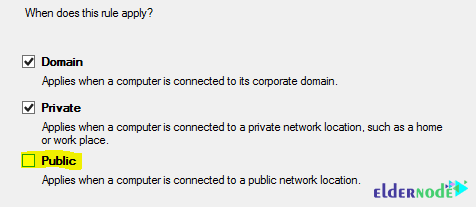
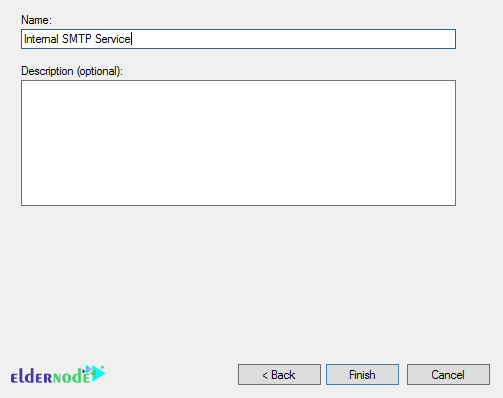
Step 13:
Give the rule a name, and click Finish to create the rule.
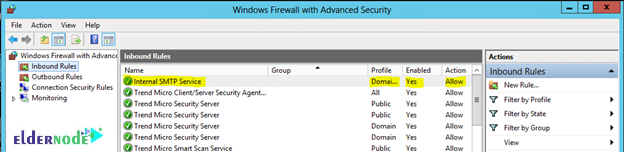
Step 14:
In this way, you see a new rule enabled in the firewall management console.
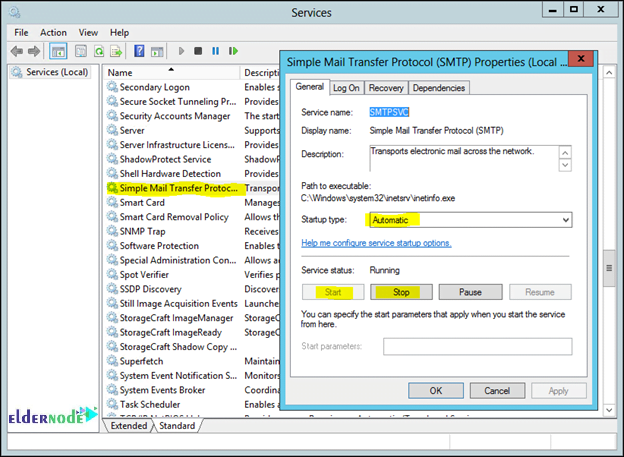
Step 15:
Finally, Restart the MTP Service and set the service for Automatic Start and then, follow the below path:
Open up the Services Management Console.
Double click on the Simple Mail Transfer Protocol service.
Stop and then Start the service. Set the Startup type to Automatic.
Conclusion
Mail server is a very important service that removes problems for managers and employees of the organization. In this article, you learned How to Setup And Configure a Mail Server On RDP. As we promised, it was not complicated. Using this guide helps you to have a ready and waiting service.