[Updated] Mikrotik is a powerful router used to increase boot speed to provide automated performance. It provides hardware and software for Internet connectivity in most of the countries around the world. MikroTik has a very high level of flexibility when it comes to network management that comes with its own sophisticated router. When you install RouterOS on your PC, it will turn it into a router with all the necessary features such as routing, firewall, bandwidth management, wireless access point, backhaul link, hotspot gateway, VPN server, and more. In this article, you will learn about Port Forwarding On Mikrotik. You can check the available Mikrotik VPS Server Services on Eldernode and order that you need.
Table of Contents
Tutorial Port Forwarding On MikroTik Router
The process of intercepting data traffic headed for a computer’s IP/port combination and redirecting it to a different IP and/or port is called Port forwarding. Using Mikrotik helps you to do this. So, you can assign a specific port to a specific service on your network so that the user can access it by entering that port in their software or browser. For example, you have a website with port 8080 inside your organization, and Mikrotik is located as a router between your organization’s internal network path and the Internet. Now, if you are considering outsourcing your IP address or domain with a port to the software within the organization, you should use a forwarding port.
What is port forwarding?
To understand the definition of port forwarding, we need to explain about router first. As you know, your internet service provider assigns one IP address to your internet connection. But when all computers on the internet need a unique IP address, what should be done if you have multiple computers in your house and only one address. Port forwards are setup in your router. To make a computer on your home or business network accessible to computers on the internet (Even though they are behind a router). So, you need to do port forwarding. In the case of gaming, setting up a security camera, or downloading files, you will need to follow this instruction.
How to configure port forwarding on MikroTik
As an IT administrator when you create a big network, users may ask to remotely connect to your VPS server or dedicated server. Undoubtedly, you will not share the server IP with him for security purposes. So, you will use port forwarding on MikroTik Router to handle all requests. Let’s see what are the required steps to achieve this purpose.
Step 1:
Login with Winbox to your own MikroTik server with admin privileges.
Step 2:
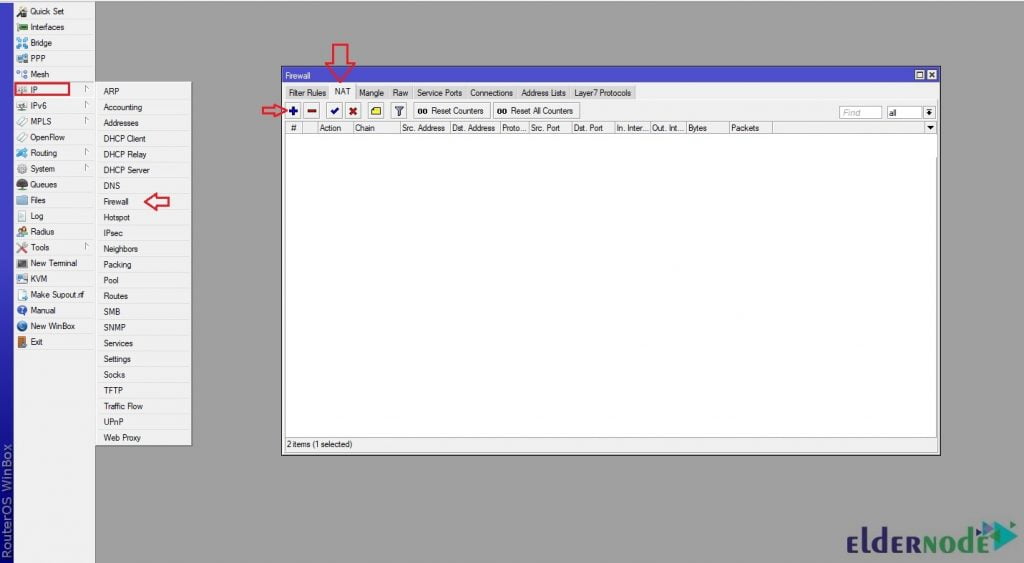
Then click “Firewall” from the “IP” menu.
Step 3:
From the Firewall page, click on the NAT (Network Address Translation) tab to open its settings and handle the packets that the router receives.
Step 4:
In the “NAT” tab, click on the “+” item to create a rule.
Step 5:
In this step, you should click on the “General” tab. Select “dstnat” from the “chain” drop-down list. In the “Dst. Address” field type this IP (10.10.10.10). From the “Protocol” list, select the connection protocol like (TCP, xdp, ddp). In the “Dst. Port” field, type 5847.
Also, let’s assume the router connects to IP (10.10.10.10) and we want to forward all requests from (10.10.10.10:5847) to the (20.20.20.20:4324).
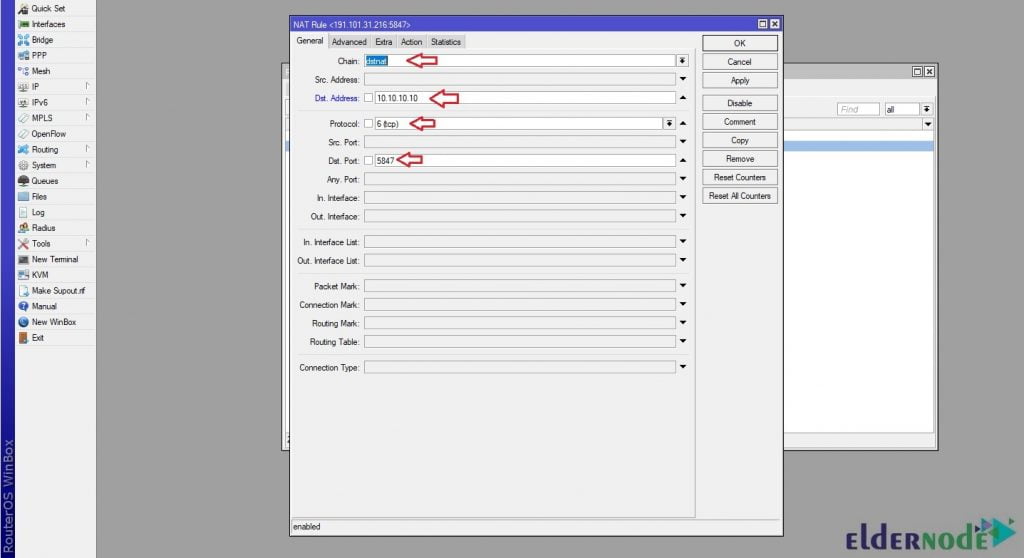
Then adjust the settings as follows:
Chain: Set this section to dstnat.
Protocol: If you want a particular protocol packet to be forwarded only, set the Protocol option.
dst port: In this section, enter the port you want to access on the Internet.
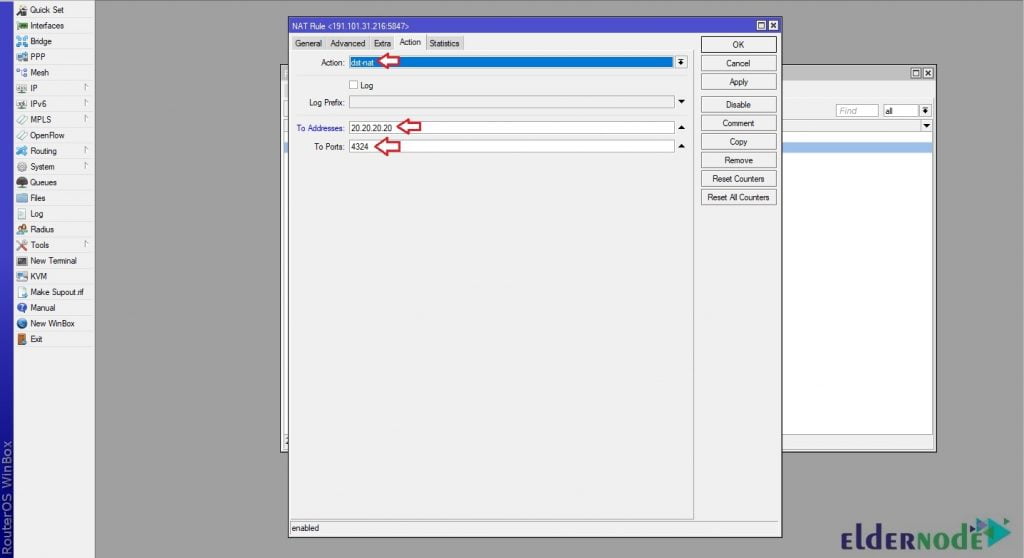
Then go to the Action tab:
Action: Set this option to dst-nat.
To Addresses: Enter the address of the server inside your organization in this section.
To port: Enter the internal server port where you intend to transfer traffic to.
Note: You can either input and output ports alike or import ports differently.
Step 6:
Now, click on the “Action” tab. From the action drop-down list, select “dst-nat”. Type this IP (20.20.20.20) on the “To Addresses” field and type 4324 on the “To Ports” field.
Step 7:
In the final step, you should click on Apply and OK to save and add the rules.
Conclusion
In this article, you learned How To Port Forwarding On Mikrotik. Using Mikrotik allows you to manage anything related to networking. Following the mentioned steps helps you to do port forwarding on Mikrotik. If you are interested in reading more, refer to How to Configure IP settings in Mikrotik.