Servers are always vulnerable to infection. Using security programs is effective in increasing security and delete infected files and programs on the server. ImunifyAV is an antivirus and security monitoring tool for websites. To keep your website free of malware, you can use ImunifyAV and cleanup malware, domain reputation monitoring, and blacklist status check. CloudLinux has created this tool as the most effective malware detection solution in the industry. In this article, we are going to Introduce ImunifyAV and Install ImunifyAV On cPanel & WHM. If you have prepared a Dedicated server, ImunifyAV allows your cPanel users to scan files and manage found malware. However, you can install this antivirus on your Operating System even if you have not installed any control panel. There are various VPS Hosting Plans on Eldernode, purchase a package due to your needs.
Table of Contents
Introducing ImunifyAV On CPanel & WHM
What is ImunifyAV?
You may have been detected as a malicious site by Google. Or be redirected to another address when you enter your domain name in a browser. It means that you have been blocked by Web hosting service due to spam, malware, or hacking. To manage this situation, you need to scan the files of the host to identify malicious ones. Here, ImunifyAV perfectly plays its role. CloudLinux released ImunifyAV as a free antivirus that has a good interface. It helps server administrators to manage the setting easier. If you are using the cPanel control panel, all the users of the server can access the settings of this antivirus. Also, the administrator controls the scanned and infected history and documents on the server.
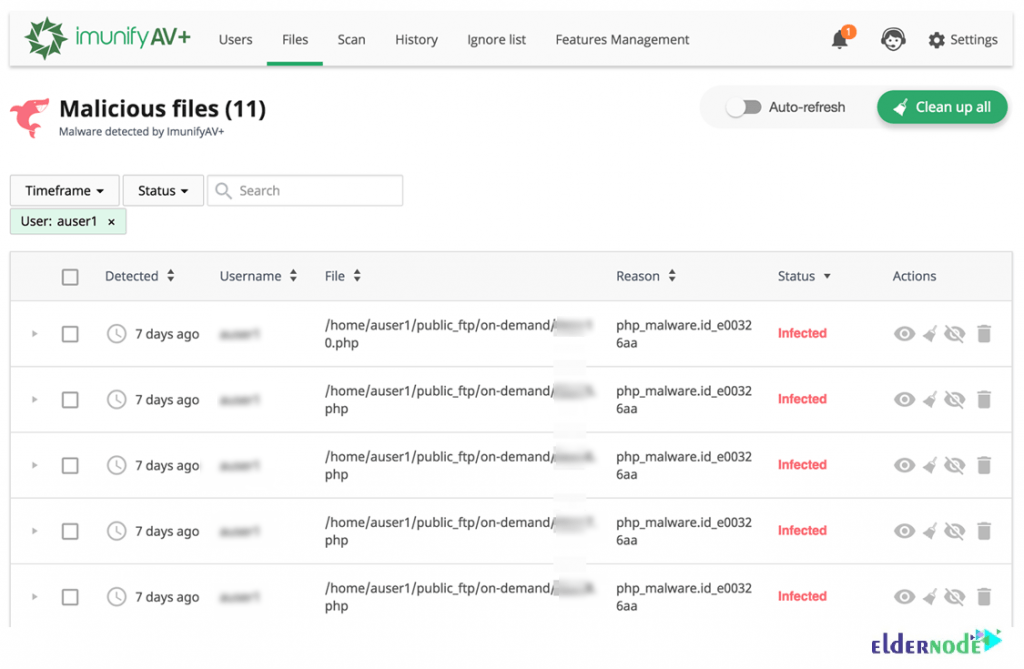
When you install ImunifyAV on your cPanel & WHM, it will give the benefit of automatic scans of hosted websites, alerting for infection with malware. Once it finds malware on a website, sends a notification to users through the ImunifyAV control panel in the Files tab. Also, if you upgrade to ImunifyAV+, you will receive an email notification to the control panel’s administrator email address. ImunifyAV provides cPanel users the choice to either clean the infection or upgrade to ImunifyAV+ when it discovers malware. Because removing malware automatically is possible in ImunifyAV+. ImunifyAV helps you recognize dangerous behaviors in real-time and immediate clean-up once detects. ImunifyAV is compatible with cPanel, Plesk, ISP Manager, DirectAdmin, and No panel. Also, Ubuntu support is coming soon.
Join us with this guide to learn how to install ImunifyAV on cPanel and enjoy its features.
ImunifyAV Features (Introducing And Install ImunifyAV On CPanel)
1- The free version includes a fully-featured malware file scanner, reputation, and blacklist status monitoring.
2- Premium version enables one-click automatic cleanup, scheduled websites check, admin and user notifications on malware detection as well as enables user permissions management and introduce User tab with a summary and scanning results.
3- Detects any types of malicious files including backdoors, web-shells, viruses, hacker’s tools, ‘blackhat SEO’ scripts, phishing pages, and others.
4- Monitors reputation and blacklist status of domains against 60+ security services including Google SB, Yandex SB, McAfee, ESET, Kaspersky.
5- Supports WordPress, Joomla!, Magento, Drupal, MODx, Bitrix, and other PHP-based CMSs and static HTML websites.
6- One-click automatic malware cleanup, scheduled & on-demand website scanning, and detailed reports.
7- UI flow optimized for security monitoring of hundreds of users and thousands of domains per server
ImunifyAV Advantages (Introducing And Install ImunifyAV On CPanel)
1- Scans the entire server from WHM and CLI
2- Monthly automatic scans easy to configure from WHM
3- History of results for past scans
4- List of directories in a specified “Ignore list”
ImunifyAV Disadvantages
1- cPanel users cannot initiate scans from cPanel.
2- Important features in WHM such as automatic cleanup and more frequent automated scans require a paid subscription.
3- Only available for CentOS, Ubuntu, CloudLinux, and OpenVZ/Virtuozzo platforms.
4- No popular third-party integrations to connect with other web applications yet
Fairly new, most documentation only available from the official website.
ImunifyAV VS ClamAV
You may know ClamAV or even used it. ClamAV is one of the most popular free and open-source antivirus software available on most Linux distributions. But due to some reasons, you may prefer ImunifyAV to ClamAV. As a system administrator if you wish to rescue the load on cPanel users, choosing ImunifyAV is more logical. If you are positive about paying for additional features, you will enjoy many more options without the terminal since the free ImunifyAV and ImunifyAV+ versions provide more features available in WHM and cPanel for faster setup.
How To Install ImunifyAV On CPanel & WHM
With a highly efficient detection engine, ImunifyAV finds most types of malware without stressing you or your system. It is free but if you need to remove malware when it is found, you need to prepare the ImunifyAV+premium edition.
Let’s go through the steps of this guide to review the process of installing ImunifyAV on cPanel.
Step 1:
You need to log into WHM as the root user. If you are logging in as a reseller account, root-level privileges must be considered. So, first, you must SSH into your server.
Step 2:
Now, you can download the ImunifyAV installation shell script from Imunify360.com. Go to your home directory and run the following command:
wget https://repo.imunify360.cloudlinux.com/defence360/imav-deploy.shStep 3:
To run the installation script, type:
bash imav-deploy.shAlso, you can install the ImunifyAV beta version add the argument –beta. Look at the below example:
bash imav-deploy.sh --betaStep 4:
As you learned, you can upgrade ImunifyAV to ImunifyAV+ to remove the found malware. So if you have an ImunifyAV+ license key, use it during installation.
wget https://repo.imunify360.cloudlinux.com/defence360/imav-deploy.shbash imav-deploy.sh --key YOUR_KEYYour_Key is your license key. Remember to replace Your_Key with the actual key purchased at the mentioned website earlier.
Use the command below to view available options for the installation script.
bash imav-deploy.sh -hIf the registration key is passed, register an activation key via the following command:
imunify-antivirus register YOUR_KEYAgain, Your_Key is your activation key or IPL in case of an IP-based license.
Note: In case you are not receiving the ImunifyAV alert in the list of security alerts, check for the below conditions to fix them:
1- Your server is not supporting ImunifyAV.
2- You are using a trial account.
3- You did not log in with the root user or a reseller account with root-level privileges.
How to update ImunifyAV instructions on CPanel
You can upgrade ImunifyAV by running the command below:
yum update imunify-antivirusUse the command below to update ImunifyAV beta version.
yum update imunify-antivirus --enablerepo=imunify360-testingHowever, if you do not want to receive updates from beta, you can remove the beta repository.
rm /etc/apt/sources.list.d/imunify360-testing.listapt-get updateHow to Uninstall Imunify from CPanel
You can uninstall ImunifyAV via SSH due to any reason you consider and stop using that. The following steps learn you How to stop and uninstall ImunifyAV.
Step 1:
To stop the ImunifyAV application, run the following command:
systemctl stop imunify-antivirusOR
service imunify-antivirus stopStep 2:
You may have removed the imav-deploy.sh installation script. To uninstall the program, download it again.
wget https://repo.imunify360.cloudlinux.com/defence360/imav-deploy.shStep 3:
And finally, to uninstall ImunifyAV, run:
bash imav-deploy.sh --uninstallHow To Enable ImunifyaV For CPanel Users
Since the ImunifyAV cPanel user interface is hidden by default, you can enable it to allow users to view their malicious files, scan history, and ignore the list.
Use the command below to enable the ImunifyAV cPanel user interface via SSH.
/opt/alt/python35/share/imunify360/scripts/av-userside-plugin.shYou can disable the ImunifyAV cPanel user interface again by running the following command:
/opt/alt/python35/share/imunify360/scripts/av-userside-plugin.sh -rConclusion
In this article, ImunifyAV was introduced to you and you learned How To Install ImunifyAV On cPanel & WHM. And finally, you learned How to enable Imunify for cPanel users. From now on you can easily give your customers automated security to combat viruses, adware, spyware, and worms. You will certainly receive fewer support calls from customers who have faced a hacked website. Go to Eldernode Community and ask your friends who have installed it before about its Pros and Cons.