AWS stands for Amazon Web Services, developed by Benjamin Black and Chris Pinkham in 2004. AWS offers a wide range of services to its users and customers, including computing, processing, server, networking, security, storage, email, mobile application development, databases, etc., all of which are provided remotely to the customer. In this article, we are going to teach you to step by step How to Install and Run WHM and cPanel on AWS. You can visit the packages available in Eldernode if you wish to purchase a VPS server.
Table of Contents
How to Install and run WHM and cPanel on AWS
Introduction to AWS
You must have heard the name Amazon. But are you familiar with AWS web services or Amazon? The company is one of the leading suppliers in the field of cloud or cloud services. More than 170 AWS services are available to web and application developers, and they have access to these services anywhere.
Amazon Web Services is an online platform for providing cost-effective and scalable cloud computing methods. This cloud platform provides features such as computing power, database storage, content production, etc. on a corporate scale and beyond.
Here is the history of AWS:
1. Amazon Web Services was launched in 2002.
2. AWS products were launched in 2006.
3. The first AWS customer-centric exhibition was opened in 2012.
4. AWS sold for $6.4 billion in 2015.
5. In 2016, revenue generation of $ 10 billion was considered as the goal of this platform.
6. AWS Snowball and Snowmobile products were released in 2016.
7. In 2019, almost 100 new cloud services were released.
Amazon offers many services for cloud applications. Here are some key services of the AWS ecosystem. The list of Amazon services in this area is as follows:
_ Computational services
_ Save
_ Database
_ Networking and content delivery
_ Security tools
_ Developer tools
_ Management tools
What is WHM?
The term WHM stands for Web Host Manager. This software is a product of the cPanel company and provides services to web host administrators along with cPanel. WHM and cPanel are actually software. Both of these softwares are installed on the server. The only difference between the two is the level of access and the type of application for individuals.
The cPanel control panel is for end-users and those who want to launch their site and buy hosting from hosting companies to upload their site on it. But if you want to have a hosting agency and sell hosting, you will get WHM access. The main server administrator also has WHM access with a higher level of access.
WHM has tools for managing clients, each delivered a cPanel. For example, the server administrator logs into his WHM account to create cPanel for his clients. It then divides the hardware resources such as user-space required, bandwidth, number of hosts to be hosted, and a variety of other peripherals and delivers them to the user in the form of a cPanel account. On the other hand, anyone who wants to launch their site must log in to cPanel, which is created by the server administrator using the WHM control panel.
There is no doubt that WHM is the most powerful hosting management software and despite its high license price, due to its performance and security, server administrators install it without any delay.
Tutorial Setup VPC (Virtual Private Cloud) for cPanel
In this section, we are going to show you how to setup a VPC on Cpanel. You must first log in to your AWS web console. Then you need to follow the path below to create a VPC:
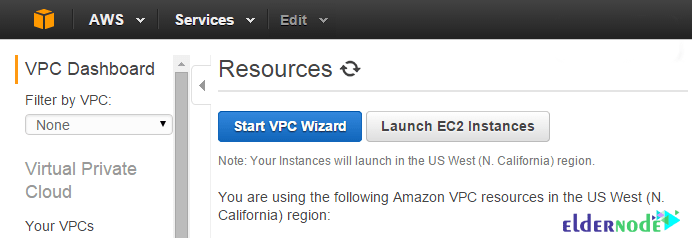
Services >> Networking >> VPC (VPC Dashboard)
In the next step, you must click on the Start VPC Wizard as shown below:
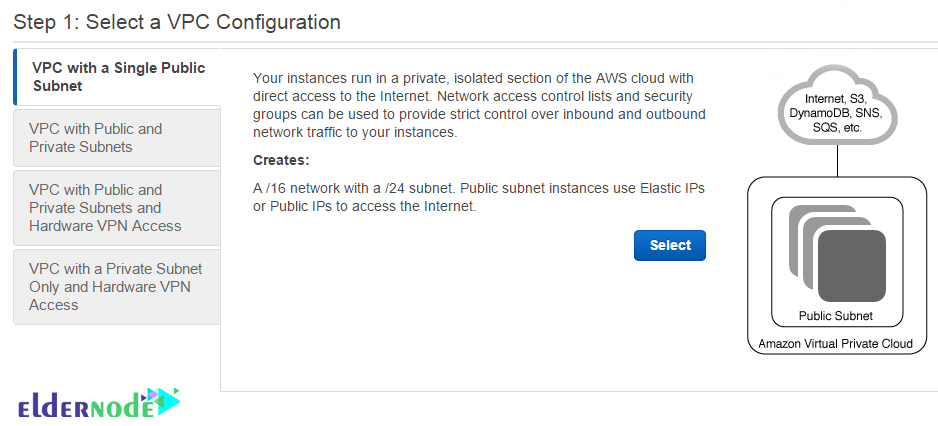
Click Select VPC with a Single Public Subnet as shown below:
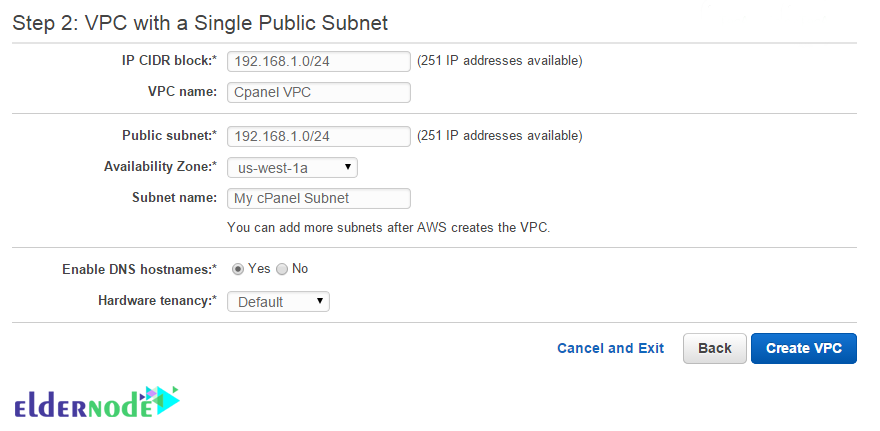
Now it’s time to enter your CIDR and public Subnet:
In the next section, we will explain how to Create EC2 Instance.
How to Create EC2 Instance
In this section, we are going to explain How to Create EC2 Instance. So you have to follow the steps below. Go to the EC2 instances section of the AWS console and create a new instance of your choice using the steps below:
1- Select an Amazon Machine Image (AMI)
2- Select an Instance Type
3- Configure Instance Details
4- Add Storage of your preferred size
5- Tag your Instance Name
How to Create Elastic IP
In this section, we are going to teach you How to Create Elastic IP. To assign a new Elastic IP, you must follow the steps below in order.
The first step is to go to VPC DashBoard.
You can then select Elastic IPs from the left column.
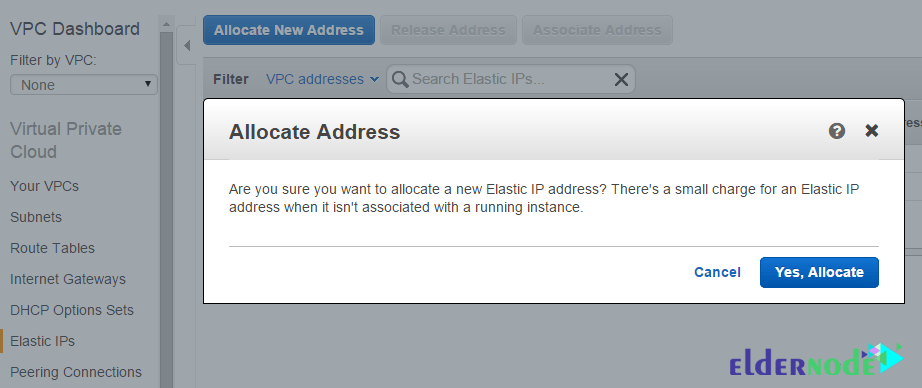
In the main window, click on Allocate New Address.
Finally, you can click Yes, Allocate to confirm.
How to Bind Elastic IP with Instance
After learning how to create Elastic IP in the previous section, we are now going to teach you how to Bind Elastic IP with Instance. To do this, just follow the steps below.
The first step is to go to the EC2 dashboard.
Then you need to select the Elastic IP link in the “NETWORK and SECURITY” section in the sidebar.
Now you need to select your Elastic IP and then click on “Associate Address“.
In the last step, you must Select Your newly created instance and click Associate.
Prerequisites for Install cPanel & WHM
Before we start the cPanel & WHM installation tutorial, we need to explain the prerequisites for Install cPanel & WHM. Follow the steps below.
First, you need to log in to the server as a root user using the pem file generated when creating the instance. To do this you can use the following command:
ssh -i server.pem [email protected]Now you need to update all the existing packages in the system using the following command:
yum updateFinally, you can reboot the system by executing the following command:
rebootThe next step is to setup the Hostname. You can easily set your Hostname temporarily using the following command:
hostname cpanel.example.comOnce you have completed the above steps, you can now make the changes by editing the configuration file.
You can edit the /etc/sysconfig/network configuration file for RHEL and CentOS distributions using the following command:
HOSTNAME=cpanel.example.comFor Ubuntu and Debian distributions you can edit the /etc/hostname configuration file:
cpanel.example.comYou can also edit the /etc/hosts file to bind hostname with local system IP:
10.0.0.100 cpanel.example.comHow to Install WHM and cPanel on AWS
After completing all the above steps correctly, we come to How to Install WHM and cPanel on AWS. At this point, our system is ready to install cPanel. It should be noted that you can use the following commands to complete the installation process. Note that this process takes time depending on your network speed and system configuration.
Therefore, you must execute the following commands in order:
cd /homeyum install wgetwget -N http://httpupdate.cpanel.net/latestsh latestAfter installing cPanel, you need to setup NAT in the next step. One thing to keep in mind is that sometimes the system does not automatically detect NAT in your instance. So you can do this using the following command:
/scripts/build_cpnatYou can now follow the path below in your WHM and check the IPv4 address to use to setup shared IPv4 virtual hosts to show your public IP address:
Home >> Server Configuration >> Basic cPanel & WHM Setup
Finally, you need to open all the input ports in the AWS security group used by the instance. It should also be noted that you can open certain ports for the input network.
How to Run cPanel and WHM
By successfully completing the above tutorials, you will be able to setup WHM and cPanel. You can now easily access and run WHM and cPanel using the following URLs.
To access WHM you can use the following link:
http://cpanel.example.com:2086You can also use the following link to access WHM with SSL:
https://cpanel.example.com:2087You can access cPanel using the following link:
http://cpanel.example.com:2082Finally, you can access cPanel with SSL using the following link:
https://cpanel.example.com:2083Now you need to open one of your favorite browsers and go to https://cpanel.yourdomainname.com:2087. One thing to keep in mind is that some browsers may display a warning message about HTTPS and not allow you to visit the WHM page. Note that in this case, you must use your IP address instead of the domain name (https://PUBLIC_IP_ADDRESS: 2087).
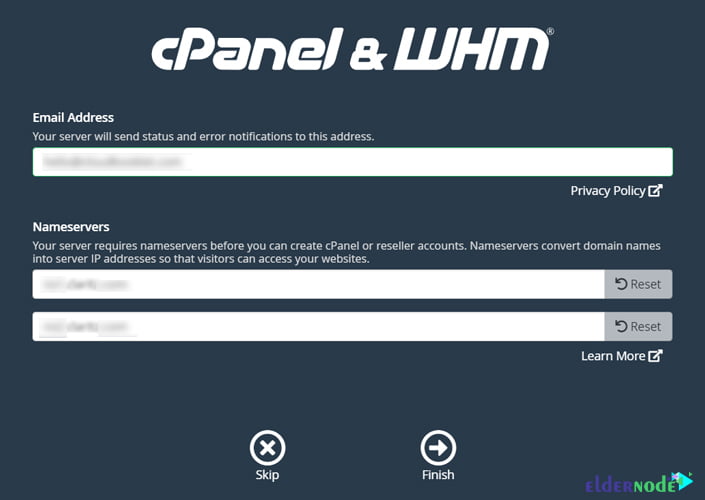
As you can see in the image above, you must enter the username as root. You also need to enter the password you created by running the passwd command. By doing this you will enter WHM. In the next step, you have to enter your email address. Finally, click on Finish.
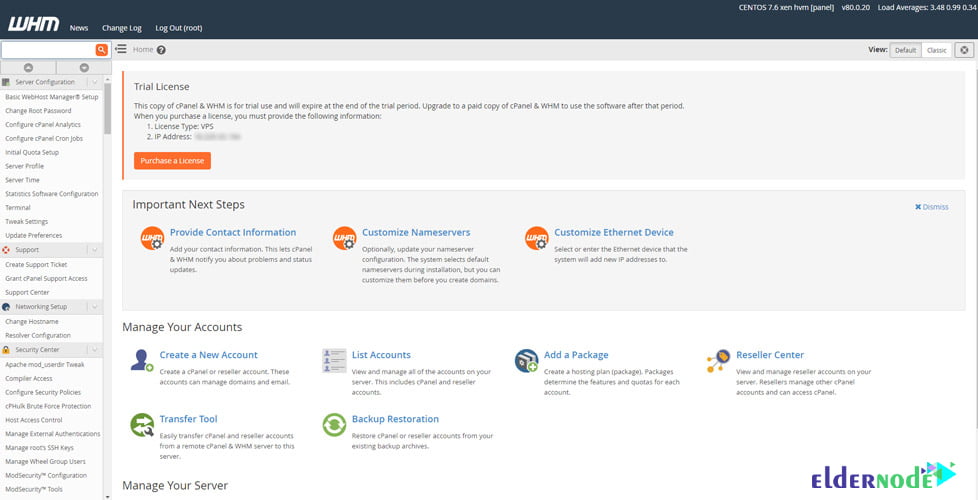
If you have done all the steps according to the instructions in this article, you will be taken to the WHM home page.
Conclusion
At the beginning of this article, we tried to introduce you to AWS. We then discussed WHM in its entirety. In the next step, we explained all the prerequisites for installing WHM and cPanel on AWS. Then we have fully taught you how to Install and Run WHM and cPanel on AWS. You can refer to the CPanel and WHM installation tutorial on Linux and VPS if you wish.


Very good information !
Thank you very much for your good opinion.