Updated: Added Video | Create Video By: Michael Morgan] Tutorial how to Install iis on Windows 2012 vps server with step by step. IIS or Internet Information Services is software that you can use to install and run Windows Server 2012 on your server as a web server. You can view and purchase various packages by visiting the Buy Windows VPS Server page in Eldernode.
In this series of Windows Server 2012 tutorials, we intend to Install iis on Windows 2012 vps server.
Table of Contents
Install iis on Windows 2012 vps server
Looking to take your web hosting capabilities to the next level? If you’re using Windows 2012, installing Internet Information Services (IIS) is a game-changer. With IIS, you can effortlessly host multiple websites while enjoying superior performance and enhanced security. In this step-by-step guide, we’ll walk you through the process of installing IIS on Windows 2012. Whether you’re a beginner or a seasoned professional, we’ve got you covered with clear instructions and helpful screenshots. By the end of this tutorial, you’ll have a fully functional IIS installation up and running, ready to handle all your web hosting needs. So, get ready to unlock the full potential of your Windows 2012 server and provide exceptional web hosting services to your clients. Follow along as we demystify the installation process and empower you to harness the power of IIS for superior web hosting. Let’s dive in and elevate your hosting capabilities today!
System requirements for installing IIS on Windows 2012
- CPU: Minimum 1.4 GHz 64-bit processor
- RAM: Minimum 512 MB
- Disk space requirements: Minimum 32 GB
Preparing your server for IIS installation
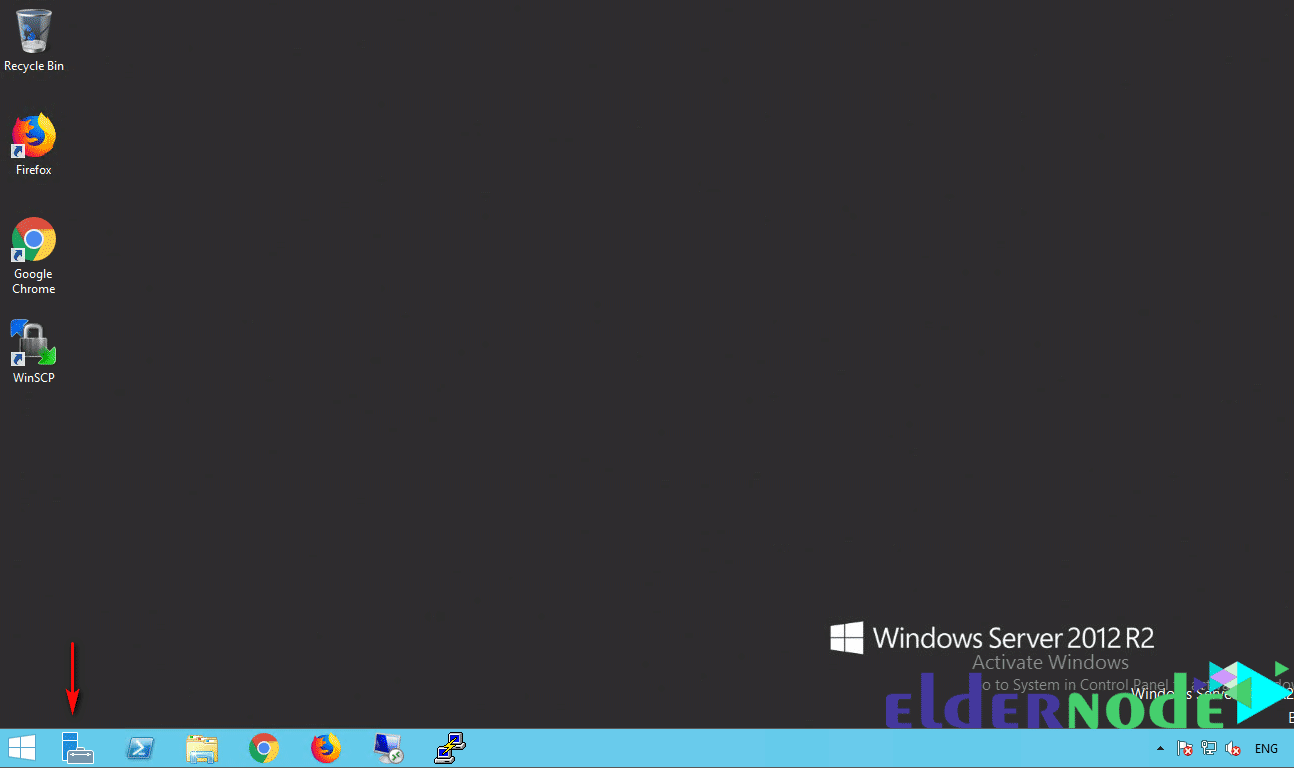
1. Open your Windows VPS Manager first.
Enabling the IIS role on Windows 2012
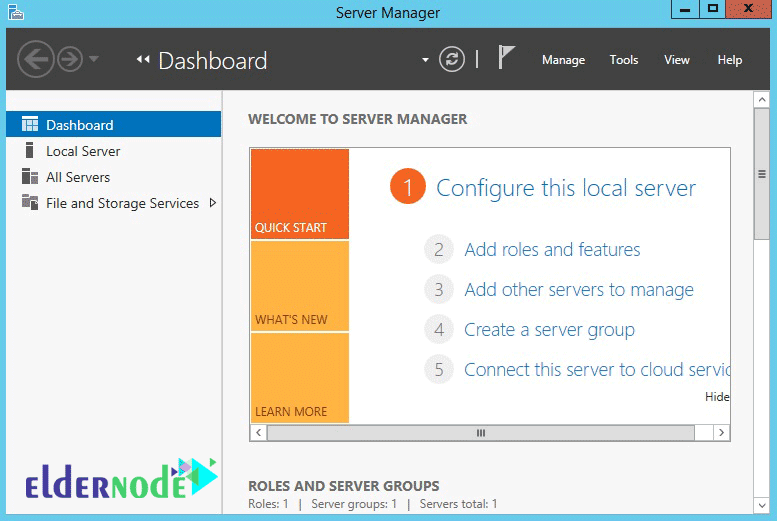
2. After you open the server administration page, click Add Roles and Features.
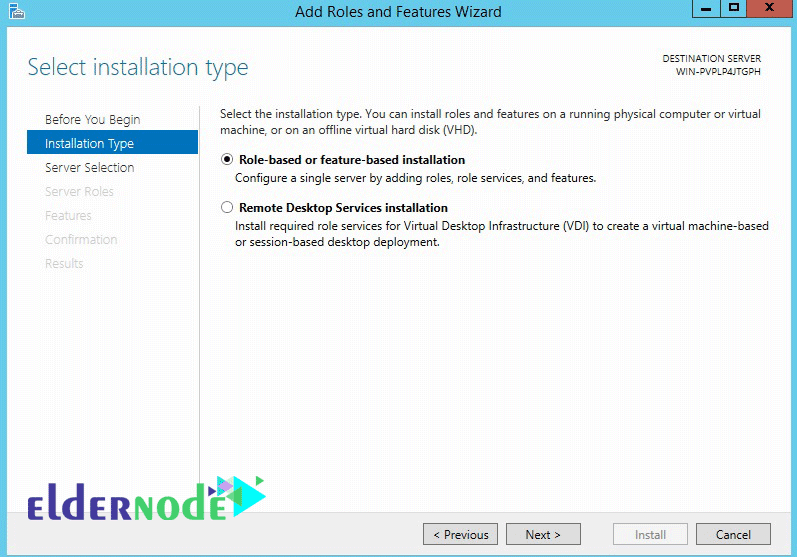
3. In the Installation type section, select Role-based or feature-based installation and click Next.
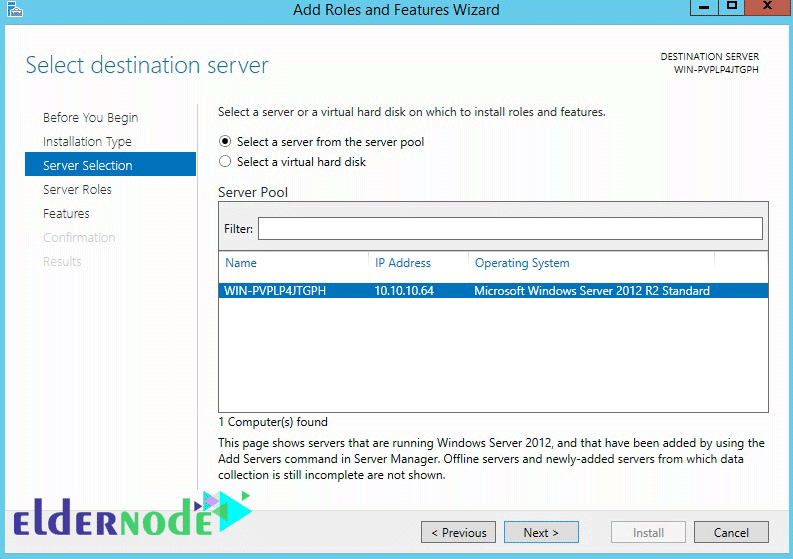
4. Click Next on this page again.
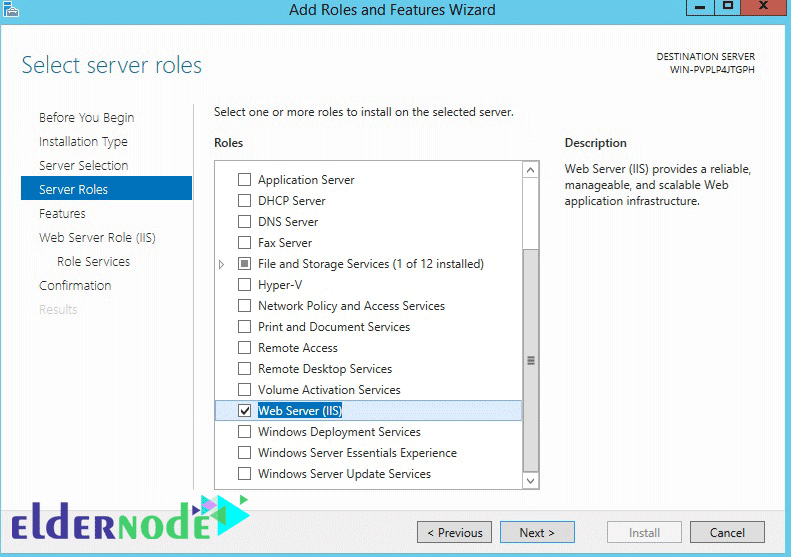
5. In the Server Roles section, select the Web Server roll.
6. Immediately after clicking on the Web Server, the following message will appear; Click on Add Features.

The following message shows the installation of a feature that is a prerequisite for installing IIS.
7. After clicking Add features, the Web Server roll is selected; Click Next.
8. At this point you can select Features if needed and click Next.
You do not need to have a specific Feature installed and selected to install IIS.
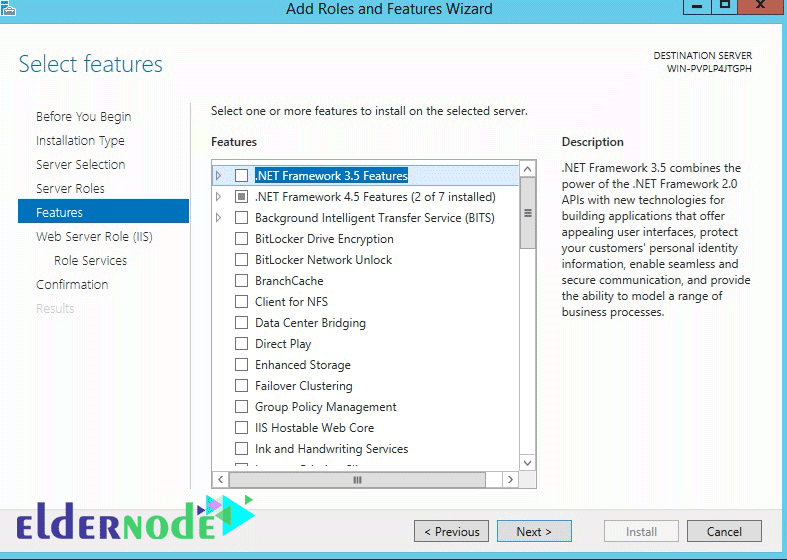
9. On this page you will find a description of the Web Server roll, after reading Next.
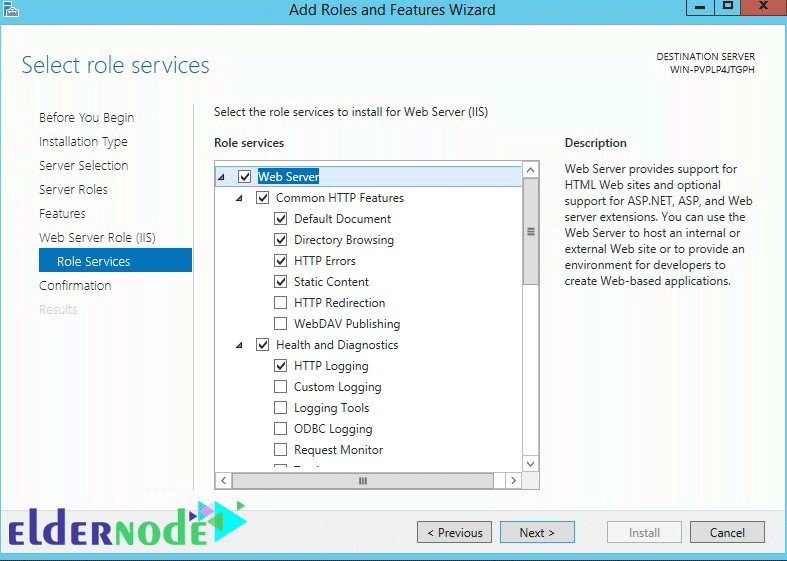
10. On this page you will find IIS-related components and services, if needed, select the options and then click Next.
11. All selected services and components are displayed at this stage. Click OK after installing them.
Keep in mind that there is a text at the top of the page that is shown in red, by checking this option to allow Windows to reboot Windows after installing Web Server if needed.
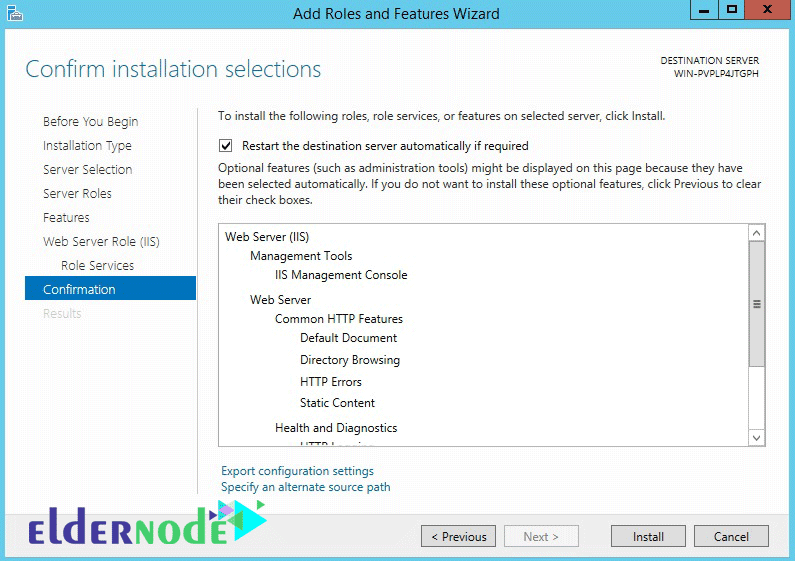
12. After you click Install, wait for the installation to finish.
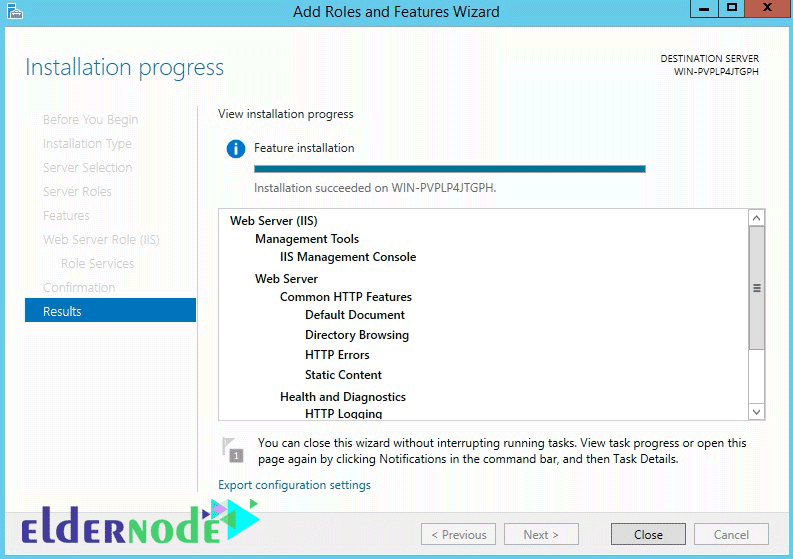
Close the page and pay attention to continuing education to open IIS.
IIS Management Section
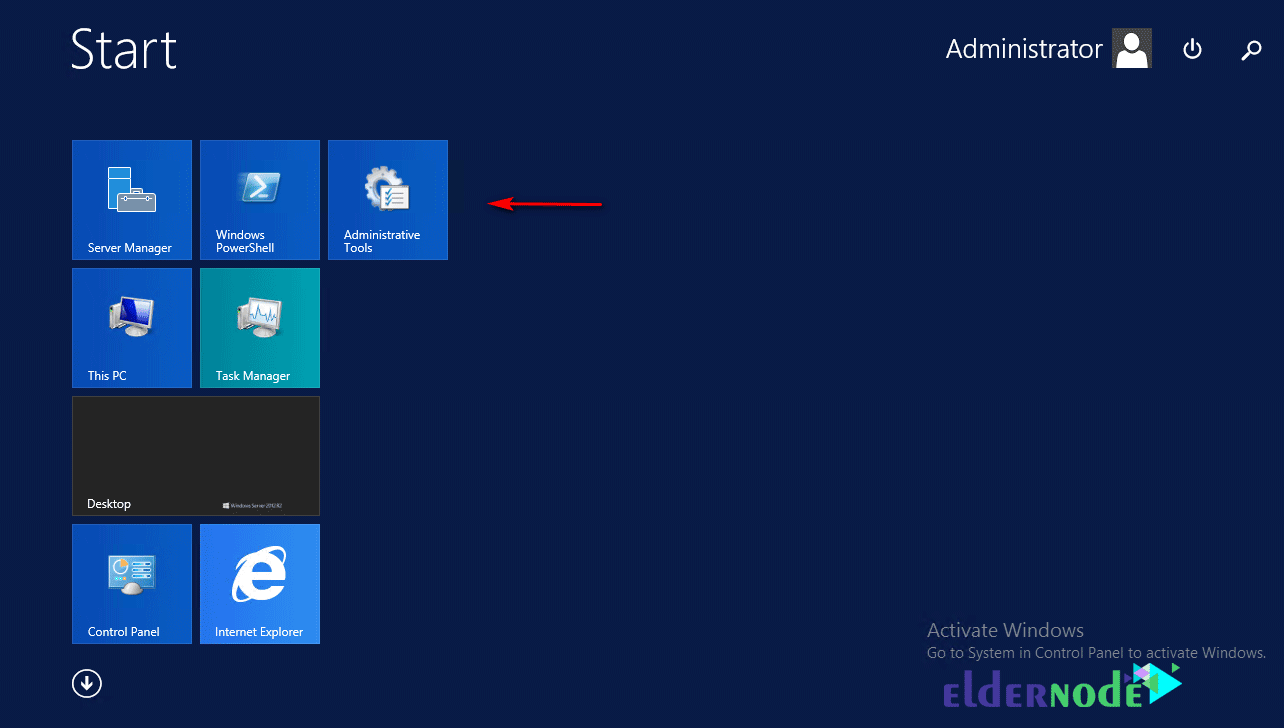
13. To open IIS, open the Administrative Tools menu from the Start menu.
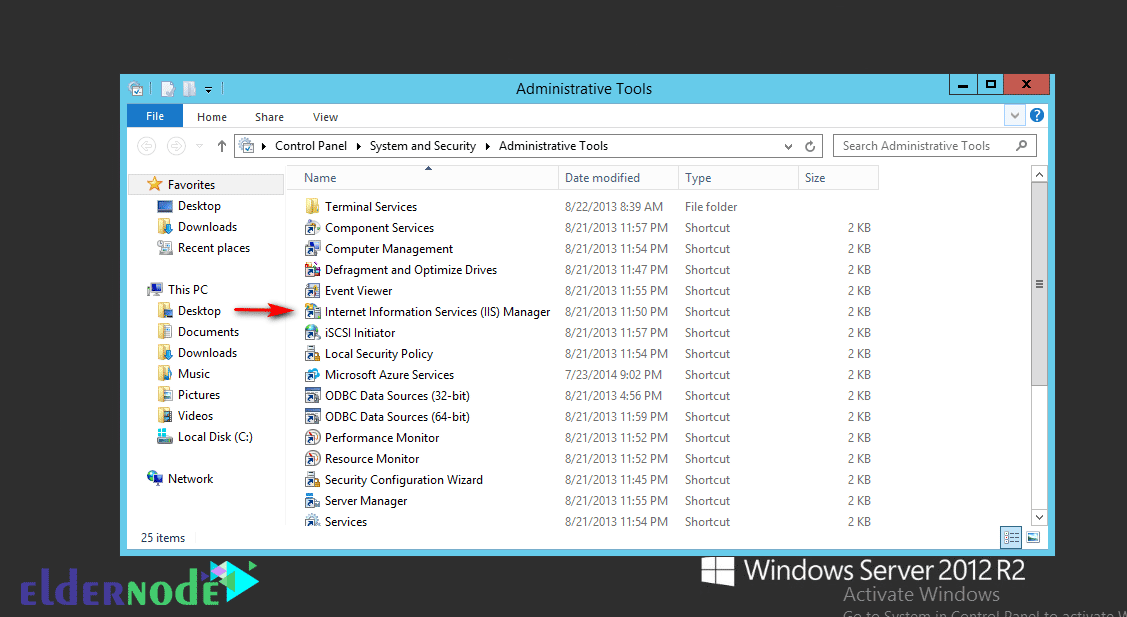
14. On the Administrative tools page, open Internet Information Services (IIS) Manager.
15. IIS installation is complete and you will see a screenshot of the IIS management page below.
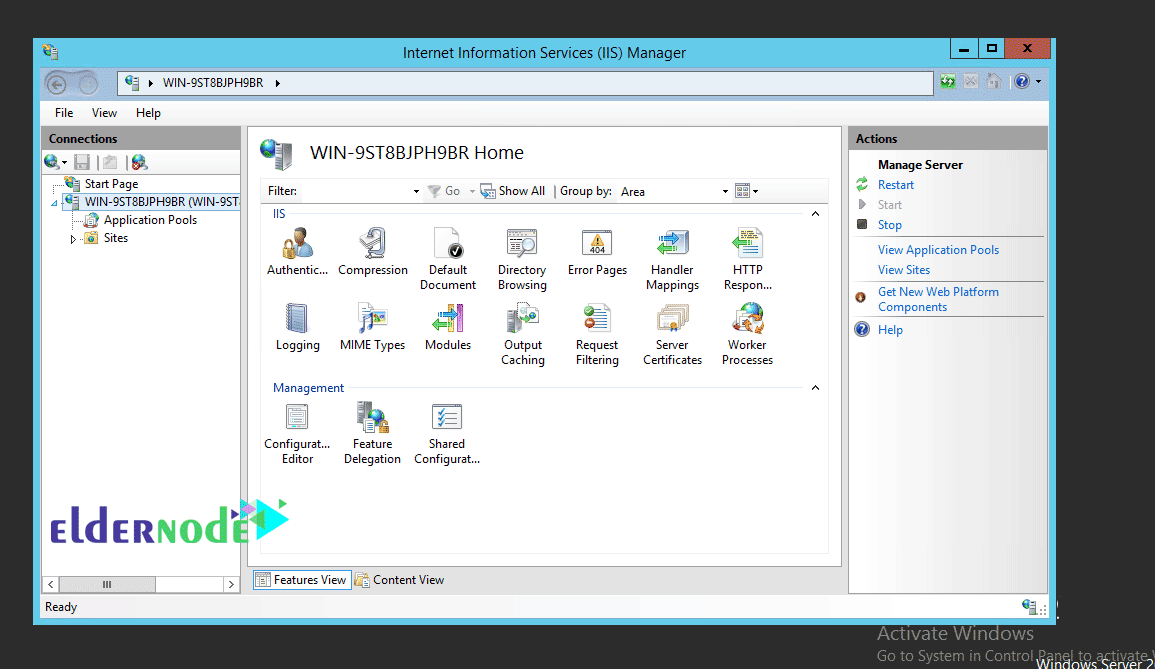
Installation of IIS on Windows Server 2012 finished.
Conclusion
Congratulations, web server superhero! You’ve successfully installed IIS on Windows 2012, giving you the power to conquer the internet. Remember to use your newfound abilities responsibly and safeguard the digital realm from villains. Stay clever, stay heroic, and never stop learning!
