Bacula is an open-source network of support solutions that allows you to create backup files and perform data recovery operations on computer systems. This system is completely flexible and stable. Although it may be a little difficult to configure, it is a good option for setting up support in most situations. The backup system is an important part of most server infrastructures. Because recovering lost data is often a vital part of recovery plans in the event of various disasters. In this article, we want to introduce you to How to Install and Configure Bacula on Windows 10. It should note that you can visit the packages available in Eldernode if you wish to purchase a Windows VPS server.
Table of Contents
Tutorial Install and Configure Bacula on Windows 10
Bacula is a backup software package that includes a set of programs for storing, retrieving, and validating information under a computer network. This software also has the option to backup and save data in encrypted form. Bacula has been developed over many years and has become a complete and easy-to-use backup suite in a variety of environments.
Note: Bacula software supports removable devices such as DVDs and USB drives.
Bacula can consider the most popular open-source software in the field of backup. In the following sections, join us to show you how to install and configure Bacula on Windows 10.
What is Bacula
In short, Bacula is a powerful software for storing, retrieving, and validating information under Windows and Linux computers. It also has the option to backup and store data in encrypted form. A good feature of Bacula is that it is multi-platform. In the next section, we will review Bacula components.
An overview of Bacula components
Although Bacula consists of several software components, it uses a server-client backup method. Here are the most important components of Bacula:
1- Bacula Director (DIR): This is software that controls the backup and recovery operations performed by file and storage daemons.
2- Storage Daemon (SD): It is software that does the work of reading and writing to the storage devices used for backups.
3- Catalog: Are services that store backed-up files in a database. This database is maintained as a SQL database such as MySQL or PostgreSQL.
4- Bacula Console: A command-line interface that allows the backup manager to interact with Bacula and control Bacula Director.
In the next section, we will teach you how to install Bacula on Windows 10. Please join us.
Install Bacula on Windows 10
In this section, we want to teach you how to install Bacula in Windows 10. To do this, just follow the steps below. The first step is to go to the Bacula website and download the Windows version:

Then go to the place where you downloaded Bacula. Right-click on the file and click Run as administrator to begin the installation process:
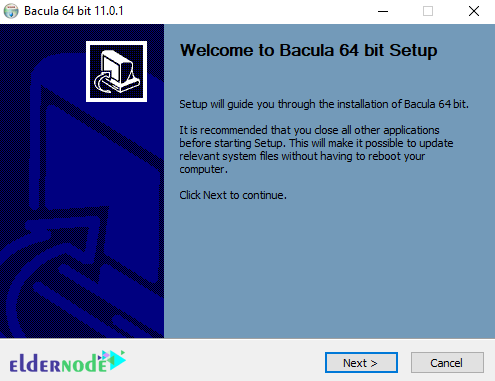
In the window that opens, click Next.
Then, click I agree to accept the license agreement:

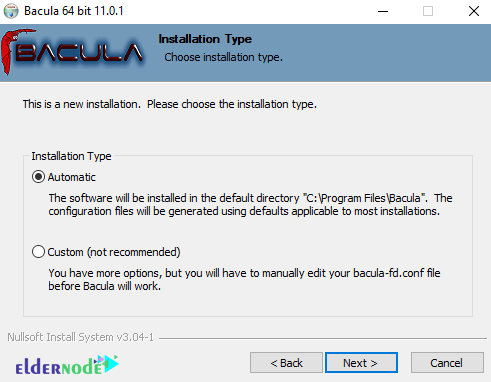
In the next step, you must select the installation type and click on Next:
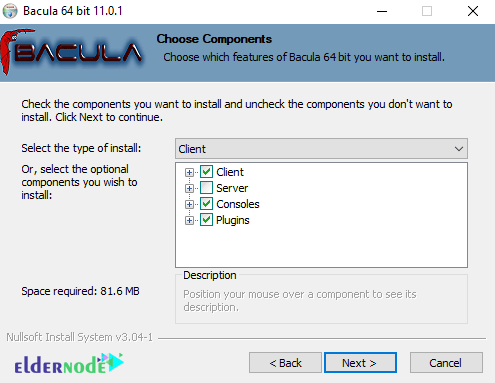
In the next step after the “select the type of installation” section, click on the drop-down menu. Then select the desired option and click on Next to continue.
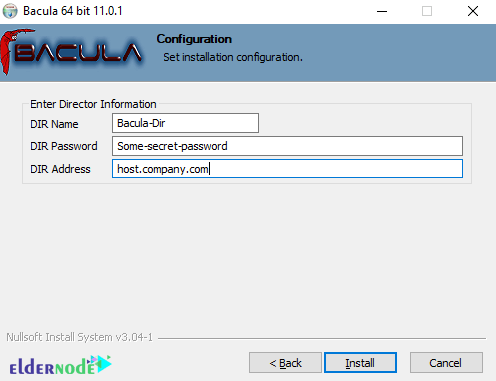
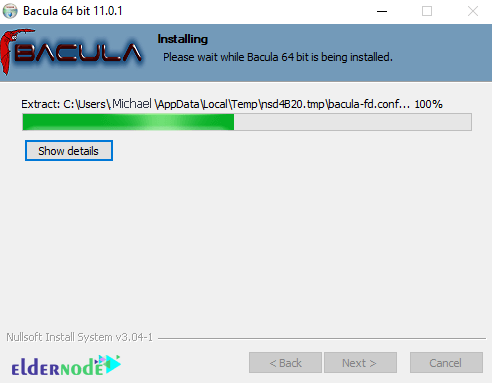
In the next step, you will be asked to enter very basic information about your configuration. After completing the required fields, click on Install.
*
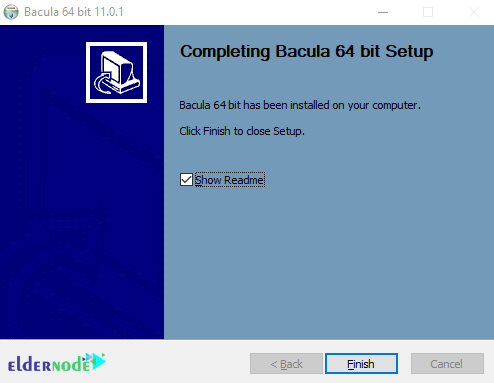
Finally, click on Finish to complete the installation process successfully.
How to Configure Bacula on Windows 10
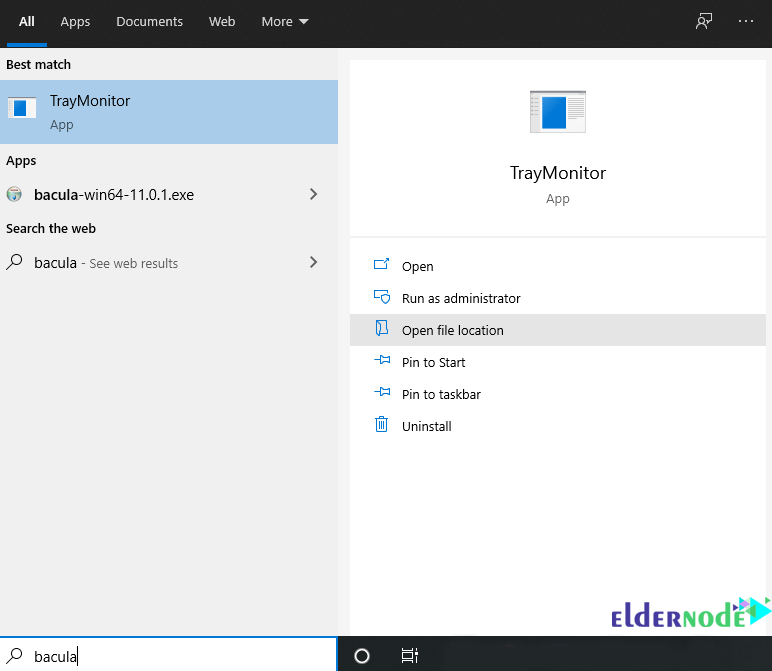
After successfully installing Bacula, in this step, we will get to how to configure its settings. In the first step, type Bacula from the Windows search box. Then from the right column, click Open file location.
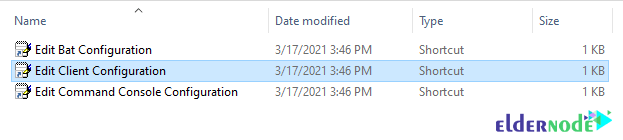
On the page that opens, double-click on Edit Client Configuration as shown below:
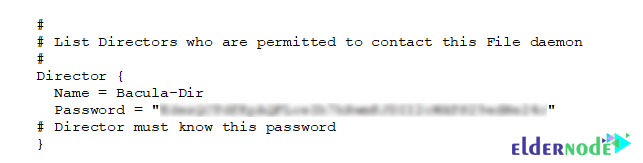
After opening the file, set the password to connect to Director Daemon like follows:
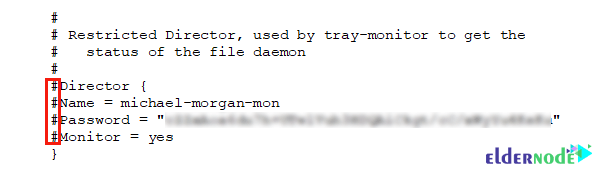
Make the Monitor section comments like the below image. Then, Save the file and close.
To make changes to the system, you must restart it once.
Finally, you need to allow the 9102 and 9103 ports on the Windows firewall.
Conclusion
The Windows version of Bacula is a native Windows port, but there are very few source code changes to the Unix code. It means that the Windows version is for the most part running code that has long proved stable on Unix systems. Bacula when running, is perfectly integrated with Windows and displays its icon in the system icon tray, and provides a system tray menu to obtain additional information on how Bacula is running. In this article, we tried to teach you How to Install and Configure Bacula on Windows 10.