Tutorial how to Connect NinjaRMM Remote Desktop On Windows 10. Remote Desktop or RDP helps users connect to another computer over a network connection with a graphical interface and is developed by Microsoft. Windows 10 is the latest Microsoft Windows Desktop version. You can Buy Windows 10 Remote Desktop via Eldernode 24 hours support and special offers.
Table of Contents
How To Connect NinjaRMM Remote Desktop On Windows 10
In the following of introducing Remote Desktop software, in this tutorial, we are going to review Ninja RMM and its function. When you connect to NinjaRMM Remote Desktop On Windows 10, you see that it allows you to access both Windows and Mac endpoints from a single pane of glass. The good news is that you will not need to learn new tools or remember additional logins to manage all your endpoints. Using this remote control lets you take control of attended or unattended endpoints with a single click and is available out of the box with virtually no setup. Feel free to use Splashtop, TeamViewer, or RDP, because Ninja RMM guarantees a fast, secure, and stable connection to help you complete your tasks faster.
What Is The RMM Software?
Remote Monitoring and Management is used for gathering information from remote endpoints and networks to assess their health and to perform various remote IT management tasks on them without disruption. As a managed service provider, you can use this software as a good solution. No more important where is your location, these professionals provide IT support you. They need a fast, reliable way of doing that without having to be physically present in client offices providing on-site support.
Ninja RMM Features And Benefits
It providers use RMM software as a fast and Secure Remote Desktop Software to transform their operations, making them more efficient, more effective, and in the case of MSPs more profitable. Let’s see what are these benefits totally.
1- Complete visibility and control from a central location
2- Comprehensive IT management via a single pane of glass
3- Automation makes support scalable
4- Proactive rather than reactive support
Recommended Article: How to Install IIS on Windows 2012 for Superior Web Hosting
How To Keep Your Endpoints Safe
Keep your endpoints safe with secure remote access. Since all of the remote session is protected by TLS and 256-bit encryption, you can make sure of the security of your endpoints.
How To Add An Application Within NinjaRMM
To add a new application, you should go through setting a condition within the policy settings. Let’s see how to get setup.
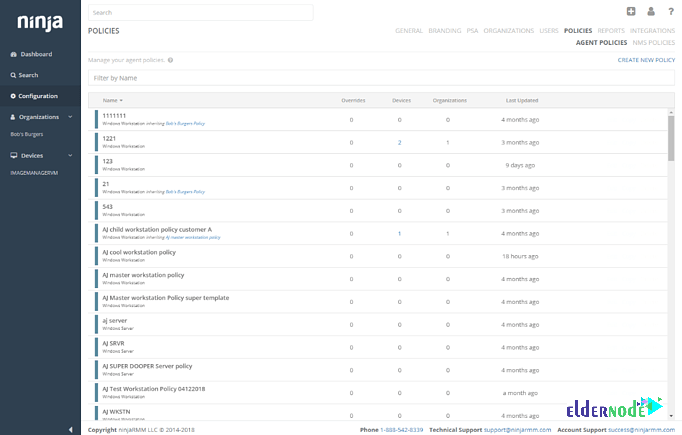
First, go to NinjaRMM policies to choose the relevant policy for the devices you want to ensure have a specific piece of software installed.
Then, you should click on ‘add a condition‘, to let it bring up a pop-up box with options.
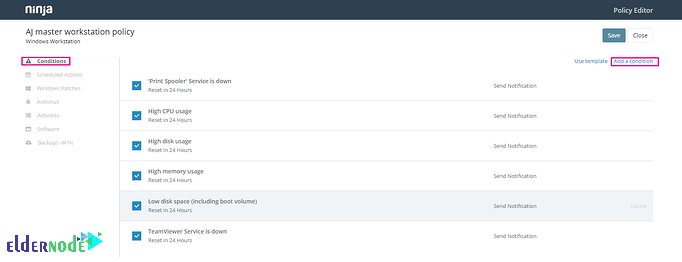
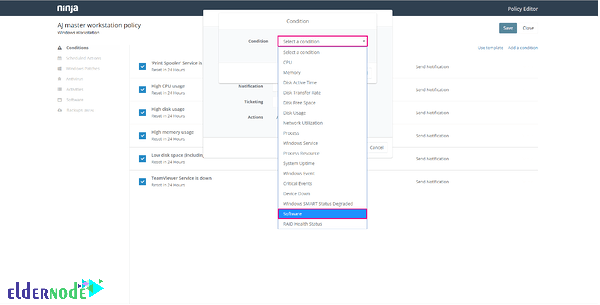
In this step, try to click on select a condition.

As you see in the image below, a drop-down menu will appear
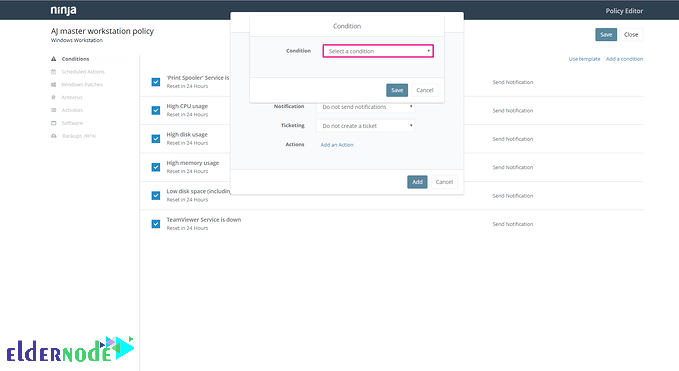
And, it is time to select software
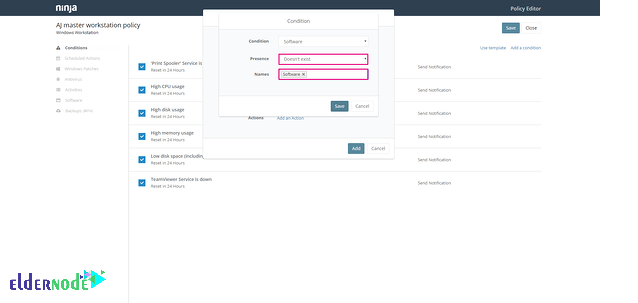
You can select the condition that will check if a software doesn’t exist or already exists on a device when you see the drop-down menu is showing the presence box. After that, you need to add in a name tag for the action; click save.
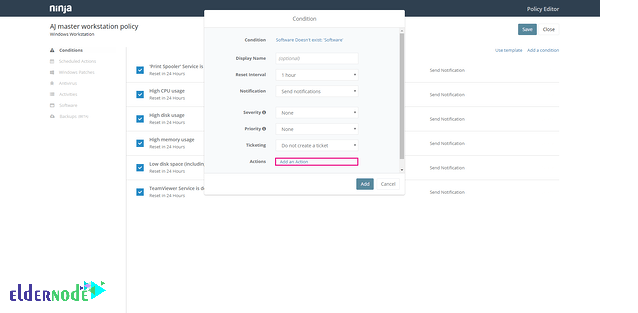
In the next drop-down menu, you can add in a display name and the reset internet for the condition. In case you are eager to send notifications, you can choose it with a severity and priority level and if you want to add a ticket using your PSA integration.
Next, you just need to click add an action.
Recommended Article: Tutorial Connect NinjaRMM Remote Desktop On Windows 10
With the next drop-down menu, you will see all actions you can choose from.
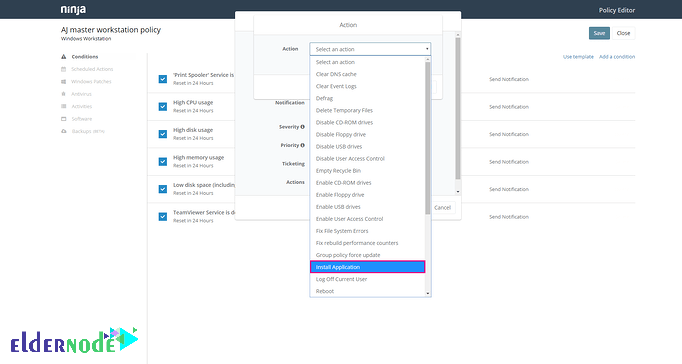
If you look at the image below, you can see that you are able to select the Architecture, add in the Upload File, a Name, the MSI or EXE URL for the download, you can also add in Parameters for command-line functions and you can also choose whether you want to run as System or as the Current User.
Conclusion
In this article, you learned How To Connect NinjaRMM Remote Desktop. Ninja is easier and integrated better with the tools you want. From now on, you can use this software on its website as a cloud base and install the agent on your Windows to send your data to the web base. In case you are interested in reading more, find our article on How to Connect Teamviewer Remote Desktop On Windows 10.

I need to use system ticket in Ninja.
This software has not yet made some their own basic ticketing system. Would like Ninja to bring that in house
I am an engineer and I need to oversees the desks and manage engineer. Will it be useful?
Since Ninja would give you the tools and enables to do your job so much quicker and easy with a clear and informative dashboard, it seems that you would feel free and satisfying using this software with simple.
Thank you, I see users are satisfied with Ninja integration, but I have this issue for TeamViewr on Mac.
You are right! Ninja has missed TeamViewer automatic integration and the users hope to see it is being fixed.
will we lose the features after upgrading?
No, one of the best points of Ninja is that Updates are released without breaking features
Is it match with MSP? We need a supportive team after buying this.
Yes, Ninja integrations with your MSP software is possible. And being customer care is what users have a report