Cockpit is a management tool that makes managing Linux servers much easier. It provides users with a graphical interface so that they can more easily perform almost all the tasks that an admin encounters during the day through the browser. This software is supporting by the major developers of Redhat Linux distribution. It can be easily installed on a Linux server. In this article, we are going to learn you how to install Cockpit Service On Linux Server. You can visit the packages available in Eldernode to purchase a Linux VPS server.
Table of Contents
Tutorial Install Cockpit Service On Linux Server
Introducing Cockpit System for Linux Server
Cockpit is software for working with a Linux server, without the need to work with the command line. This software is provided for free and open source. After installing and activating on the server, which may also be present on some Linux distributions by default, all you have to do is open the IP server with the 9090 port in the browser and log in with the root username and password.
Cockpit is still under development. This means that it may seem like another page needs to be added to the page set so that there is no need to refer to the command line. For example, if you use your server as a web server to host your personal sites, you need to install and configure a web server software such as Apache or Nginx on your server. However, there is currently no plugin for managing and configuring a web server for Cockpit, and you still need to use the command line to do so.
Summary of Cockpit System
The cockpit allows the system administrator to browse through different parts of the server. With the help of this tool, you can easily perform tasks such as container startup, storage resource management, network configuration, logging and calling logs, etc.
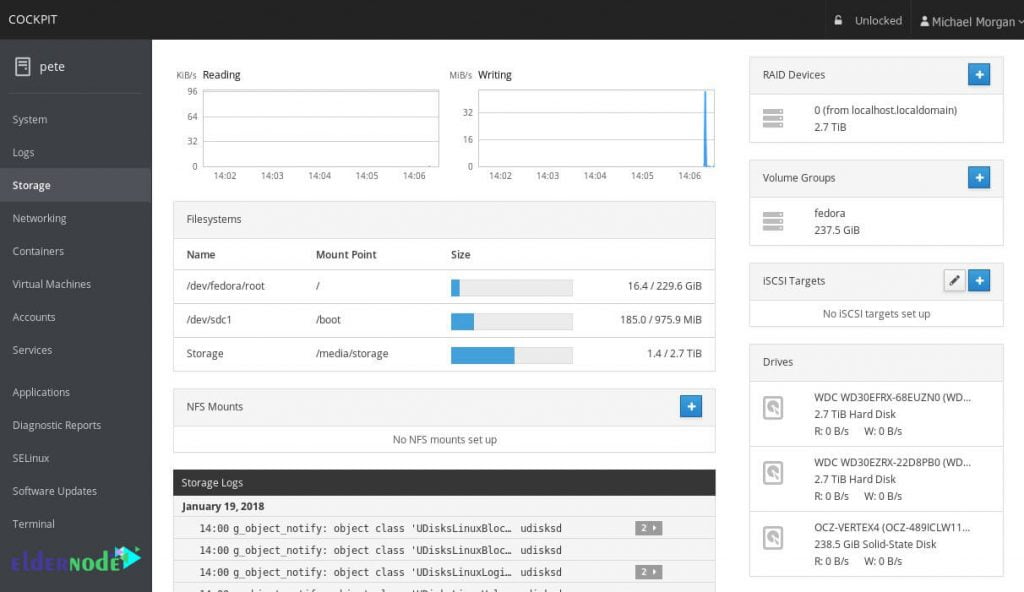
On the other hand, you can use the terminal and cockpit together at the same time. Switching between the terminal and the cockpit will not be a problem and the cockpit will continue to operate without interference. For example, a service or process that started with a cockpit can be stopped through the terminal. Also, if an error occurs in the terminal, you can see it in the cockpit logs section through the browser. The image below shows the storage settings in the cockpit environment.
It should be noted that you can monitor and manage multiple servers simultaneously. All you have to do is add the server to the cockpit. In this way, the server will be managed alongside other servers. In the following sections of this article, we will explain how to install the cockpit on various Linux distributions, including Fedora, Red Hat Enterprise Linux, Fedora CoreOS, CentOS, Debian and Ubuntu. Stay with us.
Advantages
The most important advantages of the cockpit, which is a powerful tool for monitoring and managing multiple Linux servers, are the following:
– Activate the management of multiple Linux servers in one session
– Provide a web layout in a terminal window
– Manage containers through Docker
– Ability to support system account management
– Display system performance information using Performance Co-Pilot
– Support for collecting system configuration and diagnostic information
– Support for Kubernetes clusters
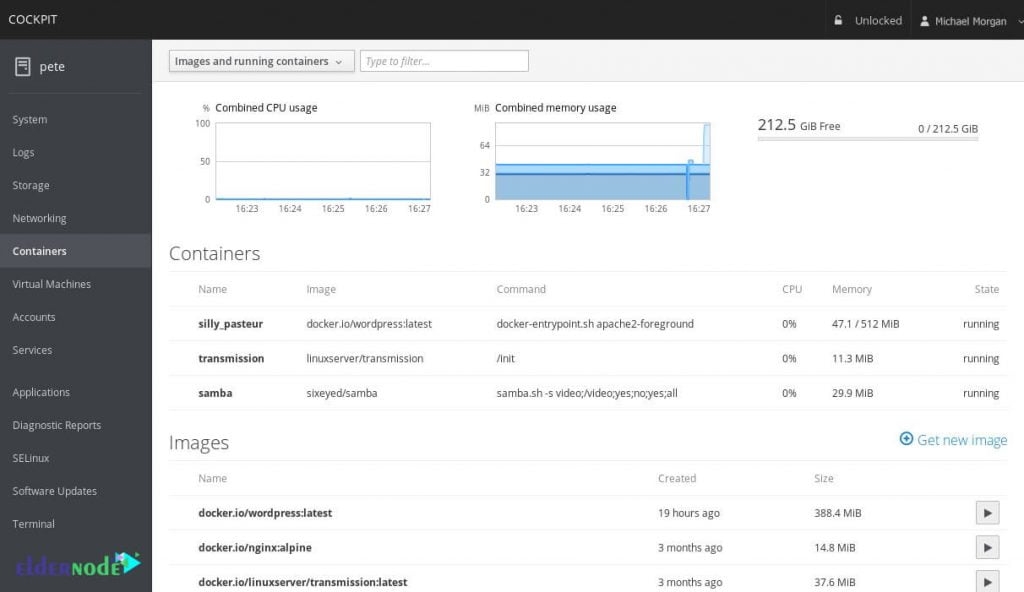
The image below shows the container settings in the cockpit environment.
Disadvantages
The cockpit of an API-based content management system does not have the ability to manage content on the front side. This means that it can not be used as a site builder service. But it is an open source service and can be used with SQLite or MongoDB to manage large databases.
10 features of the cockpit system
Cockpit covers many aspects of server management. The most important of these are:
1- Check server reports
2- Manage storage space and Hard and partitions
3- Network and firewall settings and monitor them
4- Construction and management of virtual machines as well as containers
5- Creating and managing user accounts
6- Manage and check the status of services or software packages on the server
7- Selinux settings
8- Update the server and its software
9- Has a terminal environment
10- Security level management and firewall
As you can see from the list above, Cockpit covers almost all management departments. This tool can be an interesting solution for managing and even configuring a Linux server. Of course, a server that does not need control panels to transfer hosting space or resources to the end user. Because if your server is a hosting server that offers commercial hosting, Cockpit will definitely not work for you!
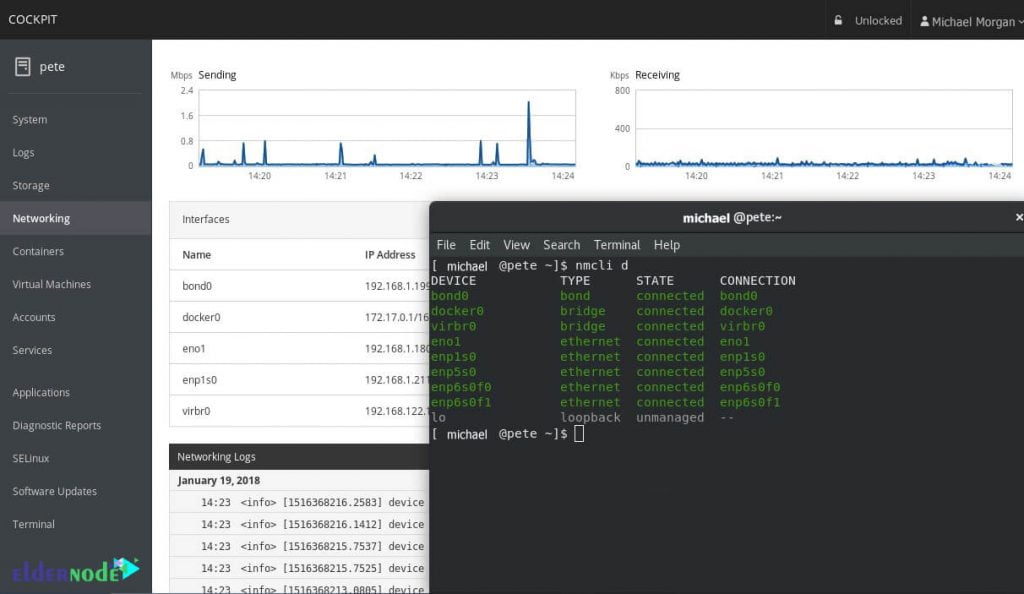
On the other hand, if you want to learn how to manage and configure a Linux server, it is best to work with Cockpit first. Working with this lightweight software introduces you to many of the concepts and principles of networking and Linux server management. In the continuation of this article, we will teach you how to install Cockpit Service on different Linux distributions. The image below shows the network settings in the cockpit environment.
Install Cockpit Service On Linux Server Distribution
How to install Cockpit Service on Fedora
Before you start installing Cockpit on Fedora, you need to know that Cockpit is available on Fedora Server by default. But to install this tool in other Fedora options, you can use the following commands. The first step is to run the following command to install the cockpit:
sudo dnf install cockpitThen in the next step, you must enable the cockpit with the help of the following command:
sudo systemctl enable --now cockpit.socketCockpit installed on Fedora successfully. If necessary, you can open the firewall using the following commands:
sudo firewall-cmd --add-service=cockpitsudo firewall-cmd --add-service=cockpit --permanentHow to install Cockpit Service on Red Hat Enterprise Linux
Now it’s time to install Cockpit on Red Hat Enterprise Linux. Note that this tool is available on Red Hat Enterprise Linux 7 and higher. To install Cockpit, you must follow the steps below. First open RHEL 7 and enable Extras repository using the following command:
sudo subscription-manager repos --enable rhel-7-server-extras-rpmsNow install the cockpit by executing the following command:
sudo yum install cockpitThen you need to enable the cockpit:
sudo systemctl enable --now cockpit.socketYou can open the firewall in RHEL 7 and 8 if needed:
sudo firewall-cmd --add-service=cockpitsudo firewall-cmd --add-service=cockpit --permanentHow to install Cockpit Service on Fedora CoreOS
Now it’s time to install Cockpit Service on Fedora CoreOS. It is interesting to know that Cockpit packages do not exist in the standard Fedora CoreOS image. Therefore, you need to use the following command and install these packages:
rpm-ostree install cockpit-system cockpit-ostree cockpit-podmanReboot the system once now. Then you need to run the Cockpit web service as root using the following commands:
podman pull cockpit/ws podman container runlabel --name cockpit-ws RUN cockpit/wsFinally you need to run Cockpit by entering the following commands:
podman container runlabel INSTALL cockpit/ws systemctl enable cockpit.serviceHow to install Cockpit Service on CentOS
To install the cockpit on a CentOS 7 or higher Linux distribution, you can use the following command:
sudo yum install cockpitThen you need to enable the cockpit by executing the following command:
sudo systemctl enable --now cockpit.socketFinally, you can open the firewall if needed using the following commands:
sudo firewall-cmd --permanent --zone=public --add-service=cockpit sudo firewall-cmd --reloadHow to install Cockpit Service on Debian
Among the various Linux distributions, it is time to install the cockpit on Debian. The first step is to activate the backports repository using the following commands:
echo 'deb http://deb.debian.org/debian buster-backports main' > \ /etc/apt/sources.list.d/backports.list apt updateThen, by executing the following command, you can easily install the cockpit package in Debian:
sudo apt install -t buster-backports cockpitHow to install Cockpit Service on Ubuntu
Installing a cockpit in an Ubuntu distribution is much easier than in other distributions. You should know that this tool is supporting on Ubuntu from version 17.04 onwards and can be install. Backports is also enabled by default on these versions. If you want to customize apt resources, you must enable them manually.
Install the cockpit on the Ubuntu by executing the following command:
sudo apt-get install cockpitConclusion
Cockpit is a free web-based server management software. A beautiful web console that allows system administrators to easily perform tasks such as storage management, network configuration, checking the performance of a VPS server or dedicated server, starting and stopping many services. In this article, we tried to have a complete introduction of the benefits and features of this tool and then explain how to install the cockpit on a Linux server in different distributions.