Every website needs to interact with a data management system or the data itself, so it needs to use a database. PHPMyAdmin has become one of the most popular software platforms for managing classified data with MySQL and MariaDB databases around the web. This article will teach you 5 Ways To Install PHPMyAdmin On Windows 10. You can check out the packages offered on the Eldernode website if you intend to buy a Windows VPS server.
Table of Contents
How to Install PHPMyAdmin On Windows 10
What is PHPMyAdmin?
PHPMyAdmin is an open-source, free, and third-party software tool written in PHP that manages the MySQL database on the web. It allows you to manage databases, tables, columns, relationships, lists, users, permissions and etc through the user interface. This software is database control software and supports a wide range of operations in MySQL and MariaDB.
Requirements to Install PHPMyAdmin On Windows 10
1- Install Apache web server on Windows
2- Install MySQL database manager on Windows
Downloading PHPMyAdmin on Windows 10
In this section, you will learn how to download PHPMyAdmin on Windows 10. To do this, follow the steps below.
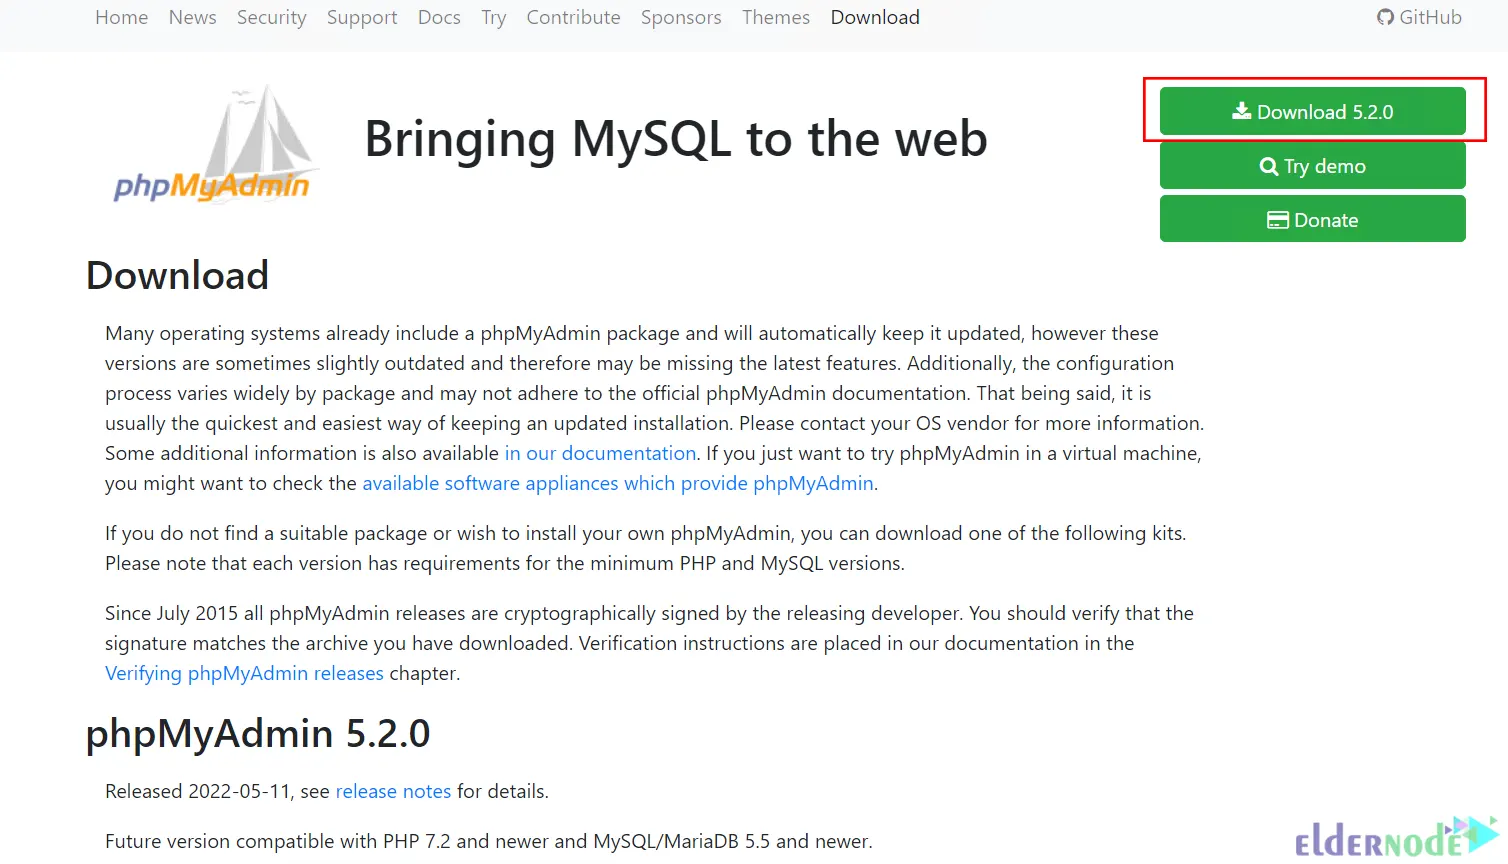
Navigate to the official PHPMyAdmin website to download the desired version of PHPMyAdmin on your Windows 10 system. Click on Download 5.2.0:
Once the download is completed, go to the downloaded folder and unzip the downloaded file. Then move it to the C:\Apache24\htdocs path.
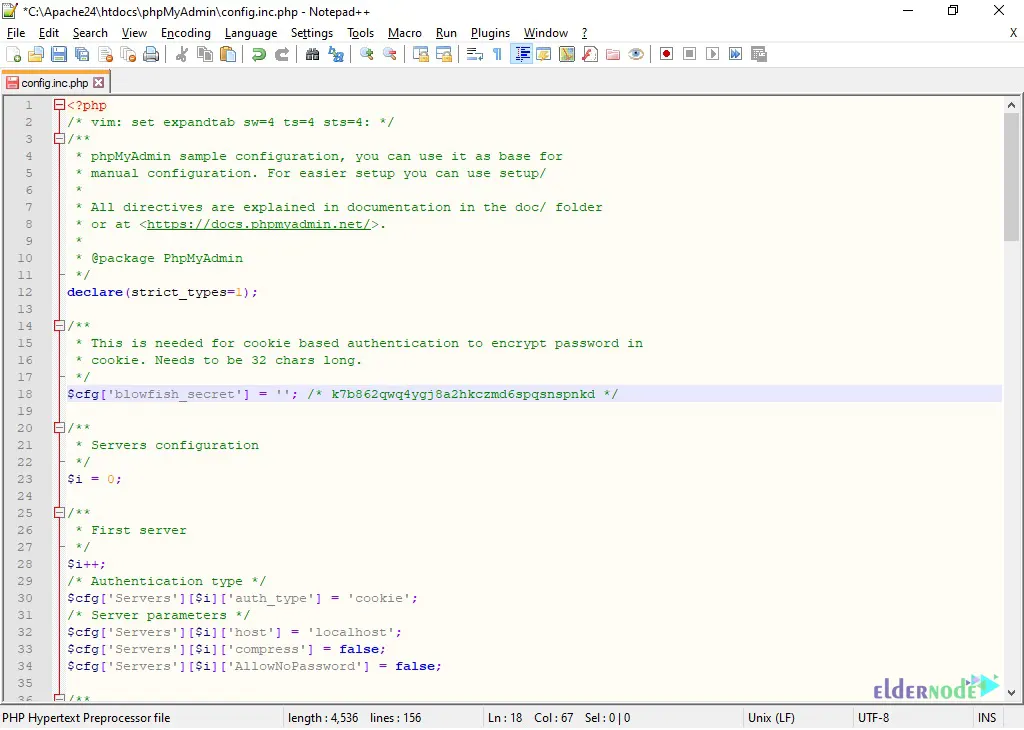
In order for the tool to work correctly, you need to set up a few PHPMyAdmin files. Find the config.sample.inc.php file inside the folder of the program and rename it to config.inc.php.
Now edit the file using your desired text editor. To do this choose the following line:
cfg['blowfish_secret'] = ''; /* YOU MUST FILL IN THIS FOR COOKIE AUTH! */Then you should enter your desired value. Note that the value must be at least 32 characters long:
cfg['blowfish_secret'] = ''; /* k7b862qwq4ygj8a2hkczmd6spqsnspnkd */
Remember to save the configuration file.
Remove the ; beginning of the extension and open the php.ini file which is located in the PHP folder. You should enable the following extensions that are required for the tool’s operation:
extension=php_mbstring.dll extension=mysqliRemember to save the configuration.
Lastly, restart the Apache server by pressing Win+R and running the command below:
services.mscHow to Log in to PHPMyAdmin on Windows 10
First, open the following URL in your web browser and enter your MySQL username and password:
http://localhost/phpmyadmin/
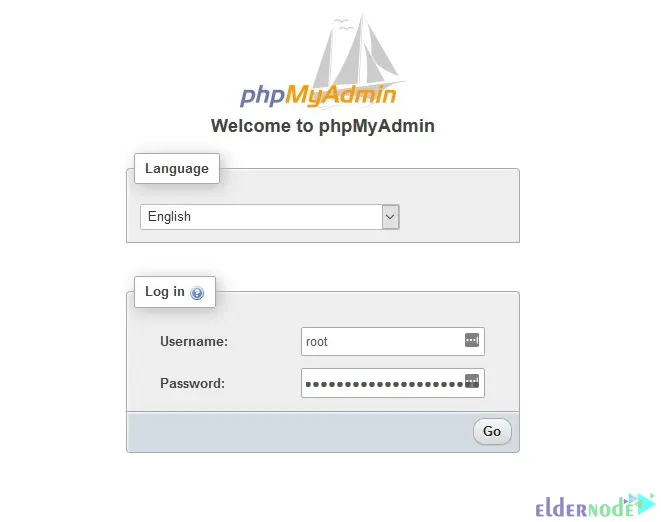
Now you should see the dashboard. If you scroll down the page, the warning sign will appear:

The reason for the warning is that the tool needs a database to work. You can import it from the same installation folder. So click on the Import menu, go to the C:\Apache24\htdocs\phpMyAdmin\sql path and choose create_tables.sql:
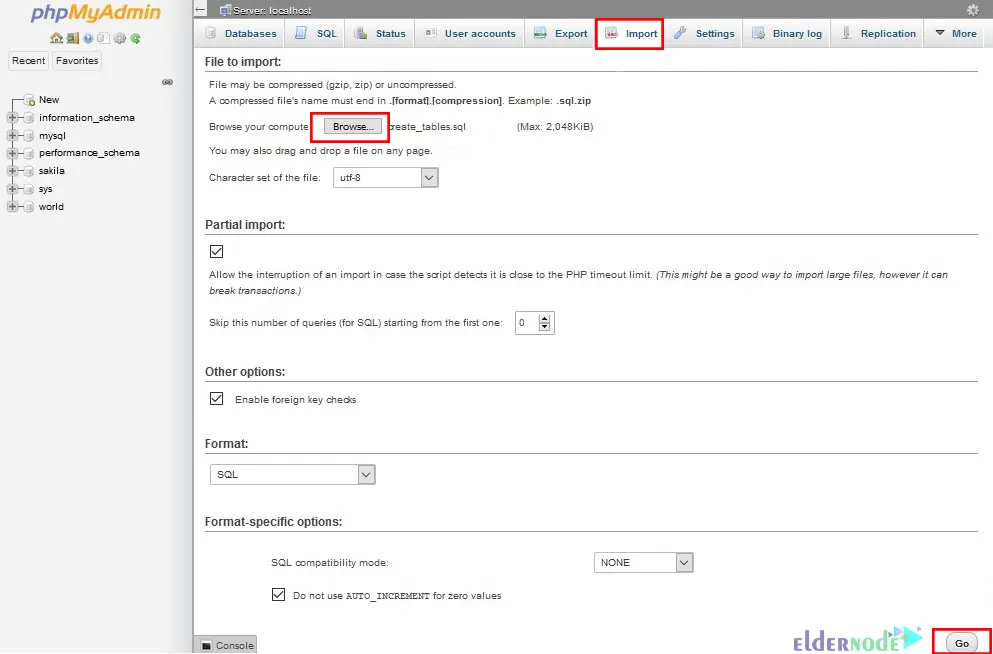
You should see a database named PHPMyAdmin.
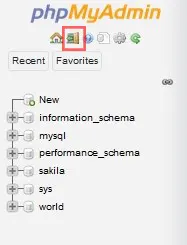
After the database is created, click on the shown icon to exit the tool:
In this step, modify the values referred to the user that manipulates the database. It will enable the database and table storage parameters and eliminate the double slashes in front of them. Also, it adds localhost in the line corresponding to the user control and modifies the value controluser and controlpass with the user and the password of MySQL.
Finally, save the configuration and come back to the PHPMyAdmin.
Conclusion
PHPMyAdmin facilitates the management and administration of MySQL. In this article, we taught you 5 ways to install PHPMyAdmin on Windows 10. I hope this tutorial was useful for you and helps you to install PHPMyAdmin on Windows 10. If you have any questions or suggestions, you can contact us in the Comments section.
