Using a proxy helps you to dig into a website and look for vulnerabilities. FoxyProxy is a Firefox extension that is using to switch an internet connection across one or more proxy servers based on URL patterns automatically. It also simplifies configuring browsers to access proxy-servers, offering more features than other proxy-plugins. Burp Suite is a popular penetration testing and vulnerability finder tool that is using to check web application security. To discover hidden flaws, you can route traffic through a proxy like Burp Suite. Then, FoxyProxy helps you to turn it on and off manually. So, you can use a browser add-on called FoxyProxy to automate this process with a single click of a button. In this article, you will learn How To Use FoxyProxy And Burp Suite For Change Proxy. If you are preparing to purchase a fully managed VPS Server, you can count on our technical team and order your considered package in Eldernode.
Table of Contents
Tutorial Use FoxyProxy And Burp Suite For Change Proxy
You can change the settings of a proxy network on the desktop version of most browsers. You can do this on Chrome, Firefox, Edge, Internet Explorer, and Safari. Also, the settings of iPhone or Android are possible to be changed. The information you need to connect to your selected proxy is available on the page of proxy information. Previously, you have learned How to setup proxy on Burp Suite. In the following, you will learn How to install Burp Suite and FoxyProxy.
How to Install Burp Suite
Join us with the first required section of this tutorial. Let’s go through the steps below and install Burp suite and FoxyProxy.
Step 1:
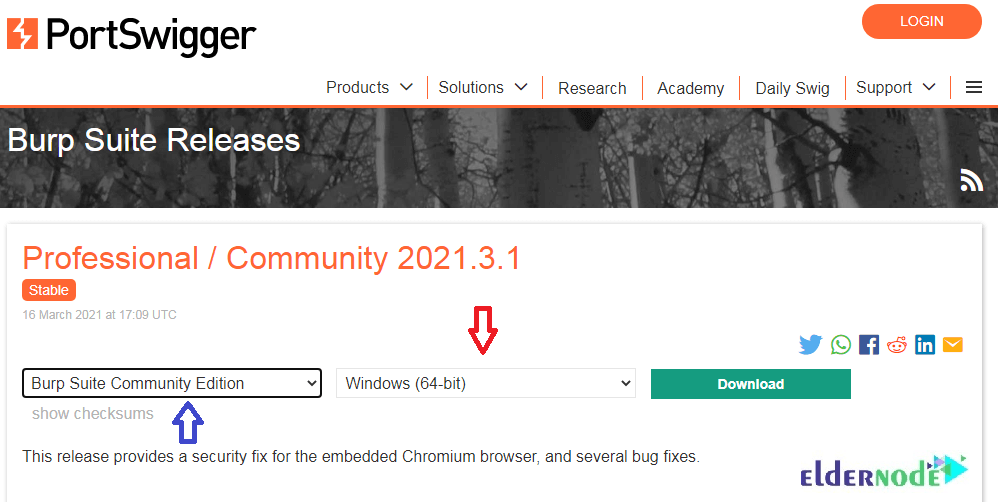
Go to the official website of Burp Suite and download the latest version.

Note to select Burp Suite Community Edition, Windows 64-bit, and press the download button.
Step 2:
Once Burp Suite is downloaded, run it and proceed with the installation path.
You do not have to work hard to install the Burp suite. Just click on Next.
Then click I accept to confirm the license agreement.
After then, click Next again and finally click Start Burp.
If you do all the steps correctly, the Burp suite will be successfully installed on your system.
Note: If you are interested in learning about Burp Suite, you can refer to Introduction and check Burp suite capabilities.
Install and use FoxyProxy and Burp Suite for change Proxy
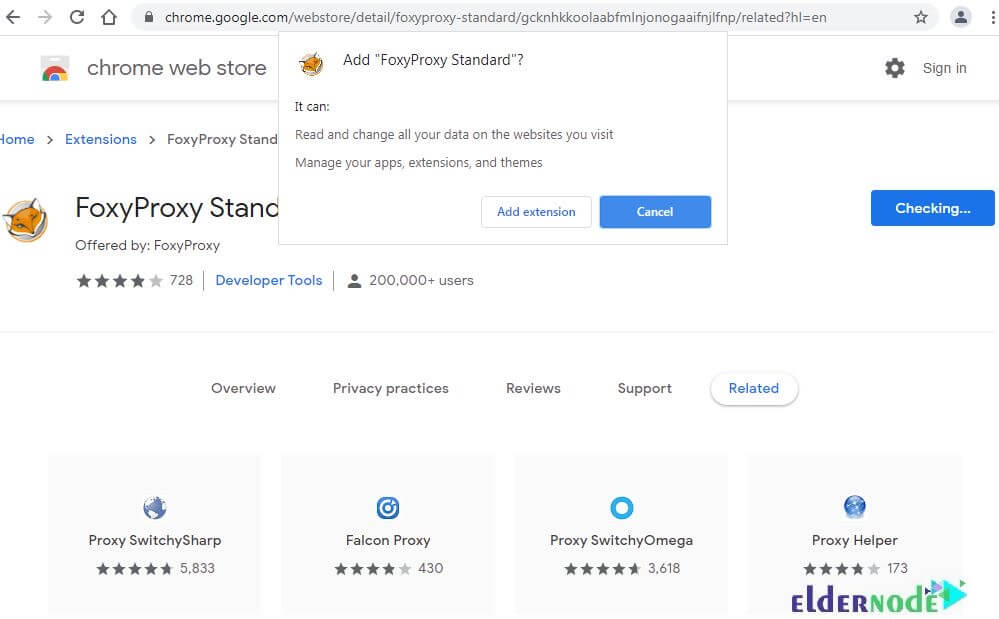
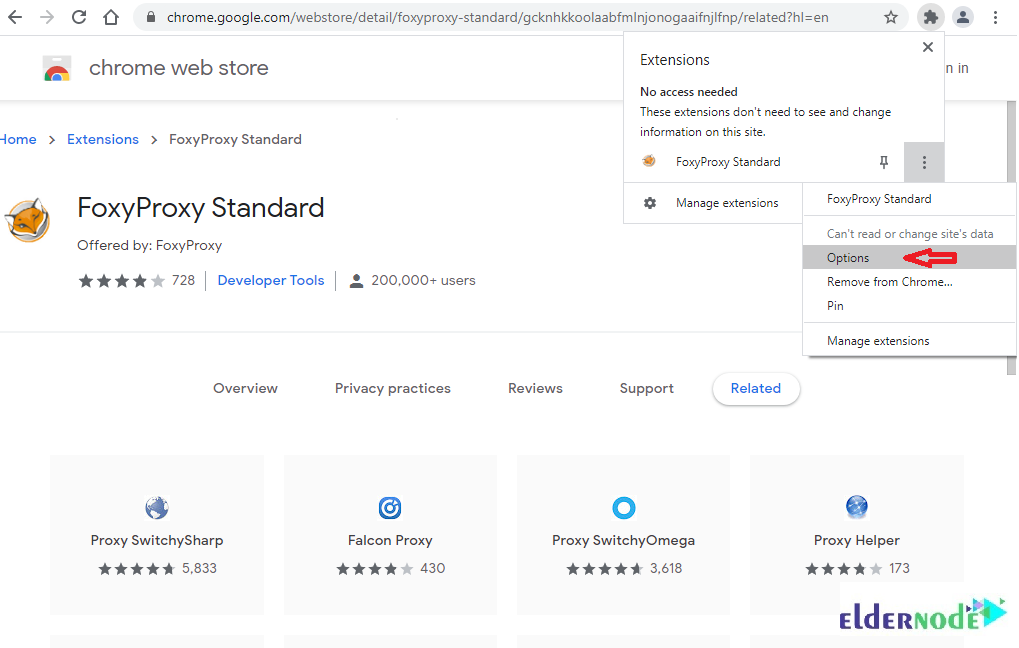
When the Burp suite is completely installed, you need to install FoxyProxy. Open your browser again search for FoxyProxy Standard, press Add to chrome and then Add extension.
On the right top of the page, click on the Fox icon and click on options.
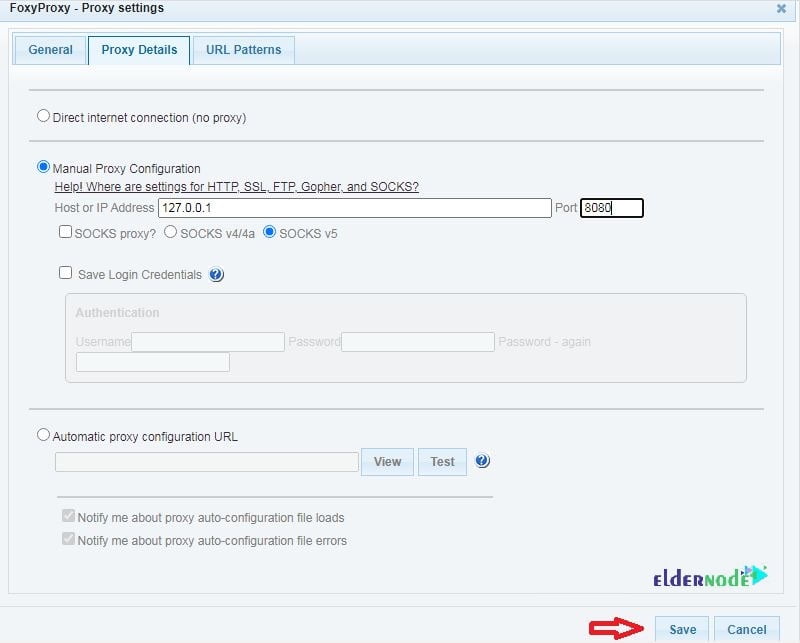
Now, click on ”Add New Proxy”.

In the field of ”Host or IP Address” enter ”127.0.0.1” and ”8080” 0n port. Click on Save button and continue.
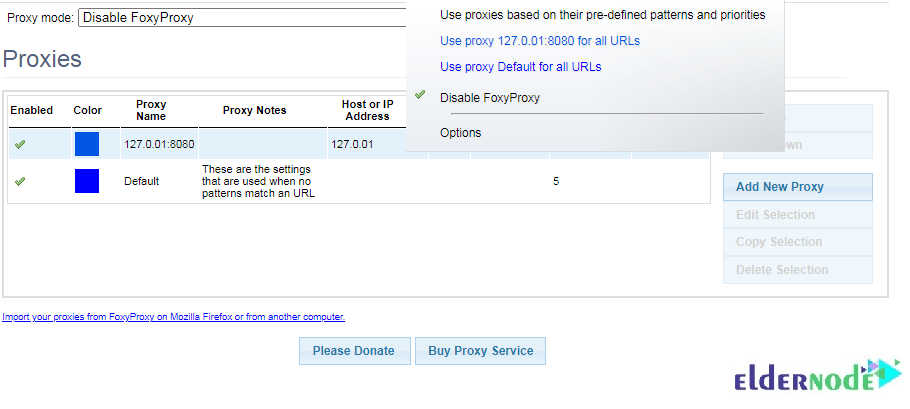
Now, you are redirected to the Proxies page and you can see the added Proxy. Also, you can see the added proxies and select from FoxyProxy.
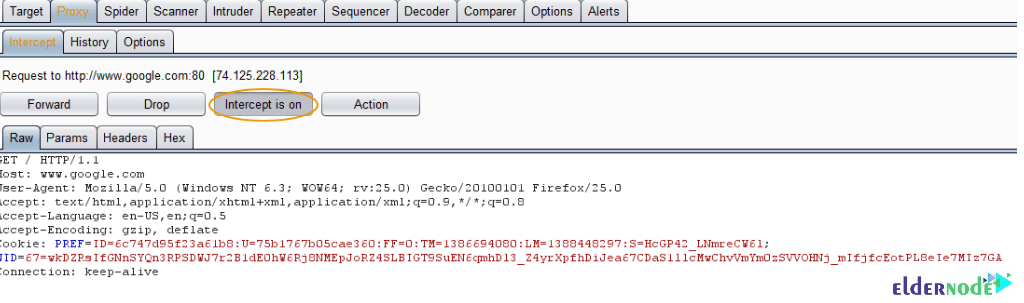
In this step, you can access HTTP Website. Turn on intercept in Burp Suite in the Proxy tab. Then, go to the Fox icon and select Burp Proxy. So, when you go back to Burp Suite you can view the request intercepted successfully.
How to eliminate untrusted connection error
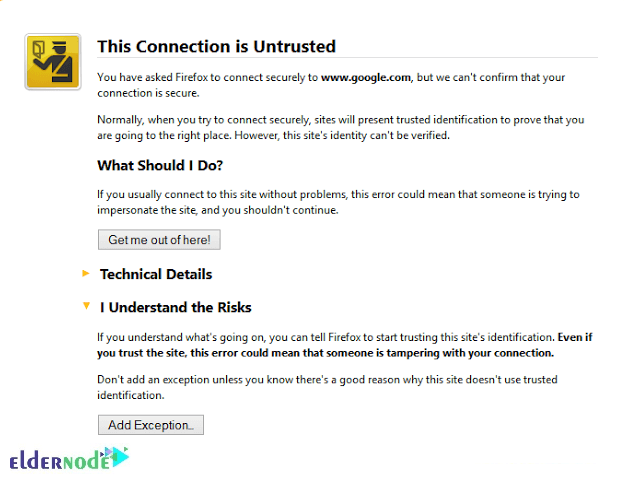
From now on, you can see that my request to Google has been captured by BurpSuite. But if not, check the appearance (circling in orange) of the “Intercept is On” button. While the Intercept is off, your traffic is likely going through Burp and you can not watch each request. So, if you head back to the browser you may see this message if you’re using Google over HTTPS.
You can set Firefox to trust the burp certificate so that we don’t get this error.
Note: The Professional version of burp allows us to get the certificate pretty easily, but in the free version we have to do a little work.
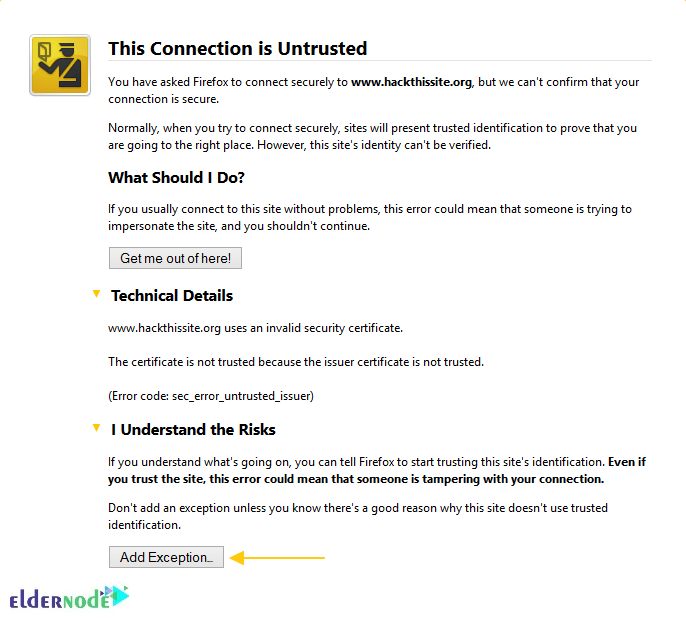
While you are on a page using HTTPS, you can click “Add Exception…”. If you navigated away from the page, simply visit any HTTPS-enabled website and go from there.
Add Exception screen allows you to view the certificate. Now, click the View… button.
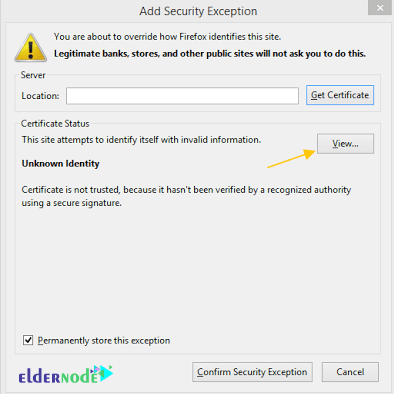
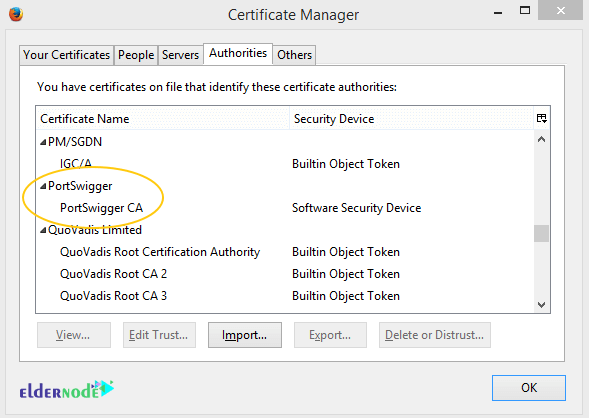
Since your browser is warning you about your certificate, you can install Portswigger CA into Firefox. Also, you need to export the certificate and note the location.
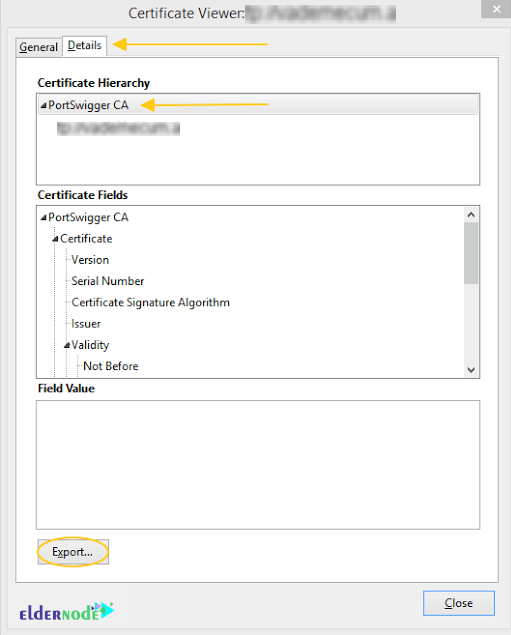
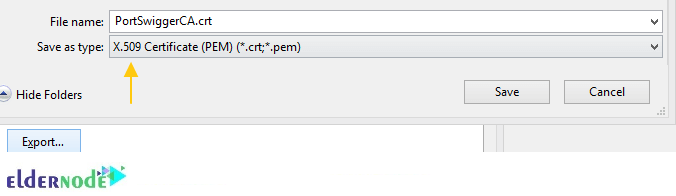
Note: Remember to select “PortSwigger CA” under the details of the certificate viewer before clicking export.
Make sure you save as the X.509 .crt, .pem file type.
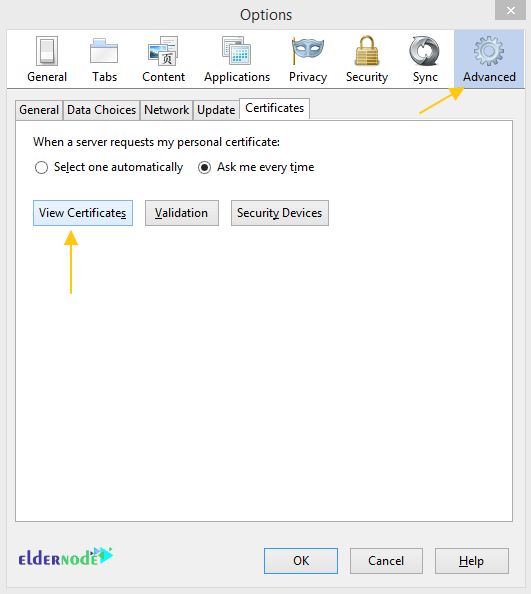
Now, you can save it and note the location. Make sure that this certificate is installed in Firefox. To do this, select “View Certificates” under “Advanced” in the Firefox Options pane.
Here, you can select import.
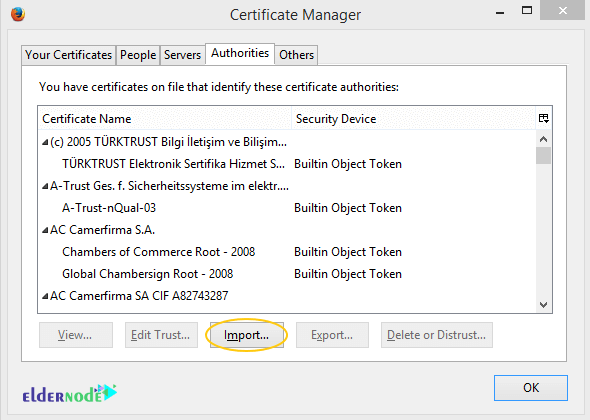
At this point, you should select the certificate you exported earlier from the noted location and click OK. Then select “Trust this CA to identify websites”
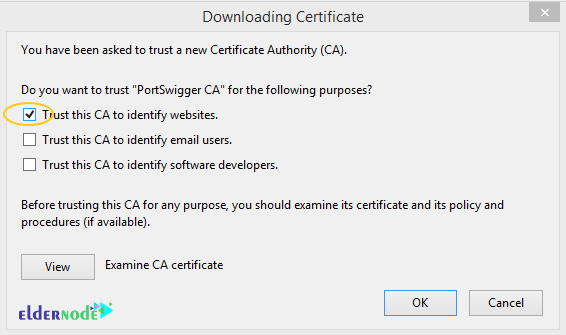
Once you see the “Portswigger CA” Certificate name under the “Authorities” tab, it means all is ok.
If done correctly, you can now navigate to any SSL site in burp without being prompted to trust the certificate.
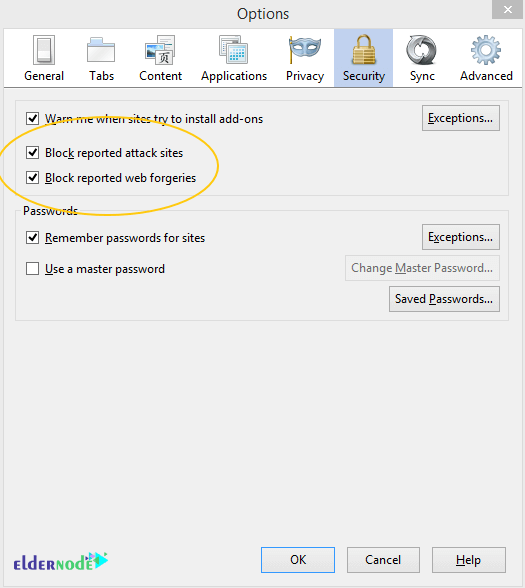
How to disable Google Safebrowsing
Since Safebrowsing can cause unwanted traffic during tests, you need to disable it. Follow the below path to do this.
Firefox button >> Options >> Options (or Tools >> Options) >> Security And unchecking both “Block Reported attack sites” and “Block reported web forgeries”
Conclusion
In this article, you learned How To Use FoxyProxy And Burp Suite For Change Proxy. You have successfully used the FoxyProxy add-on to configure Firefox to proxy through Burp Suite. The new profile in Firefox helps you to keep your normal browsing profile separated from our proxy profile.