Burp Suite is an application framework for examining the security of web applications, which includes several tools that allow you to seamlessly examine the components of a modern web application. Burp Suite is essentially a local web proxy that can be used to analyze HTTP/S requests and responses between the user’s browser and the target site and edit them if necessary. In this article, we are going to teach you How to Setup proxy on Burp Suite. It should note that if you want to buy a VPS server, you can see the packages available in Eldernode.
Table of Contents
Tutorial Setup proxy on Burp Suite
Burp Suite tool is a very powerful tool in the field of penetration testing, hacking, and web application security. This tool provides you with a lot of great features and is one of the best tools in the field of penetration testing and website security. Therefore, it is necessary for every security expert to learn to work with this tool well in order to be able to implement their penetration tests professionally. One of the most important parts of working with Burp Suite is setting up a proxy that is available by default. In the next section, join us to teach you How to Setup proxy on Burp Suite.
Setup proxy on Burp Suite Step by step
It is interesting to know that Burp’s proxy listener is a local HTTP proxy server that listens for incoming communications from your browser. It then lets you track all HTTP requests and responses sent and received by your browser. So we have to say that this is at the heart of Burp’s user-centric workflow.
It should note that Burp creates a single listener by default on port 8080 of the loopback interface. Note that when you want to start Burp for the first time, you need to check that this listener is active and running. To do this, just follow the steps below:
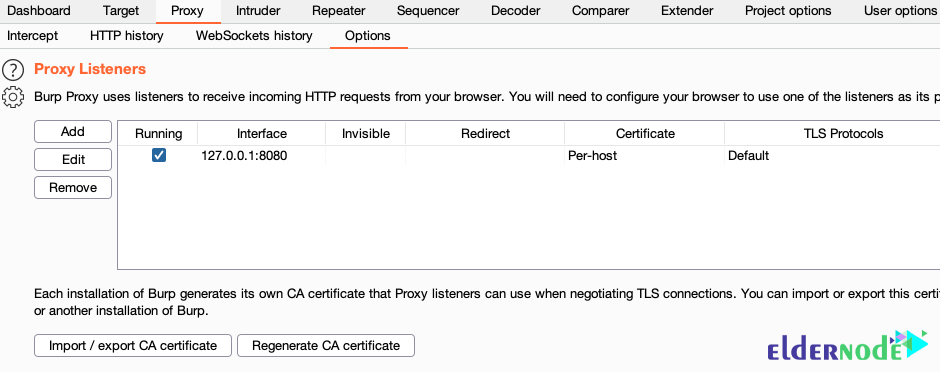
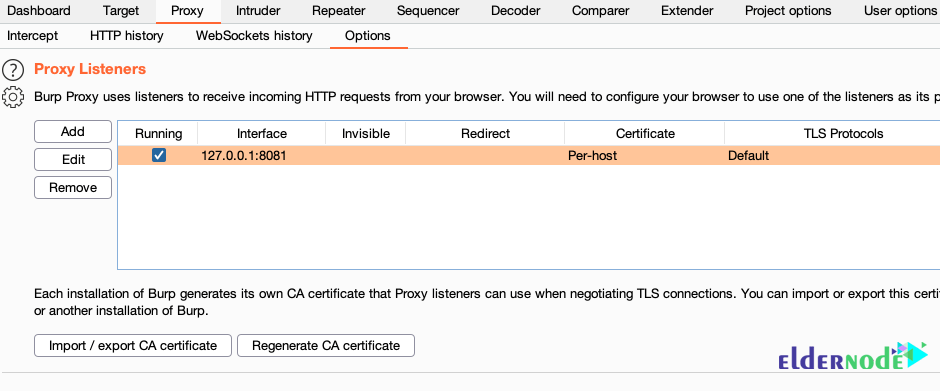
After opening Burp, go to “Proxy” >> “Options” tab.
In the “Proxy listeners” panel, you must select the interface input 127.0.0.1:8080 with the “Running” checkbox. Doing so will determine the listener’s activity and hearing. Follow these steps:
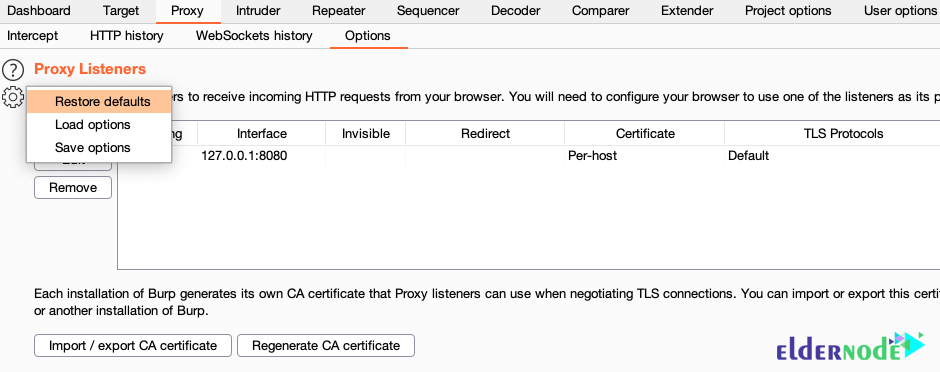
Note that otherwise, click on the “Settings” icon in the upper left corner of the panel and select “Restore Defaults“. You need to go back to the “Running” box to see if the proxy listeners are currently running.
Check that the listener is active if the checkbox is selected. If it is not active, you must follow the steps below:
The default 8080 port may not be available if the above steps still do not run the proxy listener. If so, you need to try another port. Follow these steps to do this:
In the first step, you must select input 127.0.0.1:8080 and click the “Edit” button. Doing so opens the “Edit proxy listener” dialog.
Then in the next step in the “Bind to port” field, enter the new port number that you think is free and click “OK“.
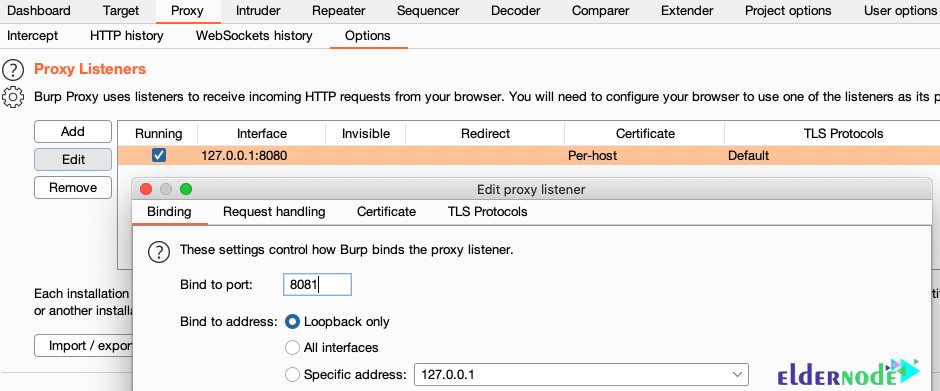
In the next step, you should try to activate the listener by selecting the “Running” checkbox.
How to Check browser proxy configuration
Once you have configured your browser proxy settings, you should follow the steps below to make sure it works properly. Note that if the browser configuration is set correctly, you can easily check your browser proxy configuration by following the steps below.
1. The first step is to make sure the proxy listener is enabled. Also, check that you have configured your browser correctly.
2. The second step is that you have to run Burp. Then open the browser you configured and go to any HTTP address. Note that at this point your browser will have to wait for the request to be completed. Just like trying to load a page. This is because Burp intercepted the HTTP request that your browser was trying to send.
Note: We recommend that at this stage do not use HTTPS for the moment.
3. The third step is to follow the steps below in order. In Burp, go to the “Proxy” tab. Then open the “Intercept” tab below. It should note that both of these tabs should be highlighted. Finally, in the “Interception” tab, you should see the HTTP interception request in the main panel.
4. In the next section, you should pay attention to the “Intercept is on” button. Note that if you click this button, it will change to “Intercept is off” and then the request from Burp will be published.
5. In the final step, you can return to your browser and see the loading of the requested page.
If you have done all of the above correctly, you have completed the mandatory configuration steps for using an external browser with Burp Suite. If you have trouble doing these steps, contact us.
Conclusion
Burp Suite is a practical framework for examining the security of web applications, which includes several tools that allow you to seamlessly examine the components of a modern web application. Proxy is the main tool of the program that can be used to check and edit all web traffic. In this article, we tried to introduce you to How to Setup proxy on Burp Suite.