OpenVAS stands for Open Vulnerability Assessment System. This tool is a vulnerability scanner and of course a very good security assessor. OpenVAS is simply a software framework consisting of several services and tools using for vulnerability scanning and vulnerability management. All OpenVAS products are free software, and most are licensed under the GNU General Public License (GPL). In this article, we want to introduce you step by step to Tutorial Setup and Configure OpenVAS on Debian 10. It should be noted that you can visit the packages available in Eldernode if you want to buy a Linux VPS server.
Table of Contents
How to Setup and Configure OpenVAS on Debian 10
OpenVAS was originally called GNessUs and is a branch of the previously open-source Nessus Vulnerability Scan. After Nessus developers at Tenable Network Security decided to turn it into proprietary software in October 2003, OpenVAS continued to operate as an open-source branch of it.
You can install OpenVAS as a virtual machine or uncompiled code or even directly on the Linux operating system. Then use all the features of a Nessus for free. This scanner has a long history since 2009 with daily updates (the name of these updates is “Network Vulnerability Tests”) or NVT for short.
As of June 2016, 47,000 NVTs have been released for OpenVAS. It also includes more than 50,000 vulnerability tests supported by a security software company. It also has an internal programming language that can perform some special and personalized tests depending on the user’s needs. You can install this tool in the form of a virtual machine or non-compiled code or even directly on the Linux operating system and use all its features for free.
Follow us in this article to teach you how to install, Setup and Configure OpenVAS on Debian 10.
Prerequisites for Installing OpenVAS on Debian 10
In this article, we are going to teach you how to install GVM on Debian 10. Greenbone Vulnerability Management (GVM), formerly known as OpenVAS, is a network security scanner that provides a set of Network Vulnerability (NVT) tests to identify security holes. Before installing this tool, you need to prepare some prerequisites.
_ At least 4 GB RAM
_ At least 4 vCPUs
_ More than 8 GB disk space
The next step is to update the system packages using the following commands:
apt updateapt upgradeSince we will be running GVM 20.08 as a non-privileged user of the system, you must create a GVM system account using the following commands:
useradd -r -d /opt/gvm -c "GVM User" -s /bin/bash gvmIn the next step, you need to create the GVM user directory as specified by the -d option in the above command. Then place the user and group ownership on GVM.
mkdir /opt/gvmchown gvm: /opt/gvmYou will also need to install the following dependencies in order to properly install OpenVAS on Debian 10:
apt install gcc g++ make bison flex libksba-dev curl redis libpcap-dev \cmake git pkg-config libglib2.0-dev libgpgme-dev nmap libgnutls28-dev uuid-dev \libssh-gcrypt-dev libldap2-dev gnutls-bin libmicrohttpd-dev libhiredis-dev \zlib1g-dev libxml2-dev libradcli-dev clang-format libldap2-dev doxygen \gcc-mingw-w64 xml-twig-tools libical-dev perl-base heimdal-dev libpopt-dev libunistring-dev graphviz \libsnmp-dev python3-setuptools python3-paramiko python3-lxml python3-defusedxml python3-dev gettext python3-polib xmltoman \python3-pip texlive-fonts-recommended texlive-latex-extra --no-install-recommends xsltproc sudo vim rsyncHow to Install Yarn on Debian 10
In this section, we want to teach you how to install the Yarn JavaScript package manager. To do this, you must enter the following commands in order:
curl -sS https://dl.yarnpkg.com/debian/pubkey.gpg | apt-key add -echo "deb https://dl.yarnpkg.com/debian/ stable main" | tee /etc/apt/sources.list.d/yarn.listapt updateapt install yarn -yHow to Install Greenbone Vulnerability Manager on Debian 10
You should build different modules from the source code to install OpenVAS on Debian 10. Download the source code of each module required to build OpenVAS using the following commands.
First, run the command below to create a temporary directory to store source codes:
mkdir /tmp/gvm10 cd /tmp/gvm10Now download GVM Libraries with the following command:
wget https://github.com/greenbone/gvm-libs/archive/v10.0.1.tar.gz -O gvm-libs-v10.0.1.tar.gzThen download OpenVAS Scanner as shown below:
wget https://github.com/greenbone/openvas/archive/v6.0.1.tar.gz -O openvas-scanner-v6.0.1.tar.gzAnd to download Greenbone Vulnerability Manager (GVM), enter the following command:
wget https://github.com/greenbone/gvmd/archive/v8.0.1.tar.gz -O gvm-v8.0.1.tar.gzYou can download Greenbone Security Assistant (GSA) by running the following command:
wget https://github.com/greenbone/gsa/archive/v8.0.1.tar.gz -O gsa-v8.0.1.tar.gzTo download Open Scanner Protocol Daemon (OSPd), enter the command below:
wget https://github.com/greenbone/ospd/archive/v1.3.2.tar.gz -O ospd-v1.3.2.tar.gzRun the command below to download OpenVAS SMB:
wget https://github.com/greenbone/openvas-smb/archive/v1.0.5.tar.gz -O openvas-smp-v1.0.5.tar.gzLastly, you should extract the source codes to the current directory as shown below:
for i in *.tar.gz; do tar xzf $i; doneHow to Install OpenVAS on Debian Linux
OpenVAS is a complete scanning engine that runs an updated and extensive feed of Network Vulnerability Tests (NVT). You need to navigate to a directory where you extracted your source code and build each component of OpenVAS.
To build and install GVM Libraries, run the following commands:
cd gvm-libs-10.0.1/ mkdir build cd build/ cmake .. make make installBuild and Install OpenVAS SMB as shown below:
cd /tmp/gvm10/openvas-smb-1.0.5 mkdir build cd build cmake .. make make installBuild and Install OSPd by running the following command:
cd /tmp/gvm10/ospd-1.3.2 python3 setup.py installRun the command below to build and install OpenVAS Scanner:
cd cd /tmp/gvm10/openvas-6.0.1/ mkdir build cd build cmake .. make make installNow make the following configurations to improve the performance of the Redis server. You should increase the value of somaxconn to avoid slow clients connections issues as shown below:
echo "net.core.somaxconn = 1024" >> /etc/sysctl.confTo prevent Redis background storage from failing in low memory conditions, enable memory overcommit as follows:
echo 'vm.overcommit_memory = 1' >> /etc/sysctl.confDisable Linux Kernel’s support for Transparent Huge Pages (THP) to avoid the creation of latencies and memory usage issues with Redis. Now create a systemd service unit:
vim /etc/systemd/system/disable_thp.service[Unit] Description=Disable Kernel Support for Transparent Huge Pages (THP) [Service] Type=simple ExecStart=/bin/sh -c "echo 'never' > /sys/kernel/mm/transparent_hugepage/enabled && echo 'never' > /sys/kernel/mm/transparent_hugepage/defrag" [Install] WantedBy=multi-user.targetNext, you need to reload systemd configurations using the command below:
systemctl daemon-reloadNow start and enable the service to run on system boot as shown below:
systemctl start disable_thp systemctl enable disable_thpIn this step, rename the default Redis server configuration file using the command below:
mv /etc/redis/redis.conf /etc/redis/redis.conf.bakAnd copy the Redis configuration that is generated:
cp /tmp/gvm10/openvas-6.0.1/build/doc/redis_config_examples/redis_4_0.conf /etc/redis/redis.confOpen the configuration file with your desired text editor:
vim /etc/redis/redis.confAnd make the following adjustments:
#unixsocket /tmp/redis-server.sock unixsocket /var/run/redis/redis-server.sock ... #pidfile /usr/local/var/run/openvas-redis.pid pidfile /var/run/redis/redis-server.pid ... # Change the working directory to /var/lib/redis dir ./ dir /var/lib/redisRedis uses /tm/redis.socket, so you must explicitly define the alternate socket directory using the db_address parameter as follows:
echo "db_address = /var/run/redis/redis-server.sock" > /usr/local/etc/openvas/openvassd.confNow reload sysctl variables created above as shown below:
sysctl -pAnd now restart the Redis server using the command below:
systemctl restart redis-serverTo update the OpenVAS NVTs from Greenbone Security Feed/Community Feed, run the command below:
greenbone-nvt-syncRun the following commands to reload Kernel modules and start OpenVAS Scanner:
ldconfig && openvassdCheck the logs to see if there is any issue with the OpenVAS scanner:
tail /usr/local/var/log/gvm/openvassd.logTo check running processes.
ps aux | grep openvasRun the following commands to build and install GVM:
cd /tmp/gvm10/gvmd-8.0.1/ mkdir build cd build cmake .. make make installAnd to build and install GSA, use the following commands:
cd /tmp/gvm10/gsa-8.0.1 mkdir build cd build cmake .. make make installYou should set up the create certificates for the server and clients as shown below:
gvm-manage-certs -aNow run the following command to create OpenVAS administrative user:
gvmd --create-user openvasadminCreate your own password as shown below:
gvmd --create-user openvasadmin --password=StrongPasswordLastly, reset the password of an already existing user by running the following command:
gvmd --user=openvasadmin --new-password=StrongPasswordHow to Access OpenVAS on Debian 10
First start OpenVAS Scanner, GSA and GVM services using the command below:
openvassd && gvmd && gsadAnd check the status as shown below:
ps aux | grep -E "openvassd|gsad|gvmd" | grep -v grepYou can now access the GSA via the URL HTTPS: ServerIP-OR-hostname:
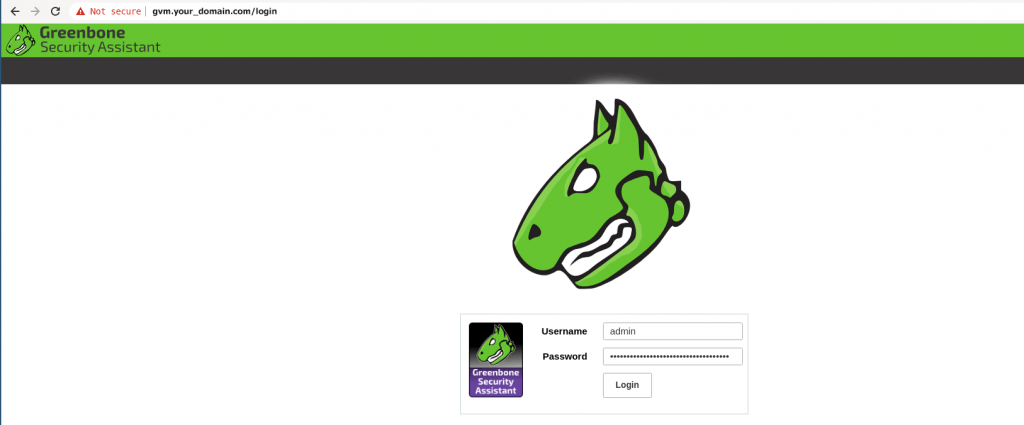
Conclusion
Scanners and security tools are very important in the cyber world. Security can also be implemented in a network in many ways, including firewalls, security scanners such as Nikto, Nmap, OpenVas, etc., but these methods are many and varied. In this article, we tried to teach you step by step about Tutorial Setup and Configure OpenVAS on Debian 10.


The Installation Manual doesn’t work. Many mistakes and download from github not possible.
What error are you getting?
Yes don’t work 🙁
Bad cmd line for example
echo “PATH=\$PATH:/opt/gvm/bin:/opt/gvm/sbin:/opt/gvm/.local/bin” > /etc/profile.d/gvm.sh
and this one
psql gvmd create role dba with superuser noinherit; grant dba to gvm; create extension “uuid-ossp”; create extension “pgcrypto”; \q exit
Thank you for your criticism. Commands have been updated.