In many companies, homes, etc. that use ADSL internet service, in addition to the modem, there is also a Mikrotik to use its wonderful features on the network. Using Mikrotik has many advantages. In this article, we are going to introduce you 4 Tips for Setting Up a Home Router with MikroTik. It is interesting to know that you can view and purchase Mikrotik VPS packages by visiting the Eldernode website.
Table of Contents
How to Setup a Home Router with MikroTik
Modem Settings
In order to connect the ADSL modem to Mikrotik, it is necessary to first make a series of settings on the modem so that Mikrotik creates the connection to the Internet, not the modem. To do this, just follow the steps below.
First, you need to connect the modem to your computer with a network cable.
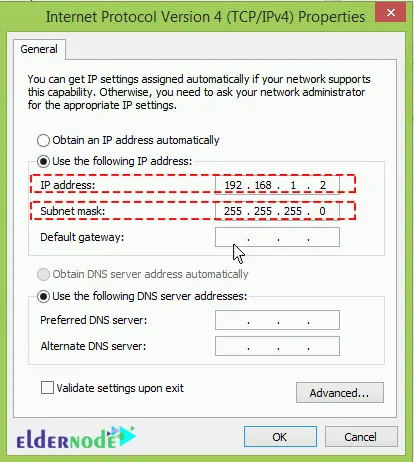
Note: Considering that the default IP of the modem is 192.168.1.1 at first, when you want to connect your computer to the modem and communicate, the IP address of the modem and the IP address of the computer must be in the same family. Therefore, the IP address of your computer should be between 192.168.1.2 and 192.168.1.254.
Select the IP address of your computer’s Ethernet network card in the modem IP address range. For example, 192.168.1.5. There is no need to set Gateway and DNS at the moment.
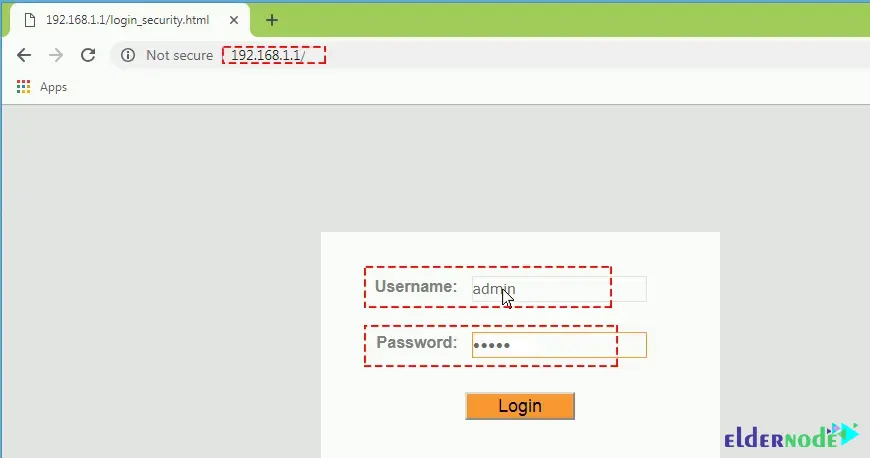
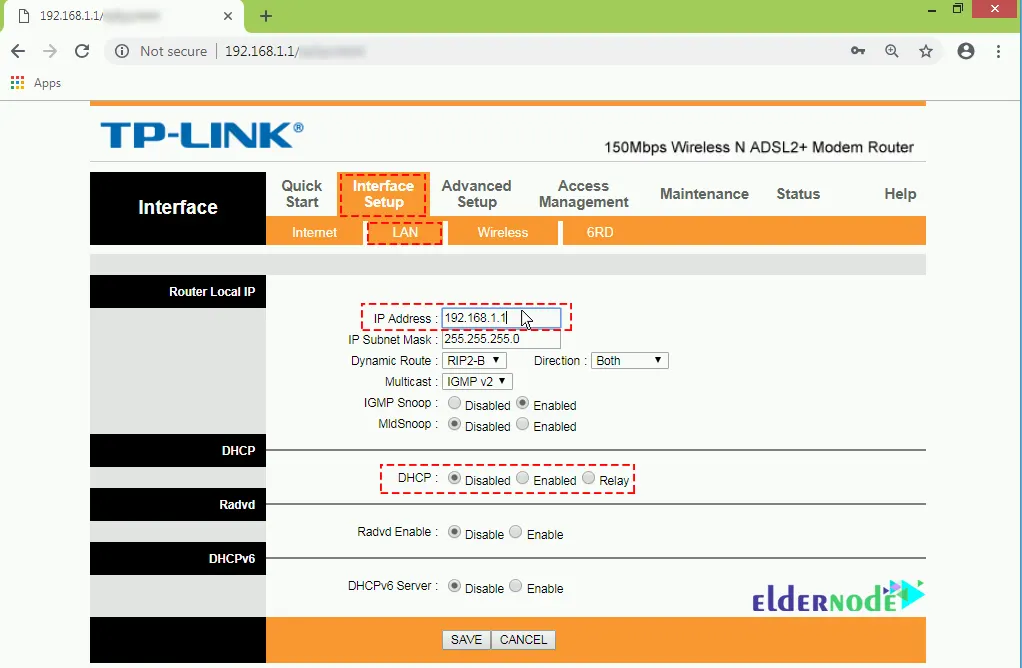
Enter the default IP address of the modem in your browser address, i.e. 192.168.1.1. Note that if your modem settings are not default, reset them.
Then you need to enter the modem settings web environment. Here you will be asked for a username and password to log in. By default, the value of both is admin.
In the Interface setup tab, disable the DHCP option in the LAN section. If necessary, you can activate the DHCP service in Mikrotik.
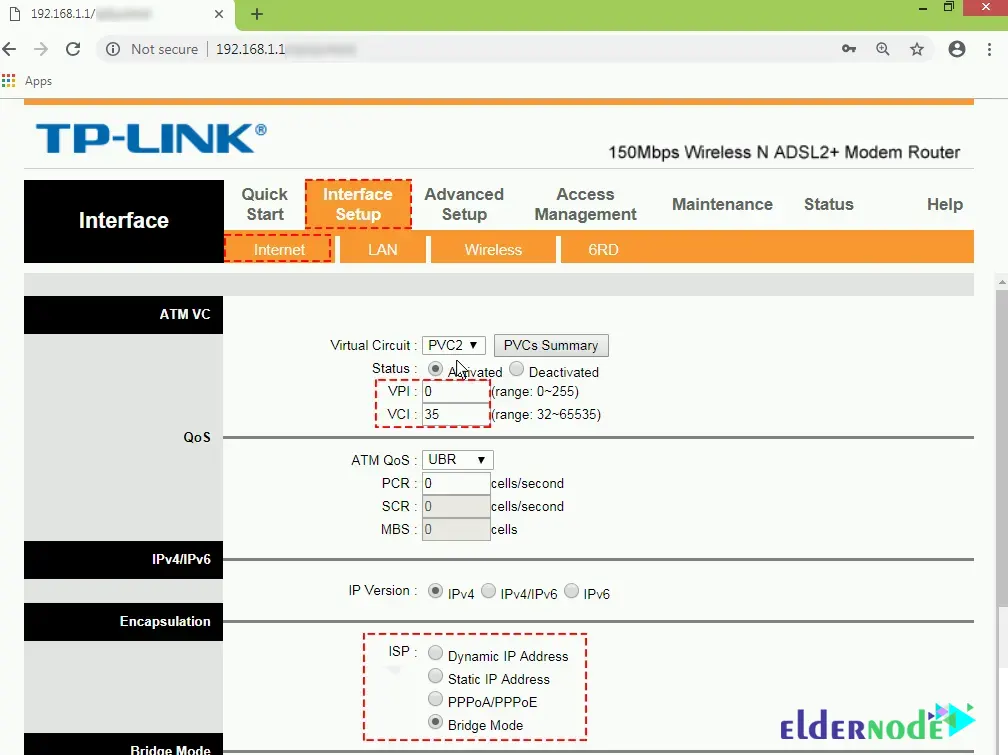
In the Interface setup tab of the Internet section, set the VPI and VCI options according to the code provided by the ISP of the Internet provider.
The main thing is to set the ISP option to Bridge Mode. To establish a PPPoE connection in Mikrotik, put the modem in Bridge mode to bridge with Mikrotik.
Familiarity with Bridge and PPPoE
There are different types of connections in the modem, two of which are widely used: bridge type and PPPoE.
What is Bridge?
When the modem connection is set to bridge type, it means it is ready to be bridged with another device. In this case, if you connect a network cable from the modem to Mikrotik, these two devices will be bridged together, and Mikrotik can give an order to connect.
What is PPPoE or Point-to-Point Protocol over Ethernet?
There is another topic calling “tunneling“. Tunneling is required to communicate with the Internet. There are different types of tunnels, PPPoE being one of them. When the modem is set to PPPoE, it will immediately ask you for a username and password. This is the username and password that your Internet Service Provider (ISP) gives you.
Note: When connecting the modem to Mikrotik, the modem connection should not be in PPPoE mode. It means that the modem is not allowed to connect first, then give internet to Mikrotik and other computers! Rather, the modem must be in Bridge mode to bridge with Mikrotik and create a PPPoE connection in Mikrotik. Now Mikrotik instructs the modem to connect to the Internet or not! Doing this is because if the internet is interrupted, with the facilities that Mikrotik has, it will be easier to diagnose and control the network.
Mikrotik Settings to Connect Home Router to Mikrotik
Disconnect the cable that you connected from the modem to the computer and connect the network cable from the second Mikrotik port to your computer.
Open the winbox software and select your Mac Mikrotik address and connect to it. If Mikrotik is on default settings, its IP address is 192.168.88.1.

At this stage, it is necessary to reset Mikrotik, which will lose its default settings and have a raw Mikrotik! Connect to it using winbox and select Reset Configuration from the System sub-menu. In the window that opens, check No Default Configuration and then Reset.

Connect again through winbox to raw Mikrotik whose IP address has changed to 0.0.0.0 after reset.
Then Connect a cable from the modem to the first port of Mikrotik.
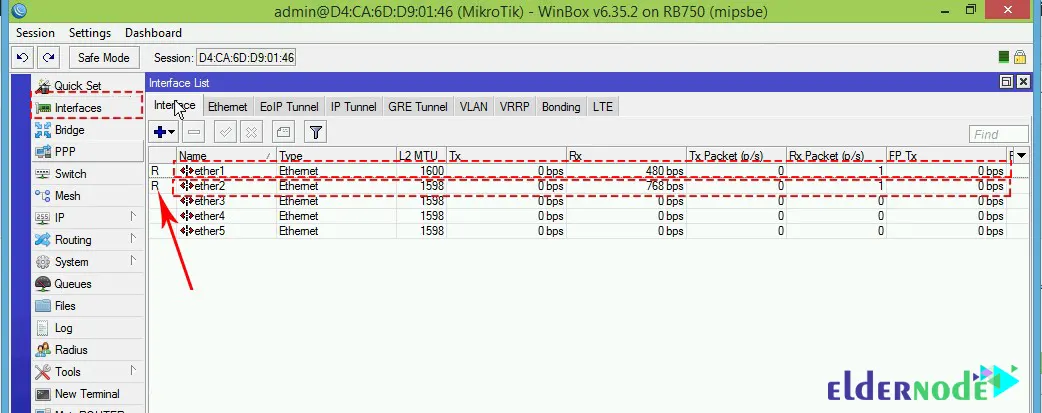
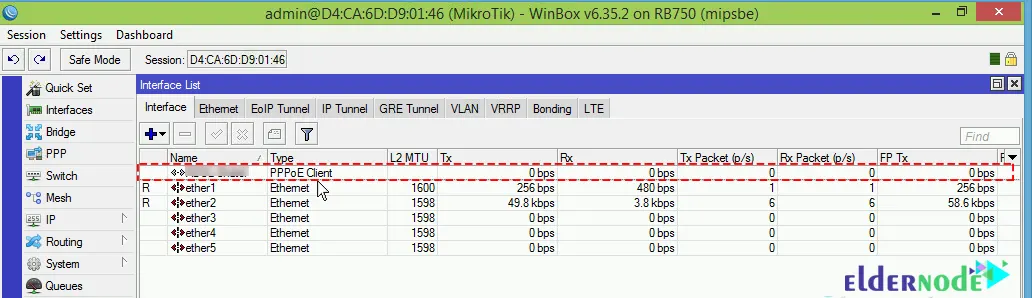
Select the Interface option from the menu to see the status of Mikrotik network cards:
To create a PPPoE connection in Mikrotik, you need to enter the username and password given by your ISP so that Mikrotik can connect to the Internet. So, click the “+” button in the Interface List window and select the PPPoE Client option.
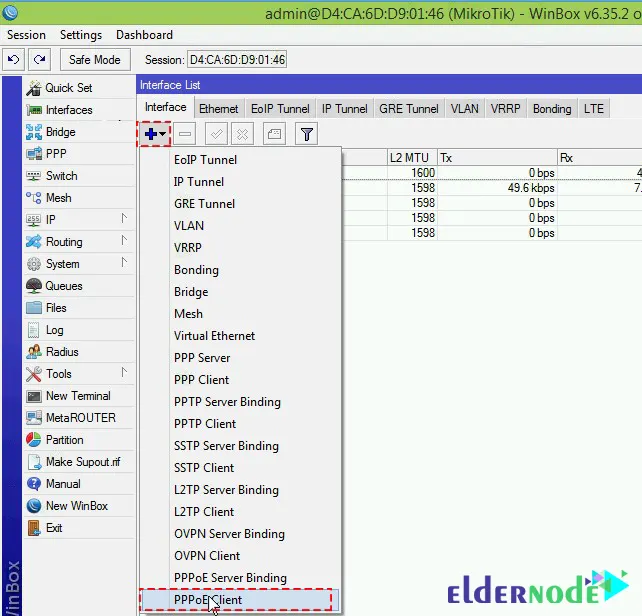
In the opened New Interface window and in the General tab, enter the name in the Name field. Now you have to specify the network card on which you want to connect in the Interfaces section.
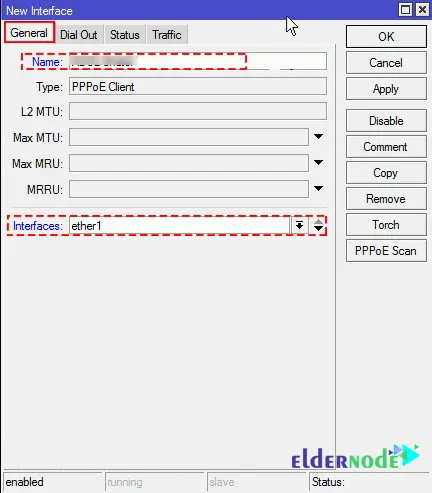
Enter the username and password provided by your ISP. When you click on OK, immediately check the status to know the status of the Internet connection.
It should note that you can check the traffic in the Traffic tab.

Whenever you want to check the connection of Mikrotik to the Internet, it is necessary to click on the PPPoE connection in the Interfaces List and in the opened window, check the Status (at the bottom of the window) whether it is Connected or disconnected.
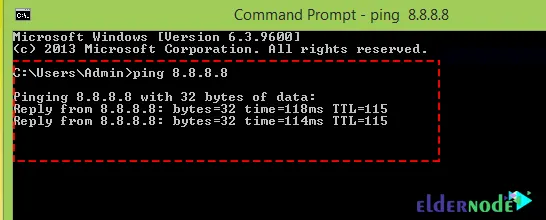
You can select Ping from the Tools menu and ping 8.8.8.8.
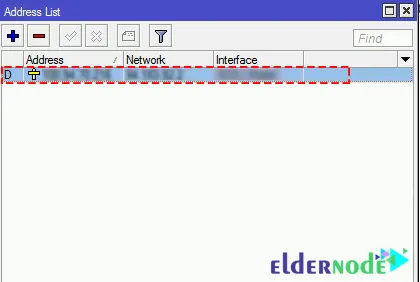
You can see the IP address given to ether1 in the IP–>Addresses section.
Connecting a Computer to the Internet
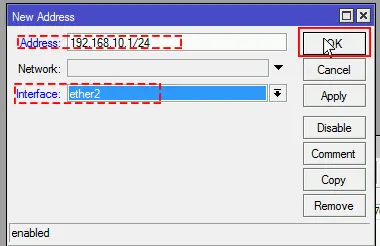
First, it is necessary to manually set the IP address for ether2 (the second network card) of Mikrotik and the computer, of course, both must be in the same family to see each other. You can enable DHCP.
Select the “+” button in the Address List window as shown in the image above and enter the address 192.168.10.1/24 for Mikrotik port 2.
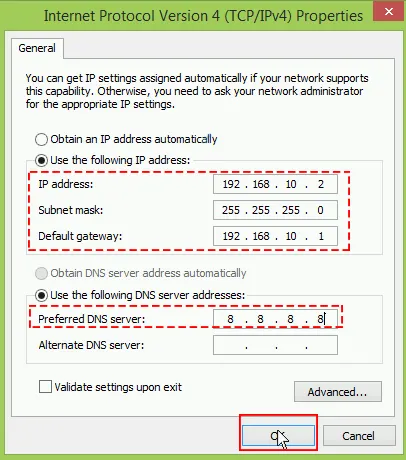
Determine the IP address for your computer in the range you gave to Mikrotik:
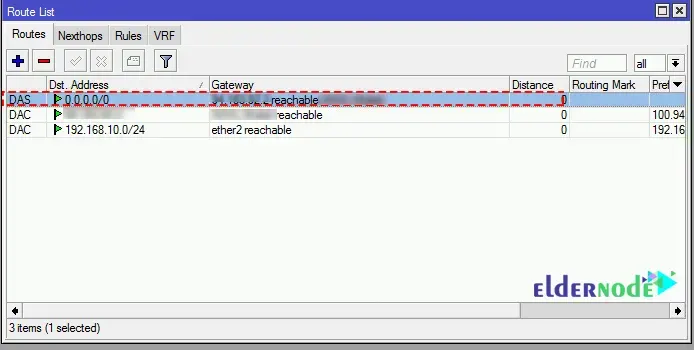
Route definition in Mikrotik
Select Routes from the IP menu. As soon as the PPPoE connection is established, a route is automatically created so that any message whose destination is 0.0.0.0/24 enters the Internet space from Mikrotik ether 1.
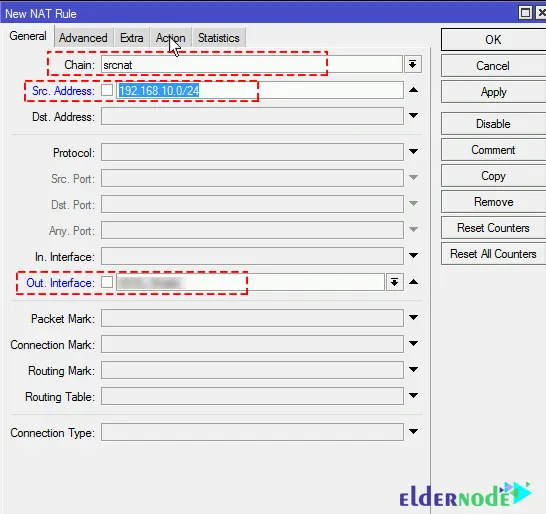
Definition of NAT in Mikrotik
Any message with the source address from the 192.168.10.0/24 family, which wants to leave Mikrotik’s ether1, must replace its IP address with Mikrotik’s port 1 (ether1) and then leave.
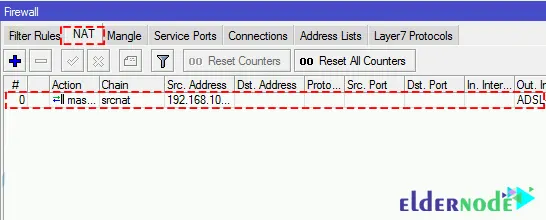
To do this, select the Fierwall from IP option and in the opened window, select the NAT tab. The New NAT Rule window opens.
First, you must define the conditions in the General tab.
chain: Select Srcnat.
Src.Address: 192.168.10.0/24
Out.Interfaces: ether1
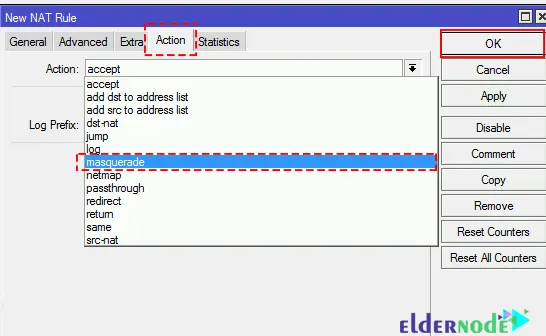
After setting the conditions in the General tab, in the Action tab, select the masquerade operation for Action and finally click OK.
*
In the final step, you can type cmd in the Run window and get a ping.
Conclusion
As you know, all global companies use modems to connect to the Internet. Modems do not provide us with the possibility of managing and controlling users due to the type of application they have. To control the access of users to the Internet, a router is placing in the path between the Internet and the user, and in this way it is possible to manage users. In this article, we tried to teach you 4 Tips for Setting Up a Home Router with MikroTik completely. If you have any questions, let us know in the comments section.