DNS is one of the important services on the network that has the task of resetting the domain name to an IP address or on the contrary. In this series of mikrotik tutorials, we are going to introduce you to DNS Configuration Tutorial in Mikrotik, so you can easily configure and configure it. You can see the packages available in Eldernode if you need to buy Mikrotik VPS. Join us by learning how to set up DNS in mikrotik via WinBox and mikrotik commands.
Configure DNS in Mikrotik: The Complete Guide
Looking to configure DNS in Mikrotik? Look no further. Why is DNS configuration important? Well, DNS (Domain Name System) is responsible for translating domain names into IP addresses, allowing computers to communicate with each other over the internet. By properly configuring DNS in your Mikrotik router, you can improve network performance, increase security, and enhance user experience. In this guide, you’ll learn how to configure DNS settings in Mikrotik, including setting up DNS servers, adding DNS records, and configuring DNS caching. We’ll provide clear instructions and practical examples, making it easy for you to follow along. So, grab your Mikrotik router, and let’s dive into the world of DNS configuration. By the end of this guide, you’ll have a solid understanding of how to configure DNS in Mikrotik and optimize your network for optimal performance. Let’s get started!
DNS Configuration Tutorial in MikroTik VPS Server
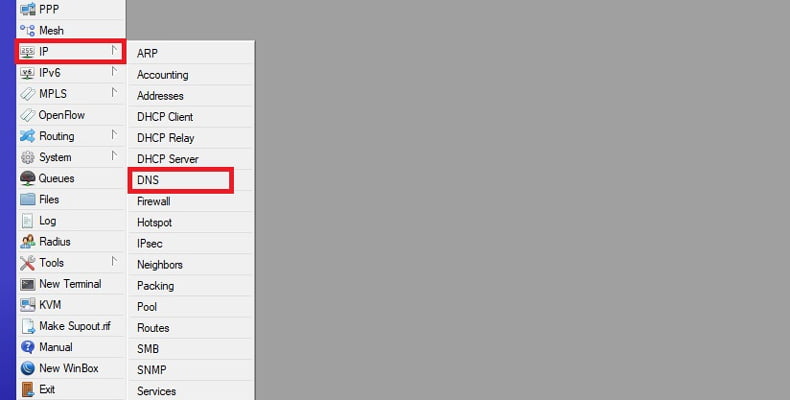
1- Connect to your mikrotik via Winbox first.
2- Then click on the DNS option from the IP menu.
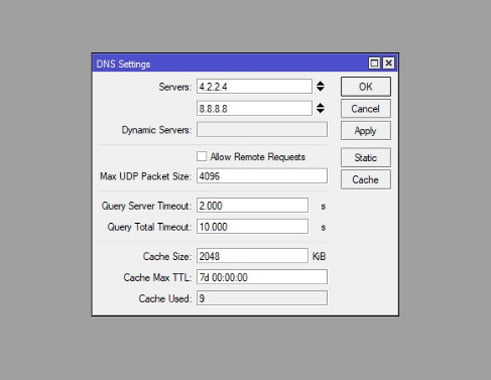
3. Now in this section you will be able to adjust your DNS settings to any of the options:
Servers: Enter the IP address of a DNS service on the Internet or your network in this section.
Dynamic Server: If you use Dynamic Server, it will be named here.
Allow Remote Request: Selecting this option will allow you to serve mikrotik as a DNS server and respond to users.
Max UDP Packet Size: The final UDP packet size is specified in this section.
Query Server Timeout: The amount of time that a mikrotik waits for a server to respond to its request will be specified in this field.
Query Total Timeout: Enter the total waiting time for a DNS response.
Cache Size: Enter the amount of cache space and cache of DNS records.
C-Size TTL: The TTL end of time defines a DNS record in this segment.
Cache Used: This value will be set by the mikrotik router compared to other settings.
Example:
Configure DNS in mikrotik via terminal
1. Connect to your mikrotik first by SSH or console.
2-Then enter the following command to enable and configure DNS.
ip dns set servers=8.8.8.8,8.8.4.4 allow-remote-requests=yes max-udp-packet-size=4096 query-server-timeout=2.000 query-total-timeout=10.000 cache-size=2048 cache-max-ttl=7dThis way you will be able to configure DNS via WinBox and Terminal in mikrotik.
If you need a mikrotik vps server, you can order from the mikrotik page.