How to Roll Back a Driver in Windows. Updating a driver on your PC doesn’t always work out well. Sometimes, they introduce bugs or simply don’t run as well as the version they replaced. Luckily, Windows makes it easy to roll back to a previous driver in Windows 10.
While driver updates generally go pretty well, that’s not always the case.
Often, updated versions introduce new features or fix bugs, but sometimes they bring new problems of their own. Those problems can range from poor performance to odd behavior to system-crashing bugs.
Generally, we don’t recommend updating drivers unless you’re experiencing particular problems or need specific features that you know the update fixes or includes. Still, sometimes you’ll want to install new drivers and take a chance.
In this article, we will teach you how to roll back a driver in Windows.
Tutorial Roll Back a Driver
When you roll back a driver, Windows uninstalls the current driver and then re-installs the previous version.
Note that Windows keeps the previous version of drivers around for just this purpose, but only the previous version—it does not keep an archive of even older drivers for you to select.
You’ll need to be signed into an account with administrator privileges to roll back a driver. Also, the feature is not available for printer drivers.
Note: As with any other such procedure, we do recommend backing up your PC before getting started.
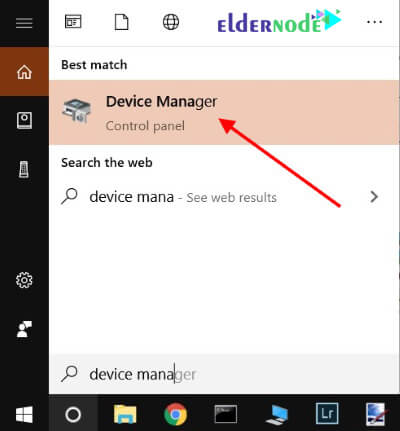
1. Open up Device Manager by pressing Windows+X and then clicking the Device Manager option on the Power Users menu.
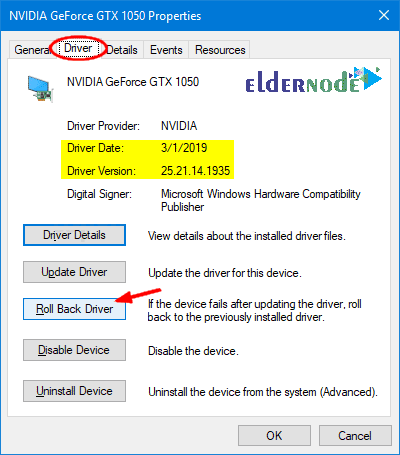
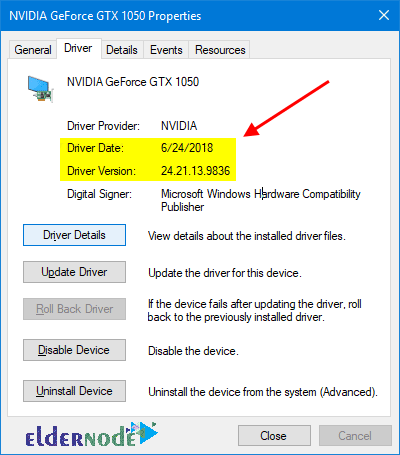
2. In the Device Manager window, find the device that’s causing you problems, right-click the device, and then click the Properties command.

3. Click the Driver tab at the top of the window, and then click Roll Back Driver.
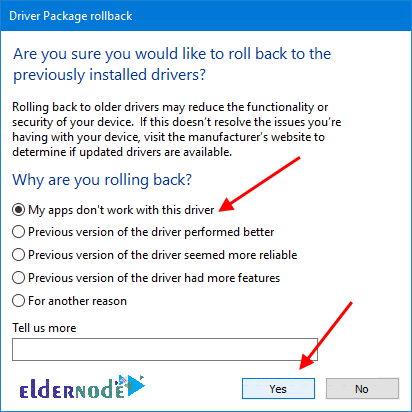
Windows prompts with a warning and asks you why you’re rolling back to a previous driver.
4. Click a response and then click Yes.
Note: If you feel the need, you can leave a detailed response in the Tell Us More field, located at the bottom of the window.
Windows then automatically restores your driver to the previous version, which could take up to 5-10 minutes, depending on the size of the driver.
Video card drivers are much larger and take longer to roll back.
Your PC might restart, after which your computer will be running the previous version driver.
Dear user, we hope you would enjoy this tutorial, you can ask questions about this training in the comments section, or to solve other problems in the field of Eldernode training, refer to the Ask page section and raise your problem in it as soon as possible. Make time for other users and experts to answer your questions.
Goodluck.