Sonar is a quality source code management tool for applications. This tool is able to cover and analyze programming quality in seven areas of design, coding rules, documentation, duplication, unit tests, complexity, and program errors. Sonar has the ability to combine metrics to produce statistical reports. This tool can use to analyze source code in almost all programming languages. In this article, we are going to teach you about Tutorial Install and use SonarQube on Ubuntu 20.04. You can visit the packages available in Eldernode if you wish to purchase an Ubuntu VPS server.
Table of Contents
Introduction to SonarQube
In general, using SonarQube has the following benefits:
_ Continuous inspection: With the help of SonarQube, the quality of the code can systematically improve.
_ Identifying deceptive problems: With the help of this program, deceptive problems such as not referring to an empty pointer and logical errors can check and identify.
_ Integration with DevOps: Using webhooks and internal RestAPI of this software, all DevOps tools such as manufacturing systems, CI engines, and development pipelines can be integrated.
_ Centralized quality: With the help of this program, the quality of the whole project control process can be managed centrally
Also among the SonarQube features are the following:
1- Support for source analysis of programs written in multiple languages such as Python, Javascript, Java, etc.
2- Support for source analysis of database functions and procedures written in PL/SQL and TSQL languages
3- Support for client-side source analysis such as JavaScript, CSS, HTML, etc.
4- Support for source analysis of mobile applications under platforms such as Android and iOS
5- Analysis of programming quality from different perspectives such as design, coding principles, amount of documentation, reusability, and complexity
6- Provide multiple graphs and statistics to identify programming bugs
7- Provide comprehensive reports of code analysis results
In the next section, we will teach you how to Install SonarQube on Ubuntu 20.04. Please join us.
How to Install Java on Ubuntu 20.04
Given that one of the prerequisites for installing SonarQube is installing Java, so in this section, we intend to teach you how to install Java. To do this, just follow the steps below.
You must first update the system using the following command:
apt updateIn the next step, if you want to use JRE, you can use the following command:
apt install default-jreYou can also use the following command if you want to use OpenJDK:
apt install default-jdkHow to Install and Setup Database for SonarQube on Ubuntu 20.04
The interesting thing to know is that SonarQube supports PostgreSQL, Oracle, or MSSQL for Windows systems. In this section, we are going to teach you how to install PostgreSQL. You can install PostgreSQL using the following command:
apt install postgresql postgresql-contribNow you should log in as a PostgreSQL superuser and Create SonarQube PostgreSQL Database and Database User using the following commands:
sudo -Hiu postgrescreateuser sonaradmincreatedb -O sonaradmin sonarqubedbpsqlALTER USER sonaradmin WITH ENCRYPTED password 'changeme';\qexitAfter you have successfully created and launched the PostgreSQL database, you should now enable the secure computing filter. It is important to note that the Seccomp filter is usually enabled by default on Ubuntu 20.04. But you can use the following command to check if Seccomp is present in your kernel:
grep SECCOMP /boot/config-$(uname -r)Finally, another prerequisite for installing SonaQube is the Fontconfig and FreeType fonts that are used to generate SonarQube executable reports. You can use the following command to install them:
apt install fontconfig-config libfreetype6How to Install SonarQube on Ubuntu 20.04
In this section, we want to teach you step by step how to install SonarQube on Ubuntu 20.04. To do this, just follow the steps below.
In the first step, you have to download SonarQube. To get the download link, you can refer to the SonarQube binaries page. Then download SonarQube using the following command:
wget https://binaries.sonarsource.com/Distribution/sonarqube/sonarqube-8.7.0.41497.zipAfter you have successfully downloaded the file, you must now extract it by executing the following commands:
apt install zipunzip sonarqube-8.7.0.41497.zip -d /opt/You can also rename SonarQube to delete the version number:
mv /opt/sonarqube{-8.7.0.41497,}After you can install SonarQube, you can now create a SonarQube system account by performing the following steps. One thing to keep in mind is that SonarQube should not run as root. So you need to create a non-admin account to run SonarQube:
useradd -M -d /opt/sonarqube/ -r -s /bin/bash sonarqubeEventually, you should set the ownership of the /opt/sonarqube to sonar user created above using the following command:
chown -R sonarqube: /opt/sonarqubeConfigure SonarQube on Ubuntu 20.04
After you have successfully installed SonarQube, you can configure it at this stage. So you can configure the database connection details according to your PostgreSQL settings above. Just open the configuration file with one of the text editors. Here we use the vim text editor:
vim /opt/sonarqube/conf/sonar.propertiesAfter making the following changes to the configuration file, you can save it and exit it:
# DATABASE ... # User credentials. ... sonar.jdbc.username=sonaradmin sonar.jdbc.password=changeme ... #----- PostgreSQL 9.3 or greater # By default the schema named "public" is used. It can be overridden with the parameter "currentSchema". #sonar.jdbc.url=jdbc:postgresql://localhost/sonarqube?currentSchema=my_schema sonar.jdbc.url=jdbc:postgresql://localhost/sonarqubedbHow to Run and Use SonarQube on Ubuntu 20.04
In this section, we will teach you how to run and use SonarQube. You can start SonarQube in standalone mode using the following script bypassing the start option. as in the following script start, it is better to use the systemd service unit:
/opt/sonarqube/bin/linux-x86-64/sonar.shYou can create a SonarQube Systemd Service Unit file using the following commands:
Note: Replace the path, /opt/sonarqube/lib/sonar-application-8.7.0.41497.jar, in the following commands:
cat > /etc/systemd/system/sonarqube.service << 'EOL' [Unit] Description=SonarQube service After=syslog.target network.target [Service] Type=simple User=sonarqube Group=sonarqube PermissionsStartOnly=true ExecStart=/bin/nohup java -Xms32m -Xmx32m -Djava.net.preferIPv4Stack=true -jar /opt/sonarqube/lib/sonar-application-8.7.0.41497.jar StandardOutput=syslog LimitNOFILE=131072 LimitNPROC=8192 TimeoutStartSec=5 Restart=always SuccessExitStatus=143 [Install] WantedBy=multi-user.target EOLIn the next step you have to reload the systemd configurations using the following command:
systemctl daemon-reloadWe recommend that you use the following commands to set the maximum number of memory maps for elasticsearch in the next step:
echo 'vm.max_map_count=262144' >> /etc/sysctl.confsysctl -pIf you have followed all the steps in this tutorial correctly, you can now easily run and enable SonarQube using the following command:
systemctl enable --now sonarqubeYou now need to install one of the Apache or Nginx web servers to access the SonarQube web interface. Here we install the Nginx server using the following command:
apt install nginx -yYou can now enable the SonarQube Nginx site by running the following command:
ln -s /etc/nginx/sites-available/sonarqube /etc/nginx/sites-enabled/Finally, you need to restart Nginx using the following command:
systemctl restart nginxThe important thing to keep in mind is that open port 80/TCP on the firewall or port 443/TCP:
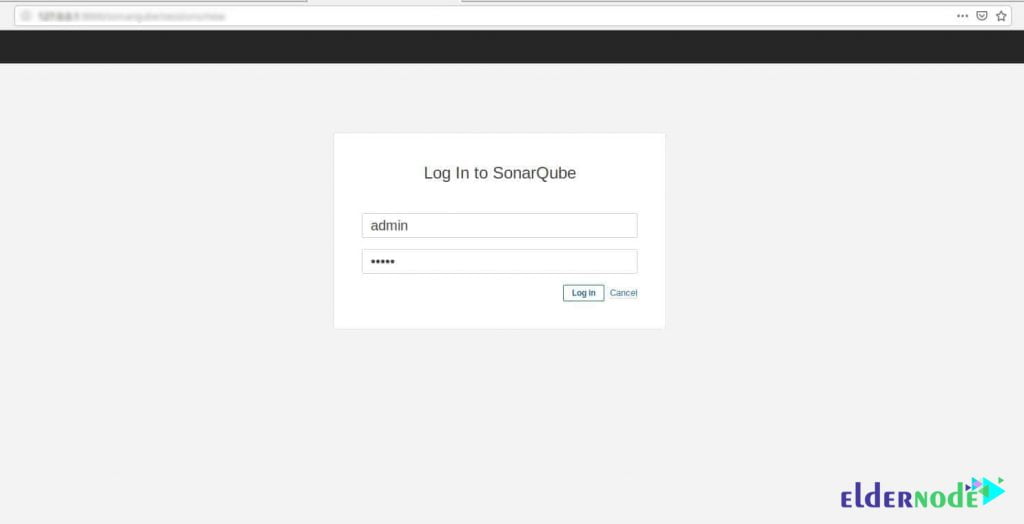
ufw allow "Nginx Full"You can access SonarQube using the following URL:
http://sonarqube-server-host-IP-or-hostname
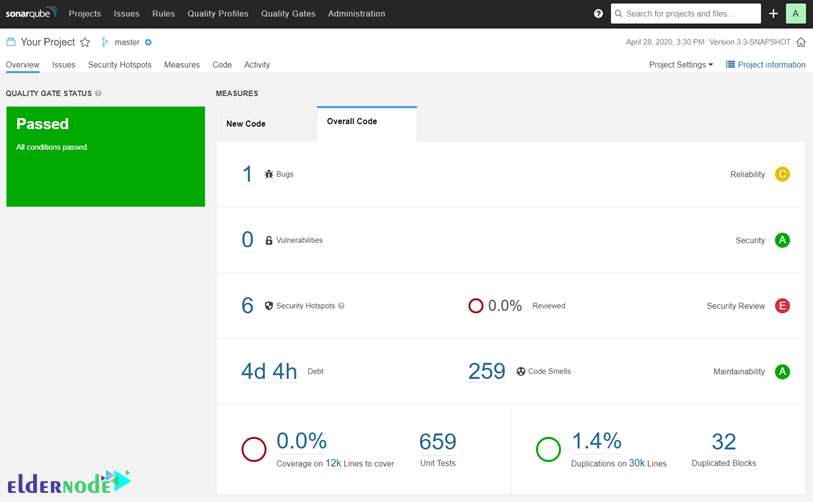
In the image below, you can see the SonarQube dashboard:
Conclusion
SonarQube Open-Source Software is a powerful tool for automatically scanning code, detecting bugs and programming errors and code vulnerabilities in more than 20 programming languages such as Java, C#, JavaScript, C/C++, and PHP. In this article, we tried to teach you to step by step how to Install and use SonarQube on Ubuntu 20.04.