
How to Set the RDP limit on Windows Server. Sometimes users who use the Windows Virtual Server may encounter the problem of limiting the number of remote desktops. In this article, we will teach you how to set the remote desktop limit in Windows Server.
Remote Desktop in Windows Server is set to 1 remote desktop at the same time by default. So you will not be able to connect multiple remotes to your server. In the rest of this tutorial, we will point out a way that you will be able to enable 999999 remote access permissions for your server.
Note: Remote Desktop will take up space of RAM and server processor per session. If you need a very large number of remote desktops, your server should have good RAM and processor.
Set the Remote Desktop limit on Windows Server
1. First, enter the desktop environment of your Windows server by the Administrator user.
2. Then open the Run window by pressing Winkey + R or right-clicking on the Start menu and selecting Run.
3. After the Run window opens, type gpedit.msc and click OK.

4. After a few seconds, your Windows Group Policy will open.
5. Click on the Administrative Templates menu to open it.
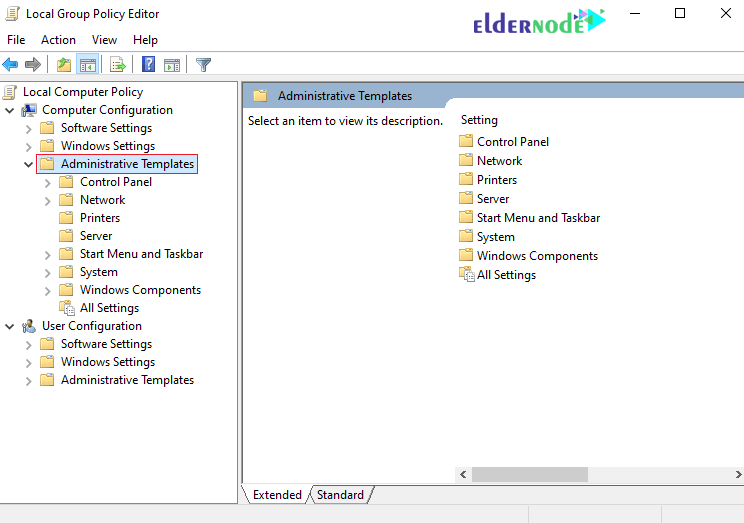
6. Now, go to the desired path in the following order:
Windows Components > Remote Desktop Services > Remote Desktop Session Host > Connections
7. In the following page, you have to make two settings.
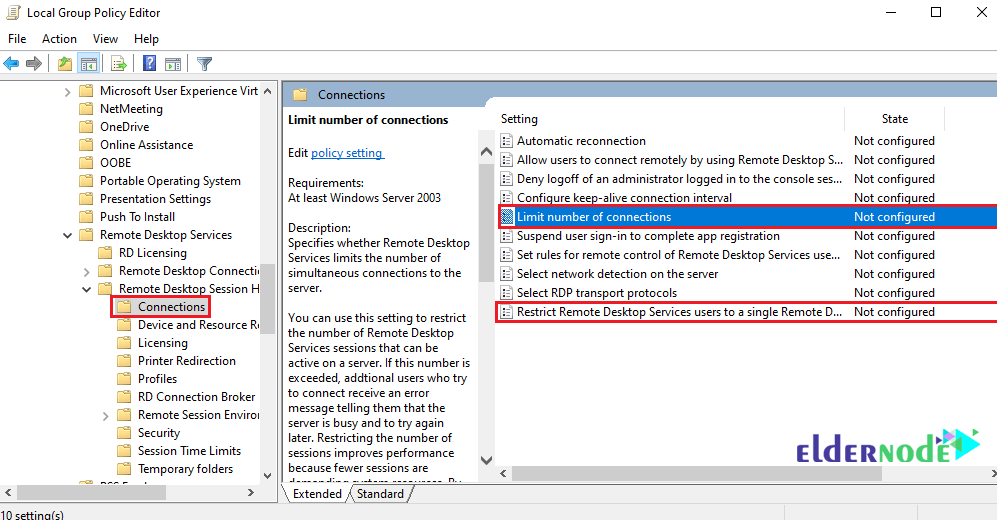
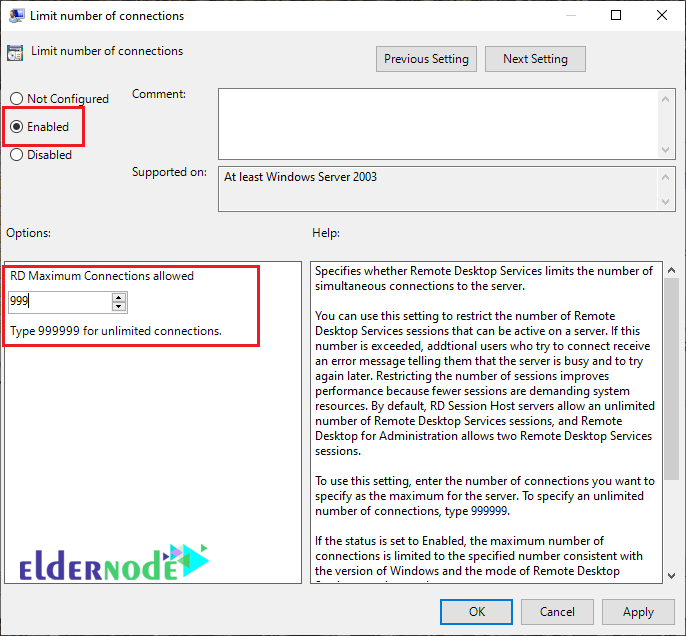
8. First, click on Limit number of connection to open it.
After selecting the Enabled option, enter the allowed number of connections in the specified field and click on Apply.
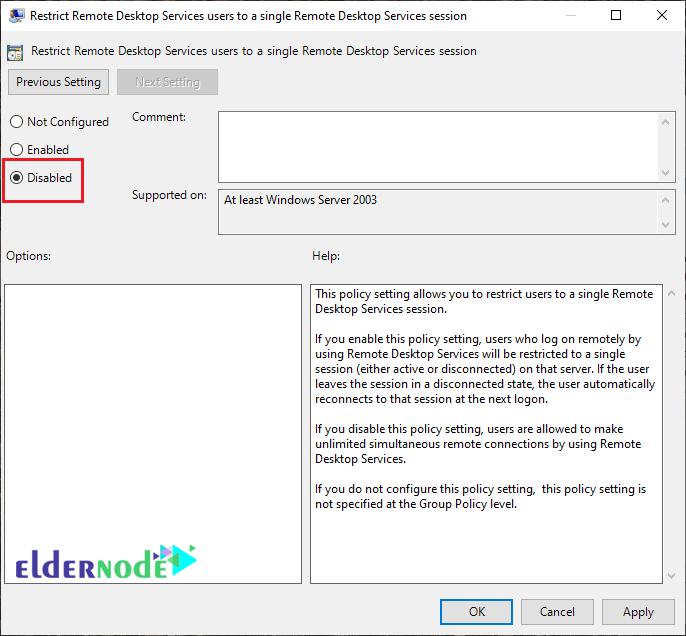
9. Select the Restrict Remote Desktop Services users to a single Remote Desktop Services session option to open it. Then set the setting to Disable and click Apply.
10. After setting these two items mentioned above, open a Command Prompt window and enter the following command to update Group Policy on your system:
gpupdate
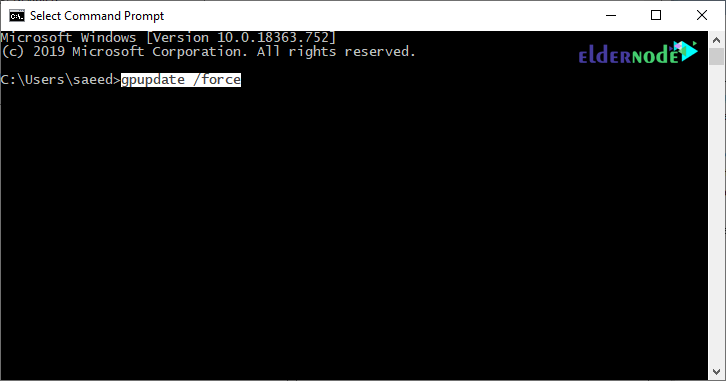
Now you can have multiple Remote Desktops at the same time.
Note: If you want to return the settings to their original state, disable them.
How to Set the RDP limit on Windows Server.
Goodluck.


