Although we use various applications to send and receive messages and they are always being upgraded to provide more access and facilities, Using Email will not be expired. Most of the official negotiations and authentication for our accounts are done with our Email. In this article, you can review the Tutorial Installing Email Server on Debian 10 with ISPconfig. This might be very helpful if you have recently prepared a Linux VPS or Debian server.
Table of Contents
How to Installing Email Server on Debian 10 with ISPconfig
To let this tutorial work better, please consider the below Prerequisites:
1- Prepare a host to install an OS and ISPConfig.
2- 2GB memory with 4GB swap.
3- The host should have an internet connection with port 25 open both ways.
4- Prepare the host a fixed IP-address.
5- The host should have a record for its IP-address.
6- Create an MX record to DNS name service for the host.
7- Get host reverse DNS name service PTR record that matches hosts FQDN.
8- A non-root user with sudo privileges.
To set up, follow our Initial Setup with Debian 10.
Install Email Server on Debian 10 with ISPconfig
According to its privacy, using Email is always routine and popular. Join us with this guide to install an Email server to be able to have full control over how your emails are accessed, managed, and stored. Before setting up the e-mail server on your host, you should check if the mail server has port 25 open both ongoing and outgoing. Also, make sure your host has that port open. While there are ways to get e-mail working even when port 25 is not open, you are recommended to install the e-mail server on that other host and forget the first altogether as far as e-mail goes.
DNS name service
What are DNS mane service entries? Mail server needs an FQDN and fully Qualified Domain name. In this example, we have considered eldernode.com for the domain name and to show that mail server hostname need not be mail, DNS1 is used as the hostname. You will see Dns1.eldernode.com in the following. This host is installed on a service provider’s system and offers to register domains, name service, and reverse name service.
While the IP address is 178.33.154.66, have a look at the list below:
1- Registered the domain eldernode.com
2- Added this IP-address as A record to DNS name service with name Dns1.eldernode.com
3- Added MX record for domain eldernode.com with value Dns1.eldernode.com
4- added reverse name service PTR record for that IP-address, pointing to Dns1.eldernode.com
Since the MX record is created for the e-mail domain, we create it for eldernode.com, and it points to Dns1.eldernode.com, the e-mail server that receives e-mail for that domain.
Reverse name service
In this example case, the reverse name service should return Dns1.eldernode.com. My service provider checked the existence of A record before adding the corresponding PTR web possible.
How to test name service
It seems a good idea to test the name service now because sending and receiving e-mails is not going to work if the name service is not set up correctly. You need to use the command nslookup instead of host if you are using Windows as your workstation instead of Linux or Unix.
host domain.com domain.com has address 188.165.143.5 domain.com mail is handled by 10 Dns1.domain.com.If you see, it shows that the domain name does have an IP-number associated. Also, there is an MX record that points to Dns1.domain.com. The ”mail is handled by” part comes from the MX record. When the e-mail is sent to @domain.com addresses to be received at Dns1.domain.com, The MX record is needed. Do not forget to check the name service for mail server FQDN is an A record and points to the correct IP-number.
dig Dns1.domain.com |grep "ANSWER SECTION" --after-context=3 ;; ANSWER SECTION: Dns1.domain.com. 3600 IN A 178.33.154.66 ;; Query time: 56 msecAnd then, check the reverse name service resolves the IP-number back to the FQDN of the mail server.
host 178.33.154.66 66.154.33.178.in-addr.arpa domain name pointer Dns1.domain.com.Note: Remember that you can use web pages to test name services instead of using host and dig commands. Two of them re intoDNS and MXToolbox.
How to install OS on Linux Debian
Do not forget to replace the IP-number, hostname, and domain name with your values.
root@dns1:/tmp# cat /etc/debian_version 10.0Also, you need to verify the correctness of setting up the hostname to help the mail system configuration ISPconfig works well.
root@dns1:~# hostname dns1 root@dns1:~# hostname -fDns1.domain.com root@dns1:~#How to install ISPConfig
in this step, you can install Apache web server, OpenSSH-server on the host, and set up root login using an ssh key. So, you can ssh the host as root directly.
root@dns1:/tmp# free -hIn case you prefer to use Emacs style editors to nano, you need to install jed. You had /etc/host and /etc/hostname correctly set up after installing the OS. So, verify the correctness of them following the Perfect Server Guide. If you do not pay attention to the hostname and FQDN to not face any problem in the mail server working at the end.
root@dns1:/tmp# hostname dns1 root@dns1:/tmp# hostname -f Dns1.domain.comIn this article, we followed the Perfect Server Guide. In this way, you can cut and paste the commands from the guide to the command-line. We do not install Mailman and use it on this host. So, we omitted the installation of BIND DNS Server, Webalizer, and AWStats. We have installed Roundcube Webmail because this host becomes an e-mail server. Run the command below to generate the 32 characters long blowfish secret.
/usr/bin/apg -m 32 -x 32How to use system
In this step, you will see how to create an E-mail domain and mailbox.
You need to log in as admin to ISPConfig first and then add a new client, new domain, and fill in the form, and also add a new Mailbox.
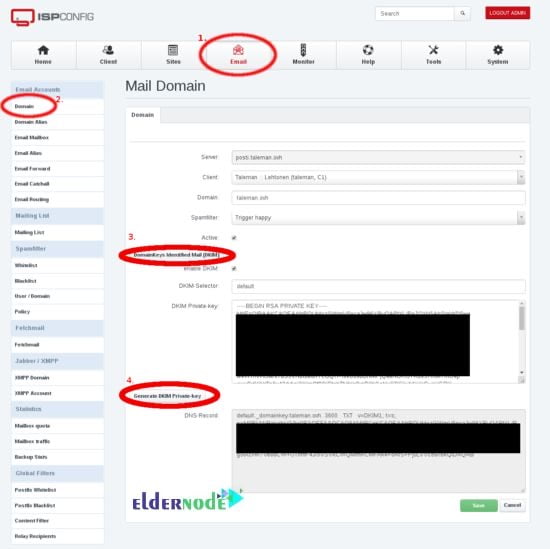
After all, create the DKIM keys and record by clicking the buttons in the order numbered in the image.
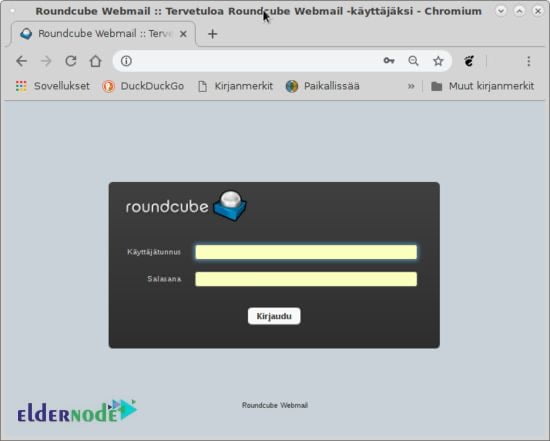
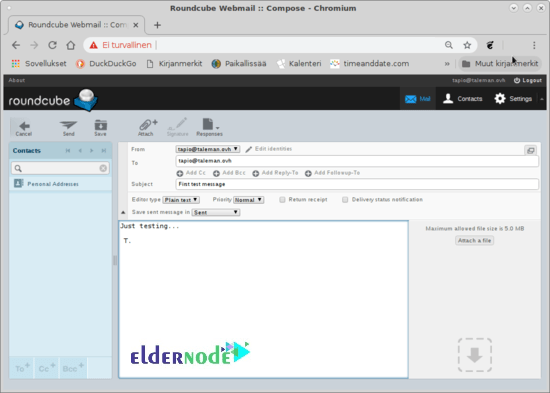
now, wait for about 2 minutes or until the red ball with the number in the upper part of the ISPConfig Panel goes away. As the first test, you need to log in to Roundcube Webmail with the above-created mailbox and send an e-mail to that same address. ISPConfig sends a Welcome message to every created mailbox, so there should be one message there already. To write a short test message, use the compose button.
***
Then, you will receive the message in the mailbox. Now you can test sending an e-mail to some other mailbox you have. Also, check if the mail arrives there or not. Next, start testing if you can send from somewhere else to the above-created mailbox.
Please be aware that if you enable greylisting for the mailbox, the e-mail sent from outside your server does not arrive immediately to the mailbox. I mean you will see in mail log entries of the attempted delivery right away so you see that mail can reach your server. The greylisting entry in file /var/log/mail.log looks something like this:
Jan 02 20:23:12 dns1 postfix/smtpd[16911]: NOQUEUE: reject: RCPT from mta-out1.inet.fi[62.71.2.194]: 450 4.2.0 <[email protected]>: Recipient address rejected: Greylisted, from=<****@*****.***> to=<[email protected]> proto=ESMTP helo=<******.****.***>Also, it is possible to monitor the mail log in a terminal window as below example:
tail -f /var/log/mail.logIn case the Greylisting is your target, use the following commands:
tail -f /var/log/mail.log | grep GreylistedOR
grep Greylisted /var/log/mail.logWhat the Greylisting does is to delay the first e-mail from the same senders to the same recipient. When the first email receives, the following e-mails arrive without an extra delay. If you see all is ok on the first try, you can ensure the working of ISPConfig Perfect Server Guide.
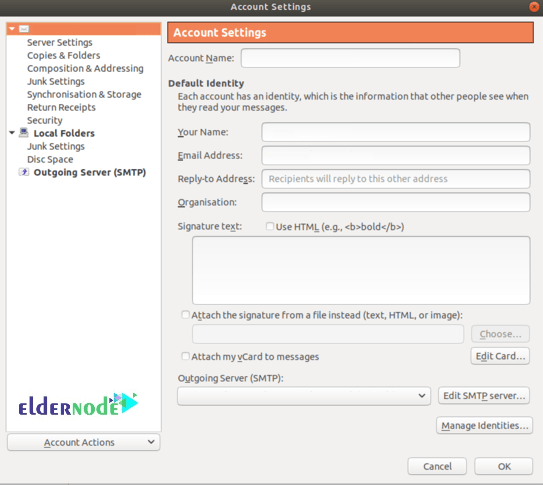
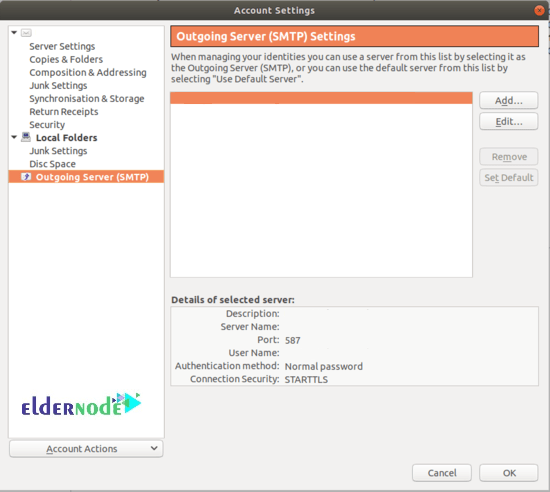
How to connect e-mail client
Thunderbird could be used as an example mail client. Other mail applications work in a similar way. ISPConfig makes the account name be the e-mail address.
***
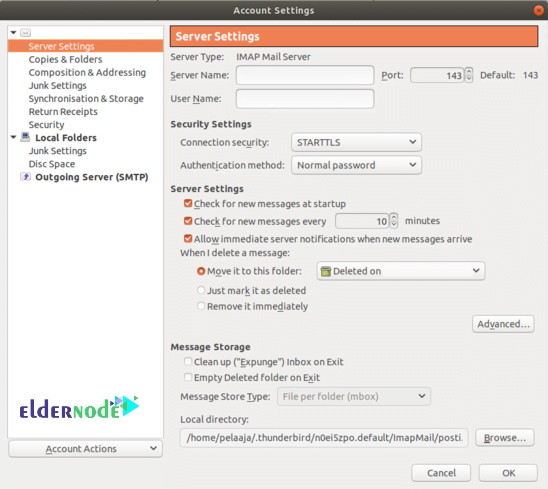
STARTTLS means the connection starts in an unprotected situation and then switches to encrypted if both parties support the encryption. As you know, SSL/TSL means the session is encrypted from the beginning. Of course the SSL.TSL is more secure. so try to prepare that if your client asks.
How to use SPF
Sender Permitted From allows you to create the record yourself. You just need to check if your name servo=ice provider can generate an SPF record, or run the following command to use Internet Search Engines.
SPF wizardYou can find a website to create an SPF name service record. Then, cut and paste the record to your name service. And add a TXT record, or maybe on some DNS system add an SFP record.
Here is an example to check how the SPF looks like in the name server:
dig domain.com -t TXT | grep spf domain.com. 3000 IN TXT "v=spf1 mx ~all"Or even:
dig +short domain.com TXT "v=spf1 mx ~all" "1|www.domain.com"How to use DKIM
ISPConfig created the DomainKeys Identified Mail for you when creating an e-mail domain. Cut and paste the DNS-Record that is the public key to your name service as the TXT record. Your name service provider may offer a tool to make creating DKIM records easier. Keep the DKIM Private-key secret. To check how the DKIM looks like in the name service:
host -t txt default._domainkey.domain.com. default._domainkey.domain.com descriptive text "v=DKIM1;h=sha256;s=*;p=MIIB(I cut long string shorter)0rp" "sTGLXyK(cut shorter)B;t=s;"While the ISPConfig creates the DKIM keys, the private key is copied to the right place in amavis settings.
Also, you can use the mail-tester.com website to check SPF and DKIM are working. the website would give you an e-mail address and you send an e-mail there from your server. Then, you must wait a minute and check it again.
How to create certificates
Since the ISPConfig can create self-signed certificates, these are created during ISPConfig installation unless you chose not to create them. It is a good idea to create proper certificates that browser, e-mail programs, and other e-mail servers trust whether if you create those self-signed certificates or not.
Note that, the created websites show Debian default web pages until you created the LE certificate for the website. Also, IsPconfig Panel was wonky and it had the self-signed certificate. Now, this new certificate or no certificate at all. Enter https address of the server in the browser, when certificates are set up. Click on the icon at the left of the browser address bar with another mouse button that shows information about the certificate. Finally, go to the ISPConfig Panel System tab, Interface Main Config, and Mail tab. There set:
Use SSL/TLS encrypted connection for SMTPto SSL.
You are able to test certificate with tools on the website, use Interner Search Engines with
ssl testingThose tools test the website when testing certificates the e-mail server has, search with
ssl testing mail serverISPConfig Roundcube Plugins
To be allowed for changing email password in Roundcube, you need to use plugins which are useful. Also, other settings could also be modified in Roundcube. These plugins are useful for webmail users. You can install ISPCongif Roundcube Plugins, it works in Debian 10 except that now ispconfig3_account/conf/config.inc.php has one more line:
config['soap_validate_cert'] = true;Since the certificate is set up and tested in the previous chapter of this tutorial this can stay at value true. Som if the host does not have a valid certificate, change this setting to false.
You may face some items in the Account Section pooped up error message.
An error occurred. Soap Error: The login is not allowed from <host ip-number>You can solve this by clicking on the Remote Access and writing Dns1.domaincom for that rcmail-remote user you have created following the tutorial. it is needed both for single-server setup and ISPConfig multiserver setup with a separate e-mail server.
Further usage
You can create another e-mail domain. You must create the MX record for that domain, and point it to your e-mail server. Also, you can use the same e-mail server for all e-mail domains you create. It would be quite a waste to create a separate e-mail server for each e-mail domain.
Troubleshooting
If you have followed this guide carefully, you should receive no problem and set up an e-mail server successfully. However, if you need to check the DNS name service, check them DNS with the websites below:
- intodns.com
- dnschecker.com
- mxtoolbox.com
In case you do not receive or sent e-mails, it is postfix that does those functions and they are logged to /var/log.mail.log. So, do
tail -f /var/log/mail.log | grep postfix to see what happens when mail is being received or sent.However, if you still face some problems in connecting with an e-mail client such as Thunderbird, use the command below:
tail -f /var/log/mail.log | grep dovecotIf a particular e-mail is problematic, you can use the ID of that e-mail to find the email log entries. For instant:
Jan 2 21:45:03 dns1 postfix/smtps/smtpd[10260]: A9F2880C76: client=dsl-tkubng21-58c1ce-191.dhcp.inet.fi[99.99.99.99], sasl_method=PLAIN, [email protected]The ID for that e-mail is A9F2880C76. Using the following command, find log entries for that e-mail.
grep A9F2880C76 /var/log/mail.log
Command mailq shows e-mails that are in the postfix deferred queue (mails that re not delivered yet). It is normal to have some recent entries there, e-mails can not always be delivered immediately. You can also see the content of those emails using the Queue ID,:
postcat /var/spool/postfix/deferred/A/A9F2880C76
Conclusion
In this article, we presented the Tutorial Installing Email Server on Debian 10 with ISPconfig. You can send emails with a client or you can use email software such as mail transfer agents or mail delivery agents. In case you are interested in reading more, follow the article on How to find the SMTP address.