How to Install SSH Client on Windows using PowerShell. There are several ways to connect to Linux, including putty and Kitty. But you can connect to your Windows server and use it without using additional software from Windows.
In this article, You can install the OpenSSH Server and client by running the following commands in Powershell. You can Choose your perfect Windows VPS Server Packages from eldernode.
Install SSH Client on Windows using PowerShell
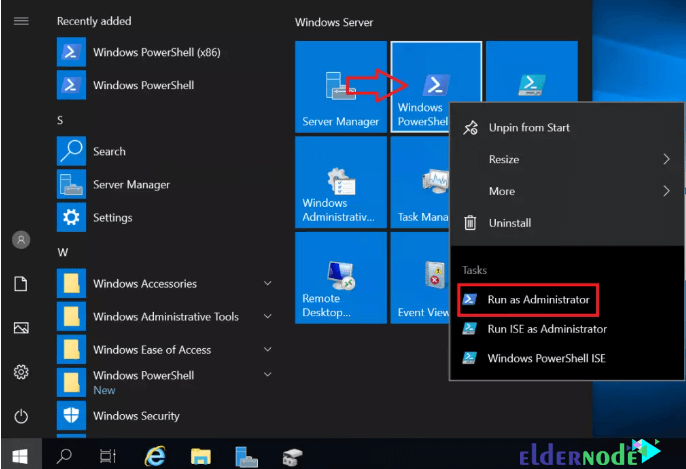
1. Open your Powershell with Administrator access to do this.
2. Run the following commands in PowerShell.
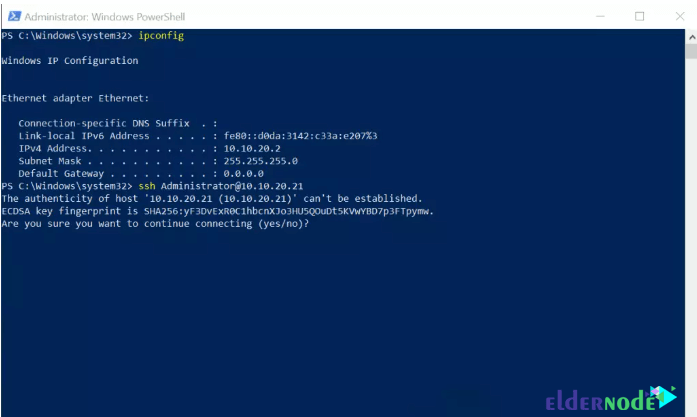
## Install OpenSSH.Server Add-WindowsCapability -Online -Name OpenSSH.Server~~~~0.0.1.0 ## Install OpenSSH.Client Add-WindowsCapability -Online -Name OpenSSH.Client~~~~0.0.1.0 ## Change server start-up to Automatic Set-Service -Name sshd -StartupType ‘Automatic’ ## Start the Server and change start-up to Automatic Start-Service sshd 3. Use the SSH Client to connect to SSH Server as shown below. Now we are on a server with IP 10.10.20.2 and we are sshing to 10.10.20.21.
4. Click Yes and then enter your account password.
5. We have successfully installed the OpenSSH Server and Client using PowerShell.
Dear user, we hope you would enjoy this tutorial, you can ask questions about this training in the comments section, or to solve other problems in the field of Eldernode training, refer to the Ask page section and raise your problem in it as soon as possible. Make time for other users and experts to answer your questions.
Enable RDP on Windows Server 2019.
Goodluck.

