Learn how To Install Burp Suite On Debian 10 Linux step by step. Let’s know about the most popular tool that is used for penetration testing of web applications. To install this tool on your server, first, you need to choose and buy your Linux VPS package. Burp helps you to have all in one set of tools and its capabilities can be enhanced by installing add-ons that are called BApps. Since it is very easy to use Burp, you can use it as a suitable choice over free alternatives.
Table of Contents
Burp Suite System Requirements
At least 8 GB of memory (You may need more memory than this if you are performing large amounts of work)
2- Two CPU cores
Why Burp Suite
Here are the 8 best and most useful features in the Burp suite tools as titles:
1- Using the target site map functionality
2- Crawling a web application with Burp Spider
3- Launching an automatic scan with Burp Scanner
4- Automating customized attacks with Burp Intruder
5- Manipulating and iterating web requests with Burp Repeater
6- Analysing application data randomness with Burp Sequencer
7- Decoding and encoding data with Burp Decoder
8- Comparing site maps
Tutorial How To Install Burp Suite On Debian 10
Join us with this guide to learn how to install Burp suite on Debian 10. But first, have a look at the following initial installation and configuration steps that helps you get ready to get BurpSuite up and running:
1- Downloading And Installing Burp Suite
You may install Burp Suite Professional or Burp Suite Community Edition. Anyone has a different process. When you verified the recent ways, you can run the installer and select your desired options within the installation wizard.
2- Launch Burp Suite And Select The Startup Options
Click on the installed application shortcut to launch Burp Suite. On Linux, the shortcut is located on the path that you selected during installation. If you launch Burp Suite from the command line, you would have more control over its execution.
How To Setup Wizard
Once you Launch Burp, the startup wizard will opens and guides you through the following steps:
1- Activate your Burp license
2- Selecting a project
3- Selecting a configuration
4- Checking your display setting
Note: Some of which only need to be performed the first time you launch a new installation of Burp.
3- Start Testing Using Burp’s Preconfigured Browser
1- Use Burp’s embedded browser, which requires no additional configuration.
2- Use an external browser of your choice. For various reasons, you might not want to use Burp’s embedded browser.
4- Configure Burp Suite Against Non-Production Systems (Optional)
Please be aware that you should completely be familiar with Burp Suite functionality and settings as it may result in unexpected effects in some applications. So, before that, you should only use Burp Suite against non-production systems.
Tutorial How To Install BurpSuite On Debian
Continue with us to see how to install BurpSuite on Debian and how to set up your browser.
Note: Fresh installs require to verify that Java 8 is installed. To do this, follow the below commands:
java -versionIf it is not then install it:
sudo apt-get install openjdk-8-jre
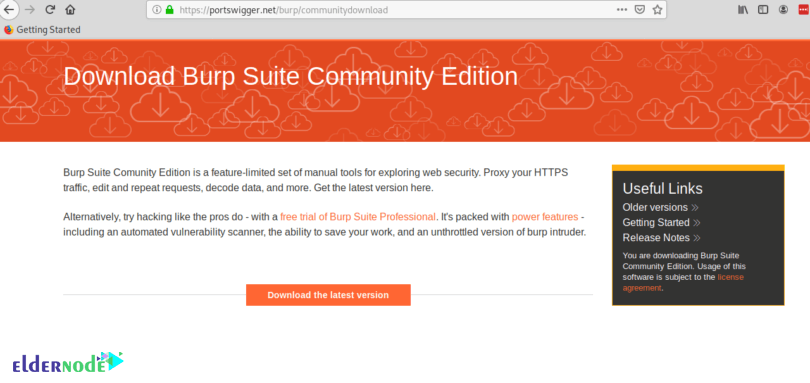
And to continue, click on the “Download the latest version” orange button.
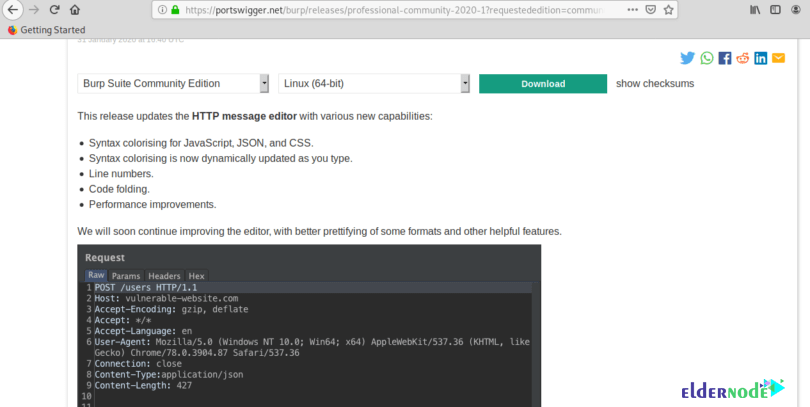
Now, click on the green Download button.
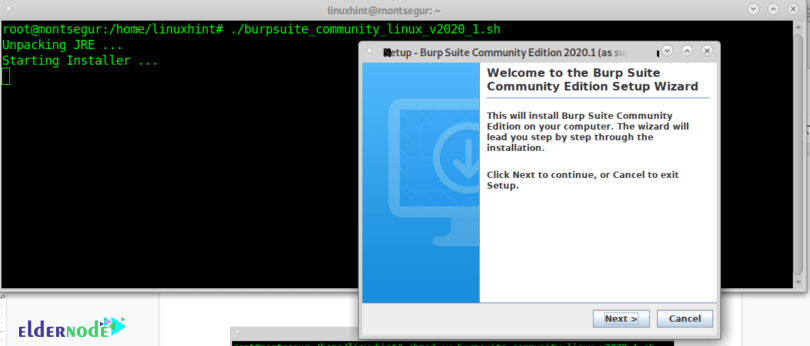
Then, you should save the .sh script and give it execution permissions using the below command:
chmod +x <package.sh>./burpsuite_community_linux_v2020_1.shAs you see, a GUI installer will prompt, so press Next to continue.
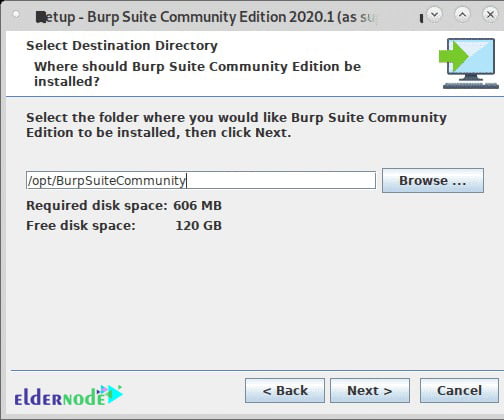
Leave the default installation directory (/opt/BurpSuiteCommunity) unless you need a different location and press Next to continue.
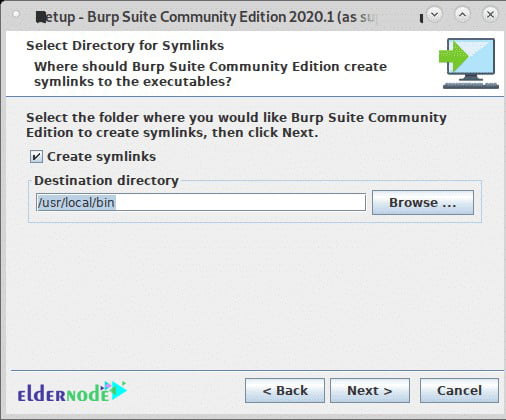
Seek “Create Symlink” selected and leave the default directory and press Next.
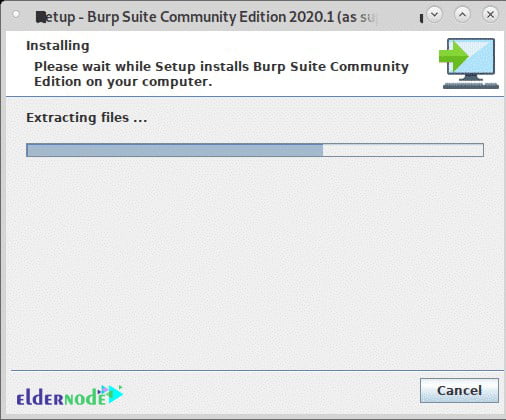
In this way, the installation process will start as it is shown below:
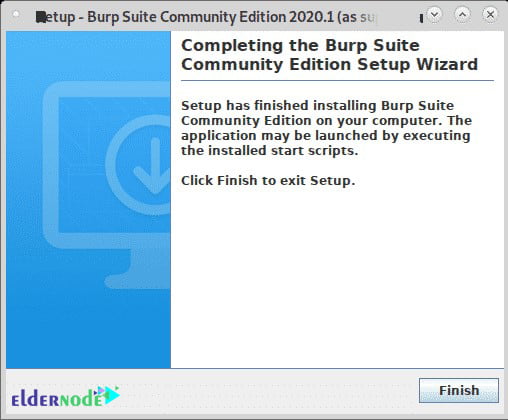
Click on Finish, when the process is ended.
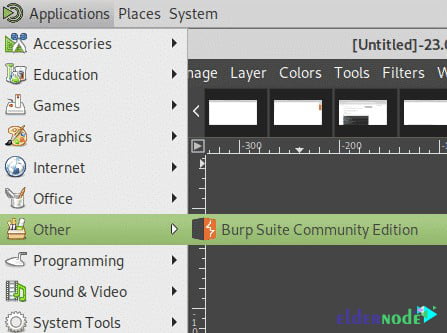
Then, select BurpSuite from your X-Window manager apps menu. ( It may exist on the category “Other”)
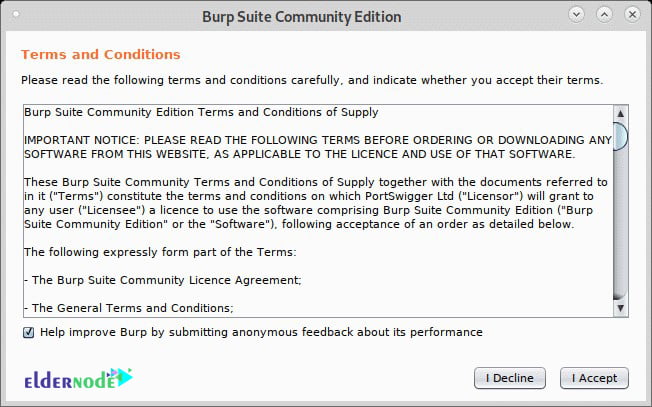
And it is time to decide if you wish to share your BurpSuite experience or not, click I Decline, or I Accept to continue.
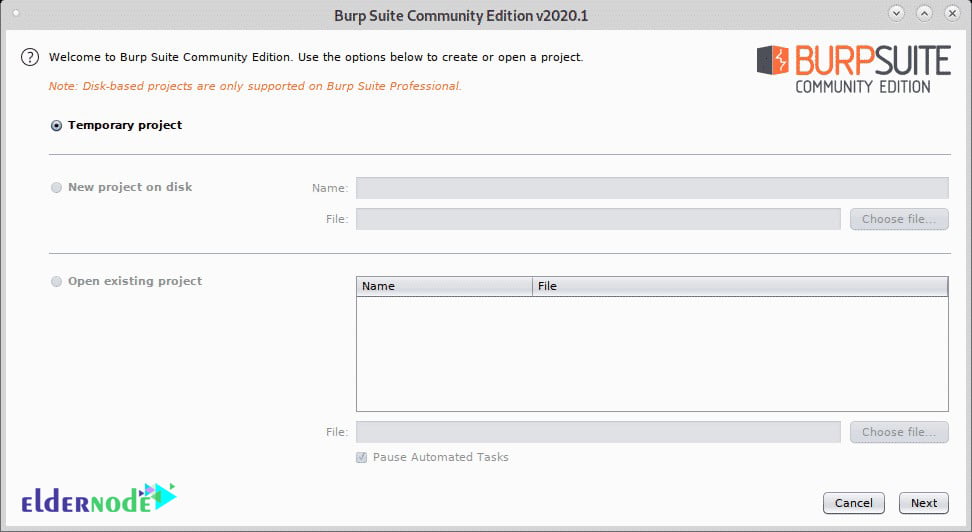
Then, leave the Temporary Project and press Next.
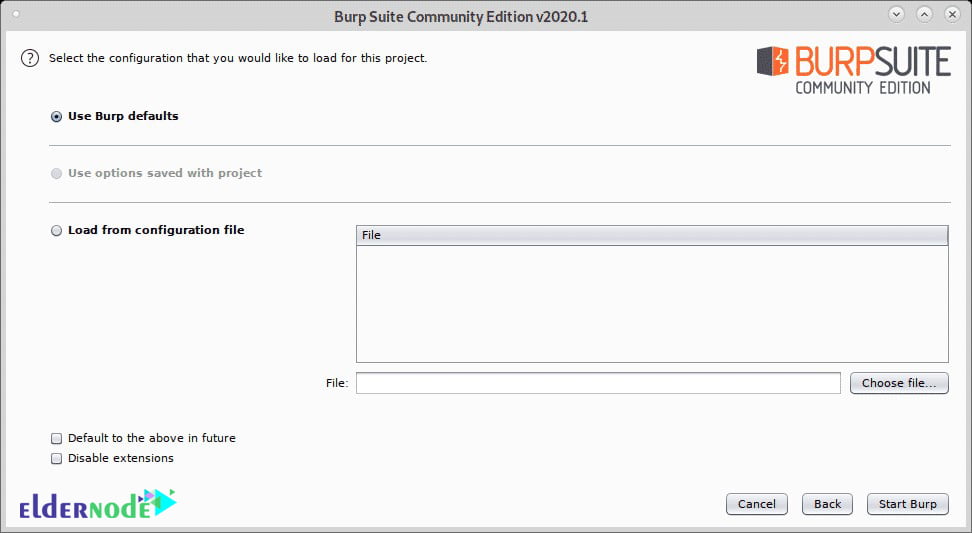
And to launch the program, you should leave use Burp defaults and press Start Burp.
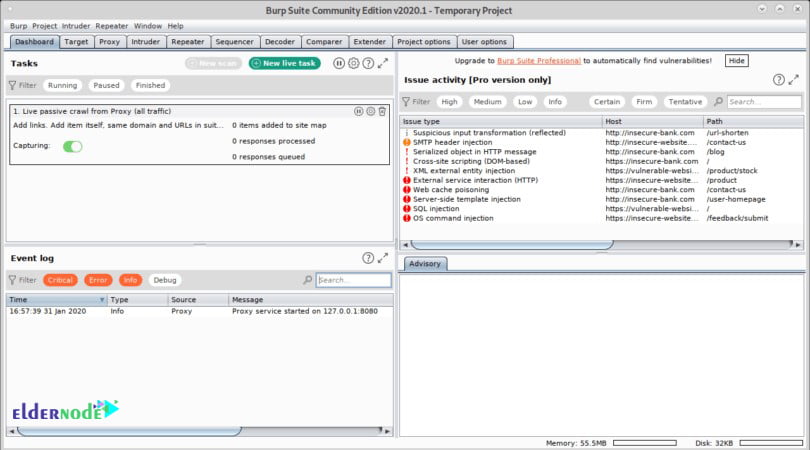
And this is the BurpSuite main screen:
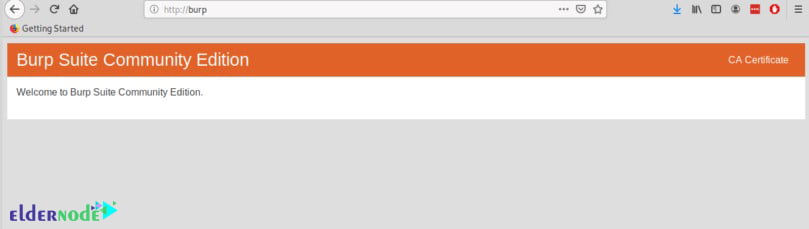
Once the below screen displayed, on the upper right corner click on CA Certificate after opening the firefox.
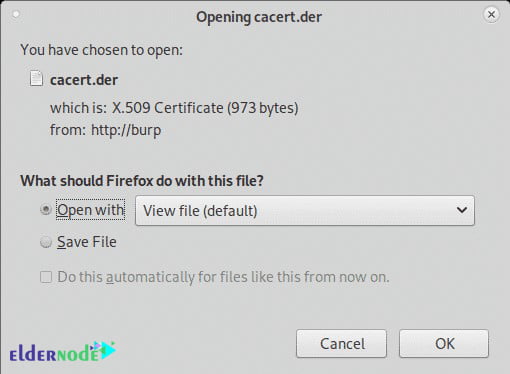
Now, you can download and save the certificate.
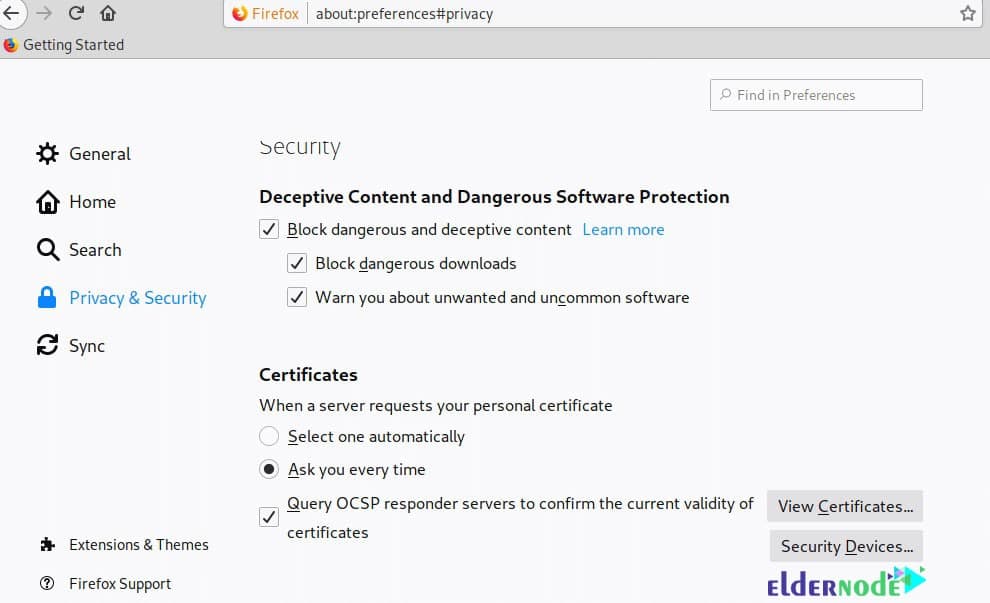
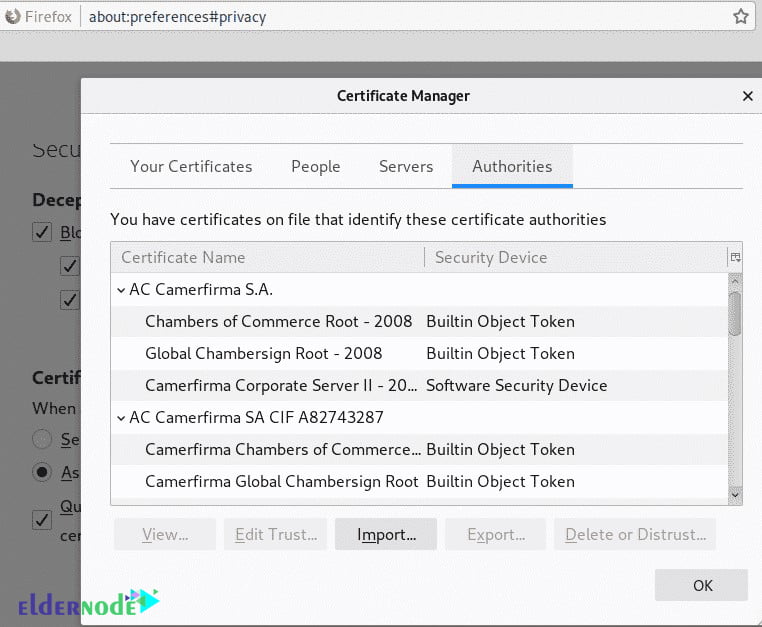
On the Firefox menu click on Preferences, then click on Privacy and Security and scroll down until you find the Certificates section, then click on View Certificates as shown below:
And then, you need to click on import.
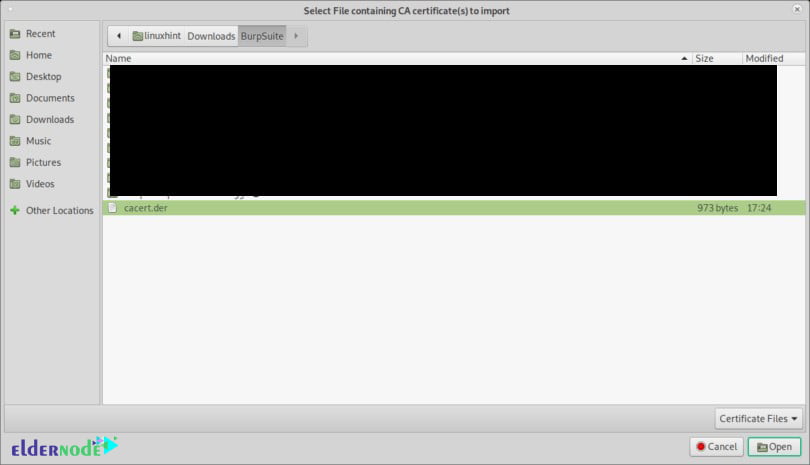
Select the certificate you got previously and press Open:
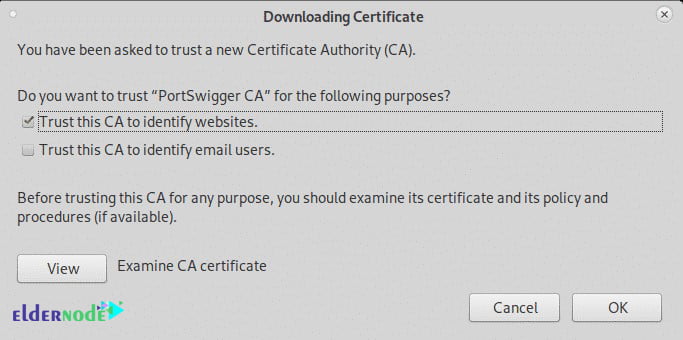
Click on “Trust this CA to identify websites.” and press OK.
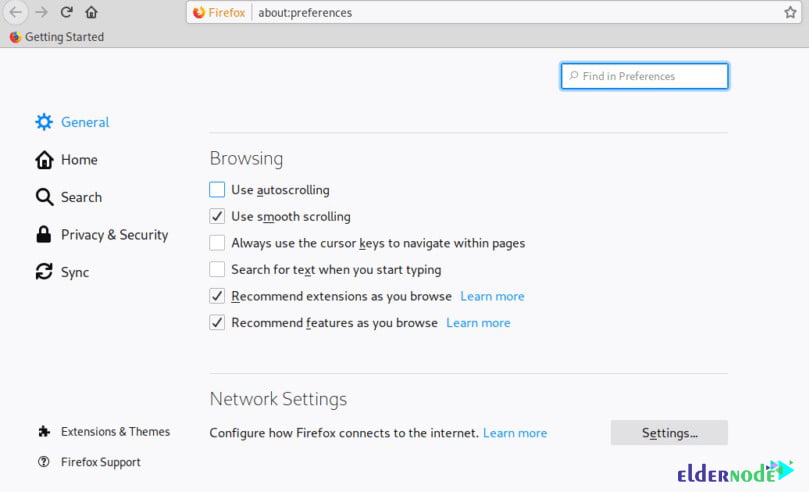
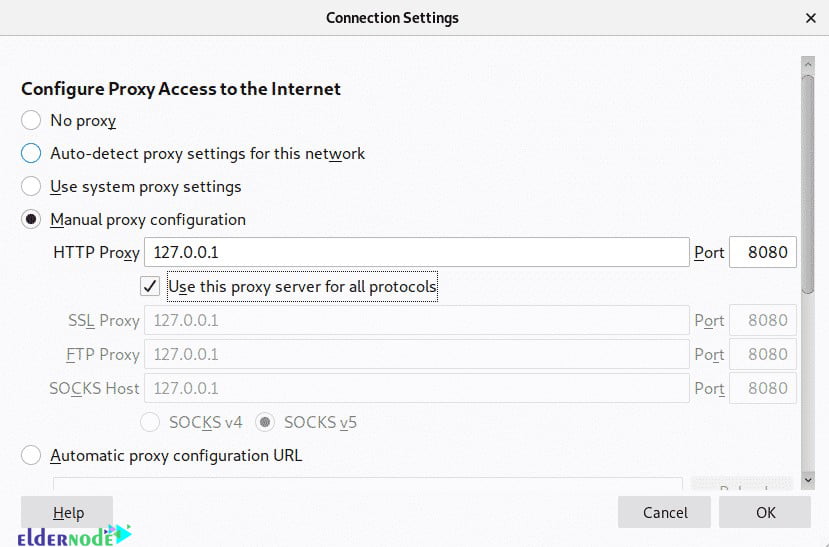
Still, on the Firefox Preferences menu click on General in the menu located on the left side and scroll down until reaching Network Settings, then click on Settings.
Now, select Manual Proxy Configuration and in the HTTP Proxy field set the IP 127.0.0.1, checkmark the “Use this proxy server for all protocols”, then click OK.
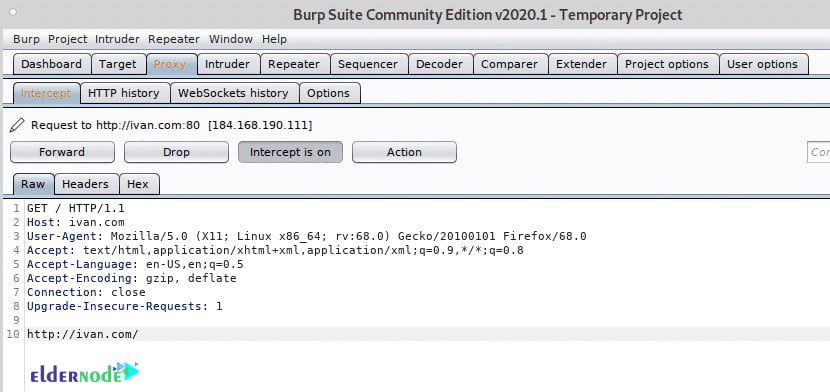
Now BurpSuite is ready to show how it can intercept traffic through it when defined as a proxy. On BurpSuite click on the Proxy tab and then on the Intercept sub-tab making sure intercept is on and visit any website from your firefox browser.
The request between the browser and the visited website will go through Burpsuite, allowing you to modify the packets as in a Man in the Middle attack.
Also, you can use DNS and the invisible Proxy feature to capture traffic from a system we can’t configure the proxy on.
On Debian and based Linux systems, to begin run Arpspoof you can install with through apt install dsniff. After installing with arpspoof, to capture packets from the target to the router on the console run:
sudo arpspoof -i <Interface-Device> -t <Target-IP> <Router-IP>Then to capture packets from the router to the target run in a second terminal:
sudo arpspoof -i <Interface-Device> -t <Router-IP> <Target-IP>Then enable IP forwarding to prevent blocking the victim:
echo 1 > /proc/sys/net/ipv4/ip_forwardNext, redirect all traffic to port 80 and 443 to your device using iptables by running the commands below:
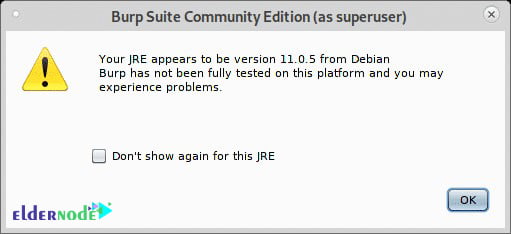
sudo iptables -t nat -A PREROUTING -p tcp --dport 80 -j DNAT --to-destination 192.168.43.38 # sudo iptables -t nat -A PREROUTING -p tcp --dport 443 -j DNAT --to-destination 192.168.43.38please be aware that you should run BurpSuite as root, otherwise some steps like enabling new proxies on specific ports won’t work:
java -jar -Xmx4g /opt/BurpSuiteCommunity/burpsuite_community.jar Once you view the below warning, press OK to continue.
Then click on Proxy>Options after opening BurpSuite and click on the Add button.
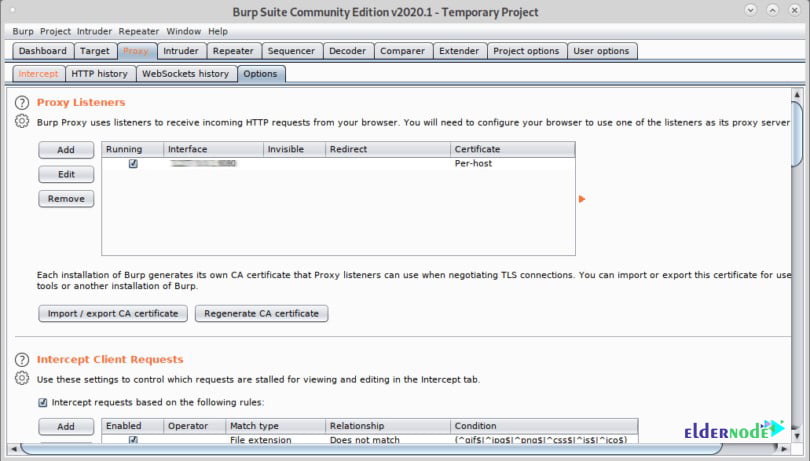
Now, you need to select 80 and on Specific address select your Local network IP address:
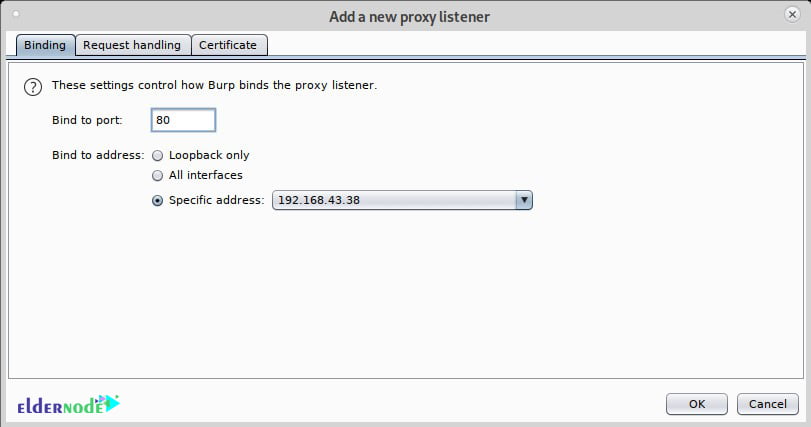
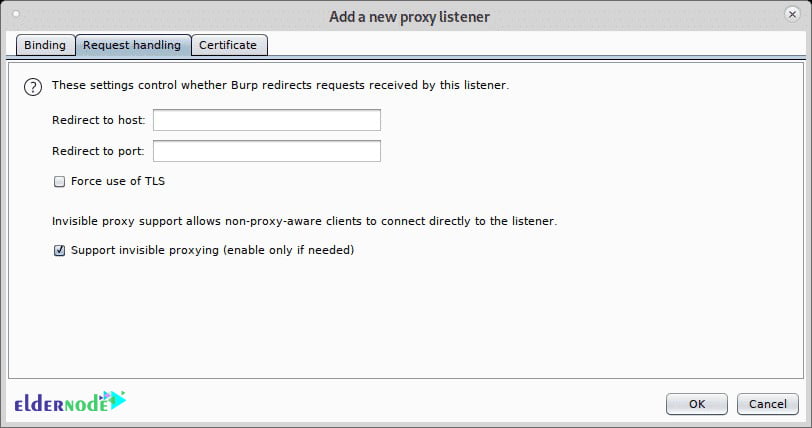
Click on the Request handling tab, checkmark Support Invisible proxying (enable only if needed) and press OK.
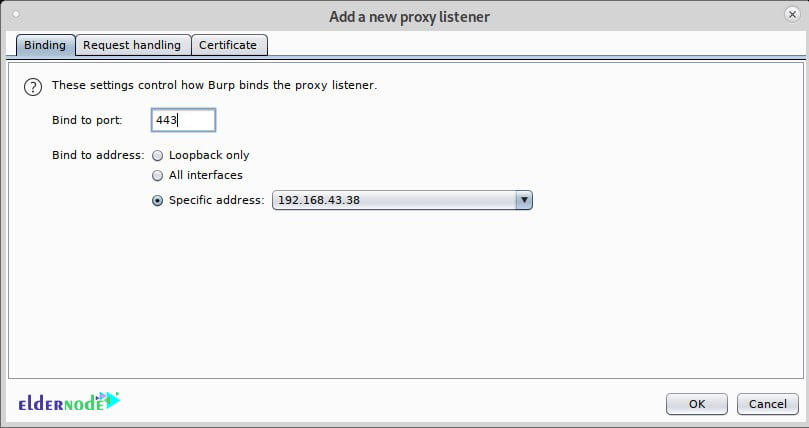
Repeat the steps above now with port 443, click on Add.
And then set the port 443 and again select your local network IP address.
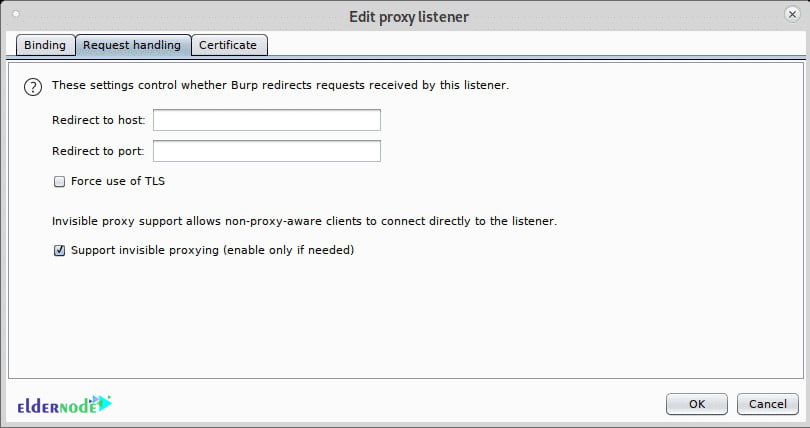
In this step, click on Request Handling, checkmark support for invisible proxying, and press OK.
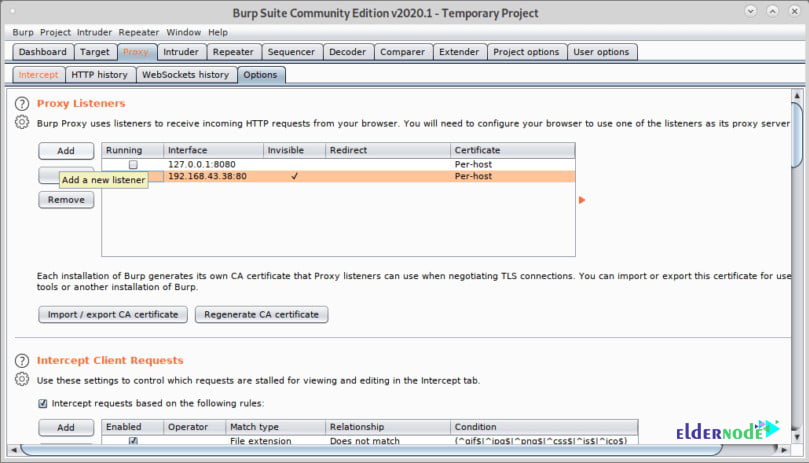
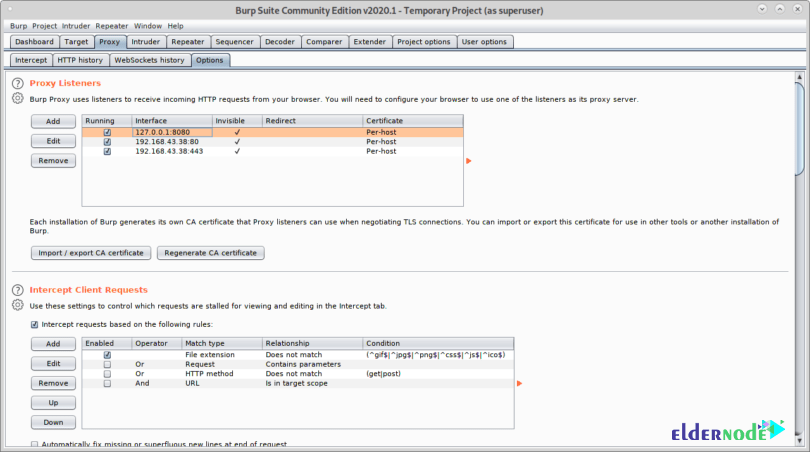
Next, you need to mark all proxies as running and as invisible.
And finally, from the target device visit a website, the Intercept tab will show the capture:
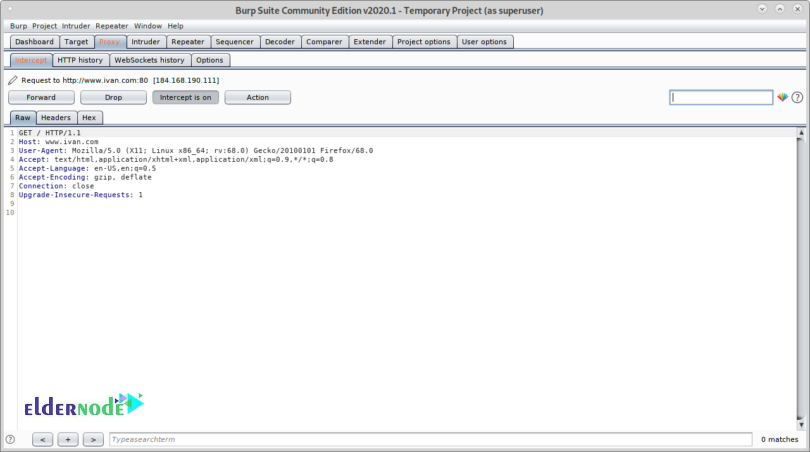
By this, you can manage to capture packets without previous proxy configuration on the target’s browser.
Conclusion (Burp Suite On Debian)
In this article, you learned How To Install Burp Suite On Debian 10. While working with Burp Suite, you would realize that there is a wide variety of things that you can do with it. In case you are interested to learn more about Debian, find our article on How To Install And Use ZSH On Debian 10 [Z shell].


Hi- Is not burp free?
It is, you can download Burp Suite Community Edition and its essential manual tools for free but users need to pay for some of the features. And if you need it you can upgrade from Community to Professional
Thank you. How can I remove it? The installation was uncompleted and I faced problems.
There is some recommended quick ways to uninstall Burp Suite that we name them in the below:
1- via Programs and Features
2- with its uninstaller.exe
3- via System Restore
4- with Antivirus
5- Reinstall Burp Suite 1.3.03 to uninstall
6- Use the Uninstall Command Displayed in the Registry
7- with Third-party Uninstaller
Good tutorial. Could you say how to import CA certificates from Burp? thanks
First you need to create the certificate, then you can import the CA certificate in the Burp Suite. You can go to the: 1- Tab Proxy, 2- options, 3- Click the button “Import/Export CA Certificate’’ and finally choose the ‘’Certificate and private key from PKCS#12 key store’’
Why it doesn’t run?!
First, please check if you have the latest version of Java and start Burp from the command line. Attention to what the error messages and outputs are saying and use them to find the solution.
Should I unpack the Burp JAR file?
It is not necessary to unzip or unpack JAR file, if your computer does not associate the .JAR file extension with some archiving software.