In the world of communications, teamwork is a vital factor to invest in time and the future. Behind your systems, you need a workspace-centered communication tool to touch a real experience. In this article, you will learn How To Install Microsoft Teams On RDP Admin. you deserve a suitable collaboration tool and also a perfect Remote Desktop Protocol. So, buy your considered RDP Admin and stay with us to learn how to install Microsoft Teams on it.
Table of Contents
Tutorial Install Microsoft Teams On RDP Admin
No matter you are handling a small or large business, you need a suitable communication platform to get in touch with your colleagues. Here is how you can install Microsoft Teams to use its features and develop your commercial activities. Due to Microsoft Teams rules, you cannot access it via a personal Officer 365 license, and you should prepare an Ofiice 365 account with the considered license of this company. So, as an IT administrator, you should observe to be included in one of the license plans such as the below ones to be allowed to use Microsoft Teamwork at your home/school/workplace.
1- Business Essentials
2- Business Premium
3- Enterprise E1, E3, or E5
4- Enterprise E4
Note: If you are a user, you need to ask your IT administrator to sign the company up for the right kind of Office 365 license.
Microsoft Teams Installation On RDP
Let’s go through the steps of this guide to finish the installation path.
Install Microsoft Teams On RDP Admin
1- As always, you are recommended to open the main page of the company to proceed with a safe and legal download.
2- Click the Downloads Teams button by scrolling down as shown below:
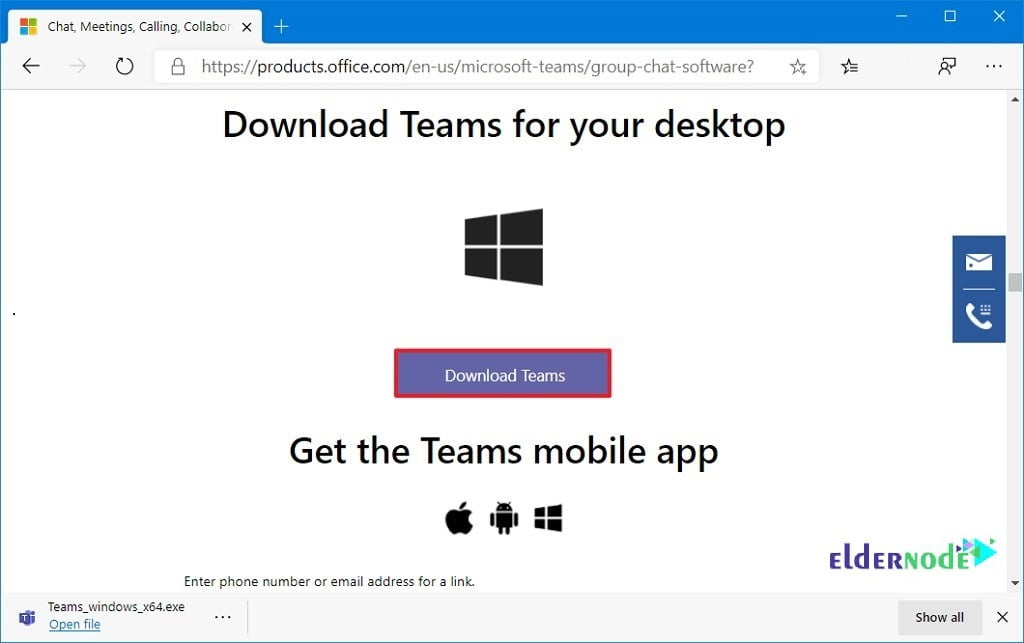
3- Depending on your considerations you would be able to choose 32- bit or 64-bit architecture. once you saved the installer on your device, you can begin the installation by double-clicking the Team-Windows-X** file.
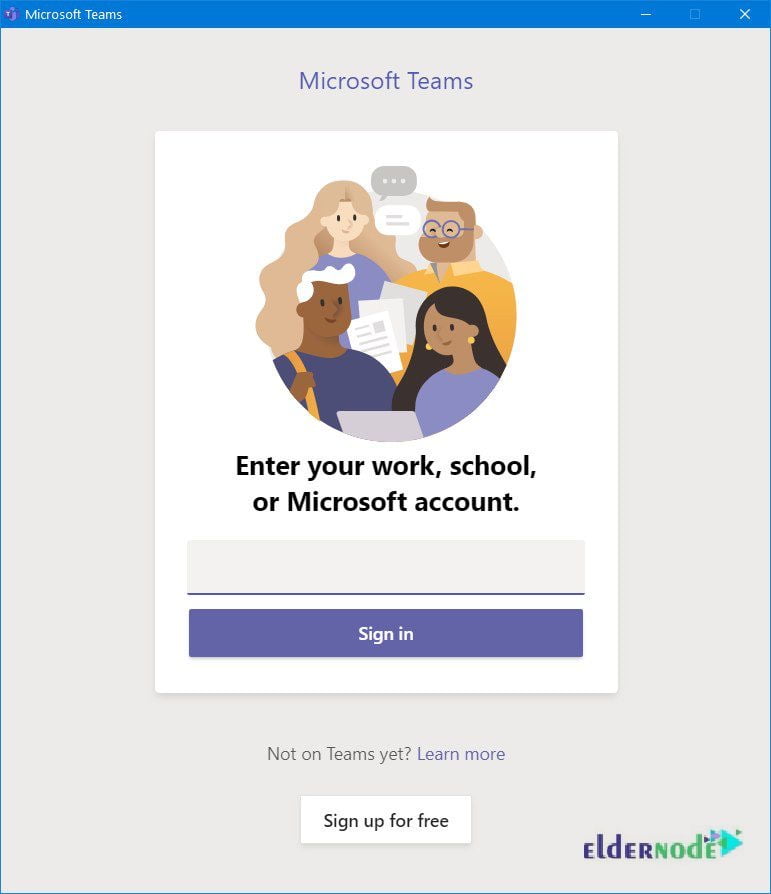
4- The first action after installing the software is to sign in with your email address. Due to your needs, you may decide to sign with your company’s email address or the account associated with Microsoft Teams which was explained in the preface.
5- Now, you can click the Sign up for Teams button.
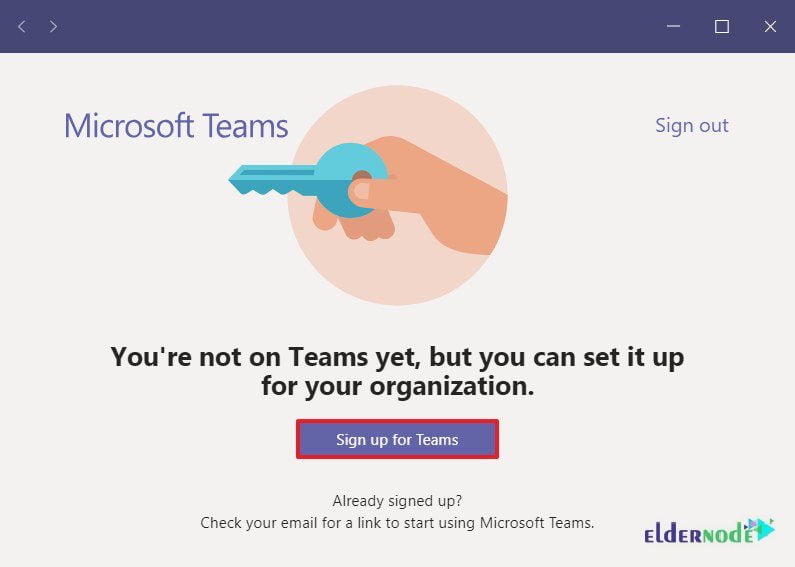
By reaching here, you have installed Microsoft Teams on your system. In the following, you can set up the account.
How To Uninstall Microsoft Teams on RDP Admin
In case you decided to remove the Microsoft Teams from your Windows RDP, you can do this permanently by following the below path:
Open settings > Click on Apps > Click on Apps & Features > Select the Microsoft Teams item (Located under the “Apps & features” section) > Click on Uninstall button as shown below:
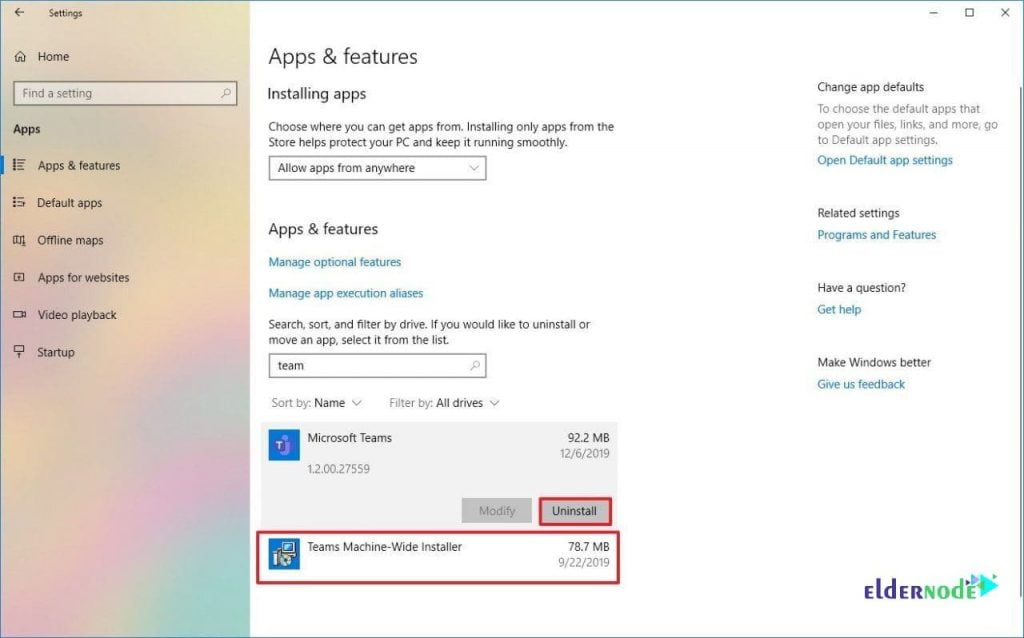
Then, continue as below steps:
Again click the Uninstall button > Select the Teams Machine-Wide Installer item (Located under the “Apps & features” section) > Click the Uninstall button twice.
From now on, Microsoft Teams will not be reinstalled automatically on your device and to use it again you should pass the steps of installation one more time.
That’s that! Other users are waiting to interact with you remotely! Drink your coffee and enjoy your business success.
Conclusion
In this article, you have learned How To Install Microsoft Teams On RDP Admin. Once you install this chat-based platform, you are ready to start chat, audio chats, and video meetings, office, and other capabilities and enjoy its satisfying numerous interfaces to other applications.
