PgAdmin is web-based software for managing PostgreSQL databases. PgAdmin is written in Python and jQuery with Bootstrap that can be installed on various platforms such as Linux, Mac OS, and Windows. In this article, we are going to teach you to step by step How to Install and Use PgAdmin on Rocky Linux. You can visit the packages available in Eldernode if you wish to purchase a Linux VPS server.
Table of Contents
How to Install and Use PgAdmin on Rocky Linux
Introduction to PgAdmin and its Features
pgAdmin provides a web environment from the PostgreSQL database. You can easily solve all your needs, including building and setting up databases, tables, users, etc., and you do not need to enter other commands.
pgAdmin is much like PhpMyAdmin using for MySQL. Users who have worked with PhpMyAdmin know that having a graphical web environment for managing and controlling a database can be very useful.
Features and possibilities of PgAdmin include the following:
– Installation on a variety of Windows, Linux, and Mac OS platforms
– Compatible with different versions of PostgreSQL
– Monitoring dashboard
– Ability to backup and restore databases
– Supports most encodings
– Powerful query tool with the possibility of color syntaxes
In the continuation of this article, join us to show you how to Install PgAdmin on Rocky Linux.
Prerequisites to Install PgAdmin on Rocky Linux
In this section, we want to show you the prerequisites to install and Use PgAdmin on Rocky Linux. To do this, just follow the steps below.
In the first step, you need to install the yum-utils package using the following command:
sudo dnf install yum-utilsThe important thing is that PostgreSQL must install on your system. You should now disable common PostgreSQL repositories:
sudo yum-config-manager --disable pgdg-commonFinally, you need to install the PgAdmin4 repository using the following command:
sudo rpm -i https://ftp.postgresql.org/pub/pgadmin/pgadmin4/yum/pgadmin4-redhat-repo-2-1.noarch.rpmHow to Install PgAdmin on Rocky Linux
After reviewing and preparing the necessary prerequisites in the previous section, we now want to explain how to install PgAdmin. In the first step, you must update the system by running the following command:
sudo dnf updateThen you need to install pgAdmin 4 using the following command:
sudo dnf install pgadmin4If you are asked to install all packages and dependencies, you will need to press “y“.
Configuring PgAdmin on Rocky Linux
Before configuring PgAdmin, you need to setup the Apache Web Server service using the following command:
sudo systemctl enable httpdNow you need to start the Apache service using the following command:
sudo systemctl start httpdYou can use the following command to verify that Apache is running:
sudo systemctl status httpdIn the next step, you need to configure PgAdmin4 by running the PgAdmin4 startup script:
sudo /usr/pgadmin4/bin/setup-web.shIn this step, you have to enter your email address and password and then press “y“.
Now you need to configure your SELinux using the following command:
sudo setenforce permissiveTo enable HTTP traffic, you need to configure the firewall by running the following command:
sudo firewall-cmd --permanent --add-service=httpFinally, use the following command to reload to apply the changes:
sudo firewall-cmd --reloadHow to Use PgAdmin on Rocky Linux
In this section, we want to show you How to Use PgAdmin on Rocky Linux. You will first need to enter the following URL in your browser to log in:
http://server-ip/pgadmin4As shown below, you must enter the email address and password you previously specified and click “Login“:

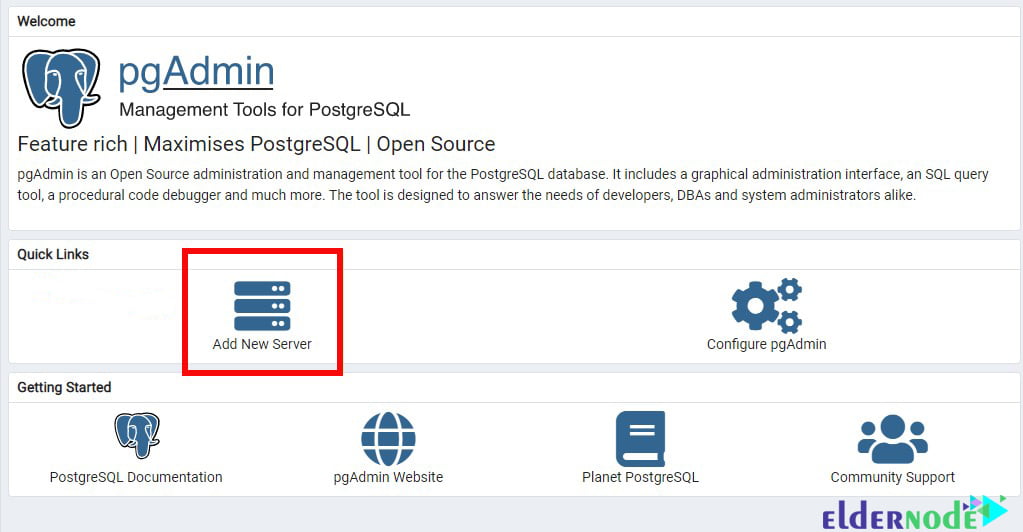
Now you can see the PgAdmin 4 dashboard:

Now you need to click “Add New Server” to connect to the new database server:
In the “General” section, you can specify a name for your database server:
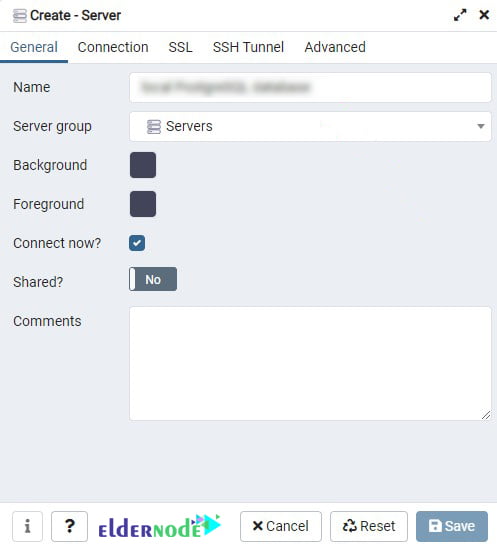
In the next step, you need to click on the “Connection” tab and fill in the required fields. Then click “Save“:

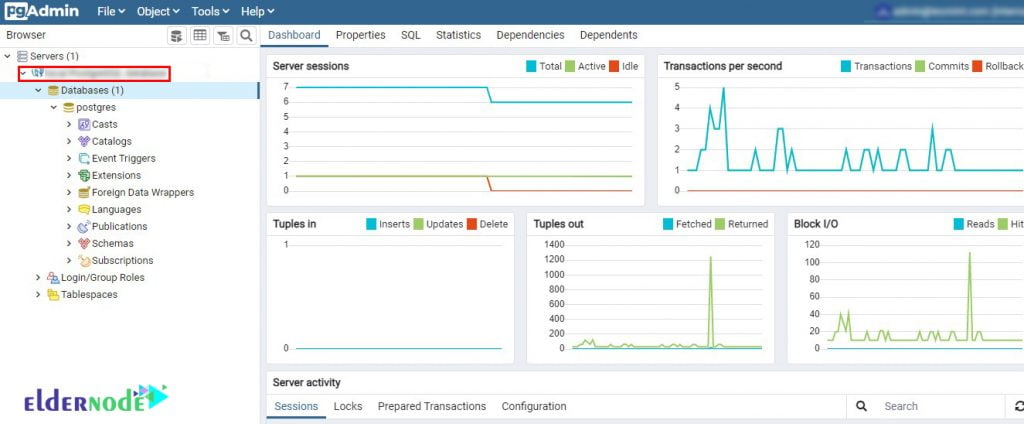
Finally, you can click on the database server in the left sidebar to see more details.
Conclusion
PgAdmin comes with a rich set of features for database management and easy-to-use connectivity, a built-in SQL editor for importing SQL scripts and, if necessary, executing SQL statements in the command line shell of the database. In this article, we tried to teach you How to Install and Use PgAdmin on Rocky Linux.


![How To Install Hadoop On Ubuntu 20.04 LTS [Focal Fossa]](https://blog.eldernode.com/wp-content/uploads/2020/11/How-To-Install-Hadoop-On-Ubuntu-20.04-LTS-Focal-Fossa-300x164.png)