In this guide, as implied by its title, includes an instruction on how i will become adept in installation and configuration of FTP Server using PowerShell. This is helpful while transferring files within a network and also remotely.
We will show you how to configure the site name, port, and root folders. Then we will explain how to create FTP users, how to authenticate users, and how to configure the SSL policy and NTFS permissions.
Table of Contents
How to Install the FTP feature
Before you can begin configuring your FTP server, you first need to install the required Windows VPS Server features:
1) FTP
2) Web Server (IIS)
3) Management Tools to administer it with PowerShell
# Install the Windows feature for FTP Install-WindowsFeature Web-FTP-Server -IncludeAllSubFeature Install-WindowsFeature Web-Server -IncludeAllSubFeature IncludeManagementTools
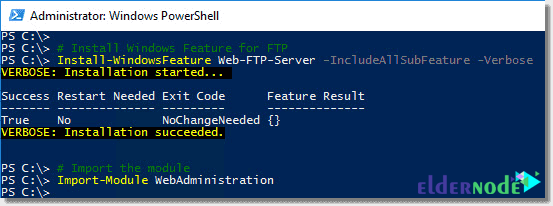
After the installation completes, import the WebAdministration module.
This will map an Internet Information Services (IIS) drive (IIS:\) through which we will configure our FTP site later in this article.
# Import the module Import-Module WebAdministrationHow to Configuring the site name, port, and root folder
You can create a new FTP site using the New-WebFtpSite cmdlet by providing an FTP site name, root folder for your FTP site, and port number.
Note: We are choosing port 21, which is the default FTP port, but you can also specify any custom port for your FTP site.
# Create the FTP site $FTPSiteName = 'Default FTP Site' $FTPRootDir = 'D:\FTPRoot' $FTPPort = 21 New-WebFtpSite -Name $FTPSiteName -Port $FTPPort -PhysicalPath $FTPRootDir
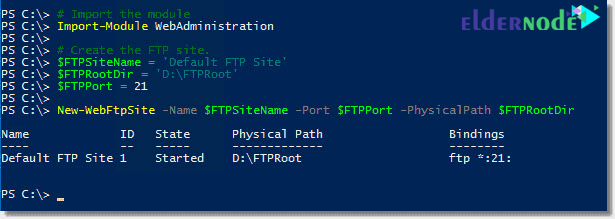
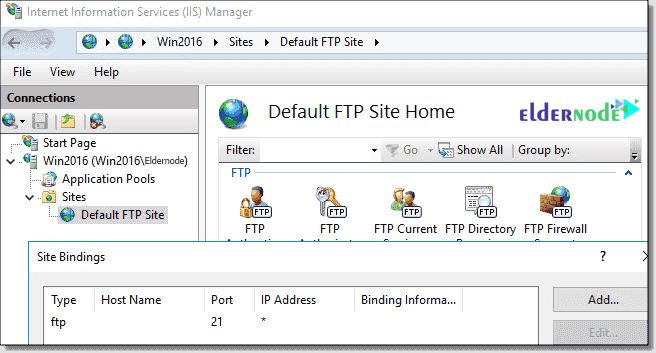
After running the cmdlet, you’ll see the FTP site and bindings in IIS Manager.
How to Create FTP users
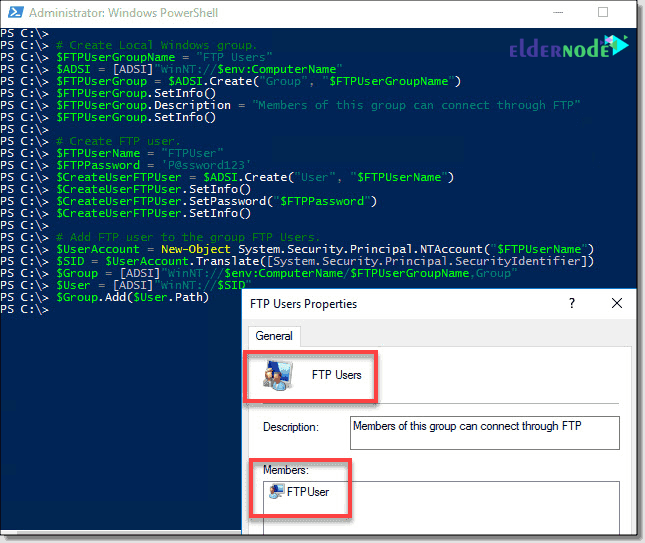
After creating a new FTP site, you can create a Windows user or group through which you can control the access to the FTP server.
First, create the Windows local group:
# Create the local Windows group $FTPUserGroupName = "FTP Users" $ADSI = [ADSI]"WinNT://$env:ComputerName" $FTPUserGroup = $ADSI.Create("Group", "$FTPUserGroupName") $FTPUserGroup.SetInfo() $FTPUserGroup.Description = "Members of this group can connect through FTP" $FTPUserGroup.SetInfo()Then we will create a new local FTP user with a username and password:
# Create an FTP user $FTPUserName = "FTPUser" $FTPPassword = 'P@ssword123' $CreateUserFTPUser = $ADSI.Create("User", "$FTPUserName") $CreateUserFTPUser.SetInfo() $CreateUserFTPUser.SetPassword("$FTPPassword") $CreateUserFTPUser.SetInfo()Add the FTP user to the Windows group:
# Add an FTP user to the group FTP Users $UserAccount = New-Object System.Security.Principal.NTAccount("$FTPUserName") $SID = $UserAccount.Translate([System.Security.Principal.SecurityIdentifier]) $Group = [ADSI]"WinNT://$env:ComputerName/$FTPUserGroupName,Group" $User = [ADSI]"WinNT://$SID" $Group.Add($User.Path)
How to Authenticate FTP users to access FTP server data
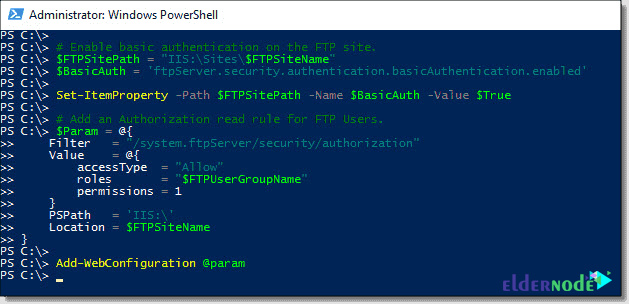
Now enable basic authentication on the FTP site and authorize the Windows group that contains the FTP user so it can access the FTP site.
# Enable basic authentication on the FTP site $FTPSitePath = "IIS:\Sites\$FTPSiteName" $BasicAuth = 'ftpServer.security.authentication.basicAuthentication.enabled' Set-ItemProperty -Path $FTPSitePath -Name $BasicAuth -Value $True # Add an authorization read rule for FTP Users. $Param = @{ Filter = "/system.ftpServer/security/authorization" Value = @{ accessType = "Allow" roles = "$FTPUserGroupName" permissions = 1 } PSPath = 'IIS:\' Location = $FTPSiteName } Add-WebConfiguration @param
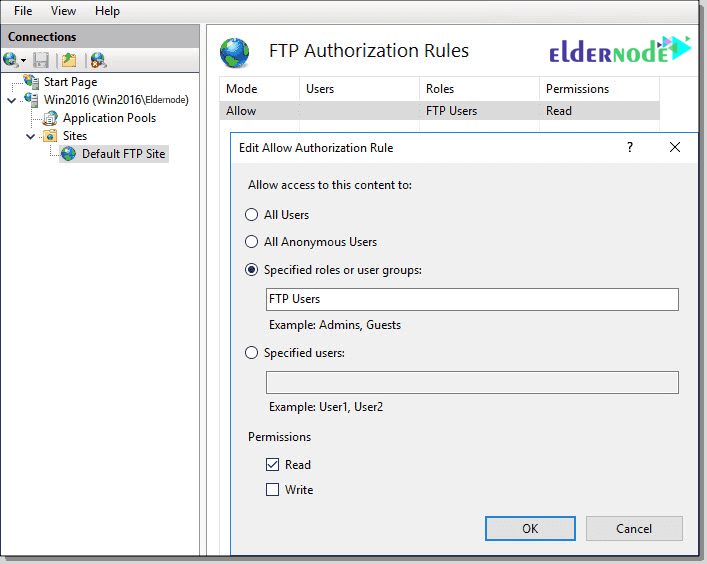
You can also check these settings under IIS Manager >> FTP Site >> FTP Authorization Rules.
SSL policy and NTFS permissions to the FTP root folder
Change the SSL policy from Require SSL to Allow SSL connections.
$SSLPolicy = @( 'ftpServer.security.ssl.controlChannelPolicy', 'ftpServer.security.ssl.dataChannelPolicy' ) Set-ItemProperty -Path $FTPSitePath -Name $SSLPolicy[0] -Value $false Set-ItemProperty -Path $FTPSitePath -Name $SSLPolicy[1] -Value $false

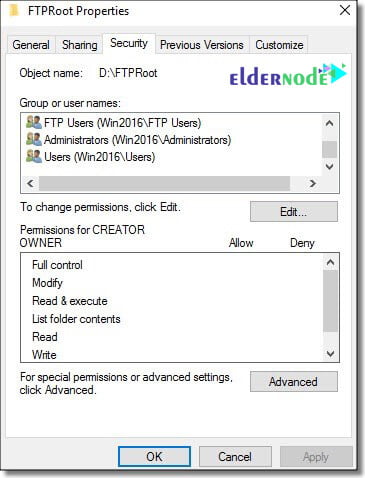
The commands below set the NTFS permissions on the FTPRoot folder to allow the FTP user group to access the files:
$UserAccount = New-Object System.Security.Principal.NTAccount("$FTPUserGroupName") $AccessRule = [System.Security.AccessControl.FileSystemAccessRule]::new($UserAccount, 'ReadAndExecute', 'ContainerInherit,ObjectInherit', 'None', 'Allow' ) $ACL = Get-Acl -Path $FTPRootDir $ACL.SetAccessRule($AccessRule) $ACL | Set-Acl -Path $FTPRootDir
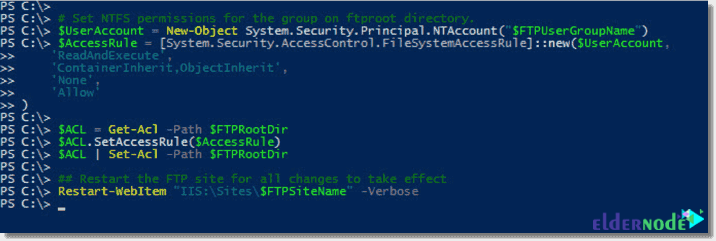
You can verify this from the FTP root folder properties under the Security tab.
Restart the FTP site for all changes to take effect
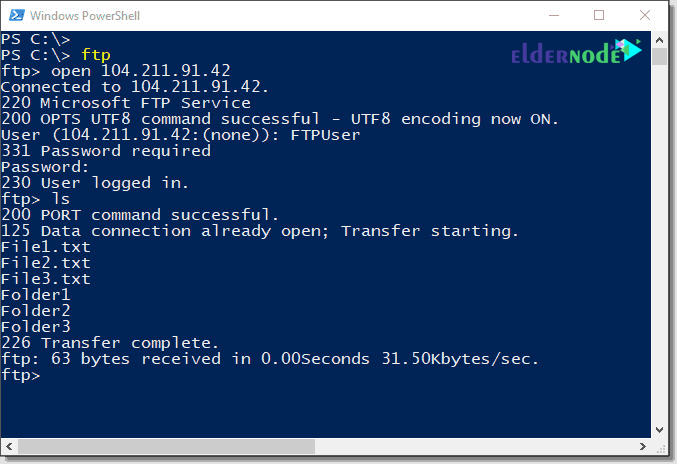
Restart-WebItem "IIS:\Sites\$FTPSiteName" -VerboseYou can test the FTP server, which should allow you to access files, content, and directories under the FTP root folder.
Conclusion
Congratulations! Through the use of PowerShell’s capabilities you`ve configured and installed an FTP server as the administrator of the machine. Now it is convenient to change files between devices or somewhere over the Internet.


