OpenSSL is a comprehensive encryption library that uses the TLS protocol, which is an open-source application. It was first released in 1998 and is available for Linux, Windows, macOS, and BSD systems. OpenSSL allows users to do a variety of things with SSL. These include creating a CSR (Certificate Signing Request) and generating private keys, as well as installing an SSL certificate. In this article, we are going to teach you about Tutorial Configure OpenSSL on Windows Server 2016. You can use the packages available in Eldernode to purchase a Windows VPS server.
Table of Contents
How to Configure OpenSSL on Windows Server 2016
OpenSSL is a robust, commercial-grade, and full-featured toolkit for the Transport Layer Security (TLS) and Secure Sockets Layer (SSL) protocols. In the next section, we want to introduce you to the concept of OpenSSL. Then we will teach you how to install OpenSSL on Windows Server 2016. Finally, we will teach you how to configure OpenSSL. Please stay tuned for the rest of this article.
Introduction to OpenSSL
OpenSSL is one of the most widely used tools in the field of SSL. SSL certificates are in high demand now. Since the launch of the HTTPS Everywhere campaign, the landscape of encryption has changed dramatically. First, they introduced SEO as an incentive to install digital certificates, and later, they made Chrome HTTPS mandatory for all websites. If you do not use an SSL certificate, popular browsers such as Chrome and Firefox will not consider your site as a “secure” website.
Proper implementation of SSL is critical to the security and success of a website. Although many webmasters are learning about SSL for the first time and do not know much about SSL, it is important that they have the tools they need. One of these tools is OpenSSL.
With OpenSSL, you can request a certificate for your digital certificate and install SSL files on your server. You can also convert your certificate to various SSL formats as well as perform a variety of authentications. All you have to do is learn a few common OpenSSL commands, and with each new certificate installed, the configuration process will be faster and easier. Because not all servers provide a web interface for SSL management, on some operating systems OpenSSL is the only solution for installing and configuring your certificate.
In the continuation of this article, join us to teach you to step by step how to install OpenSSL on Windows Server 2016.
How to Install OpenSSL on Windows Server 2016
In this section, we want to teach you How to Install OpenSSL on Windows Server 2016, 2019, 2012. To do this, just follow the steps below in order.
The first step is to go to the OpenSSL download page. Then, according to your system version, download the latest OpenSSL build. You can also download OpenSSL by running the following command in PowerShell:
curl.exe -L -o Win64OpenSSL.exe https://slproweb.com/download/Win64OpenSSL-1_1_0j.exeAfter you have successfully downloaded OpenSSL, you can now begin the installation process by running the following command in PowerShell:
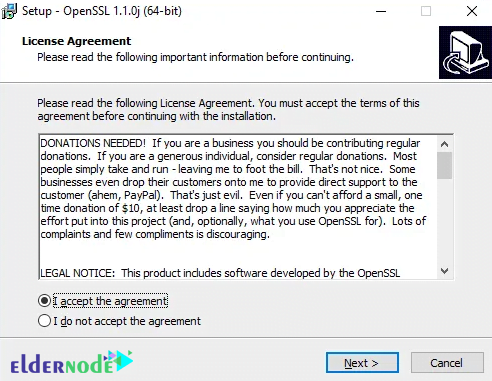
.\Win64OpenSSL.exeIn the window that opens, select the I accept the agreement option to confirm the license agreement and click Next:
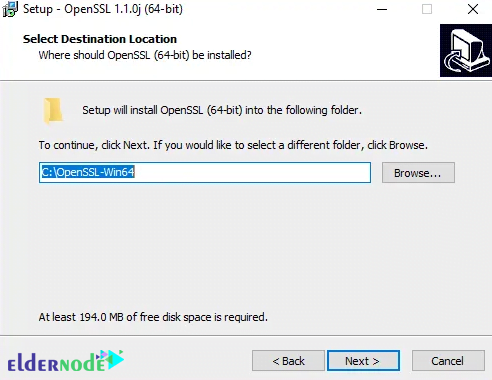
In the next step, you need to specify the installation path of OpenSSL and click on Next:
Then, you can select the directory for Application shortcut:

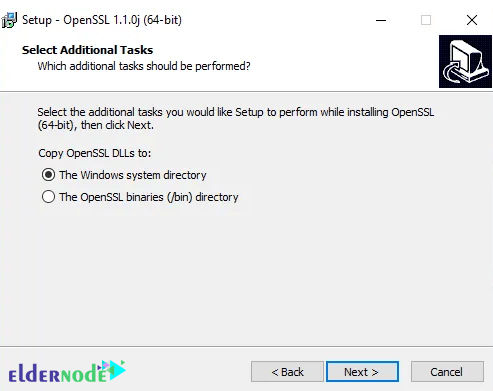
Then you have to select additional tasks to do in the next step. Therefore, after selecting one of the options in the image below, you must click on Next:
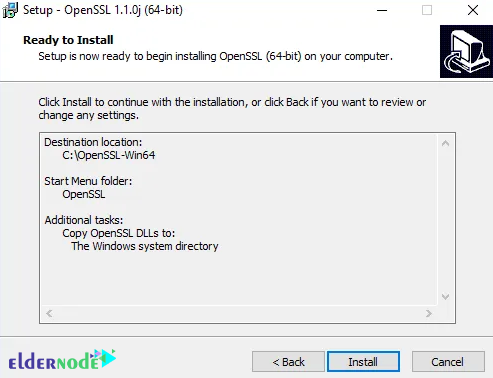
Finally, click Install to install OpenSSL on your system:
*
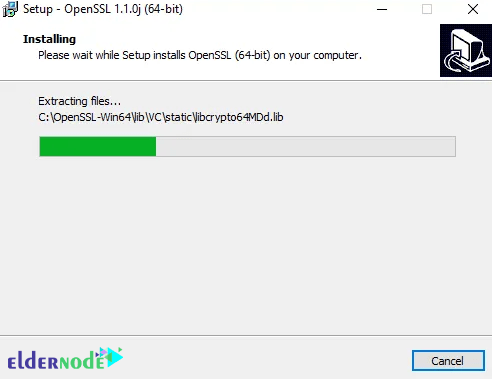
Click on Finish to complete the installation:
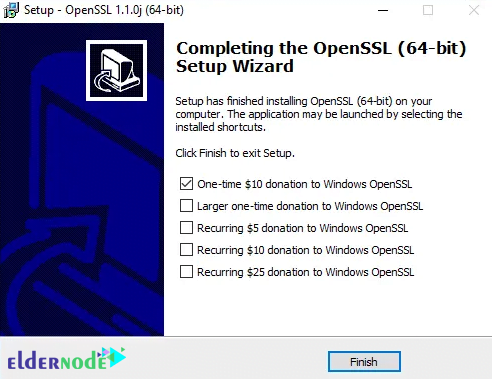
Note: Once the installation is complete, you need to add C:\OpenSSL-Win64 for the 64-bit version and C:\OpenSSL-Win32 for the 32-bit version to the PATH of the Windows environment.
Configure OpenSSL on Windows Server 2016
After you were able to successfully install OpenSSL in the previous section, we now want to configure it. You can create a test SSL certificate using the following command to verify your installation:
openssl.exe req -new -nodes -keyout server.key -out server.csr -newkey rsa:2048You can now configure environment variables to make OpenSSL work properly on your system. These environmental variables are OPENSSL_CONF and Path. You can easily use the following commands to make these settings:
set OPENSSL_CONF=C:\OpenSSL-Win32\bin\openssl.cfgset Path=%Path%;C:\OpenSSL-Win32\binIt should be noted that you can view the OPENSSL_CONF and Path variables permanently in the system. To do this, follow the steps below:
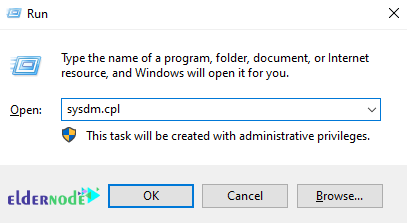
The first step is to press the Windows+R key combination to open the Run window:
Then type “sysdm.cpl” and press Enter:
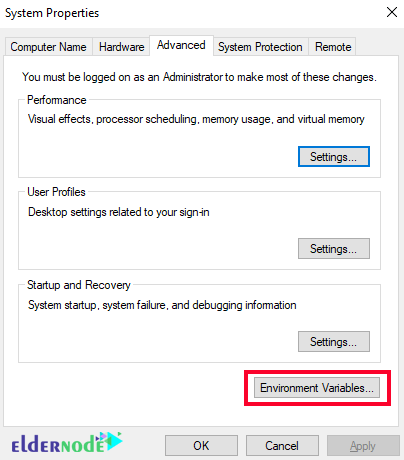
Next, you need to go to the “Advanced” tab and click on “Environment variables“:
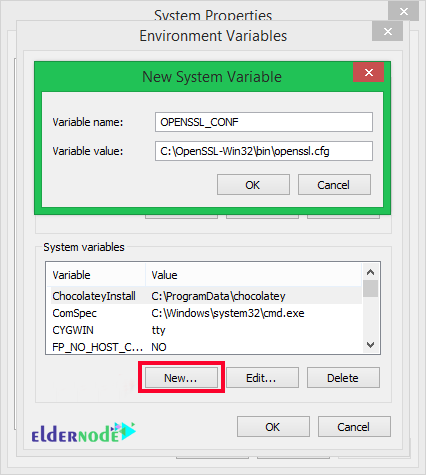
The following image shows how to configure OPENSSL_CONF Variable:
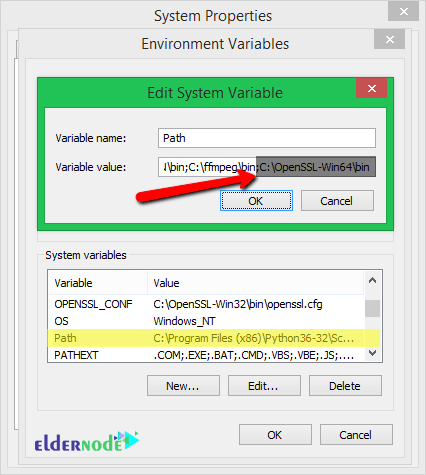
The following image shows how to configure Path Variable:
Conclusion
At the beginning of this article, we tried to introduce you to the concept of OpenSSL. Then we explained how to install OpenSSL on Windows Server 2016. Finally, we taught you how to configure OpenSSL.


