If you don’t want to do a fresh install of Linux Mint 21, you can simply upgrade Linux Mint 20.3 to Linux Mint 21. This article will teach you How to Upgrade Linux Mint 20.3 to Linux Mint 21. If you want to purchase your own Linux VPS server, you can order what you want by checking the economical packages in Eldernode.
Linux Mint is a free, open-source, easy-to-use, and comfortable desktop operating system. It is one of the most popular Linux distributions and one of the best Linux distributions for beginners. In order for Linux Mint to best support different hardware, there are different desktop versions including Cinnamon, GNOME, XFCE and KDE. You can easily install Linux Mint than most Linux distributions.
The Linux Mint upgrade process is bound to take several hours. Note that your current Linux Mint installation should be up to date and you need to install updates where necessary.
In the continuation of this article from the Linux training series, we intend to teach you to step by step how to upgrade from Linux Mint 20.3 to Linux Mint 21.
How to Install Mint Upgrade Tool
In the first section, you will learn how to install Mint Upgrade Tool. Follow the steps below and enter the required commands.
Open your terminal and update your system packages with the following command:
sudo apt updateNow install the Mint Upgrade tool using the following command:
sudo apt install mintupgradeNote: If you can’t find a mint upgrade in the repositories, you should switch to the default Linux Mint mirror and refresh the apt-cache.
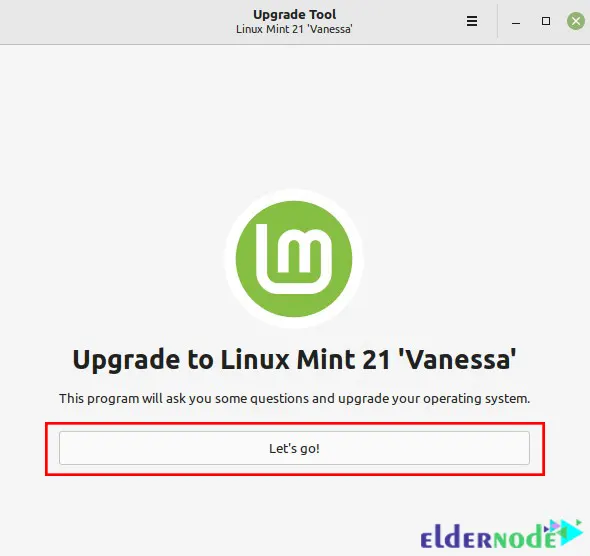
You can launch the Mint Upgrade tool by running the following command:
sudo mintupgradeYou will see the following screen. Click on Let’s go!:
Upgrading Linux Mint 20.3 to Linux Mint 21
In this section, we will teach you step by step how to upgrade from Linux Mint 20.3 to Linux Mint 21.
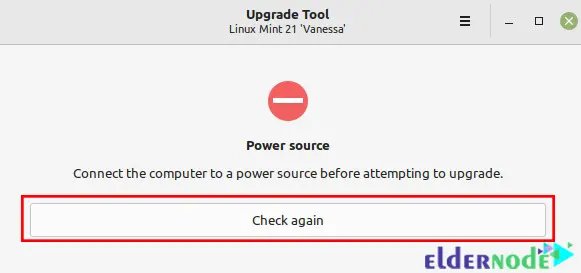
Several tests are performed by the upgrade tool to prepare the system for upgrade. One of these check tests is to check if your computer is connected to a power source:

If your computer is not connected to a power source, you will see the following screen asking you to connect your computer to a power source. Click Check again:
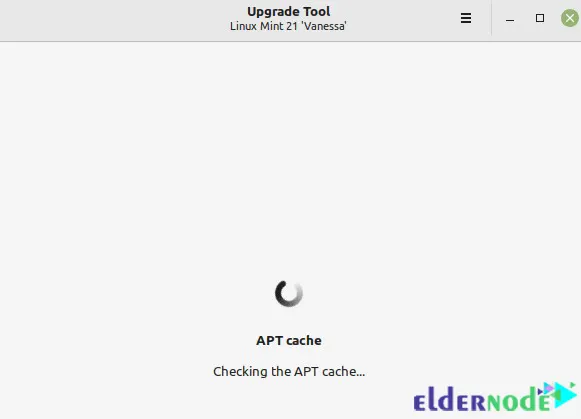
If all tests are successful, the apt update is run by the upgrade tool in the background to get the latest version of the package list from the configured software repositories. To view details, refer to the terminal:
Before performing the upgrade, you should update your system. To apply the updates, click Check again:
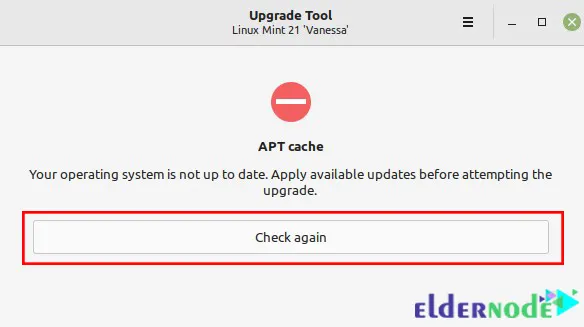
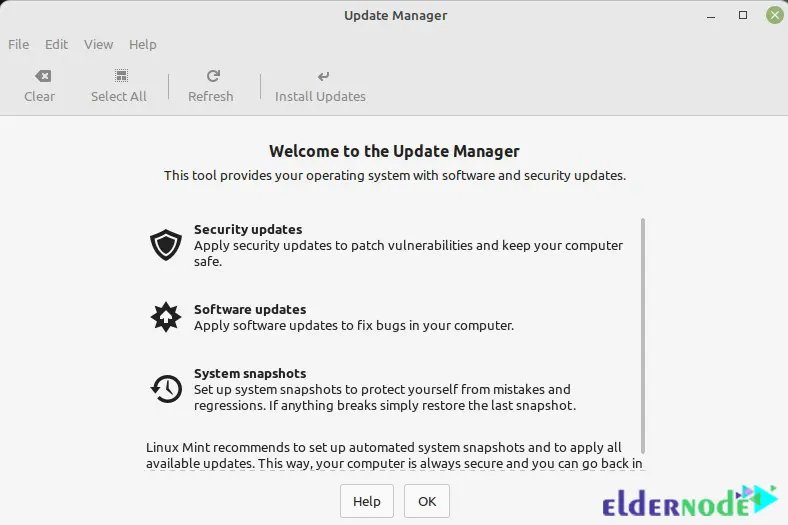
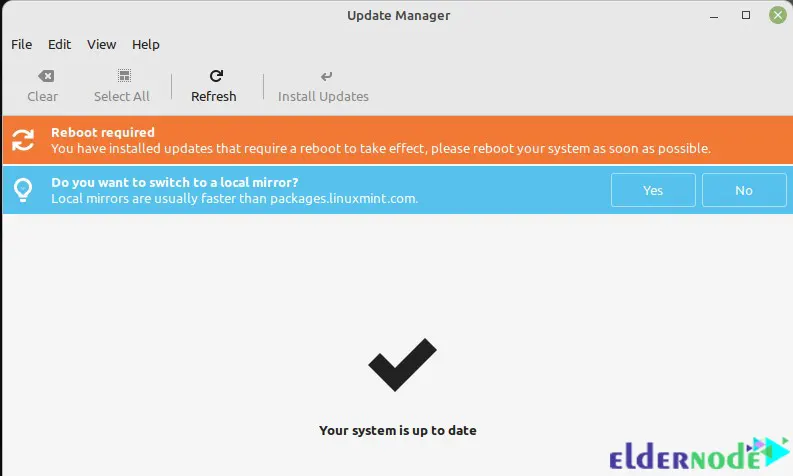
If the upgrade tool can’t open the update manager, you can search it in the system menu and open it manually. Now click on OK and then Install Updates to run the updates:
After the update is complete, reboot your system to apply the changes:
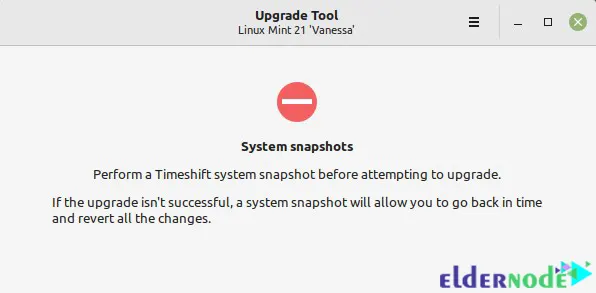
In this step, use Timeshift to create a system snapshot. This will help you to restore your system if the upgrade fails for one reason:
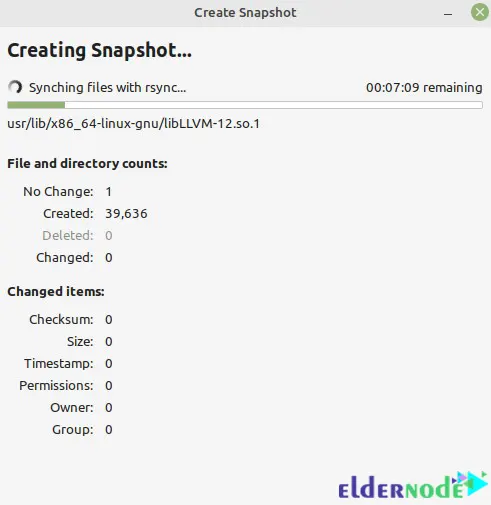
To create a system snapshot, you need to click Create in Timeshift’s main interface:
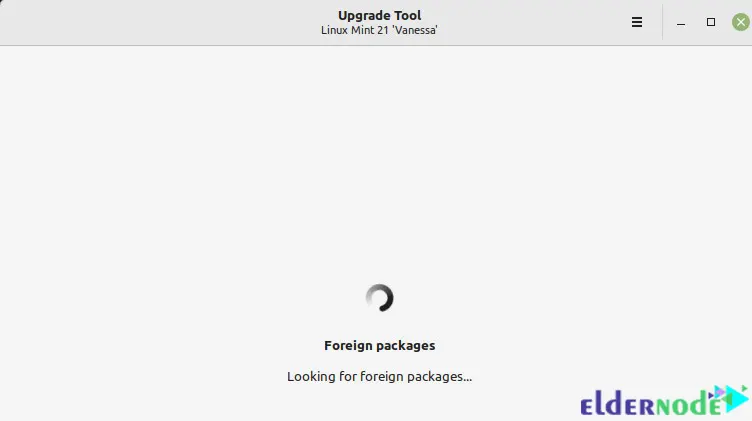
Now the upgrade tool will search for packages:
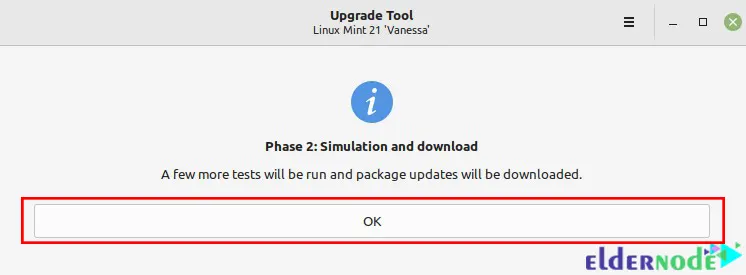
Then more tests are performed by the upgrade tool and package updates are downloaded:
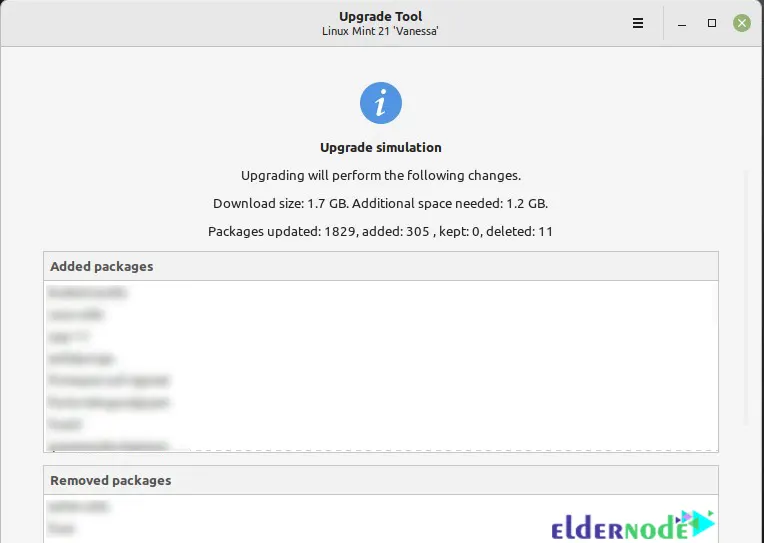
After the simulation is complete, all changes to be applied will be displayed by the system, including packages to be updated, packages added, packages to be kept, and packages that are removed:
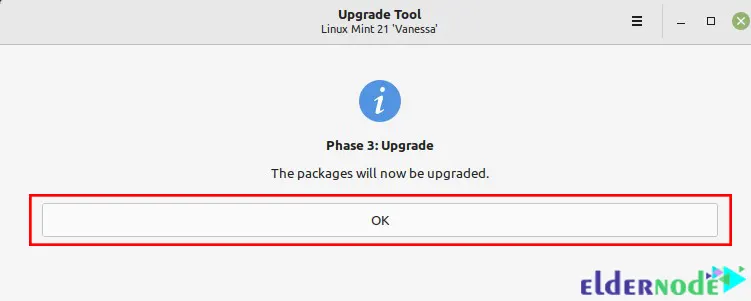
After downloading all the updates, you should install them. Click OK to start upgrading the packages:
After completing the upgrade process, you should uninstall the mint upgrade tool. To do this, run the following command:
sudo apt remove mintupgradeFinally, reboot your system using the following command:
sudo rebootThat’s it! The upgrade process from Linux Mint 20.3 to Linux Mint 21 is completed successfully.
Conclusion
Linux Mint is used by millions of people and is one of the best alternatives to Microsoft Windows and MacOS. In this article, we taught you how to install the Mint Upgrade tool and how to upgrade Linux Mint 20.3 to Linux Mint 21. I hope this tutorial helped you to upgrade to Linux Mint 21 from Linux Mint 20.3. If you have any suggestions or problems, you can contact us in the Comments section.