In this article, we will teach you Tutorial connect Cpanel email account to Gmail. Attracting the user in any field is considered very important. In online businesses, the first step after buying a host and domain is to connect with your contacts via email and other methods. For example, imagine you got a stable host like a VPS Hosting. Now after launching the site, you should take action to interact with your users.
Table of Contents
Tutorial connect Cpanel email account to Gmail
CPanel offers several features for easier management of emails. In this article, we are going to teach you how to connect your CPanel email hosting account to Gmail. After learning this tutorial, you will be able to add email accounts within the web host to the Gmail user panel. Also, manage all website email accounts with Gmail.
Stay with us by continuing the training.
What is the use of connecting Host Email to Gmail?
Imagine that you are the manager of a large website and you have created several email accounts within your website host. You decide to check all the emails you receive on a daily and regular basis. There are two ways to do this:
– The first way is to log in to the webmail of each email account in the host (Cpanel) of your website every day.
– The second way is to connect that email account to mail clients such as windows live mail, outlook, or Windows 10 mail software.
Now there is another better way to manage your site’s email accounts, and that is to connect all the emails in your website host to the Gmail control panel. By doing this, you will be able to manage all the email accounts of your website centrally in Gmail. In fact, by connecting the web hosting emails to Gmail, from now on you just need to log in to your Gmail account and manage all your host emails from within Gmail centrally.
Follow us to set up host emails in Gmail in the continuation of this useful article.
How to connect CPanel email account to Gmail
First, log in to CPanel.
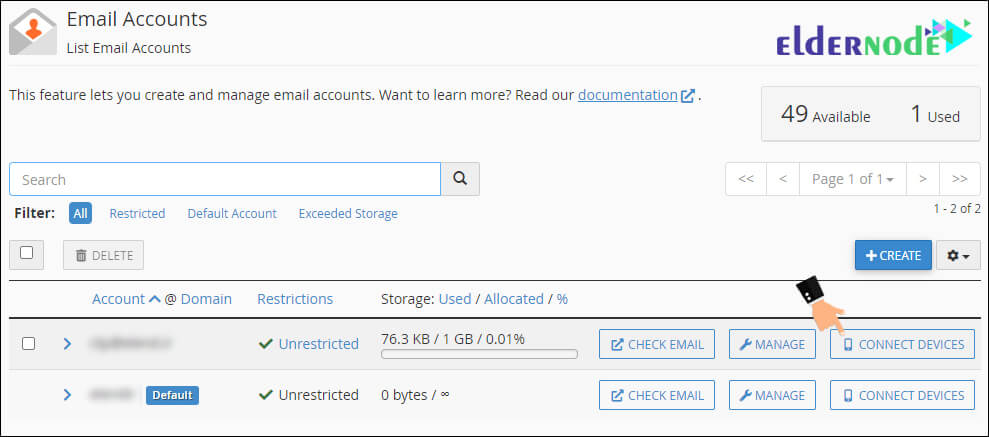
Then from the email section, click on the email accounts icon to enter the following page:

In the email accounts section, the email accounts that you have already created are available. We want to connect one of these emails to Gmail. To do this, click on the set up mail client option in front of this email account to enter the Set Up Mail Client page for [email protected].
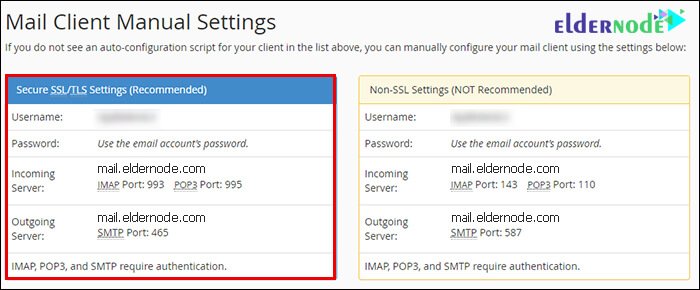
Here are the settings for connecting the email address [email protected] to other email management clients.
There are two boxes in the Mail Client Manual Settings section. In the following, we will explain both to you:
1. Secure SSL / TLS Settings (Recommended) marked with a blue box. If you use the values in this field to connect these email hosts to Gmail software, your email data will be exchanged by SSL encryption between the Gmail server and the host email server.
Note: CPanel also recommends using this method.
2. Non-SSL Settings (NOT Recommended) is not recommended by CPanel and if you use the information in this box to connect this email account to Gmail, your email data will be exchanged between the Gmail server and host email server without encryption.
We also use the values in the left side box according to the recommendation of CPanel.
How to configure Gmail to connect to CPanel
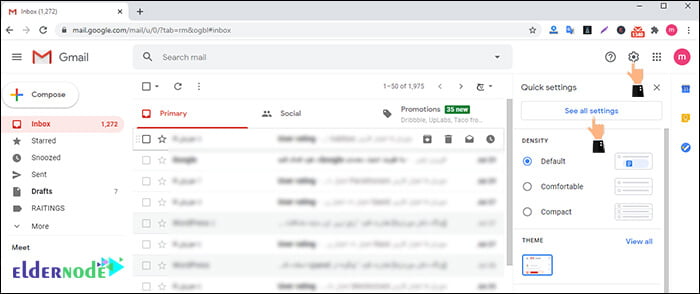
After entering Gmail, click on the ⚙ (setting) icon from the top right. Then, from the submenu that opens, click on the setting option.
Click on the accounts and import tab to enter the following page:
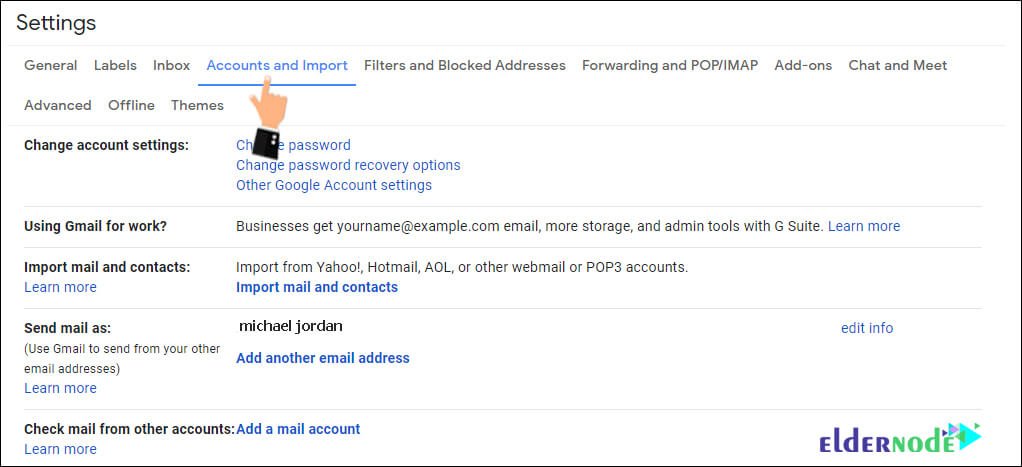
In front of the check mail from other accounts section, click on the add a mail account option to open the following window:
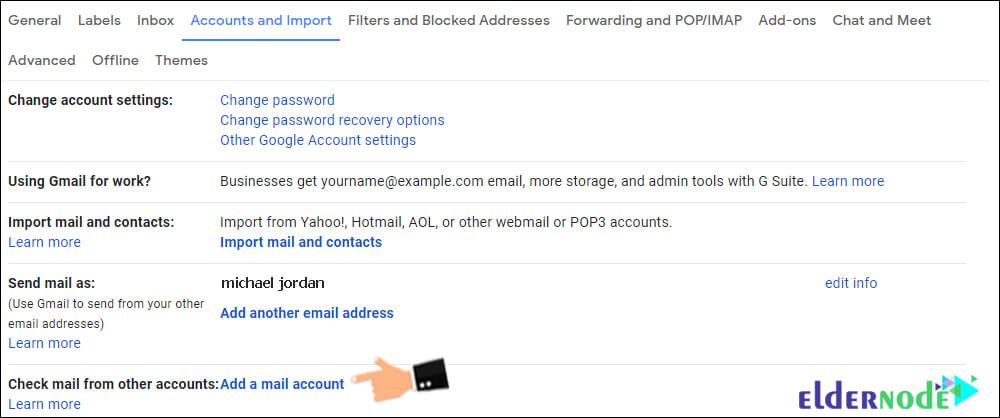
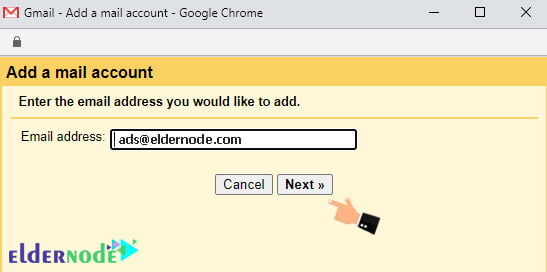
In the email address field, you must enter the address of the email account you want to connect to the host.
Since we want to connect our website emails to Gmail, then we type [email protected], then click on the next button below to enter the next step.
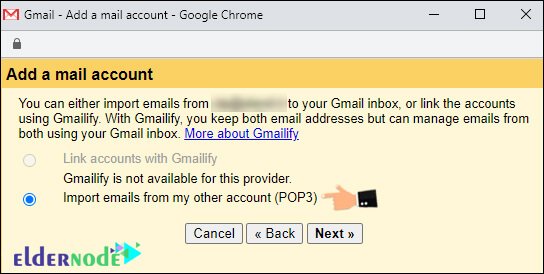
In the next step, after selecting the import emails from my other account pop3 option, click on the next button to move to the next step.
Nest step on Tutorial connect Cpanel email account to Gmail, we are going to email settings in Cpanel
Practical tutorial on email settings in Cpanel
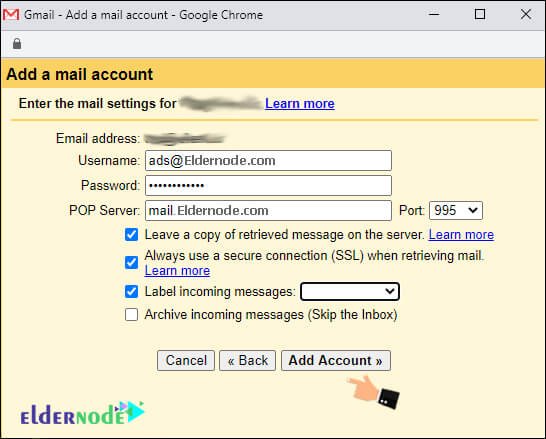
The third step, enter the mail settings for [email protected], is one of the most important steps in this training. You have to set all the following fields, which we will explain to you one by one:
— Username: In the username field, you must enter the username of this email account. Enter the CPanel email account information page and copy this value in front of the username field and paste it in this field.
— Password: In this field, you must enter the password of the email account you want to connect to Gmail.
Note: The password of this email account is exactly the same password that we set when creating the email address [email protected] in Cpanel host.
— Pop server: In this field, you must enter the mail server address of the website pop host. Re-enter the email settings page in the Cpanel and in front of the incoming server section, copy this value completely and paste it in the pop server field.
— Port: In this section, you must select the port number of the pop3 host of the website.
To know this amount, enter the e-mail account information page in CPanel. Then from the incoming server section in front of the pop3 port section, remember this value, which is 995, and select port number 995 from the drop-down menu.
— leave a copy of retrieved message on the server: If you check this option, a copy of the emails sent and received by this email account will always be saved on the main mail server, ie the website host. If this option is not checked, the emails sent and received from this account will be exchanged only by Gmail and no copy of them will be stored on the server and host.
— always use a secure connection SSL when retrieving mail: If you check this option, the emails sent and received by this email account will always be exchanged between Gmail and the host mail server on a secure SSL platform.
— label incoming messages: Gmail allows you to enable a separate directory other than inbox and spam or trash inside the left side of the Gmail panel. By doing this, all the emails received by this email account will be listed in that directory and will not be mixed with the emails received by our main Gmail account.
— archive incoming messages skip the inbox: If you enable this option, incoming emails from our host email account, in addition to being stored in a dedicated directory, a copy of them will be transferred to the Gmail inbox.
Click the add account button to enter the next step.
At this point, Gmail tells us that this email account was successfully added. If you wish, you can even send emails with this added email, even though the Gmail account, in addition to receiving emails from this account. In this step, select yes and click on the Next button.
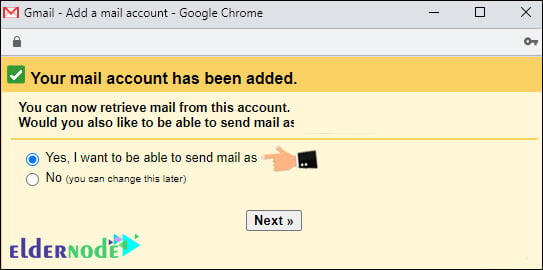
In the next step, the email account is successfully added.
You can send emails with added email, even though the Gmail account, in addition to receiving emails from this account.
In this step, select yes and click on the Next button.
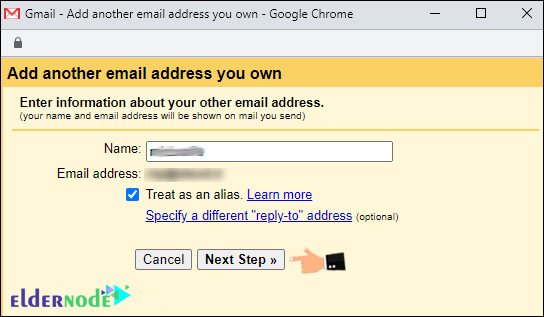
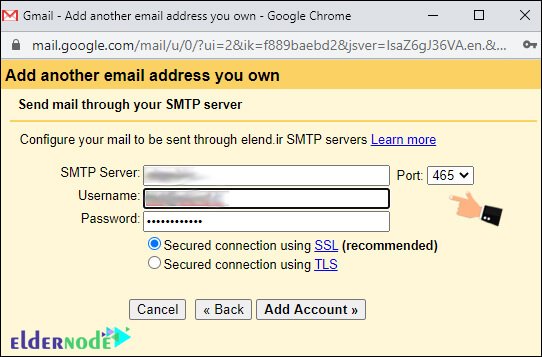
Now we enter the Send mail through your SMTP server. Because outgoing emails are usually sent via the SMTP protocol, you must enter the SMTP values of the website host in these fields. In the following, we will explain about each of these fields:
— SMTP server: In this field, you must enter the outgoing email address of the website mail server. To re-enter the manual settings page of your CPanel email account. Then copy this value in front of the outgoing server and paste it in this window.
— Port: From this drop-down menu, select the SMTP server port number. Because we do not know about this value, we will go back to the e-mail account profile page in the Cpanel and we will see this value from the outgoing server section in front of the SMTP port section. As you can see, it is 465. Then go back to Gmail and select 465 in front of the port in the drop-down menu.
— Username: In this field, you must re-enter the username of this email account. Go back to the Cpanel and in front of the username field, copy this value, which is the same as the email address, and paste it in this field.
— Password: In this field, you must re-enter the password of this e-mail hosting website that you set when creating the e-mail account.
— Finally, there are two options for sending emails:
secured connection using SSL
secured connection using TLS
Because we want our emails to be sent on a secure SSL platform, we choose the first option. Then click on the add account button from below to enter the next step.
Next, we enter the verify step of adding an email account to Gmail.
Gmail wants to know at this point whether we really own the email account we are adding or not! So Gmail sent an authentication code to the same email address that we are adding and now it asks us to enter that code in this field so that we can finalize the steps of adding an email account to Gmail.
Check email COnfirmation from Gmail on your Cpanel mail account.
You must be logged in to your webmail host to view the emails received by this email account. Then log in to Cpanel again and click on the check email from the mail section.
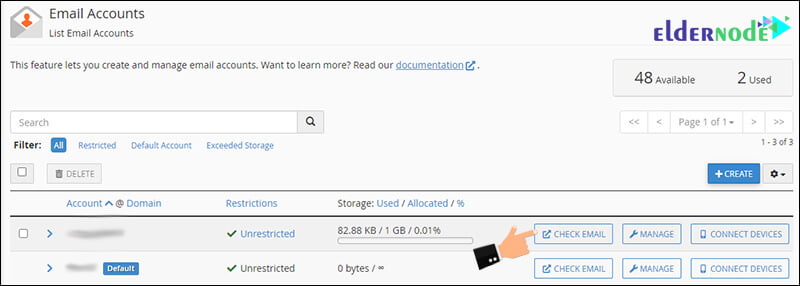
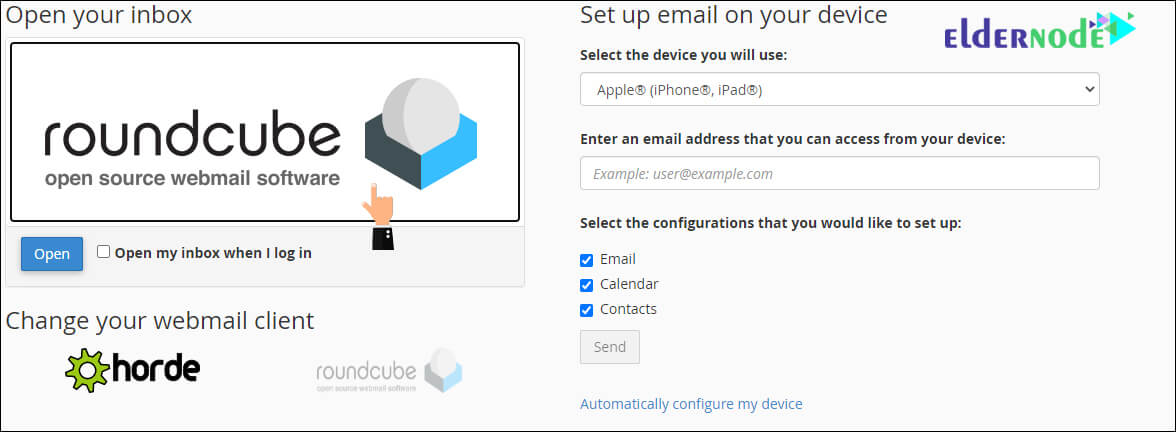
On the next page, click on the RoundCube webmail to enter the user interface.
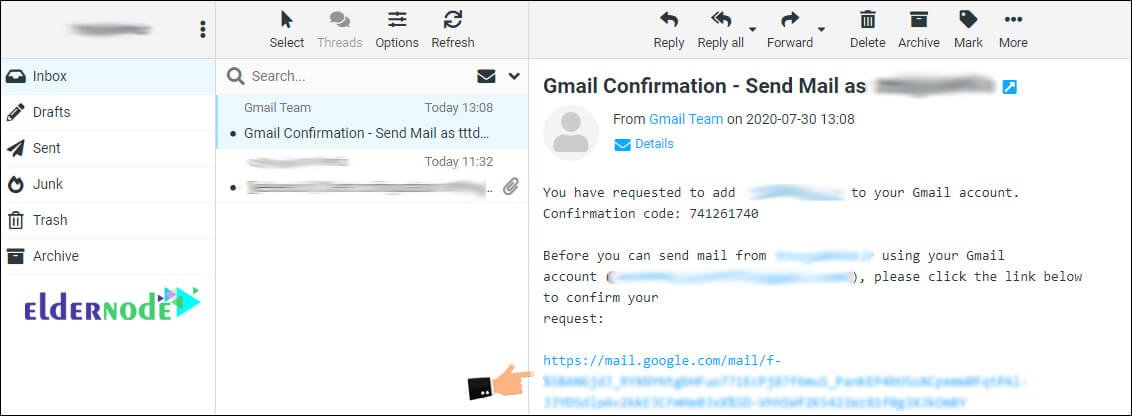
Open the first email sent by Gmail.
Click on the link specified in the image below.
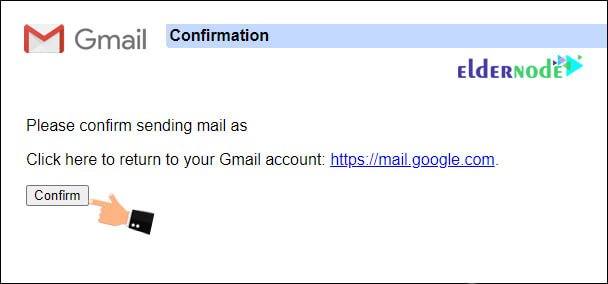
Click the confirm button to see the message that the steps were successful.
As you can see, a directory has been added on the left side of Gmail and the emails of that website host email account are available inside.
How to send an email with a second account
If you want to send an email with this Gmail account from now on, you must do the following:
1. Click the compose button.
2. From the “from” section, click on the icon so you can select the second account you added.
Dear user, we hope you would enjoy the Tutorial connect the Cpanel email account to Gmail, you can ask questions about this training in the comments section, or to solve other problems in the field of Eldernode blog, refer to the Ask page section and raise your problem in it as soon as possible. Make time for other users and experts to answer your questions.
Goodluck.
