There are several reasons why your WiFi adapter may not work in Windows 10, such as outdated drivers, incorrect settings, hardware problems, or interference from other devices. This article will teach you How to Troubleshoot WiFi Adapter Issues on Windows 10. If you intend to buy a Windows 10 RDP VPS, you can check out the packages offered on the Eldernode website.
Table of Contents
Troubleshooting WiFi Adapter Issues on Windows 10
Since many tasks depend on a stable Internet connection, you must have a proper network connection. If your WiFi adapter won’t connect to your network in Windows 10, it could be for several reasons, such as incorrect network settings, outdated drivers, or interference from other wireless devices. These reasons are easy to solve. We offer additional solutions to help you troubleshoot your WiFi adapter issues on Windows 10.
8 Steps to Troubleshoot WiFi Adapter Issues on Windows 10
In the first step, you should check if the problem lies with your WiFi or laptop. For this, connect your wireless network with other devices and see if you can connect to your wireless network or not. If other devices can’t detect the WiFi, the problem is with your WiFi and you should check the WiFi. But if other devices detect WiFi, the problem is with your laptop, and follow the steps below to fix this problem.
1- Checking that the Wireless Switch is On
On some devices, there is a physical switch on the wireless network capability. Normally, there is a switch on the edge of your laptop that you need to turn on. If there is no hardware switch, you can activate wireless networks by pressing key combinations such as Fn and F5 buttons.
If your problem is not solved, go to the next step.
2- Enabling the Wireless Adapter
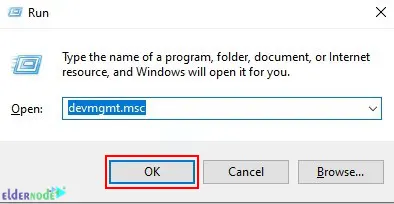
In this step, you check whether the wireless adapter is enabled in your system. Because if the wireless adapter is disabled, your system cannot detect or connect to WiFi. To do this press Windows+R to open the Run box. Then type devmgmt.msc and press OK:
In the opened page, double-click on Network adapters, right-click your wireless network adapter, and Enable the device:
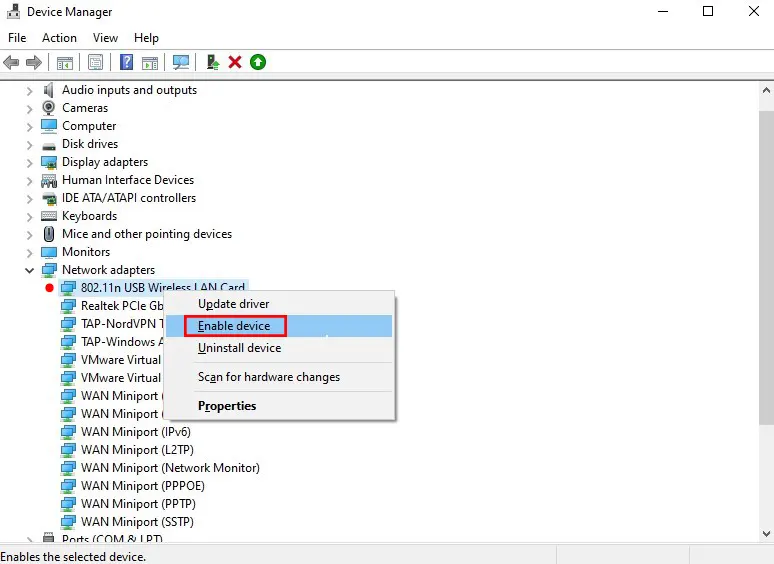
If you see Disable the device instead of Enable the device, it means the wireless network is already enabled.
Once finished, restart your computer and check if you can connect to the wireless network.
3- Disabling Airplane Mode
WiFi networks not being detected may be due to Airplane Mode being enabled. You should disable it to see the hotkeys that allow you to turn on or off WiFi. You can disable Airplane Mode by pushing the key with an Airplane icon.
If your problem is not solved, go to the next step.
4- Updating Your Wireless Network Adapter Driver
One of the causes of wireless network problems can be caused by the loss or damage of your network adapter. So at this stage, you need to upgrade your network adapter driver. Note that you must be online to update your driver. But your WiFi is not working, so connect via Ethernet and download and install your wireless network driver.
You can upgrade your network adapter driver manually or automatically. Updating network adapter drivers manually requires technical know-how, time, and patience and is possible through Device Manager.
You can see the latest updates compatible with your Windows version using the driver updater without the need to provide any information. It allows you to automatically update for free or upgrade to the full version. Its registered version can be used to update drivers in two clicks and offers a 60-day money-back guarantee. But you can update one driver at a time using its trial version.
Firstly, download the Advanced Driver Updater by clicking the following link:
https://cdn.systweak.com/runcamps/setups/adusetupg_systweakblog-5658_2.exe?of=adusetupg_.exe
Once the download is complete, run the tool and press Start Scan Now:
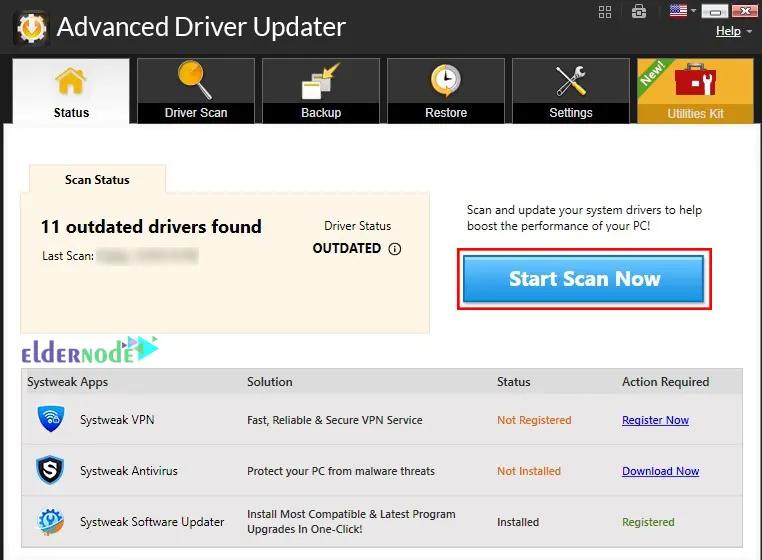
After the scan is finished, you will see the outdated drivers and the option to update to the latest drivers. If you use the Trial version, you should click Update driver and if you use the registered version, you should click on Update all to update drivers:
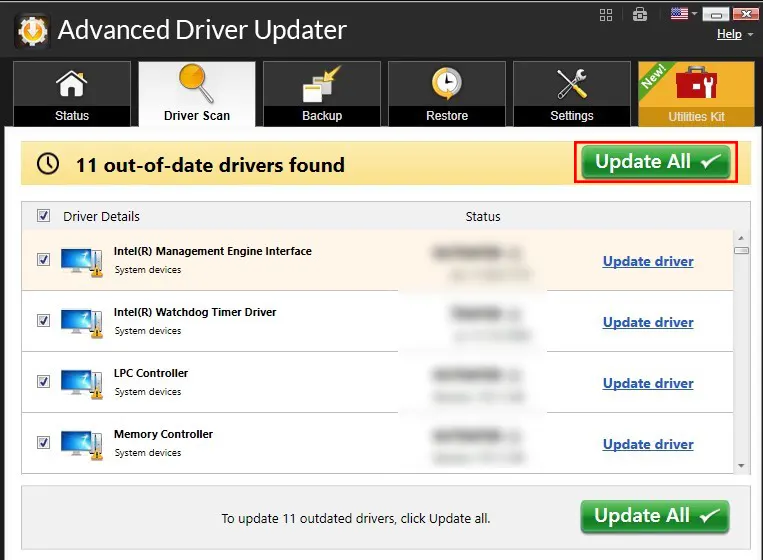
Finally, restart your computer to changes take effect and try to connect to the wireless network.
5- Enabling the WLAN AutoConfig service
The WLAN AutoConfig service is a vital function that implements the logic to setup, discover, connect, and disconnect from a wireless network. It determines whether your laptop detects WiFi networks or not. So you should enable it. To do this, press Windows+R to open the Run box, type services.msc, and press OK.
On the page that opens, scroll down and double-click on WLAN AutoConfig:
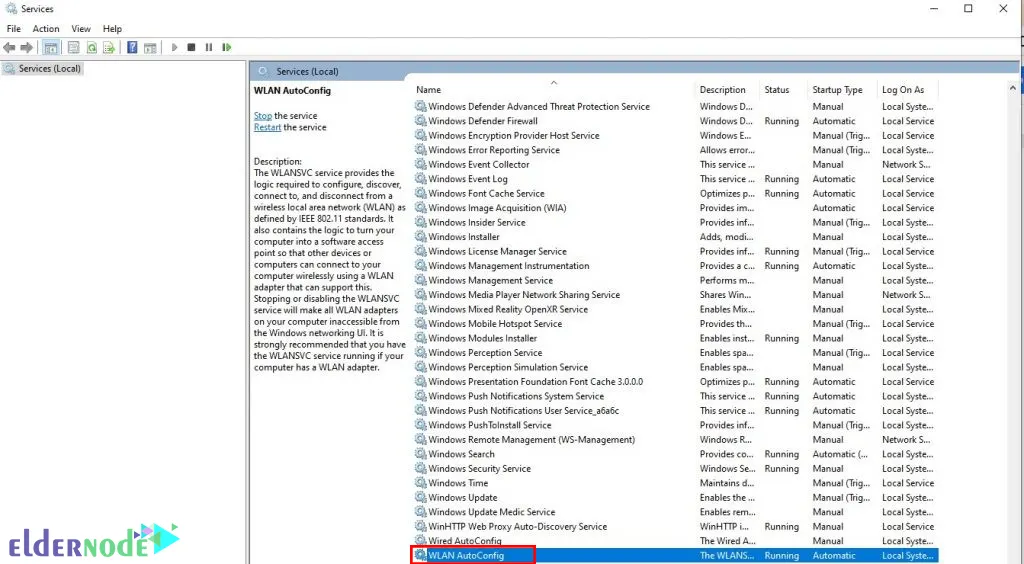
Now double-click on it, click on the General tab, and set the Startup type to Automatic. Then click Start to make sure the service is running:
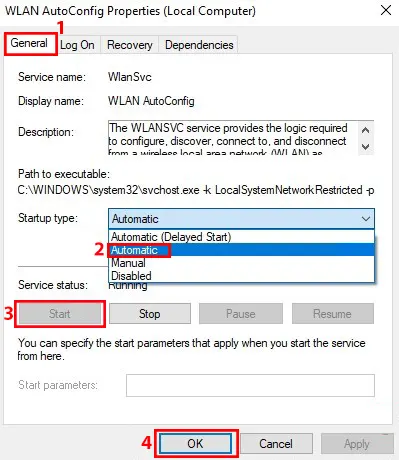
To save the changes, click Apply and then OK.
Check if wireless networks can be detected or not.
6- Running Windows Troubleshooter
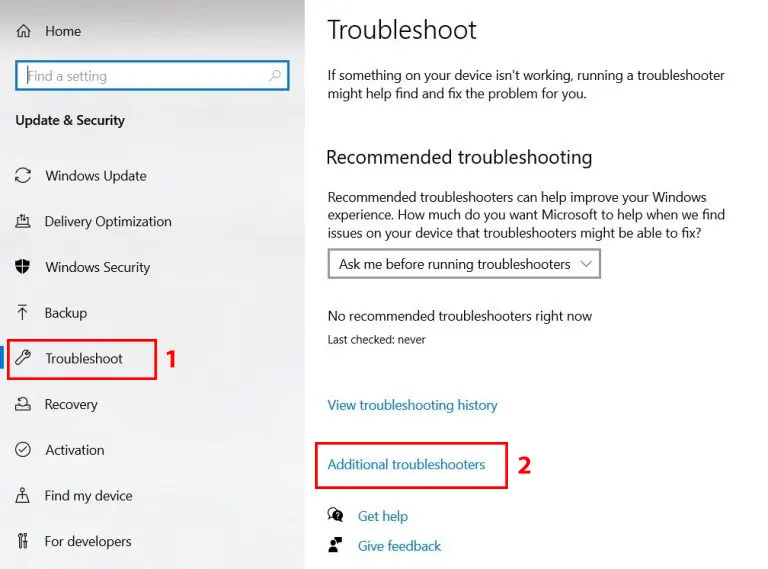
Windows itself has a built-in troubleshooter that can help users solve various problems. You can also use it to solve WiFi problems. To do this, press Windows+I to open Windows Settings and click on Update & Security:
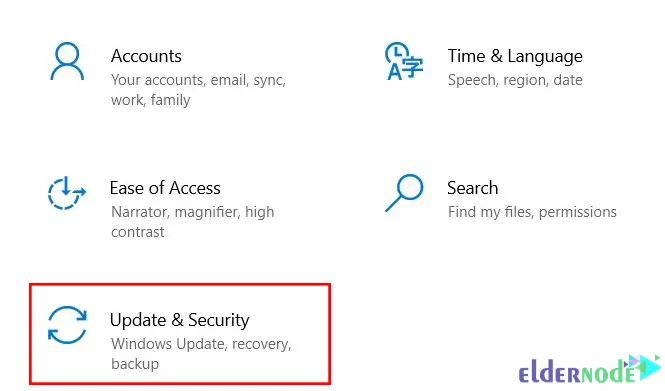
Now click on Troubleshoot from the left side and then Additional troubleshooters:
Next, you should choose Incoming Connection and Run the troubleshooter:
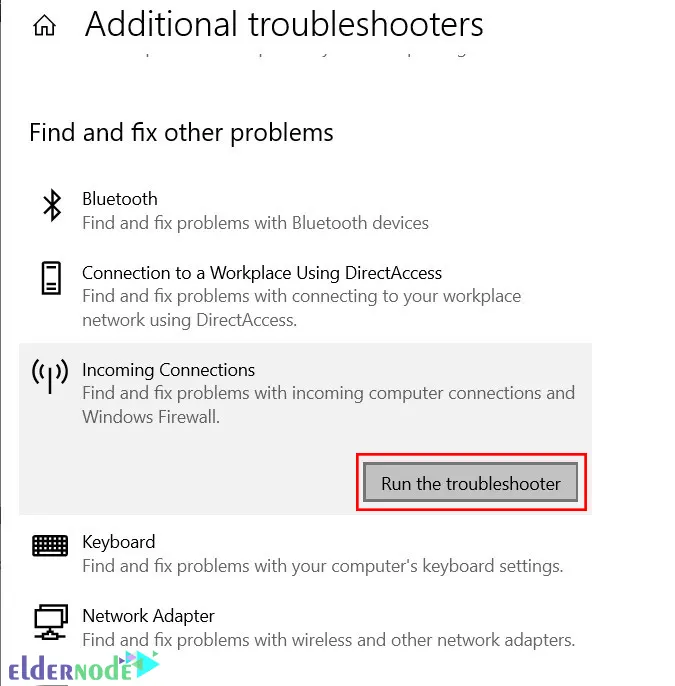
Now troubleshooter looks for problems and fixes them automatically.
Lastly, restart your system and check if the problem is fixed or not.
7- Configuring Power Management for Wireless Adapter
To Configure Power Management for Wireless Adapter, press Windows+X and choose Device Manager:
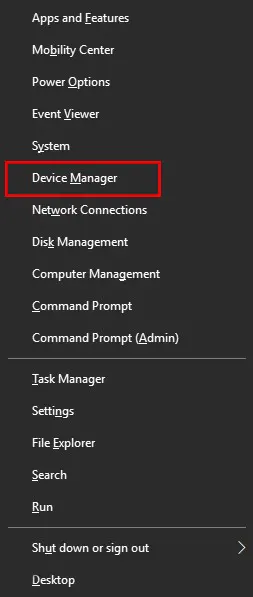
Now double-click Network adapters and right-click on your wireless network adapter. Then choose Properties.
In the opened tab, you should click the Power Management tab and uncheck the box next to Allow the computer to turn off this device to save power:
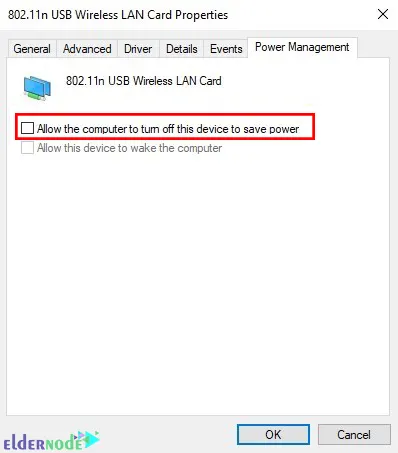
This prevents the wireless adapter from being disabled to save power.
Lastly, restart your computer and try to connect to WiFi networks.
8- Adding your Wireless Network Manually
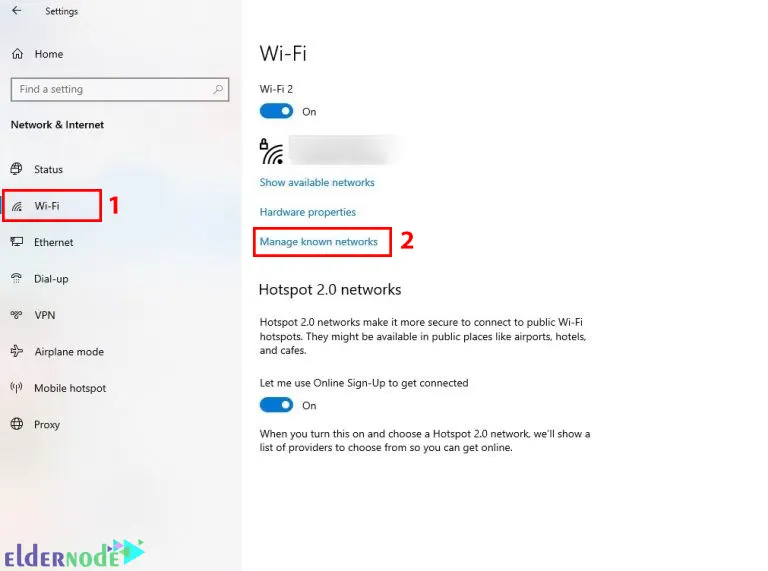
If you still can’t connect to WiFi networks, it’s better to add them manually. To do this, press Windows+I to open the Settings app. On the opened page, click Network & Internet:

Press Wi-Fi on the left and click Manage known networks:
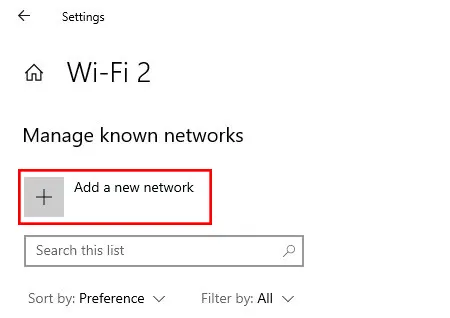
Now click Add a new network:
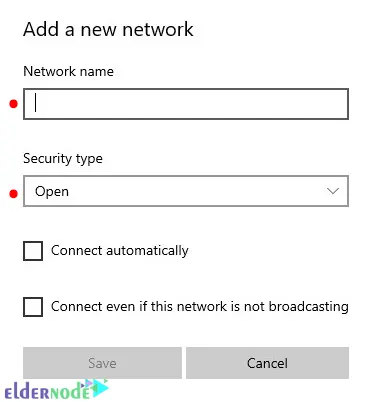
You should fill in the required information, checkmark the box next to Connect automatically, and click Save:
Lastly, click the Internet icon in the system tray and Connect.
That’s it!
Conclusion
Several reasons can cause WiFi adapter issues. In this article, we taught you how to troubleshoot WiFi adapter issues on Windows 10. I hope you found this tutorial useful and that it helps you to solve WiFi adapter issues on Windows 10. If you have any questions or suggestions, you can contact us in the Comments section.
