IP address is generally a unique identifier to identify a device in a network. The types of IP addresses are divided into two categories. The first category is IPv4 and the second category is IPv6. In this article, we are going to teach you How to Setup and Configure IPv6 on Windows. If you want to buy a Windows VPS, you can visit the packages offered on the eldernode website.
Table of Contents
What is IPv6?
As you know, the IPv4 is a 32-bit address that is displayed as 4 numbers in base ten separated by periods. This version of IP provides 2 to the power of 32 addresses. Currently, more than 90% of addresses in the world are IPv4.
IPv6 is the newer version of IPv4, but we need to know what was the reason for migrating to IPv6? There were 2 main problems with IPv4. The small space related to Public addresses, which in the most optimistic case can be 2 to the power of 32 bits of IP address, which is running out and the size of the routing tables is growing. Routers on the Internet manage about 500,000 routing lines.
In the short term, Subnetting and Summarization solutions were presented. In these solutions, instead of using Classful addressing and wasting IP addresses, Classless addressing was used. Summarization feature was also used in Routing Tables. But for the long term, the IPv6 solution was proposed.
Advantages of IPv6
– Less processing cost: IPv6 packets have been redesigned to generate and use simpler headers. This issue improves the processing of packets by the sender and receiver systems.
– More IP addresses: IPv6 uses a 128-bit addressing structure. While IPv4 uses a 32-bit addressing structure. This number of IP addresses ensures that there are even more addresses than will be needed in the coming years.
– Multicasting: Multicasting is used as the main method of communication in IPv6. Unlike IPv4, IPv6 does not provide the broadcast method. The broadcast method uses the network bandwidth in a non-optimal and inappropriate way.
– IPSec: The Internet Protocol Security (IPSec) protocol did not exist in IPv4, but IPv4 supported it, while IPv6 has this protocol built in and can encrypt all communications.
How to Setup IPv6 on Windows VPS
In this section, we intend to teach you how to setup and enable IPv6 on Windows. To do this, you need to do the following steps in your Windows 10.
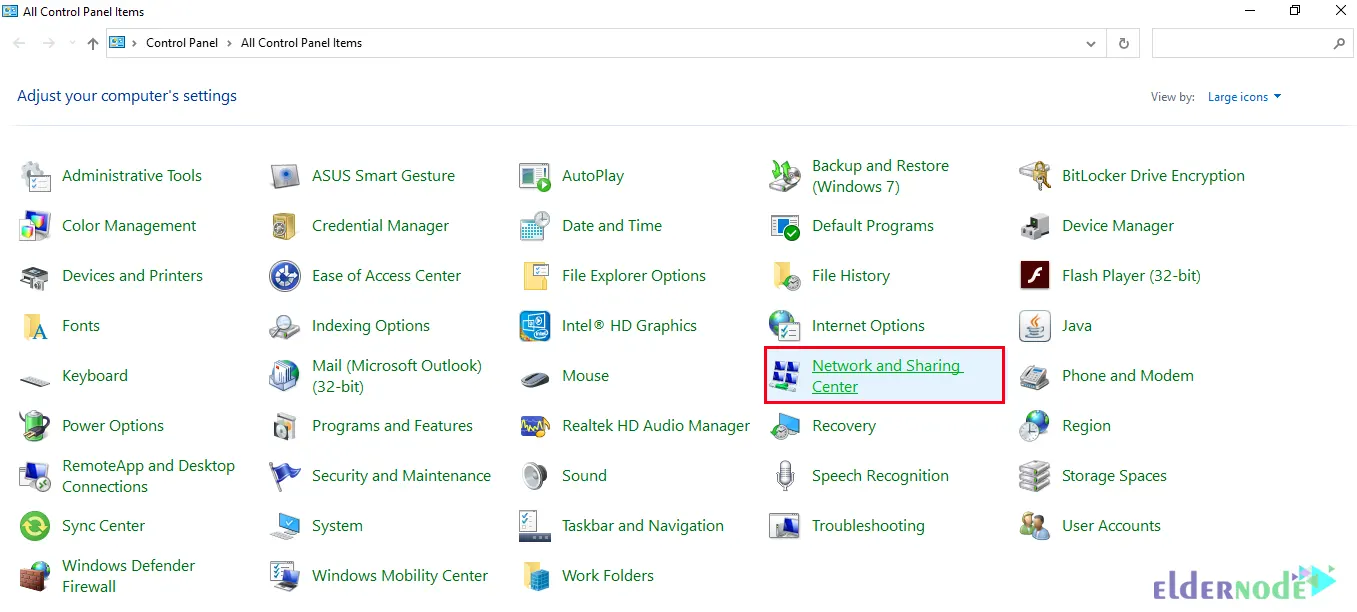
The first step is to open the Control Panel.
Then you have to click on Network and Sharing Center in the opened page:
Now you can click on Setup a new connection or network. After doing this, click Next:

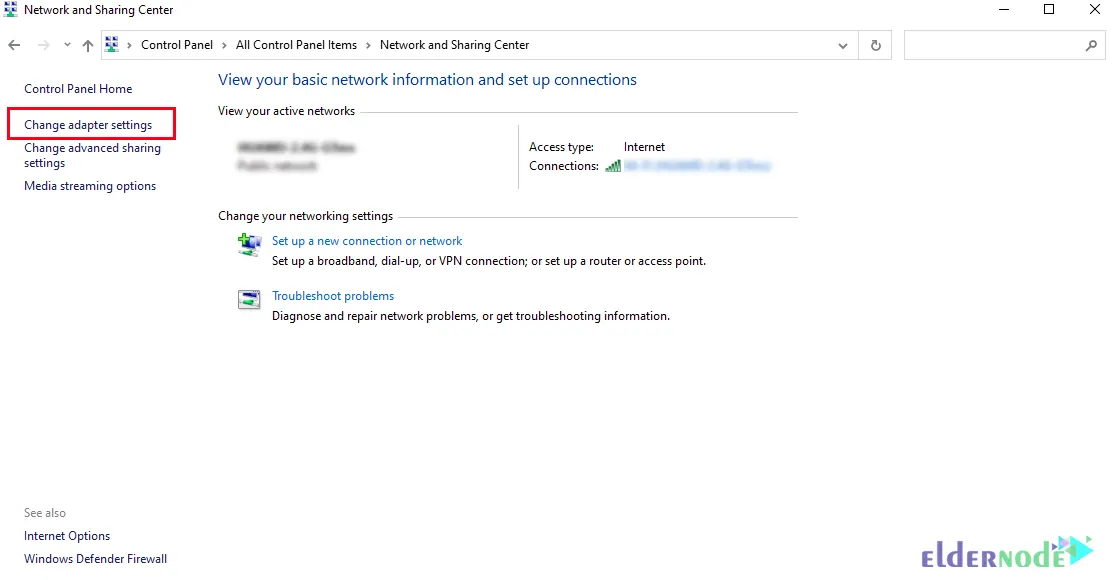
After you have successfully created a new connection, now you should click Change Adapter Settings on the left side of the network and sharing center:
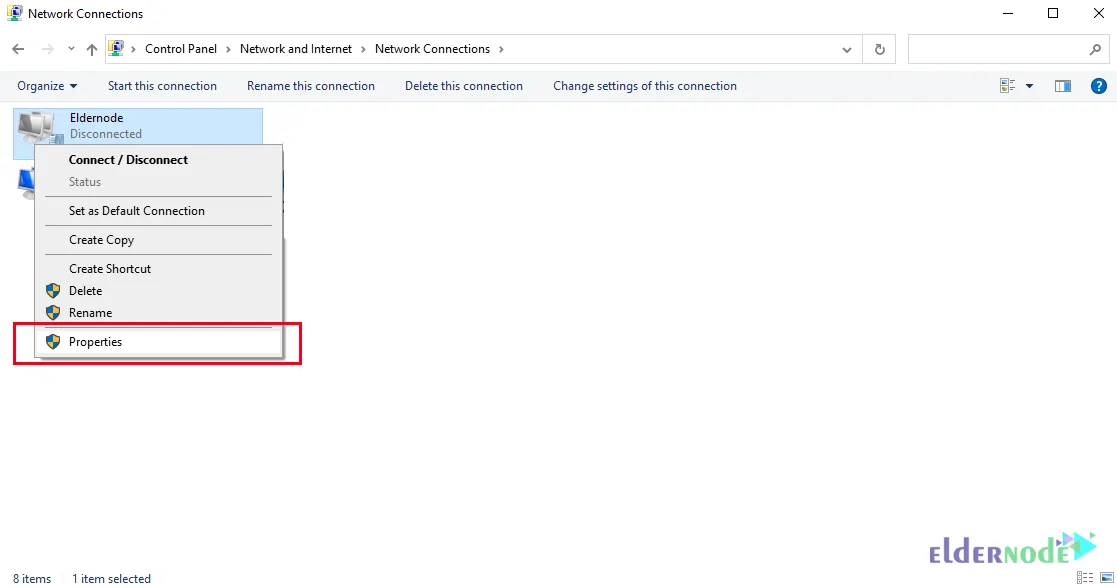
In the next step, you need to right click on your network connection and then click on Properties:
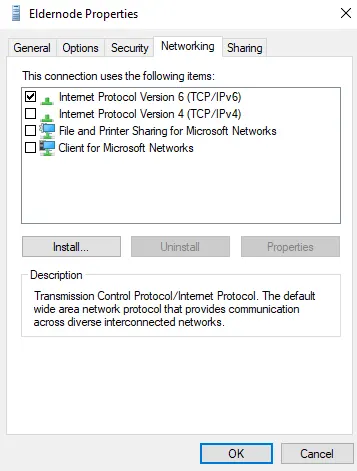
From the Networking menu, check the Internet Protocol version 6 (TCP/IPv6) option and click on Properties:
In the window that opens, you must tick the Use the following IPv6 address option. After doing this, it is necessary to complete the required fields as shown in the image below:
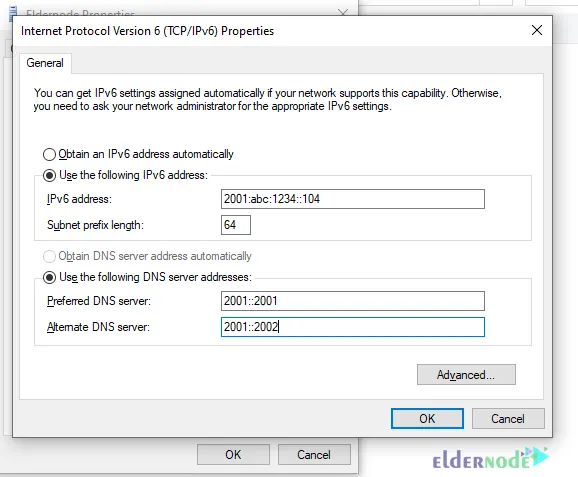
Finally, click OK to apply the changes. Then open the command line and run the following command in it to see information about IPs:
ipconfigHow to Configure IPv6 on Windows
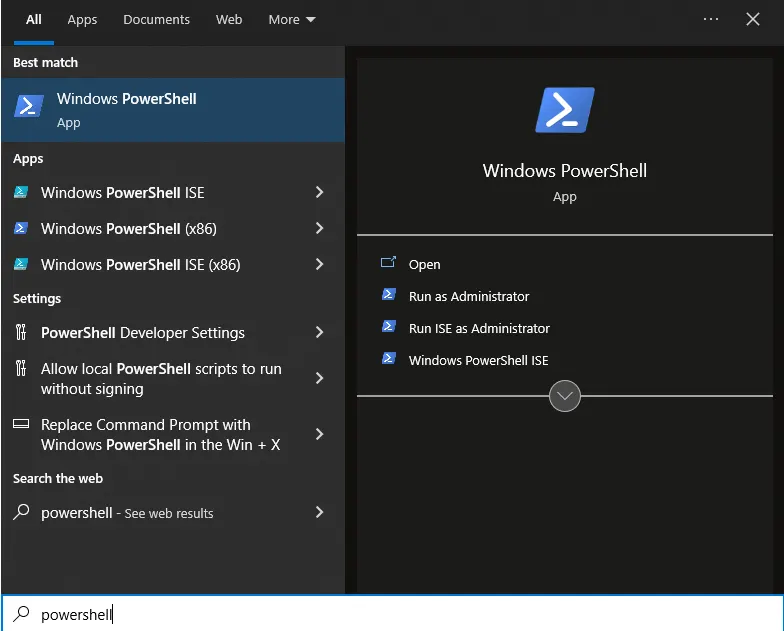
In this section, we are going to discuss how to configure IPv6 on Windows. To do this, you need to search for and run PowerShell from the Start menu:
To view the status of network adapters, it is necessary to run the following command:
Get-NetAdapterBinding -ComponentID ms_tcpip6Now you need to run the following command:
Enable-NetAdapterBinding -Name "Adapter Name" -ComponentID ms_tcpip6Note: You can type and run your actual network adapter name instead of Adapter Name in the above command.
You can enable IPv6 for All Network Adapters by running the following command:
Enable-NetAdapterBinding -Name "*" -ComponentID ms_tcpip6You can also Disable IPv6 for Specific Network Adapter using the following commands:
Get-NetAdapterBinding -ComponentID ms_tcpip6Disable-NetAdapterBinding -Name "Adapter Name" -ComponentID ms_tcpip6Finally, you can use the following command to Disable IPv6 for All Network Adapters:
Disable-NetAdapterBinding -Name "*" -ComponentID ms_tcpip6Conclusion
In the topic of IPv6, there is no more talk of binary and decimal, and the reason is that these numbers are big, that’s why they talk about IPv6 in terms of hexadecimal. This address is an address of 32 hexadecimal numbers, which consists of 8 sections of 4 hex separated by a :. In this article, we tried to teach you How to Setup and Configure IPv6 on Windows after introducing IPv6. If you have any question, you can share it with us in the comments section.