Anaconda is a package manager and is incredibly useful for data tasks. It contains a significant number of important libraries, especially libraries in the field of machine learning. It also includes very important tools. This article will explain 2 Ways to Setup Anaconda on MacOS. If you intend to buy your own VPS server, you can check out the packages offered on the Eldernode website.
Table of Contents
How to Install Anaconda on MacOS
Anaconda is a free and open-source distribution of Python and R Programming Languages used to simplify package management and deployment. You can use it for Machine Learning, Large-Scale Data Processing, Predictive Analytics, and Other uses. Package versions are managed by the Conda package management system. The Anaconda distribution is used by more than 15 million users and includes more than 1,500 popular data science packages suitable for Windows, Linux, and macOS.
1- Downloading Anaconda on MacOS
First, navigate to Anaconda‘s official website and choose Anaconda installer for MacOS as shown below to start the download:

Anaconda has SHA-256 checksums and it is better to use it because it is more secure. Once you downloaded the installer, you should verify it by entering the following command in the terminal:
shasum -a 256 filename2- Installing Anaconda on MacOS
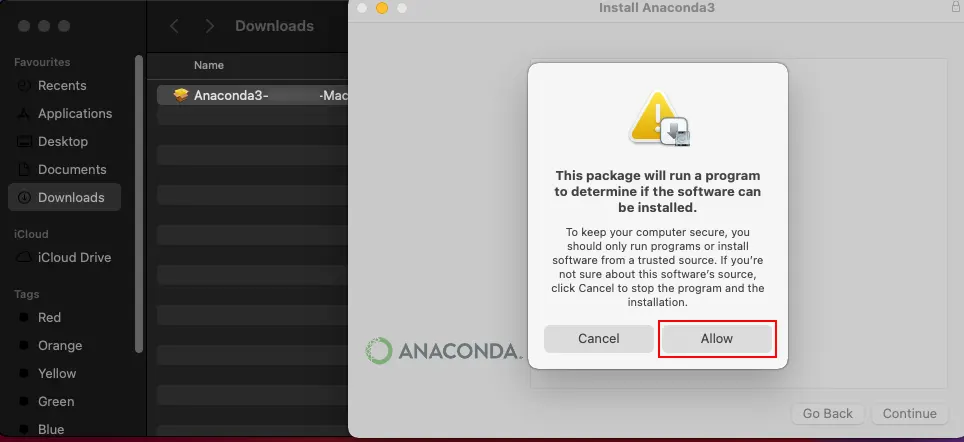
Navigate to the downloaded directory and double-click on the downloaded file. You will see the following screen, start the installation by clicking on Allow:
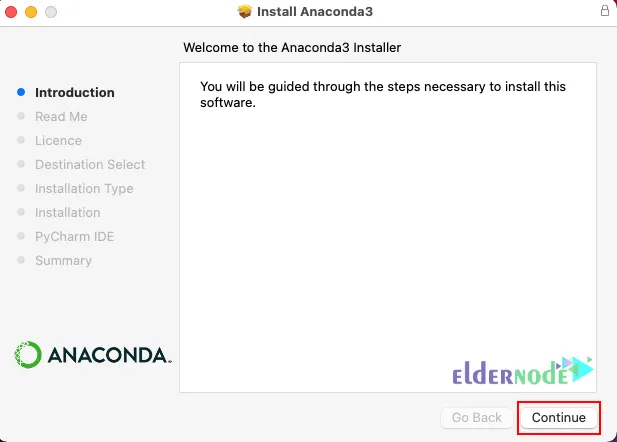
Click on Continue to proceed to install Anaconda:
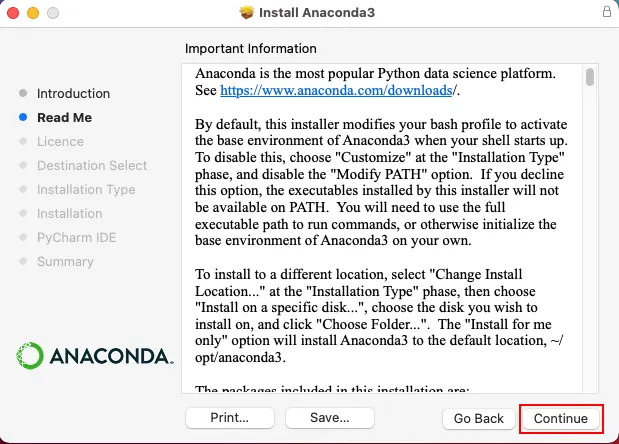
Now read the information in the Read Me section and click Continue again:
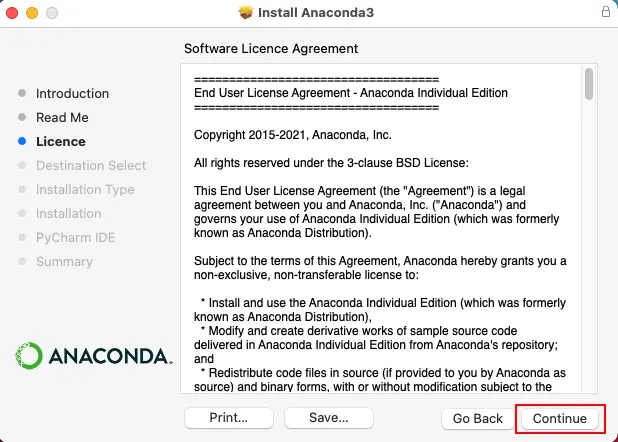
Read the Software License Agreement and click on Continue:
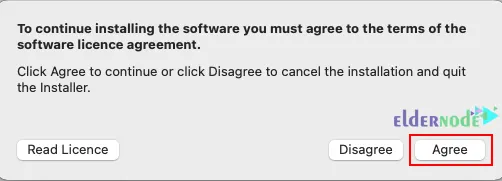
And to accept the license agreement, press Agree:
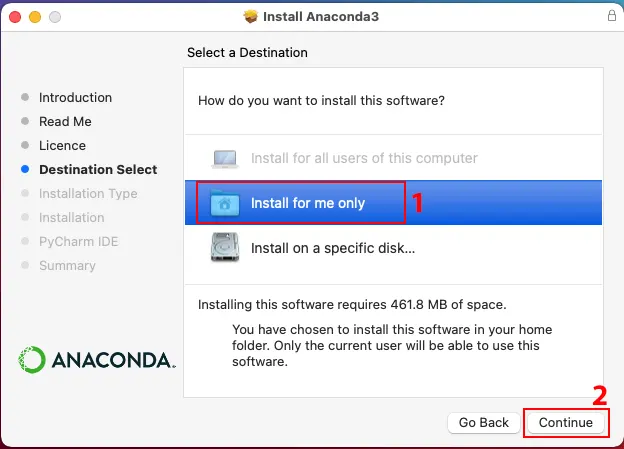
In this step, you should choose a destination to install the software. If you want it for personal use, select Install for me only:
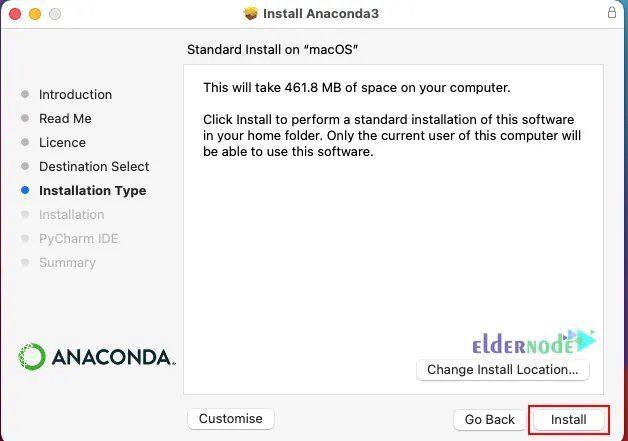
After you have set the previous steps, you can start the installation by clicking Install:
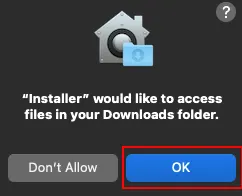
You may see the following dialog box appears, click OK:
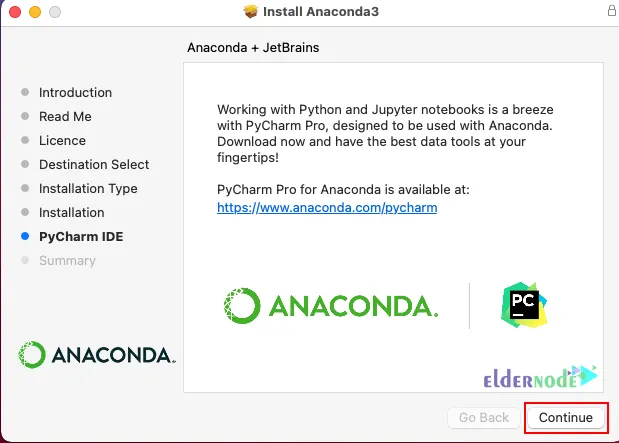
Click on Continue to skip this step, if you don’t want to install PyCharm IDE:
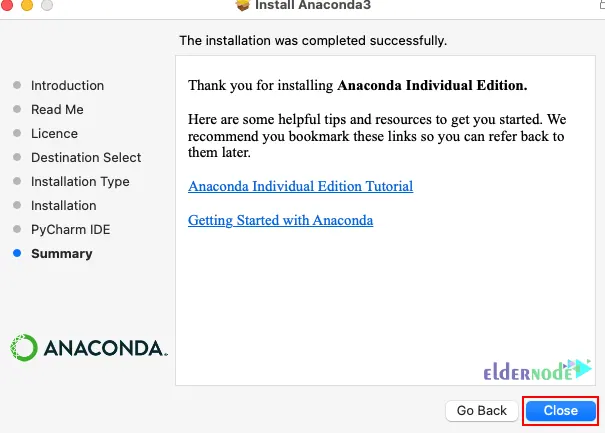
The installation of Anaconda on Mac is finished, so click Close:
You can activate Anaconda and check if it installed successfully or not using the following command:
conda activateTo view the list of installed packages, run the command below:
conda listIf you want to update Anaconda, navigate to the Anaconda directory and enter the following command:
conda update condaThat’s it!
Conclusion
Anaconda is one of the most popular Python and R distributions that has an easy implementation process. In this article, we taught you how to setup Anaconda on MacOS in 2 ways. I hope you found this tutorial useful and that it helps you to install Anaconda on your Mac operating system. If you face any problems or have any questions, you can contact us in the Comments section.

