A VPN Server is a virtual server configured to host and provide VPN services to users worldwide. A server is a combination of VPN hardware and VPN software that allows users to connect to a secure private network. Pritunl is a VPN Server. In this article, we will explain How to Install and Configure Pritunl VPN Server on Debian 11. You can purchase Linux VPS Server if you want from the packages offered on the Eldernode website.
Table of Contents
How to Install Pritunl VPN Server on Debian VPS
What is Pritunl VPN Server?
Pritunl VPN Server is an open-source enterprise VPN software that provides a simple and user-friendly web interface. This VPN Server can create a wide range of cloud VPN networks and can be used as an alternative to Aviatrix and Pulse Secure solutions. You can virtualize your private networks in data centers in minutes.
Pritunl is one of the most secure VPN servers in the world and all traffic between customers and the server is encrypted. Pritunl also offers several layers of protection including 2FA, mobile authentication, user PIN, and so on. It offers an official client package and supports all OpenVPN clients for most devices and operating systems.
Pritunl Features
– Supports multi-cloud VPN peering
– Supports Wireguard and OpenVPN clients
– Configure up to five layers of authentication to give it better security
– Configure for the multi-cloud site-to-site links with VPC peering
– Ease of installation, configuration, and management
– Highly scalable for thousands of users
In the continuation of this article from the Debian training series, we intend to teach you step by step How to Install and Configure Pritunl VPN Server on Debian 11.
Installing Pritunl VPN Server on Debian 11
First, log in to your Debian machine as a user with Sudo privileges or as a root user and update your system:
sudo apt update sudo apt -y full-upgradeNow you should check if your system needs a reboot or not:
[ -f /var/run/reboot-required ] sudo reboot -fIn the next step, you need to add MongoDB and Pritunl repositories.
To do this first update your system again and install the required basic utility packages:
sudo apt update sudo apt install gpg curl gnupg2 software-properties-common apt-transport-https lsb-release ca-certificatesNow you should import MongoDB APT repository keys to your system as follows:
curl -fsSL https://www.mongodb.org/static/pgp/server-5.0.asc sudo gpg --dearmor -o /etc/apt/trusted.gpg.d/mongodb-5.gpgAnd then import Pritunl VPN GPG keys using the following command:
sudo apt-key adv --keyserver hkp://keyserver.ubuntu.com --recv 7AE645C0CF8E292ANext, you can add the Pritunl repository by running the following command:
echo "deb http://repo.pritunl.com/stable/apt $(lsb_release -cs) main" sudo tee /etc/apt/sources.list.d/pritunl.listTo add MongoDB repository:
echo "deb [ arch=amd64,arm64 ] https://repo.mongodb.org/apt/debian buster/mongodb-org/5.0 multiverse" sudo tee /etc/apt/sources.list.d/mongodb-org-5.0.listNow it’s time to install Pritunl and Mongo server packages by running the following command:
sudo apt install mongodb-org pritunlThen you can start Pritunl and MongoDB using the following command:
sudo systemctl start pritunl mongodAnd to enable it:
sudo systemctl enable pritunl mongodThe installation process was completed successfully!
How to Configure Pritunl VPN Server on Debian 11
Before doing this, you should access the Pritunl web console on an IP of a web browser server:
http://<your_server_ip>Then you will see the following page asking you for the Setup Key:
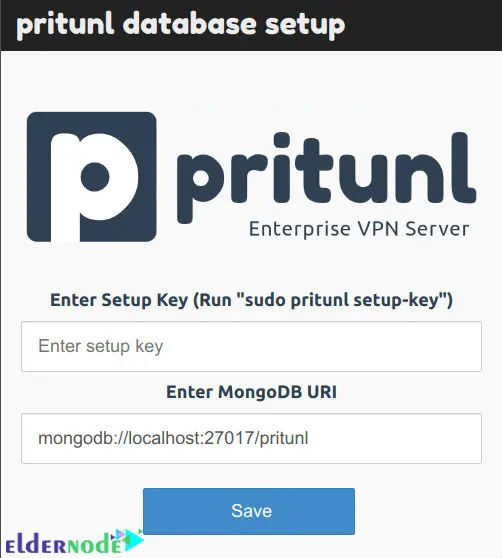
You can generate Setup Key using the following command:
sudo pritunl setup-keyAfter entering the setup key and MongoDB URL, you will see the Login Pritunl page. Enter your Username and password and click on Sign in:
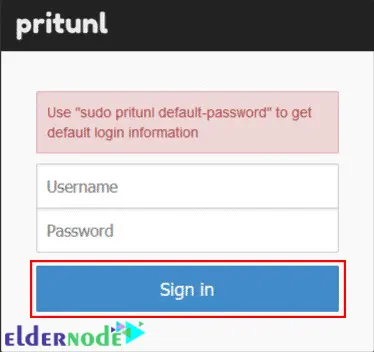
If you want to create a default username and password, just run the following command:
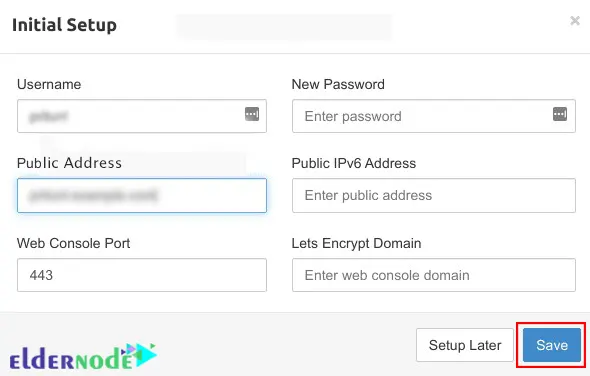
sudo pritunl default-passwordAfter logging in, you will see the following page where you can set domain and Let’s Encrypt SSL, change the admin user and password:
Now you should configure organizations, users, and servers:
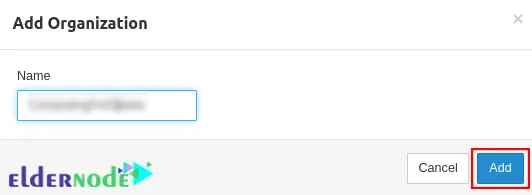
You should go to the Users section to add VPN users. Click on Add organization to create a new organization:

Then choose a name for yourself and click Add:
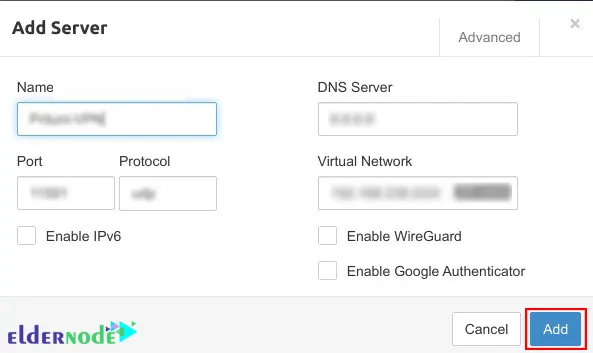
Go to the Servers section and click on Add server to create a VPN server. Then on the opened page, fill in the information and click Add:
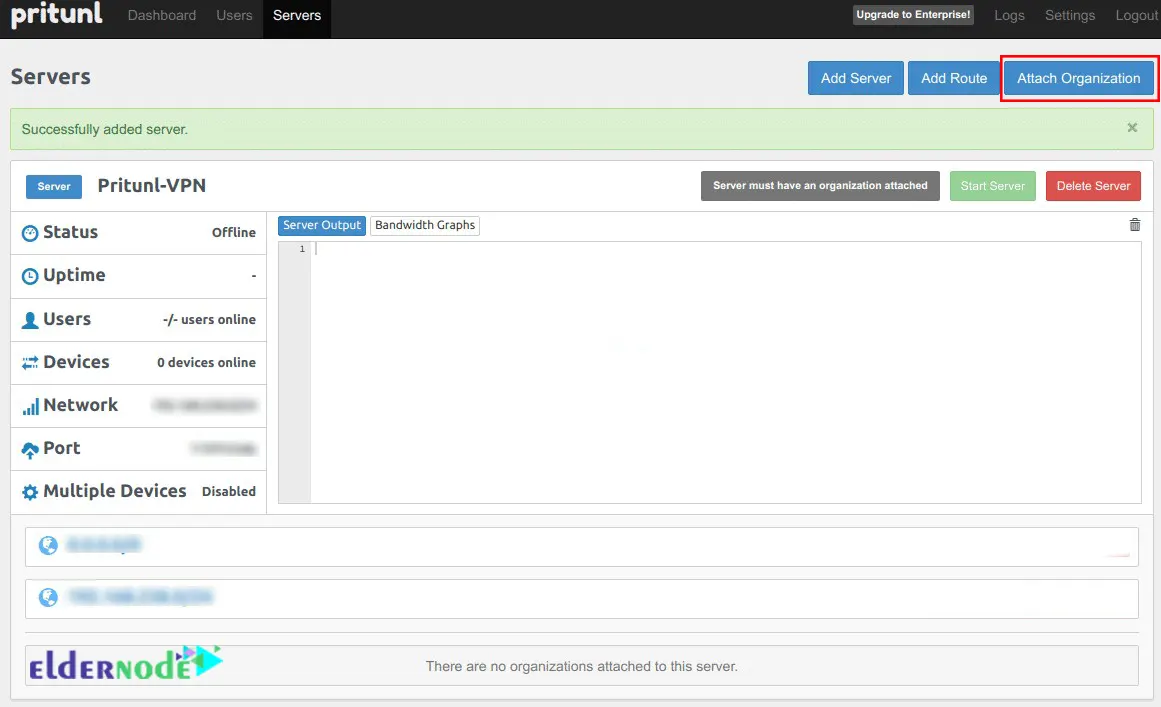
You can attach the server to an organization by clicking on Attach organization and then choosing your organization:
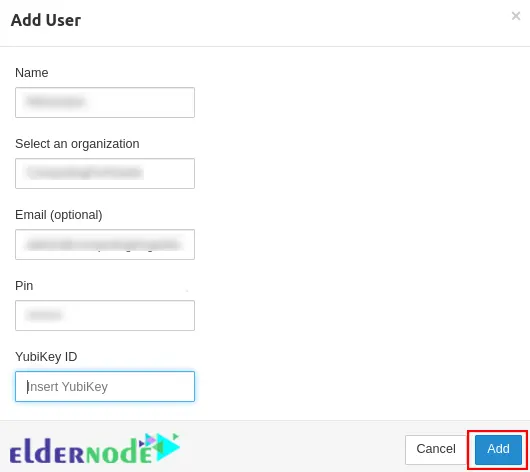
If you want to create a user profile on your VPN server, click on Add user:
Remember that you can add many users at once by clicking the Bulk Add user function on the web interface.
That’s it!
Conclusion
Pritunl is one of the most secure VPN servers available, which can provide a reliable interconnection between different virtual private cloud networks. This VPN server offers up to five layers of authentication. In this article, we taught you how to Install and Configure Pritunl VPN Server on Debian 11. I hope this tutorial was useful for you.