Users who enter the field of site design are familiar with content management systems (CMS). WordPress is a site content management system that you can use to launch a variety of websites and blogs. Due to the high flexibility of the WordPress content management system, you will be able to use it to launch any type of website. In this article, we are going to teach you How to Install WordPress on AlmaLinux 8.4. You can see the packages available in Eldernode if you want to buy a Linux VPS server.
Table of Contents
How to Install WordPress on AlmaLinux 8.4
Introduction to WordPress and ita Features
There are many content management systems available to set up a website, some of which have advantages over others. WordPress is a content management system consisting of a wide variety of templates and skins that are provided to users for free. You can use this system to launch your site without any programming skills.
The sites you create with content management systems are actually dynamic sites. If you are new to site design and want to build a website, we suggest using content management systems like WordPress. Because site design and programming are very time-consuming and costly.
The most important benefits and features of WordPress are:
1. Simplicity and ease of use
2. Sustainability and creativity
3. Attractive design options
4. Flexibility
5. Search Engine Optimization (SEO)
6. Structure
7. Easy content management
8. Be pervasive
9. Ability to subscribe
10. Open-source
11. Response
12. Performance
13. Programming Interface Application (APIs)
14. Scalability
15. WordPress support
16. Speed and efficiency
Follow us in this article to show you How to Install WordPress on AlmaLinux 8.4.
Prerequisites to Install WordPress on AlmaLinux 8.4
In this section, we want to teach you the prerequisites for Install WordPress on AlmaLinux 8.4. It should be noted that the first step is to have access to the root user account (or access to the administrator account with root privileges).
To get started, you need to log in to your AlmaLinux 8.4 server via SSH as the primary user using the following command. Note that in the following command you must replace “IP_Address” and “Port_number” with the corresponding IP address and your SSH port number:
ssh root@IP_Address -p Port_numberThen you need to update the system using the following command:
dnf update -yYou should now verify the current version of your operating system by running the following command:
cat /etc/os-releaseAfter completing the above steps, we now reach the LAMP installation stage. First, you need to install the Apache web server, MariaDB server, PHP, and other packages using the following command:
dnf install httpd httpd-tools mariadb-server php php-json php-mysqlnd php-json php-curl unzip -yYou should now be able to start the Apache and MariaDB services using the following commands and enable them to restart the system:
systemctl start httpdsystemctl enable httpdsystemctl start mariadbsystemctl enable mariadbHow to Create a WordPress Database
To create a database for WordPress in the first step you must log in to MariaDB using the following command:
mysqlNext, you need to create the database and user using the following commands:
MariaDB [(none)]> CREATE DATABASE wpdb;MariaDB [(none)]> CREATE USER 'wpuser'@'localhost' IDENTIFIED BY 'password';You can grant all privileges to the WordPress database by executing the following command:
MariaDB [(none)]> GRANT ALL ON wpdb.* TO 'wpuser'@'localhost' IDENTIFIED BY 'password' WITH GRANT OPTION;Finally, you need to flush the privileges and exit MariaDB using the following command:
MariaDB [(none)]> FLUSH PRIVILEGES;MariaDB [(none)]> EXIT;Install WordPress on AlmaLinux 8.4
In this section, we are going to discuss how to install WordPress on AlmaLinux. To do this, you must follow the steps below. First, change the directory to the Apache web root and download the latest version of WordPress using the following commands:
cd /var/www/htmlwget https://wordpress.org/latest.tar.gzNow you need to extract the downloaded file by running the following command:
tar -xvzf latest.tar.gzNext, you need to change the directory to WordPress and rename the sample configuration file using the following commands:
cd wordpressmv wp-config-sample.php wp-config.phpNow you need to edit the sample configuration file by running the following command and then define your database settings:
nano wp-config.phpAfter opening the configuration file you need to change the following values:
define( 'DB_NAME', 'wpdb' );/** MySQL database username */ define( 'DB_USER', 'wpuser' );/** MySQL database password */ define( 'DB_PASSWORD', 'password' );/** MySQL hostname */ define( 'DB_HOST', 'localhost' );Finally, you need to save the file using the following commands and then set the appropriate ownership on the WordPress directory:
chown -R apache:apache /var/www/html/wordpressHow to Configure WordPress on AlmaLinux 8.4
In this section, we want to discuss how to configure WordPress on AlmaLinux. The first step is to configure Apache. To do this, you need to create an Apache virtual host configuration file for WordPress using the following command:
nano /etc/httpd/conf.d/wp.confAfter opening the configuration file with one of the text editors you want, you now need to add the following lines to it:
<VirtualHost *:80> ServerAdmin [email protected] DocumentRoot "/var/www/html/wordpress" ServerName wp.example.com ErrorLog "/var/log/httpd/example.com-error_log" CustomLog "/var/log/httpd/example.com-access_log" combined <Directory "/var/www/html/wordpress"> DirectoryIndex index.html index.php Options FollowSymLinks AllowOverride All Require all granted </Directory> </VirtualHost>After configuring Apache, you must save the file using the following command and restart Apache to apply the changes:
systemctl restart httpdThe next step is to configure the firewall. To do this, you must enable ports 80 and 443 through the firewall using the following commands:
firewall-cmd --permanent --zone=public --add-service=httpfirewall-cmd --permanent --zone=public --add-service=httpsIn the last step, you can reload the firewall by running the following command to apply the changes:
firewall-cmd --reloadHow to Access WordPress on AlmaLinux 8.4
In the previous sections, we showed you how to install and configure WordPress on AlmaLinux. Now we want to teach you how to access the WordPress admin panel. To do this, you must follow the steps below.
You can access the WordPress installation wizard by entering the following URL in your browser:
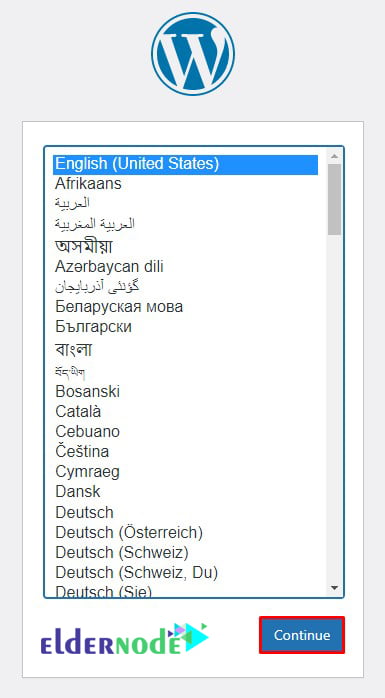
http://wp.example.comRunning the above command will take you to the following page. In the next step, you need to select the language you want and then click on the Continue button:
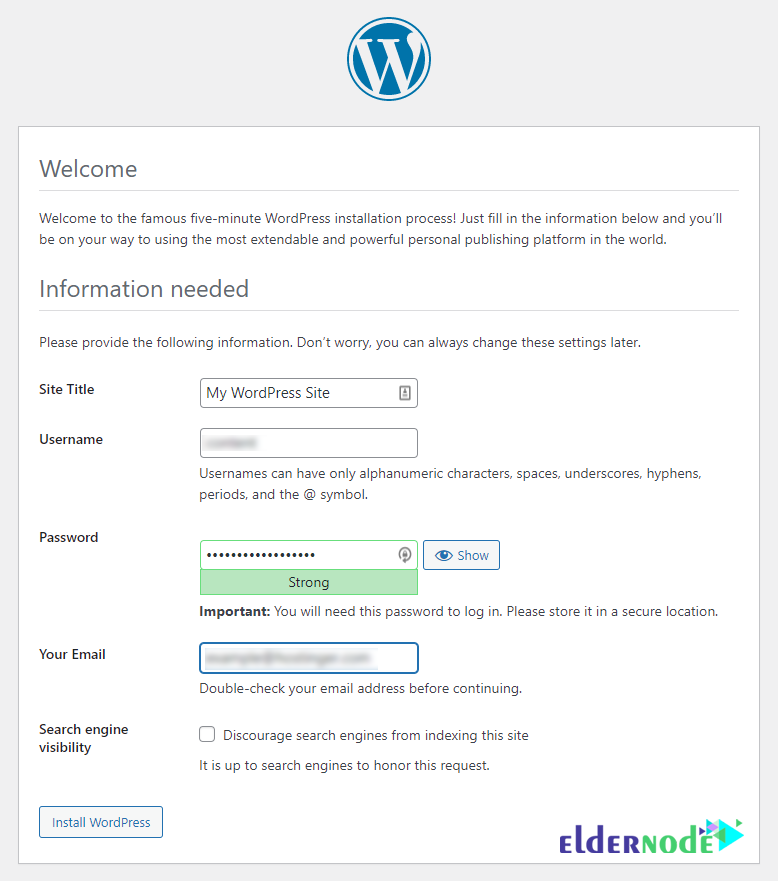
After you have selected the language you want in the previous section, you now need to enter the site name, administrator username, and password. Then click on the Install WordPress button:
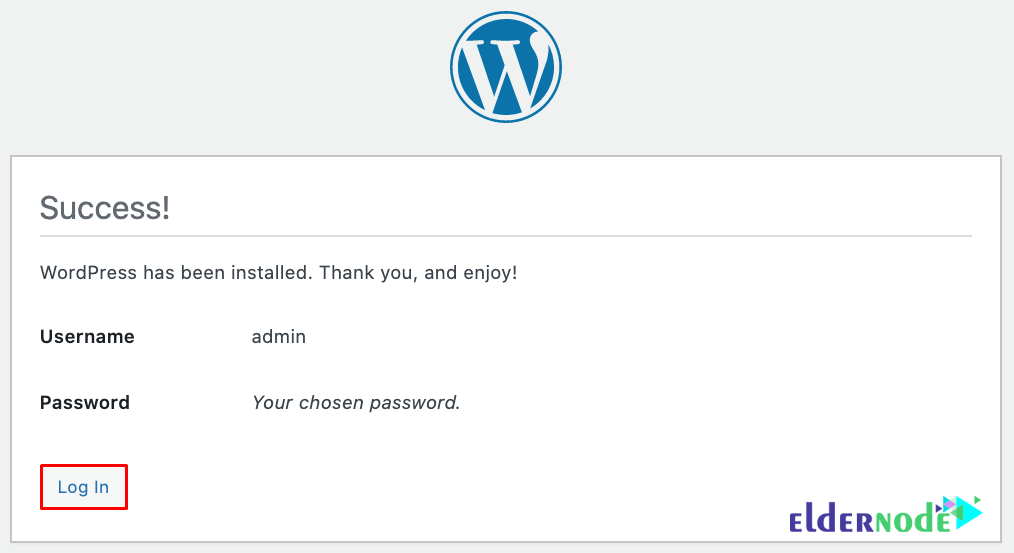
As you can see in the image below, you have to click on the Log In button:
After clicking on the Log In button, you will be redirected to the WordPress admin login page:
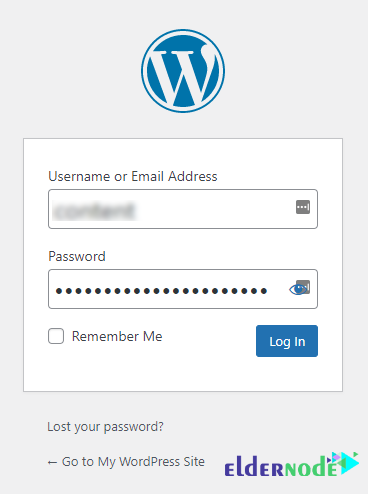
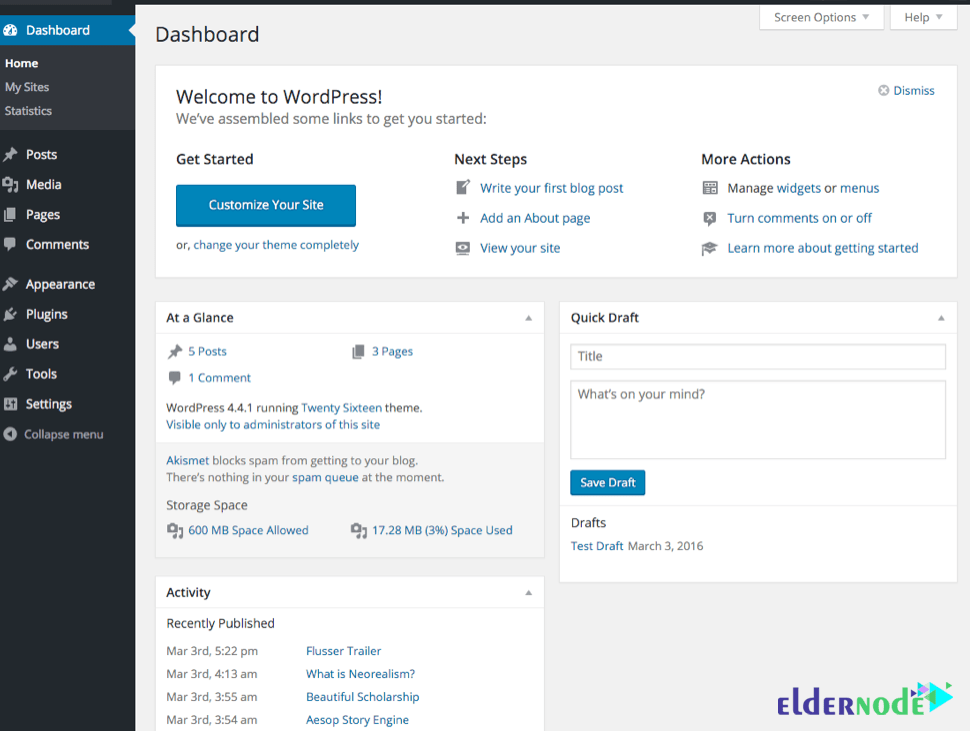
In the final step, you must enter your username and password and click on the Log In button. By doing this you will see the WordPress admin panel:
Conclusion
WordPress starts with an active and heartfelt open-source community and can help you get a great website up and running. In this article, we tried to teach you to step by step how to Install WordPress on AlmaLinux 8.4.