In the Following of monitoring tools tutorials, we are going to present the Nagios installation guide. On any Linux operating system, you can run this open-source network monitoring system. Since the Nagios provides an overview of the critical parameters, it is not different you prefer to work in the command-line interface or web-based graphical interface. Administrators would receive emails and text messages as alert notifications, once a critical level is identified to be able to fix the detected network or server problems. Prepare your own Linux VPS and continue with us to learn how to Install Nagios Monitoring on Ubuntu 20.10 Server.
To let this tutorial work better, please consider the below Prerequisites:
A non-root user with sudo privileges.
Table of Contents
Tutorial Install Nagios Monitoring on Ubuntu 20.10
To maintain the security and availability of your system and service, you need the help of a monitoring tool to prevent any negative impact on your business. Using the TCP port, SMTP, POP3, HTTP, NNTP, PING, etc Nagios is able to keep tabs on network details. After preparing an Ubuntu VPS you are ready to download and install Nagios. Let’s go through the steps of this guide to learn and finish it.
How To Update Your System
Due to some security considerations, it is better to update your system:
sudo apt-get updateNote: In case you have installed the Ubuntu system recently, you need Apache and PHP. Run the following command to install them:
sudo apt-get install wget build-essential unzip openssl libssl-devsudo apt-get install apache2 php libapache2-mod-php php-gd libgd-devHow To Create A Nagios User
One step before the installation is to create a new user account for Nagios in your system. Use the command below to create one in your system:
sudo adduser nagiosTo add your created user to a group, you need to create a group for Nagios setup ”nagcmd” first. Then, add your ”nagios” user to the Apache group.
sudo groupadd nagcmdsudo usermod -a -G nagcmd nagiossudo usermod -a -G nagcmd www-dataHow To Install Nagios Core Service
It is time to install the Nagios core. You can receive the latest version of Nagios core from the official site for free.
cd /opt/wget https://assets.nagios.com/downloads/nagioscore/releases/nagios-4.4.5.tar.gzThen, to move the files to your chosen location, extract the files by running:
tar xzf nagios-4.4.5.tar.gzOnce the extract is finished, use the commands below to navigate to the ”nagios” source directory and install. In this way, you can compile Nagios with Ubuntu.
cd nagios-4.4.5sudo ./configure --with-command-group=sudo make allsudo make installsudo make install-initsudo make install-daemoninitsudo make install-configsudo make install-commandmodesudo make install-exfoliationTo make multiple event triggers for your Nagios web interface, copy event handlers scripts under libexec directory.
How To Setup Apache with Authentication
To create an Apache configuration file for your Nagios server, run:
sudo vi /etc/apache2/conf-available/nagios.confTo prevent more changes in configuration, setup apache authentication for user nagiosadmin:
htpasswd -c /usr/local/nagios/etc/htpasswd.users nagiosadminThen, to make the new settings take effect enable Apache configuration and restart Apache service:
sudo a2enconf nagiossudo a2enmod cgi rewritesudo service apache2 restartHow To Update Your Email Address
you just need to run the following command to let you edit the file of ”contacts.cfg” which is located in the directory usr/local/nagios/etc/objects, to include the email address where we want to receive notifications.
sudo gedit /usr/local/nagios/etc/objects/contacts.cfgHow To Install Nagios Plugins
In this step, you should download the latest nagios-plugins source and install. To do this run:
cd /optwget http://www.nagios-plugins.org/download/nagios-plugins-2.2.1.tar.gz/pre>tar xzf nagios-plugins-2.2.1.tar.gz/pre>cd nagios-plugins-2.2.1And to compile and install Nagios plugins, type:
sudo ./configure --with-nagios-user=nagios --with-nagios-group=nagios --with-openssl/pre>sudo make/pre>sudo make installHow To Verify Settings
To verify the Nagios installation and configuration file, run the following commands, and then you are ready to start the Nagios core service.
/usr/local/nagios/bin/nagios -v /usr/local/nagios/etc/nagios.cfgservice nagios startTo let Nagios start on your system boot automatically, configure Nagios by running the following command:
sudo systemctl enable nagiosHow To Use Nagios On Ubuntu
You can ensure that the configuration was properly seen or not by running the command below:
sudo /usr/local/nagios/bin/nagios -vHow To Access Nagios Web Interface
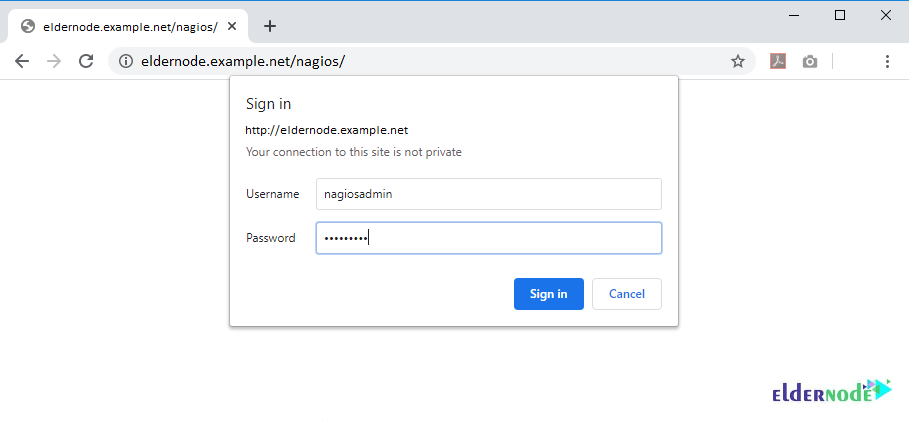
You can access your nagios setup if you access the nagios server. To do this, you need to use hostname or ip address followed by /nagios.
http://eldernode.example.net/nagios/In this way, you have authenticated Apache. The username could be nagiosadmin and the password is the one you created when you were setting up Apache with the Authentication step.

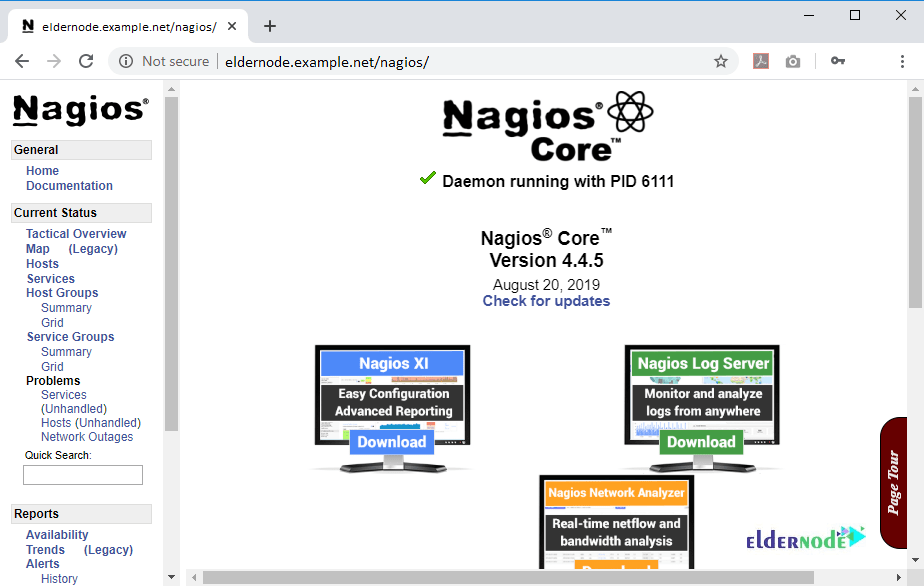
Once you log in, you can view the Nagios interface as below. Also to see hosts, services, and alerts use the sidebar button.

Conclusion
In this article, you learned How To Install Nagios Monitoring on Ubuntu 20.10. From now on you are ready to use this most popular tool and monitor and troubleshoot your server performance issues. In case you are interested in learning more, find the related article on Introducing Nagios Monitoring System for Linux.


