Google Chrome is now the world’s largest browser and half of the world’s people use it as their default browser. In this article, we intend to introduce you to 5 Ways to Install Google Chrome on Ubuntu 20.04. It should be noted that if you want to buy an Ubuntu VPS server, you can visit the packages offered on Eldernode.
Table of Contents
Installing Google Chrome on Ubuntu 20.04
In the continuation of this article from the Ubuntu training series, we intend to teach you how to install Google Chrome on Ubuntu 20.04 using 5 methods.
Downloading from the official website
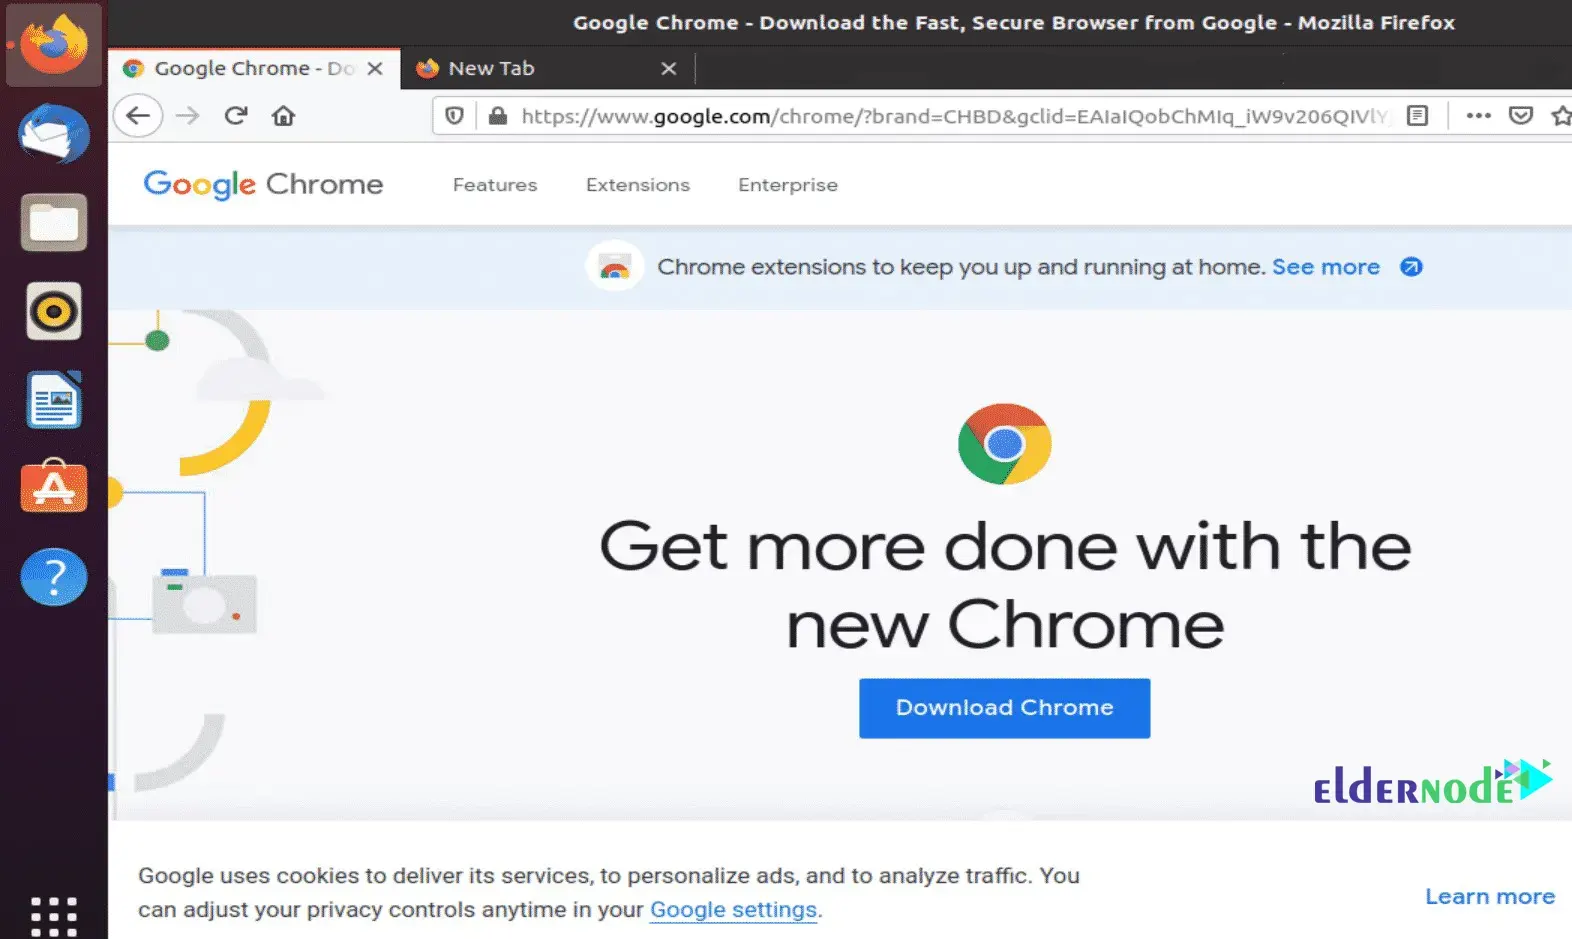
The first method to Install Google Chrome, which we intend to teach in this article, is using the official website. Open one of your desired browsers and enter the URL to download Google Chrome.
Then click on Download Chrome:
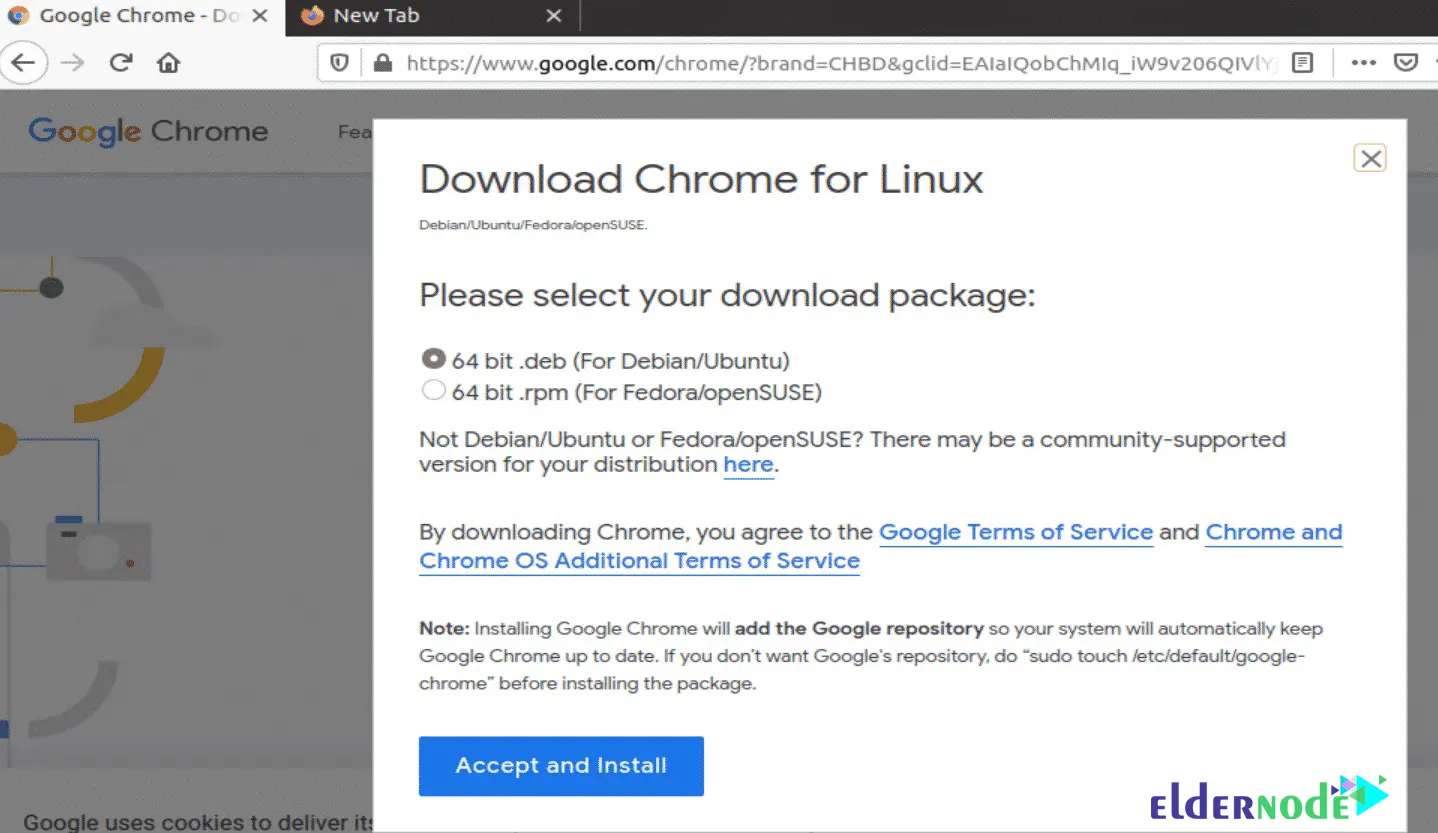
As you can see in the image below, you must select the first option, i.e. 64 bit .deb (for debian/ubuntu) and then click on Accept and Install:
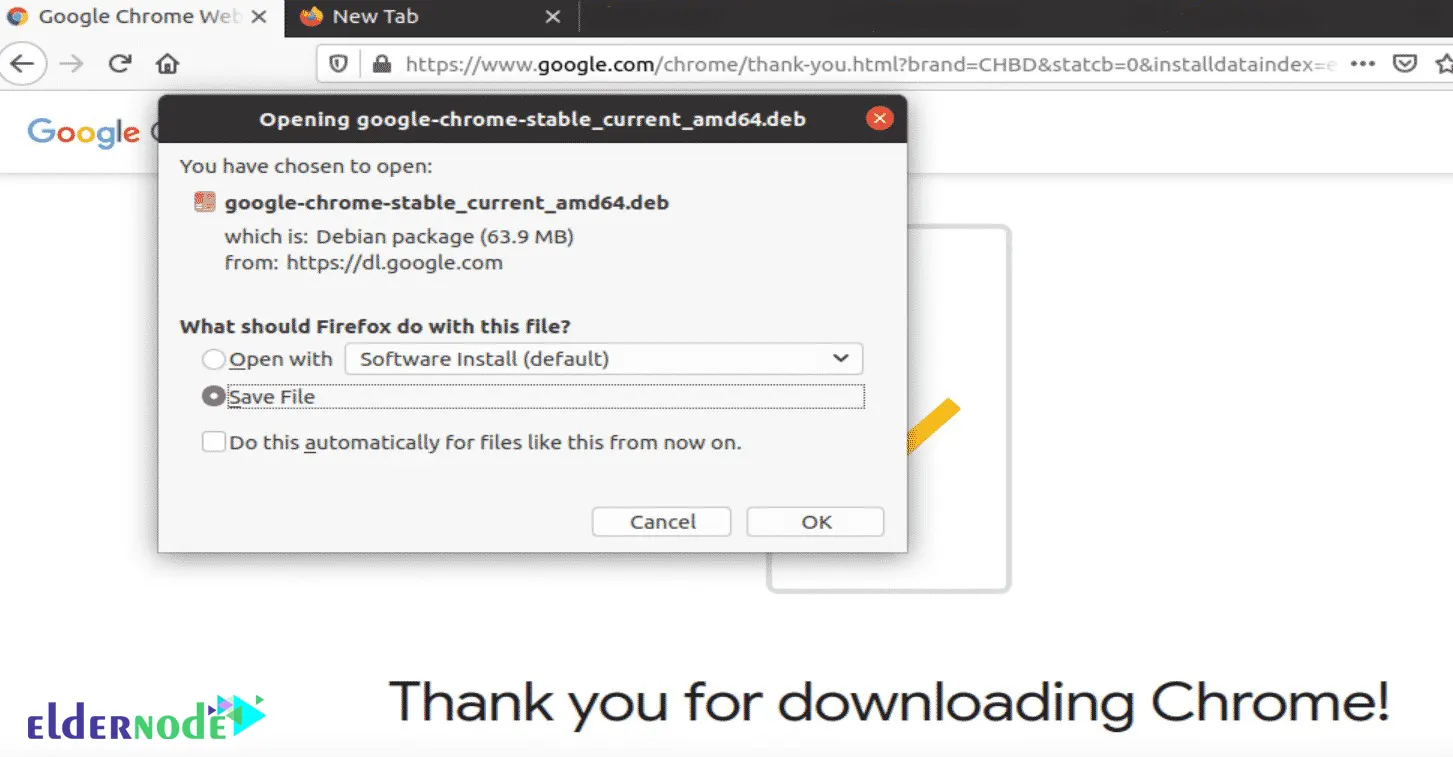
As shown in the image below, select the Save File option and click on Ok:
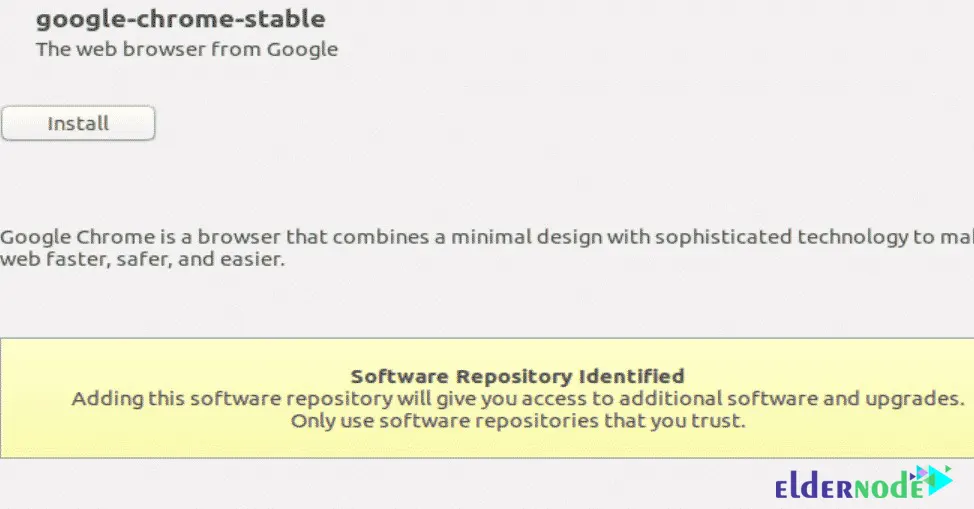
At this stage, it is necessary to run the installation file by referring to the Ubuntu Software Center and click on Install in your own Ubuntu system:
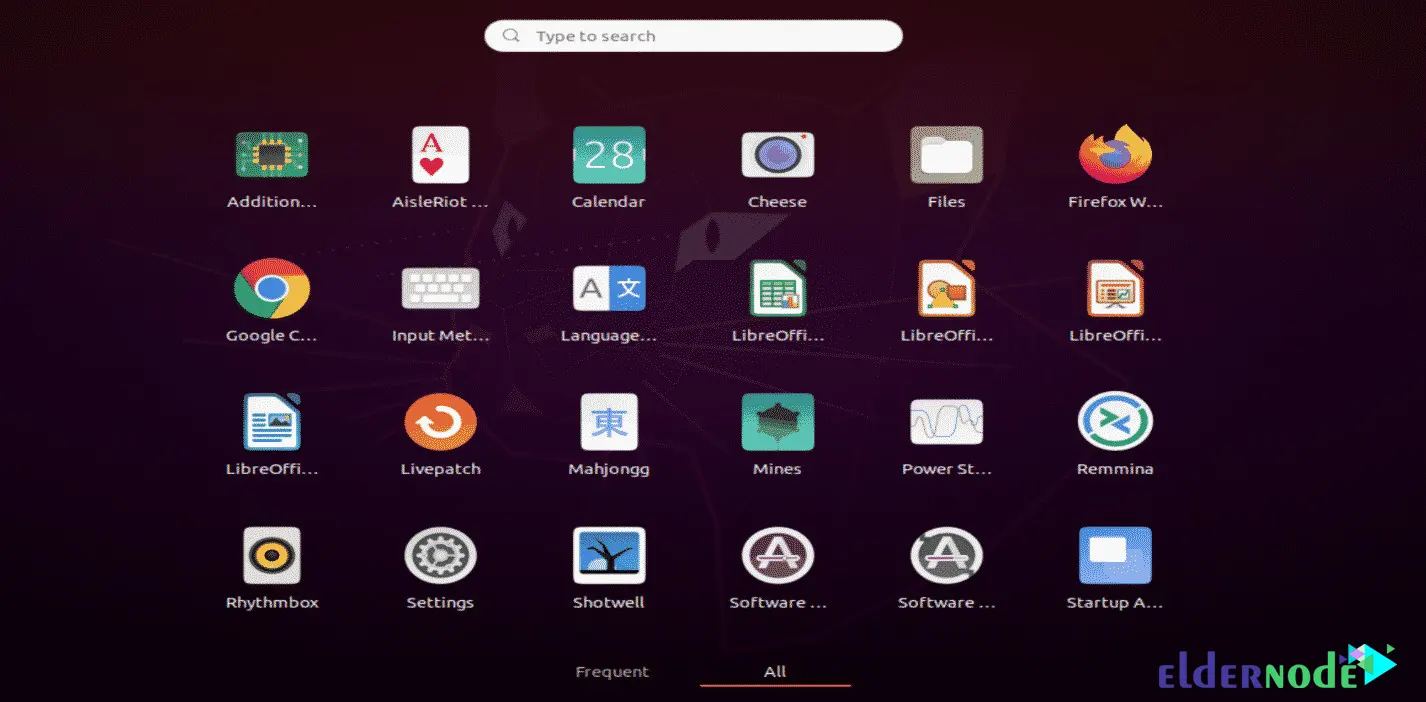
Finally, by visiting the Activities menu, you will see that Google Chrome has been successfully installed:
Using the PPA repository
In this section, we are going to teach you how to install Google Chrome on Ubuntu using the PPA repository.
In the first step, you need to set the public key to access the Chrome repository. To do this, you need to use the following command:
wget -q -O - https://dl.google.com/linux/linux_signing_key.pub | sudo apt-key add -Now you need to set the Google repository for Chrome using the following command:
sudo sh -c 'echo "deb [arch=amd64] http://dl.google.com/linux/chrome/deb/ stable main" >> /etc/apt/sources.list.d/google.list'Now, you should update the system using the following command:
sudo apt updateFinally, you can install Google Chrome by running the following command:
sudo apt install google-chrome-stableInstalling manually
In this step, we want to teach how to install Google Chrome on Ubuntu 20.04 using the terminal or manually.
Therefore, you must first update the system using the following commands:
sudo apt updatesudo apt upgradeNow you need to check the wget version by running the following command:
wget --versionYou can also Install wget by running the following command:
sudo apt install wgetNow you can download Google Chrome using the following command:
wget https://dl.google.com/linux/direct/google-chrome-stable_current_amd64.debInstall the desired package by running the following command:
sudo dpkg -i google-chrome-stable_current_amd64.debFinally, you can run the following command in the Linux terminal to start Google Chrome:
google-chromeUsing the Snap package
In this section, we are going to show you how to install Google Chrome on Ubuntu 20.04 using Snap. With this method, you can easily install Google Chrome by running the following command:
sudo snap install chromiumUsing the Flatpak package
In this section, we are going to teach you how to install Google Chrome on Ubuntu 20.04 using the Flatpak package. If Flatpak is not installed on your system, you need to install it by running the following command:
sudo apt install flatpakAfter installing Flatpak it is now necessary to add the Flathub repository:
flatpak remote-add --if-not-exists flathub https://flathub.org/repo/flathub.flatpakrepoNow you can use the following command to install Google Chrome:
flatpak install flathub com.google.ChromeYou can also run Google Chrome using the following command:
flatpak run com.google.ChromeConclusion
As mentioned in this tutorial, Google Chrome is the most used web browser in the world. It’s a fast, easy and secure browser built for the web. In this article, we tried to fully teach you 5 Ways to Install Google Chrome on Ubuntu 20.04. You can share your questions related to this article with us.