![How To Install and Use AlmaLinux 8.4 [Complete]](https://blog.eldernode.com/wp-content/uploads/2021/09/How-To-Install-and-Use-AlmaLinux-8.4-Complete.png)
The AlmaLinux distribution is a binary branch of RHEL 8 built by the creators of the CloudLinux operating system. AlmaLinux is a powerful option to replace CentOS with support until at least 2029. In this article, we are going to teach you to step by step How To Install and Use AlmaLinux 8.4. You can see the packages available in Eldernode if you want to buy a Linux VPS server.
Table of Contents
Tutorial Install and Use AlmaLinux 8.4
Introduction to AlmaLinux
AlmaLinux is an open-source, community-based Linux operating system that bridges the gap left by the discontinuation of the stable version of CentOS Linux. AlmaLinux OS is a 1:1 binary compatible fork of RHEL® guided and built by the community. As a standalone, completely free operating system, AlmaLinux has $1M in annual support from CloudLinux Inc. and other sponsors.
It is interesting to know that AlmaLinux operating system is a corporate server operating system and stable Linux distribution with regular versions that come with long support windows. You can rely on AlmaLinux to run any important workload.
Another important point is that the members of the AlmaLinux operating system foundation, their sponsors, and partners support the AlmaLinux operating system with long-term investment and support commitments. Doing so is to ensure that distribution is unrestricted and cost-effective.
Prerequisites to Install AlmaLinux
_ An ISO image file of AlmaLinux 8.4.
_ A 16 GB USB drive for use as a bootable installation medium.
Note: Once the ISO download is complete, you can use the UNetbootin or Etcher tool to make a bootable USB drive from the ISO image.
_ A minimum of 15GB of hard disk space and 2GB RAM.
How to Configure before starting AlmaLinux Installation
In this section, we want to fully teach you how to configure AlmaLinux before installing AlmaLinux 8.4. To do this, you must carefully follow the steps below.
How to Boot AlmaLinux
After downloading the AlamLinux file to the bootable USB drive, connect it and restart the system. It should be noted that the boot settings in the BIOS are booted from the USB drive.
Note that when your computer boots, you will see a dark screen with installation options. You need to select the first option “Install AlamLinux 8.4” as shown below and then press ENTER:

After completing the previous step, a restart message will be displayed:
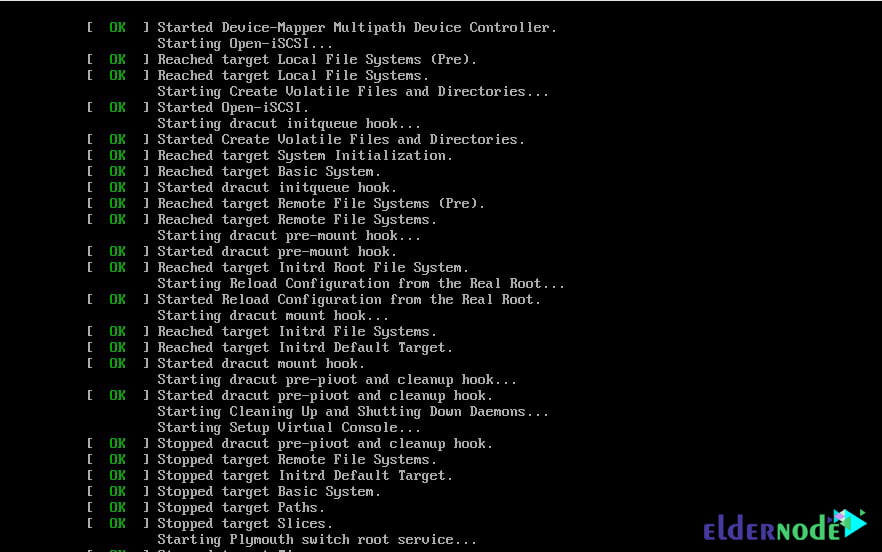
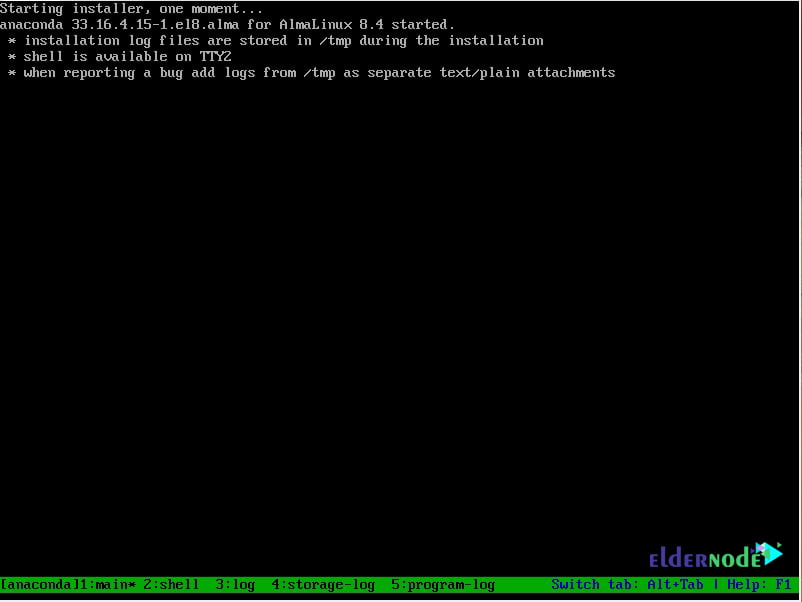
As you can see in the image below, the installer launches the basic instructions:
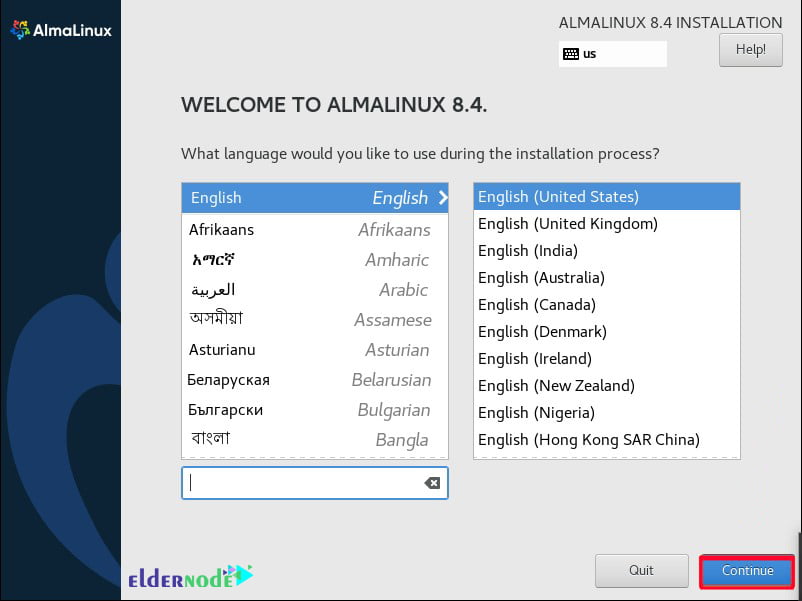
How to set the language for installing AlmaLinux
In the next section, you must select the language you want to install AlmaLinux and click Continue:
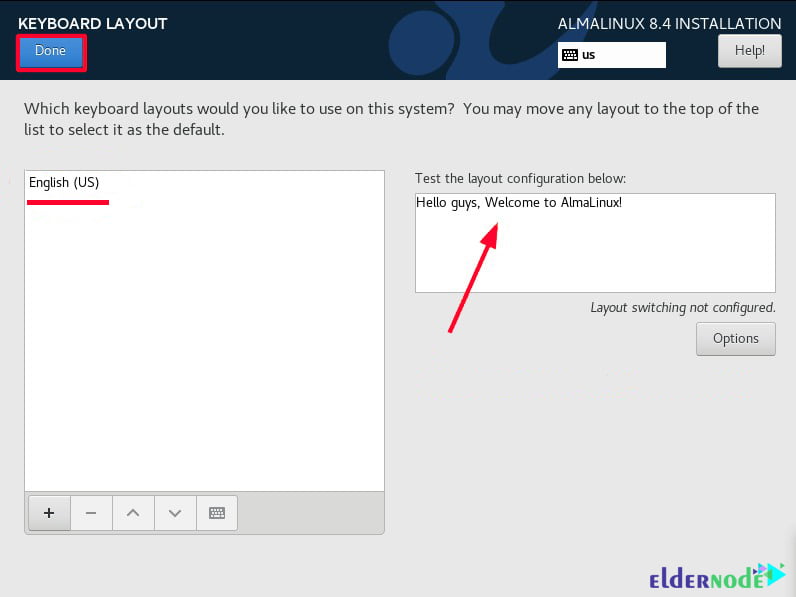
Configuring the Keyboard to AlmaLinux
The next step is to set the keyboard. To do this, click on the “Keyboard” icon in the “Localization” section:

As you can see, the default keyboard language is set to English. It should be noted that you can test how the text appears in the text box on the right:
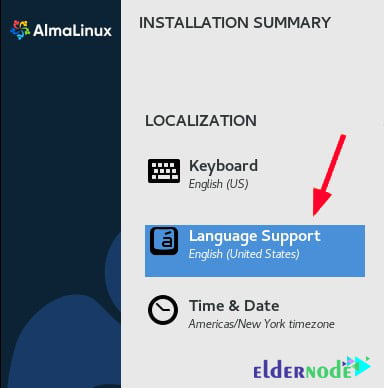
Configuring Language Support
Click the “Language Support” icon to launch Language Support. By doing this, you will be able to add additional languages after the installation is complete. So after selecting the language support options, click on “Done“:
*

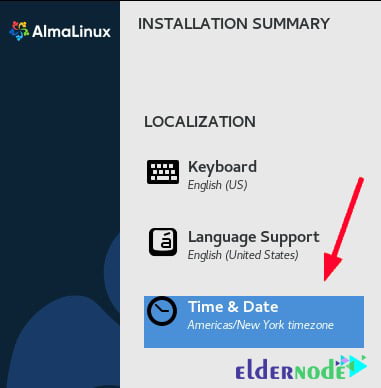
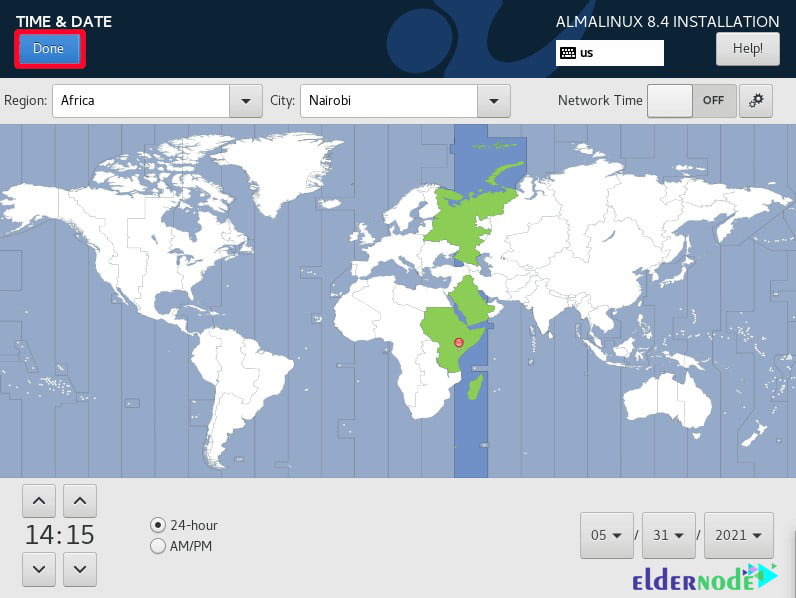
How to Set Time and Date for AlmaLinux
To make the time and date settings, first, click on it as shown below. Then click on the world map and set your location. In the next step, you need to set the relevant time and date. When done, click “Done“:
*
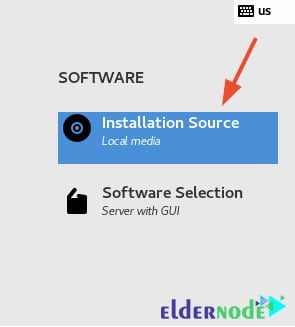
Software section settings in AlmaLinux
In the next section, we want to configure the software section. Note that in the “Software” section, there are two options: 1) the installation source and 2) the software selection. You must click on the “Installation Source” option:
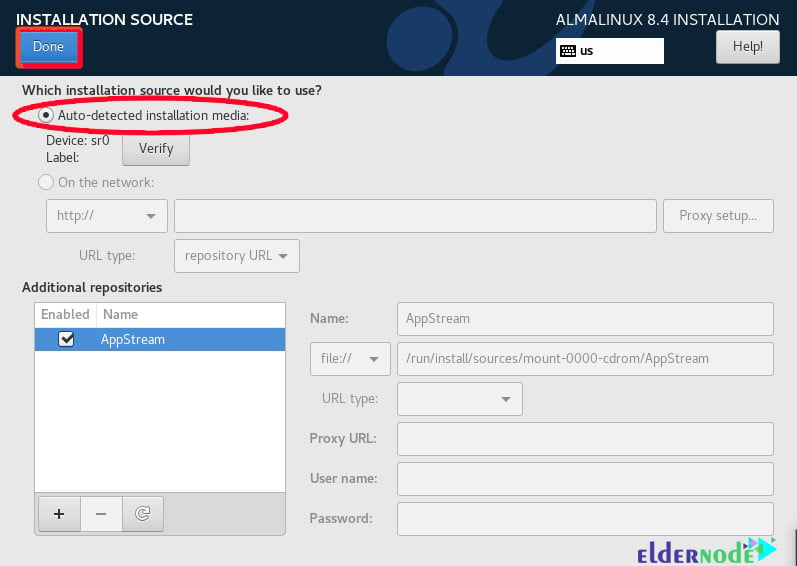
The installation source is already set to “Auto-detected installation media“. So simply click on the “Done“:
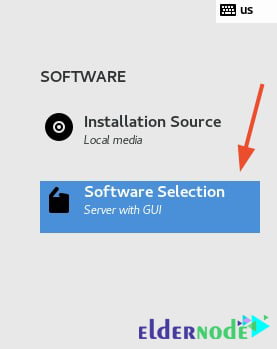
Go back to the previous page and click on Software Selection:
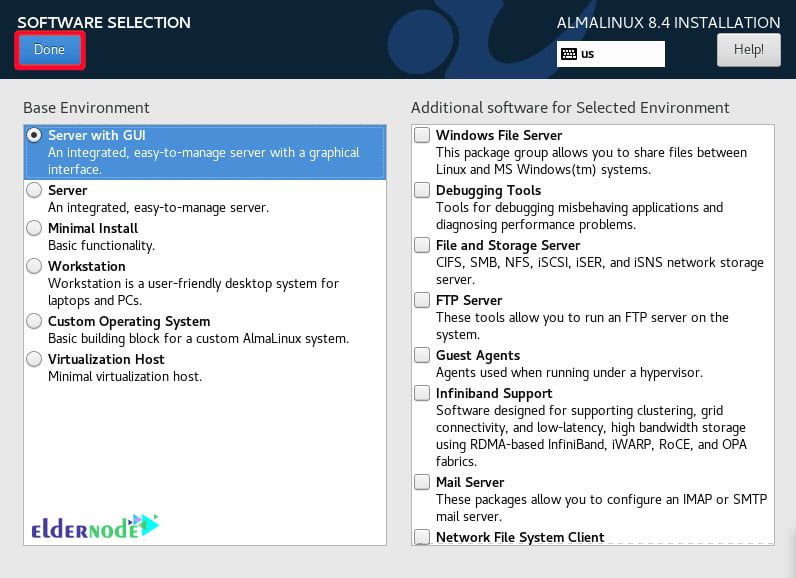
Select the “Server with GUI” option as shown below in this section. Then select your desired environment and select any of the additional components from the right panel. after doing this, click on Done:
How to set up partitioning in AlmaLinux
In this section, we want to teach you how to partition. As you can see in the image below, it can be found in the “System” in the “Installation Destination” section”
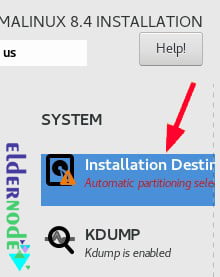
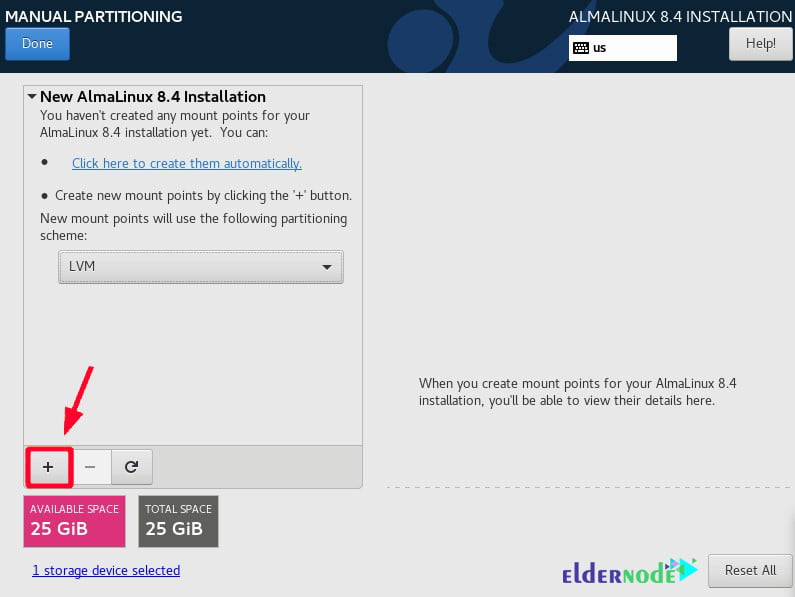
The point to note is that by default, partitioning is set to Automatic. This setting is very suitable for beginners. But you can do partitioning manually for complete control. To do this, select the “Custom” option and click on “Done“:

In the “Partitioning Manual” window, click the (+) button:
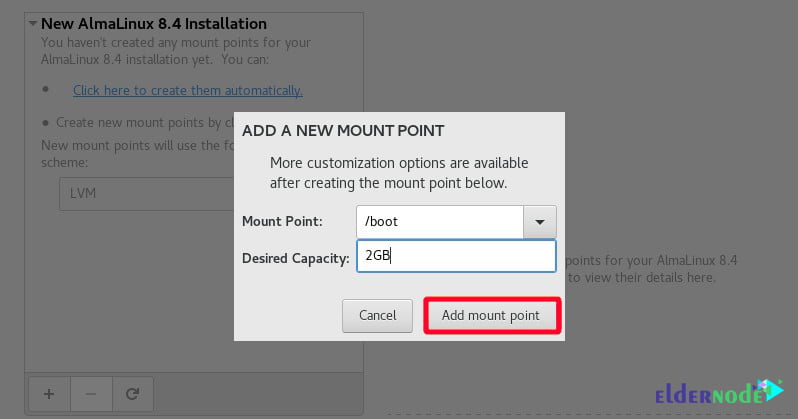
Now you need to fill in the details of the /boot mount point and click the “Add mount point” button:
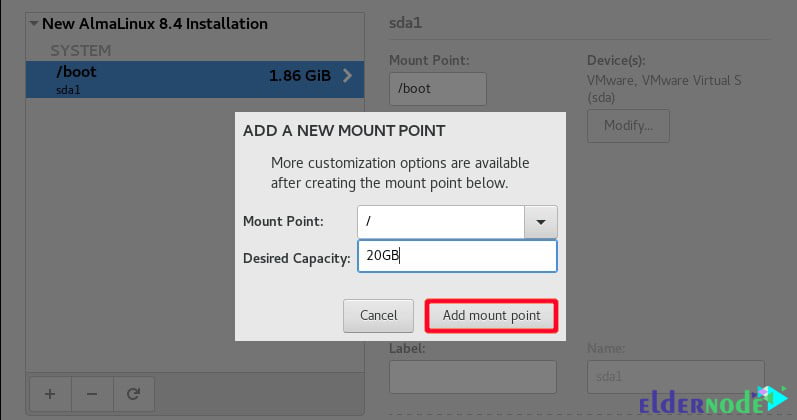
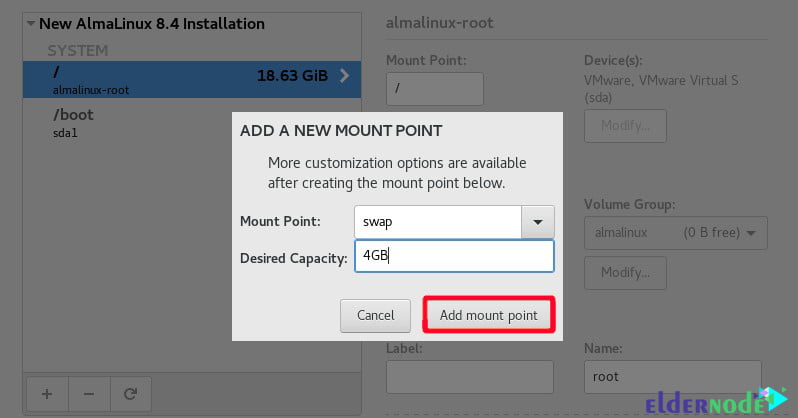
Similar to the image below, for the root mount point (/), fill in the details and click the “Add mount point” button:
*
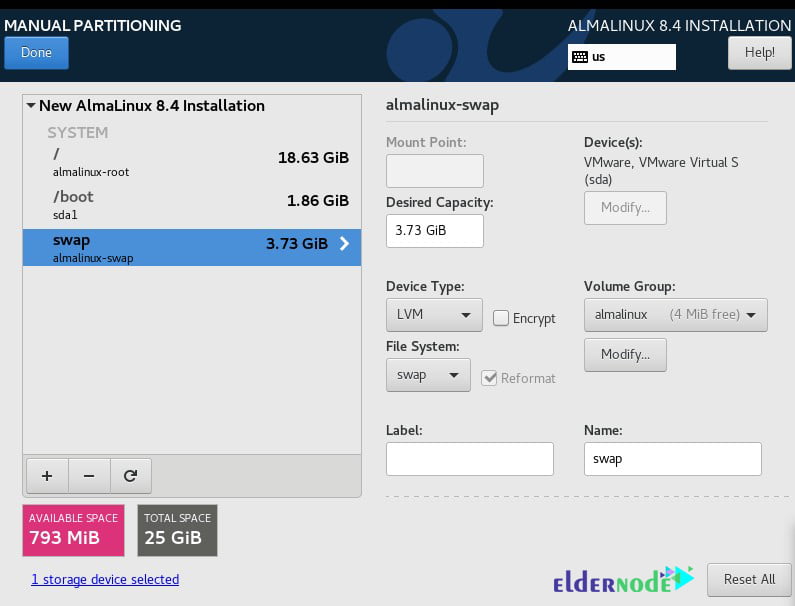
After viewing the settings you made, click Done:
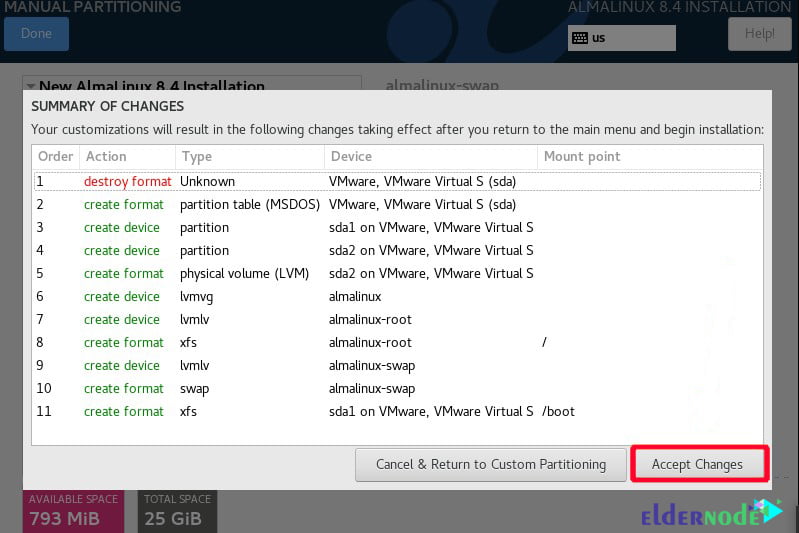
In the window that opens, click on Accept changes:
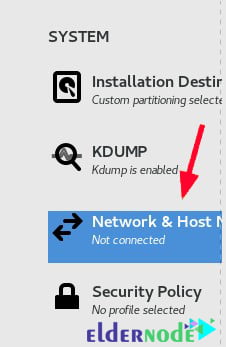
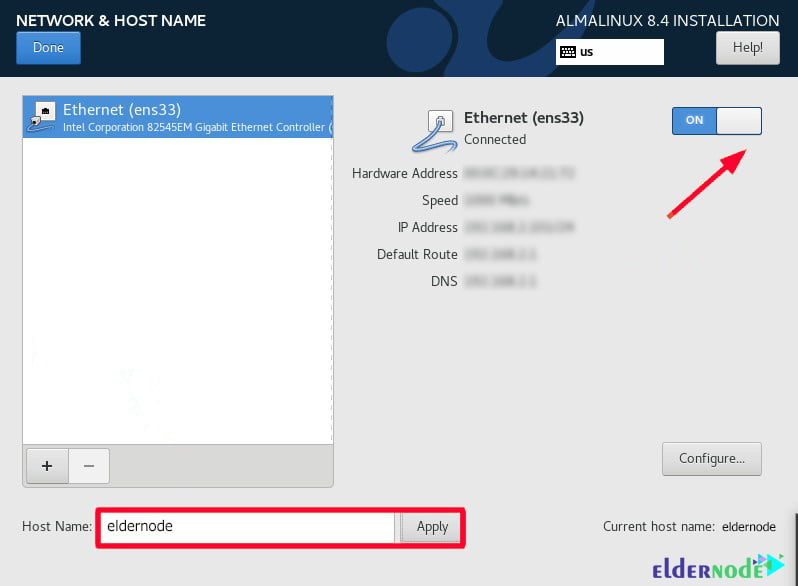
How to Configure Network and Hostname for AlmaLinux
Setting up the network and hostname is another thing that needs to be done. You can change your network adapter to get the IP address dynamically using DHCP from the DHCP server.
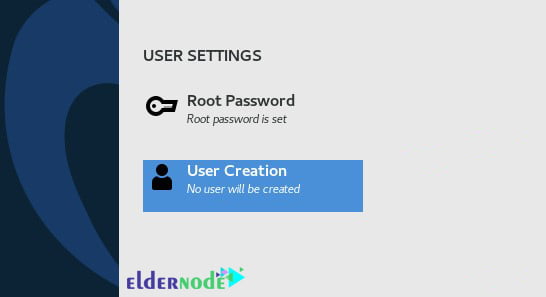
User Settings for AlmaLinux
Similar to the image below, you can specify the name of your system host and click “Apply“. Then click “Done” to save all changes.
Follow the figure below to configure the master password and click “Done“:

You can now click “User Creation“:
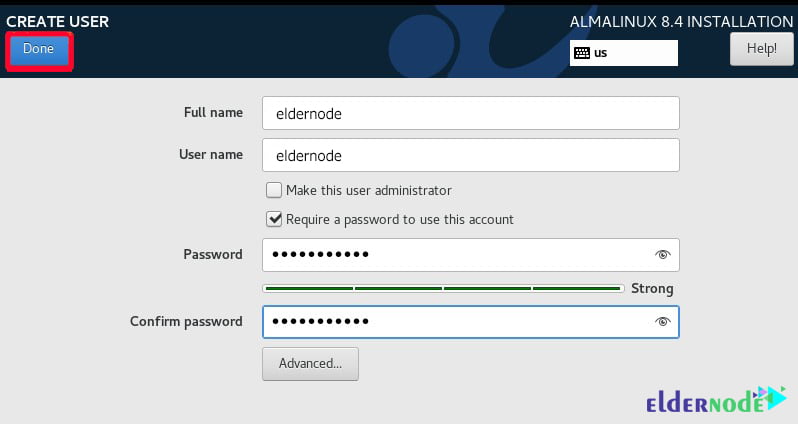
Click “Done” after completing the required fields:
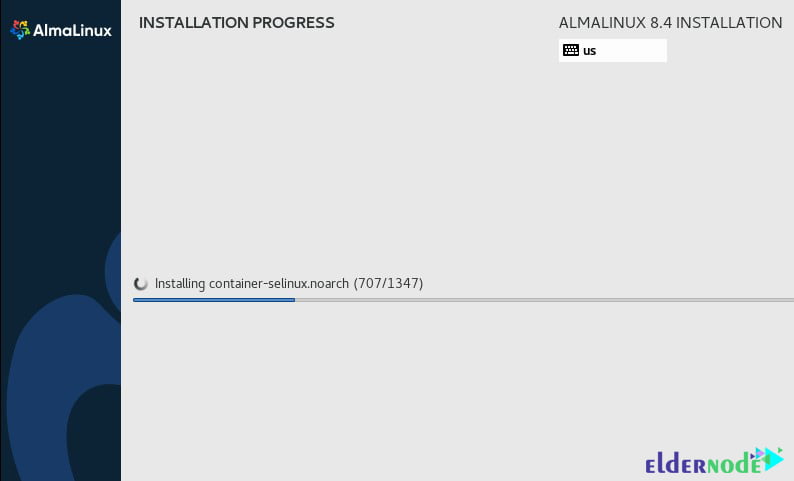
Installing AlmaLinux 8.4
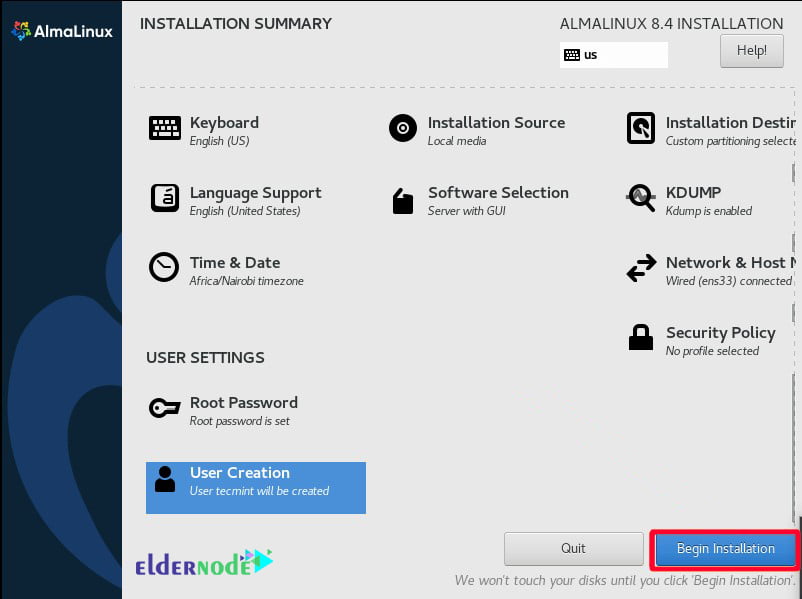
Now that you have completed the pre-installation configuration in the previous sections, we now turn to how to install AlmaLinux. To do this, click on the “Begin Installation” button:
*
You should click on the “Reboot system” button to see the image below and remove the USB installation media:
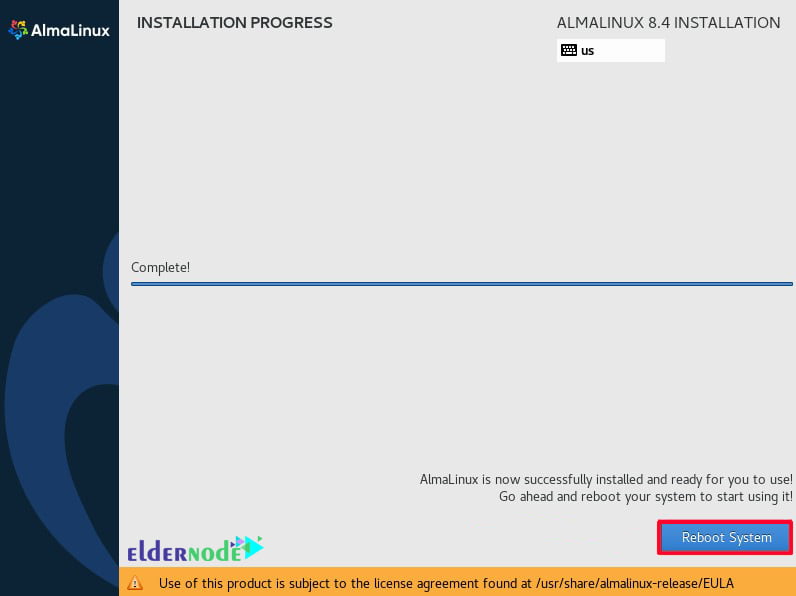
By completing the above steps, the AlmaLinux installation will be completed. In the next section, we will look at how to set up and get started with AlmaLinux. Please join us.
How to Start and Use AlmaLinux
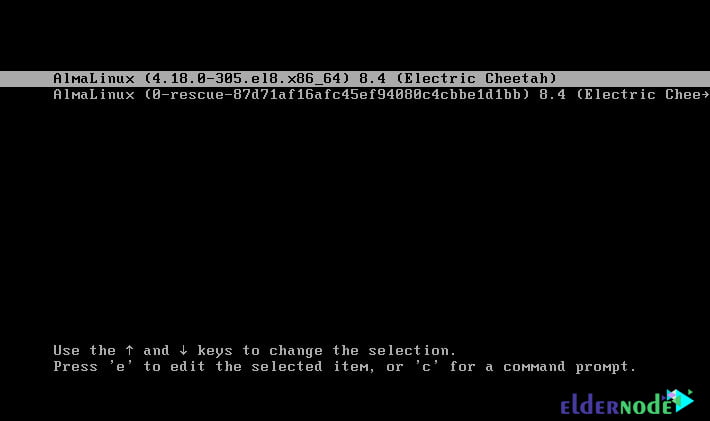
In this section, we want to teach you how to start AlmaLinux. When you restart the system, Grub AlmaLinux offers two options. To get started, select the first option:
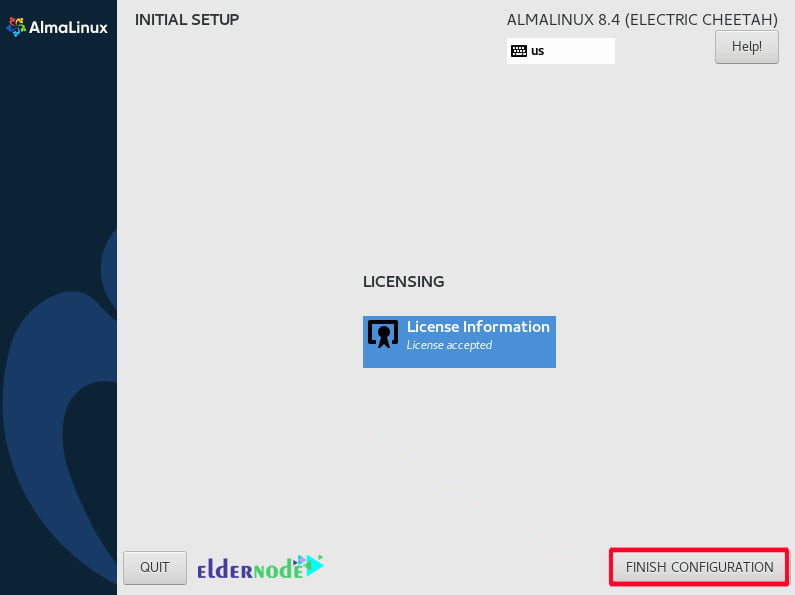
In the next step, you must click on the “License Information ” option:
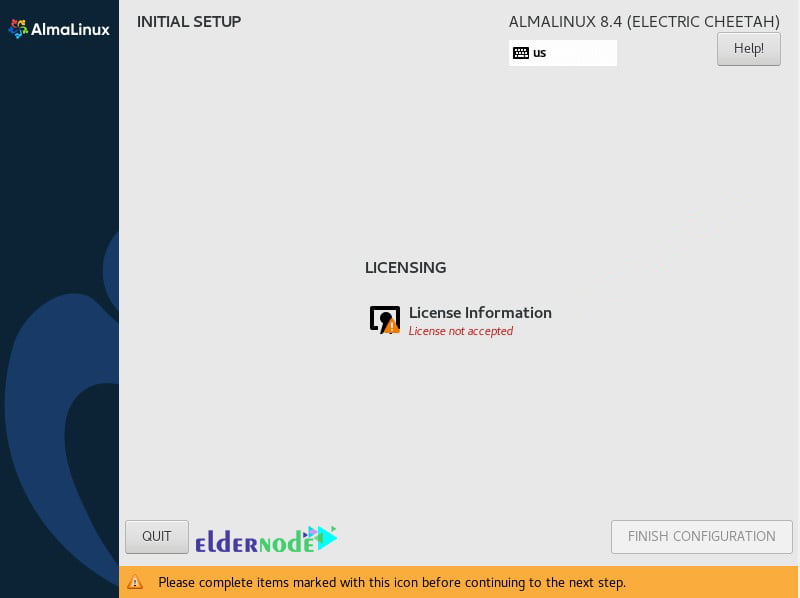
Now, after selecting the option to accept the License Agreement, click on Done:

Finally, click on FINISH CONFIGURATION:
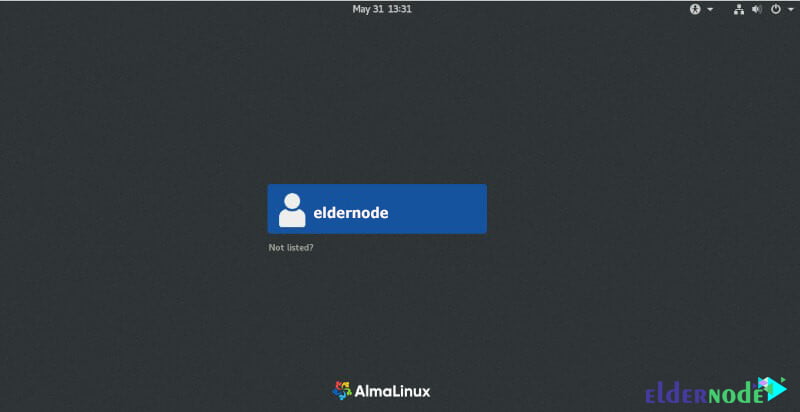
You should click on your account by viewing the image below:
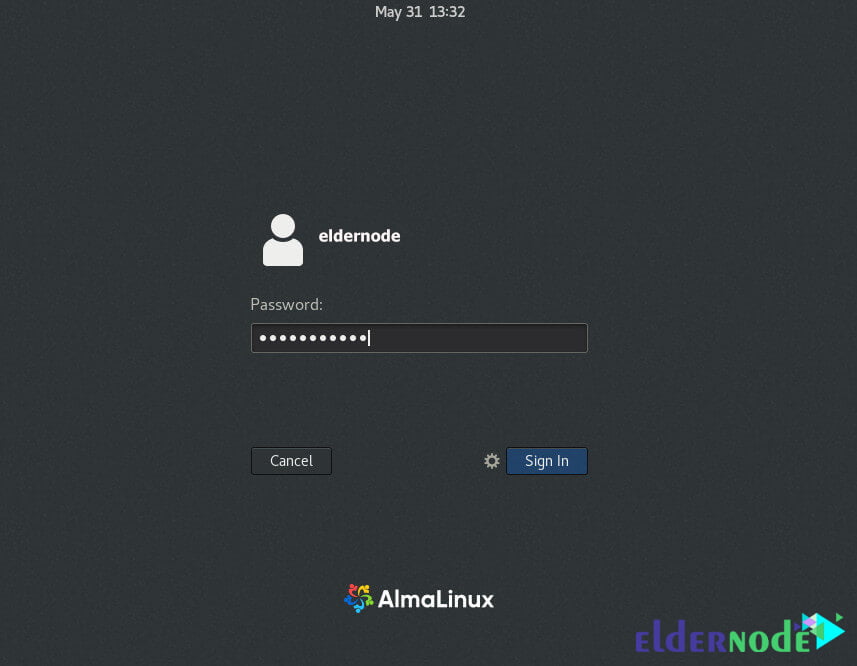
In the next section, after entering the password, you must click on Sign in:
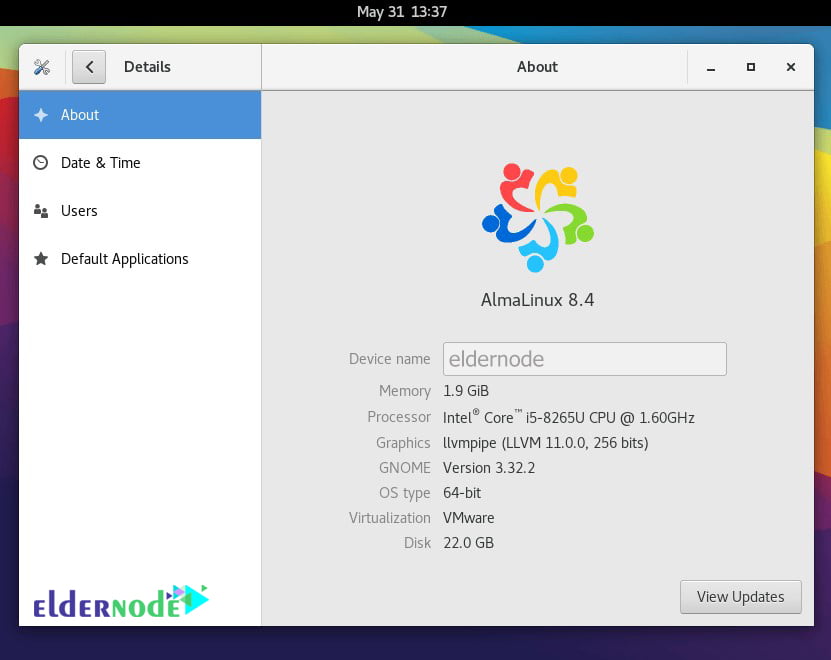
If you have completed all the steps correctly, you can enter the AlmaLinux desktop environment:
Conclusion
As mentioned earlier, AlmaLinux is a binary spin-off of RHEL that is being developed as a replacement for CentOS. This script distribution has developing to migrate from CentOS 8 to AlmaLinux, which can using to convert Linux without the need to reinstall, but before that, make a full backup copy of the entire operating system and its contents. In this article, we tried to teach you How To Install and Use AlmaLinux 8.4.