How to Install and Configure Gradle on Windows. gradle is a build automation system. Today’s apps, for example an Android app, are not structurally as simple as they were fifteen years ago.
In the past, program code was written by a programmer and executed after compilation. But today, a programmer needs to perform various operations before running a program to create program executable files such as an apk or exe file. Note that the programmer must repeat this operation after each change in the program to re-run.
This operation is called construction operation. The time consuming, complexity, and variety of the manufacturing process has led programmers to build automated manufacturing systems such as gradle.
Because build automation is an integral part of the consistent delivery of software projects, Gradle integrates seamlessly with multiple IDE’s, including Android Studio. This tutorial covers the manual installation of Gradle on Windows.
You can Choose your perfect Windows VPS Server Packages from eldernode.
Download the Latest Gradle
1. Open the command prompt from the Start menu. Then create a directory for Gradle to land:
C:\Users\Administrator>mkdir C:\Gradle2. Run the following command to insert Gradle into the folder you just created:
C:\Users\Administrator>curl -L https://services.gradle.org/distributions/gradle-6.5-bin.zip --output C:\Gradle\gradle.zip % Total % Received % Xferd Average Speed Time Time Time Current Dload Upload Total Spent Left Speed 0 0 0 0 0 0 0 0 --:--:-- --:--:-- --:--:-- 0 100 97.6M 100 97.6M 0 0 97.6M 0 0:00:01 0:00:01 --:--:-- 115M3. Now, open an instance of File Explorer and navigate to the C:\Gradle directory.
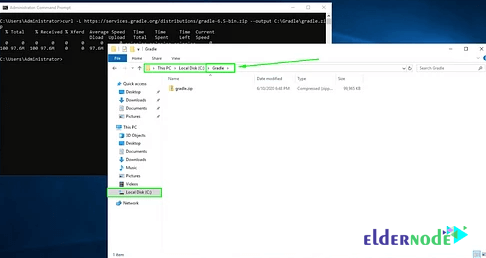
4. Next, extract the gradle.zip file by right-clicking the file and selecting Extract All….
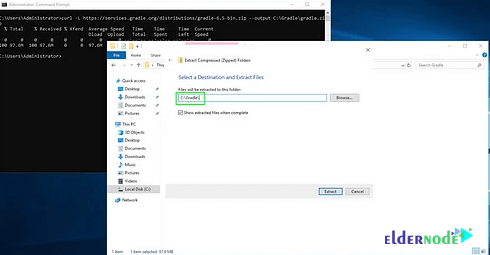
Note: Before hitting the Extract button, adjust the path to extract the files directly to the Gradle directory.
5. The extraction should look like it does in the below image. Once it does, hit the Extract button:
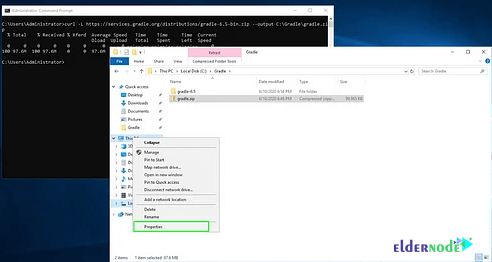
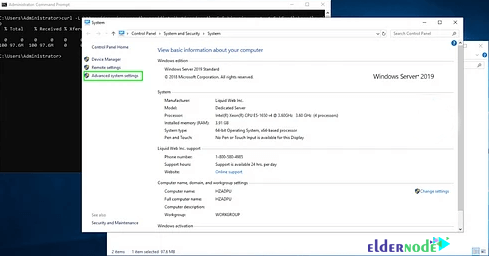
6. Gradle successfully installed. It’s time to set up the Environmental Variable for it. To do this, right-click on This PC and click Properties.
7. Select Advanced system settings from the left column:
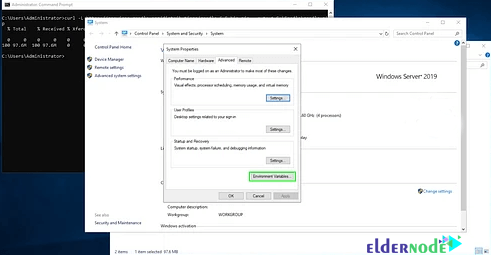
8. In the window that opens, click on Environment Variables.
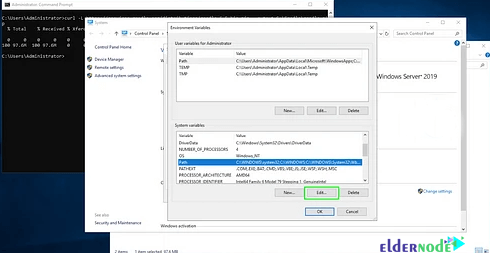
9. Find Path under the System variables header and select it and hit the Edit button:
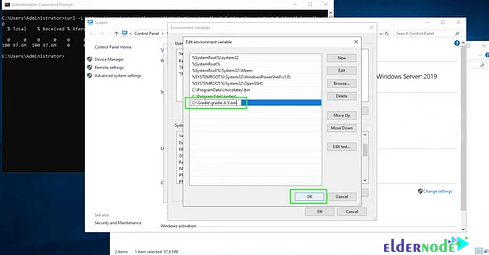
10. Then in the window that opens, click on New and enter C:\Gradle\gradle-6.5\bin.
11. Click OK to save the new variable.
Verify Gradle Installation
To verify that Gradle has been installed and is available, open a new one, and run the following command:
C:\Users\Administrator>gradle -v Welcome to Gradle 6.5! Here are the highlights of this release: - Experimental file-system watching - Improved version ordering - New samples For more details see https://docs.gradle.org/6.5/release-notes.html ------------------------------------------------------------ Gradle 6.5 ------------------------------------------------------------ Build time: 2020-06-02 20:46:21 UTC Revision: a27f41e4ae5e8a41ab9b19f8dd6d86d7b384dad4 Kotlin: 1.3.72 Groovy: 2.5.11 Ant: Apache Ant(TM) version 1.10.7 compiled on September 1 2019 JVM: 14.0.1 (Oracle Corporation 14.0.1+7) OS: Windows Server 2019 10.0 amd64Gradle is now installed!
Goodluck.


