Virtualizor is a powerful web-based VPS Control Panel that supports fully automated backups of the Virtual Machines. With useful features and an intuitive interface, Virtualizor is suitable for enterprises that need to power up their businesses. It also works well for VPS service providers. In this article, you will learn How To Create And Restore Backup On Virtualizor. To order your considered VPS, visit Eldernode and ask our Technical Team to guide you on your purpose.
Table of Contents
Tutorial Create And Restore Backup On Virtualizor
A Virtualaizor is a VPS Control Panel that helps to create, deploy, maintain, and manage several virtual private servers on a single server. Previously, you have learned all about Backup Linux VPS. Join us with this guide to learn How to Create VPS Backup and then Restore Backup on Virtualizor.
How to Create VPS Backup on Virtualizor
To create the backup of the VPS, you can use the Create VPS Backup API. Depending on the backup plan to the VPS, the image of VPS will be stored locally or remotely. Then, you will find the log file for the backup process at /var/virtualizor/log/backup/VPSID.log. The API response will contain ”done” as ”1” after the backup process is started successfully.
Note: Virtualizor supports KVM, Xen, OpenVZ, Proxmox, Virtuozzo, LXC, etc with an inbuilt hourly billing system. The Backups on the End User Panel are for OpenVZ only.
What is Backup Plan
To create different VPS backup settings for different VPS on the same server(s) you need Backup plans. Also, it is possible to assign backup plans to individual VPS or to the entire VPS plan.
Using Virtualizor allows you to have three ways to backup the VPS:
1- FTP
2- SSH
3- Local Backup
Note: If you choose FTP, you will be able to configure the setting only if the FTP backup server is configured.
How to Setup a Backup plan for a Server
You need to pass three main steps to setup a backup plan.
First of all, add the Backup server where the backups will take place. Follow the below path to do this:
1- Go to Virtualizor Admin Panel >> Servers >> Add backup server
2- Select the Backup server type(SSH and FTP) and enter the server credentials.
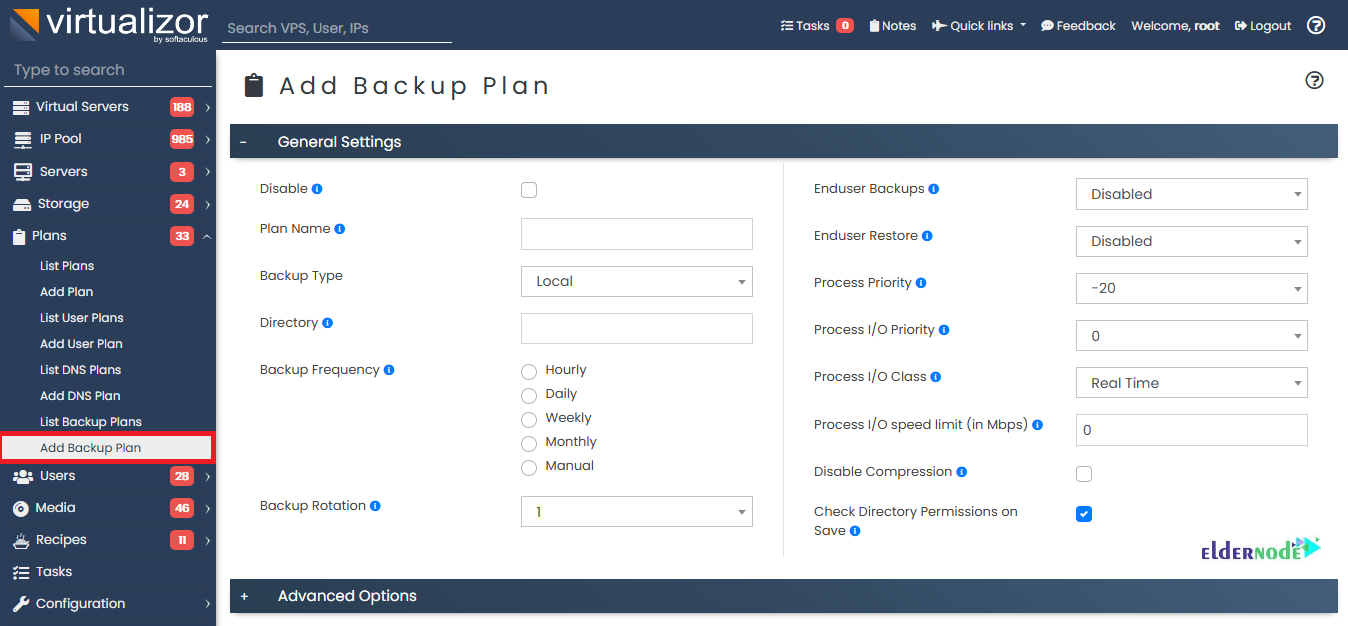
Once the backup server is added, you are ready to run the second step and create a backup plan. Follow the below path to do this.
Virtualizor Admin Panel >> Plans (Menu) >> Add Backup Plan.
In the third step, you will Assign the backup plan to a VPS. Consider that you will be able to assign a backup plan to individual VPSes or to the VPS plans. So if you need to assign a backup plan to a particular VPS, follow the below path:
1- Edit the VPS: Virtualizor Admin Panel >> Virtual Servers (Menu) >> List All >> Edit (Button)
2- Expand the Advanced Options block and select the previously created backup plan.
To assign the same backup plan that is assigned to the VPS plan, you can select Same as VPS Plan. So, follow the below path to do this:
1- Edit the VPS plan: Virtualizor Admin Panel -> Plans (Menu) -> List Plans -> Edit (Button)
Expand the Advanced Options block and select the previously created backup plan.
How To Restore VPS Backup On Virtualizor
To restore the backup of the VPS, you need to use the Restore VPS Backups API to restore. Virtualizor allows you to restore the VPS to the original VPS or create a new VPS altogether using the backup image. Also, you need to use the Backup VPS Details API to get the details of the backup directory and the date use. The API response will contain ”restore_done” as ”true” after the restoration process is initiated.
However, you can use Restoring backup to restore backup on the VPS of your server. So, let’s go through the steps of this section to review How to Restore VPS:
Step 1:
Go to ”Backup >> Restore VPS Backups”.
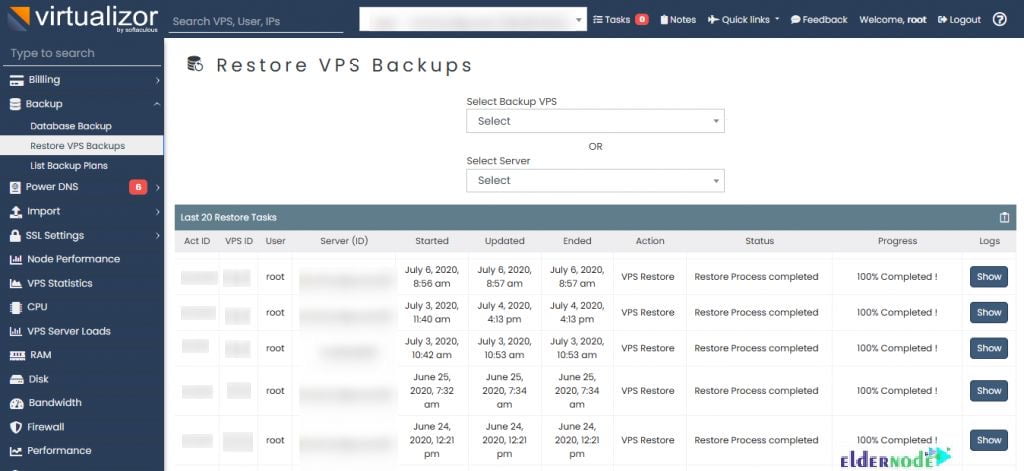
In the top search bar, you can select the server of which VPS you want to restore. The last 20 tasks and new restore tasks will be updated.
In the Select Backup VPS field, select VPS to restore, and in the Select Server field, Select Server on which VPS backup is present.
In two ways, you will be able to restore VPS backups:
1- Select Backup VPS
2- Select Server
Restore VPS backups by Selecting Backup VPS
If you need to select the VPS you want to restore, you must use this method:

In the field of Select Backup VPS, select VPS to view the list of backups of selected VPS to be restored.
Selecting the VPS you want to restore allows you to get the select server and select directory are updated as per the backup plan of VPS. Also, to restore the VPS of the respective date, select the date.
Restore VPS backups by Selecting Server
If you need to select the server on which VPS backup is present, you must use this method:
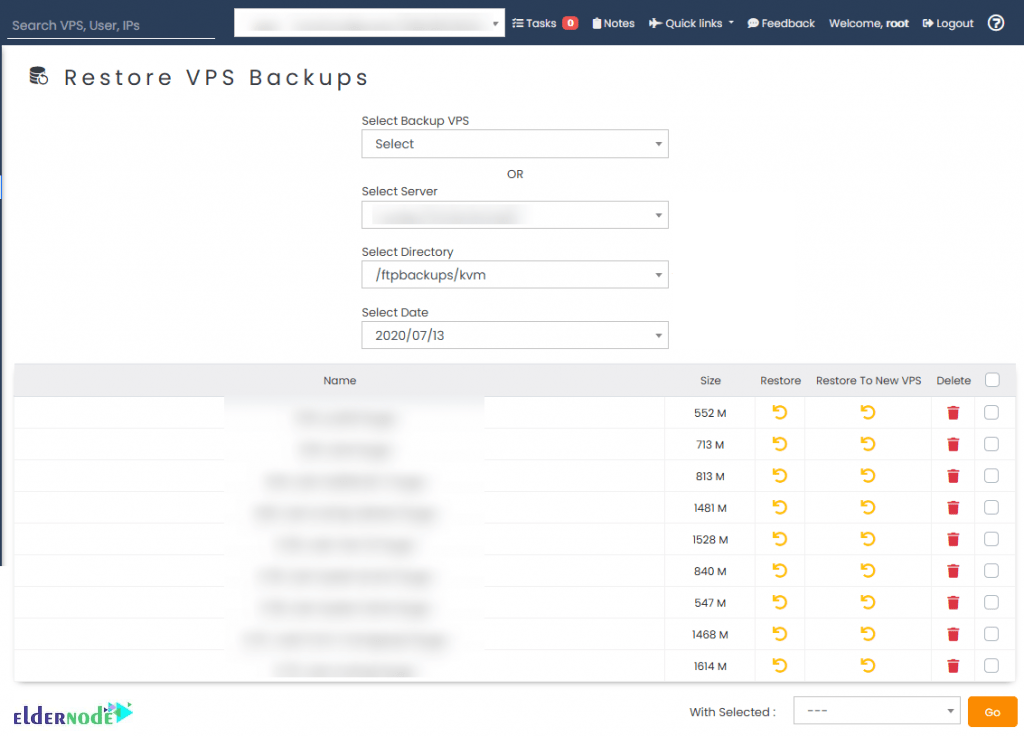
As you see in the above image, there are three fields. The first one is where you can Select Server on which VPS is present. Then, in the Select Directory field, select the VPS backup. And finally, Select date in the VPS backup.
Once you selected all the required fields, you will get a list of backups of different VPS from that list you can restore anyone VPS.
Note: if VPS backup is present in another directory rather than the directory in drop-down there is another option after that you can provide the directory in which VPS backup is present.
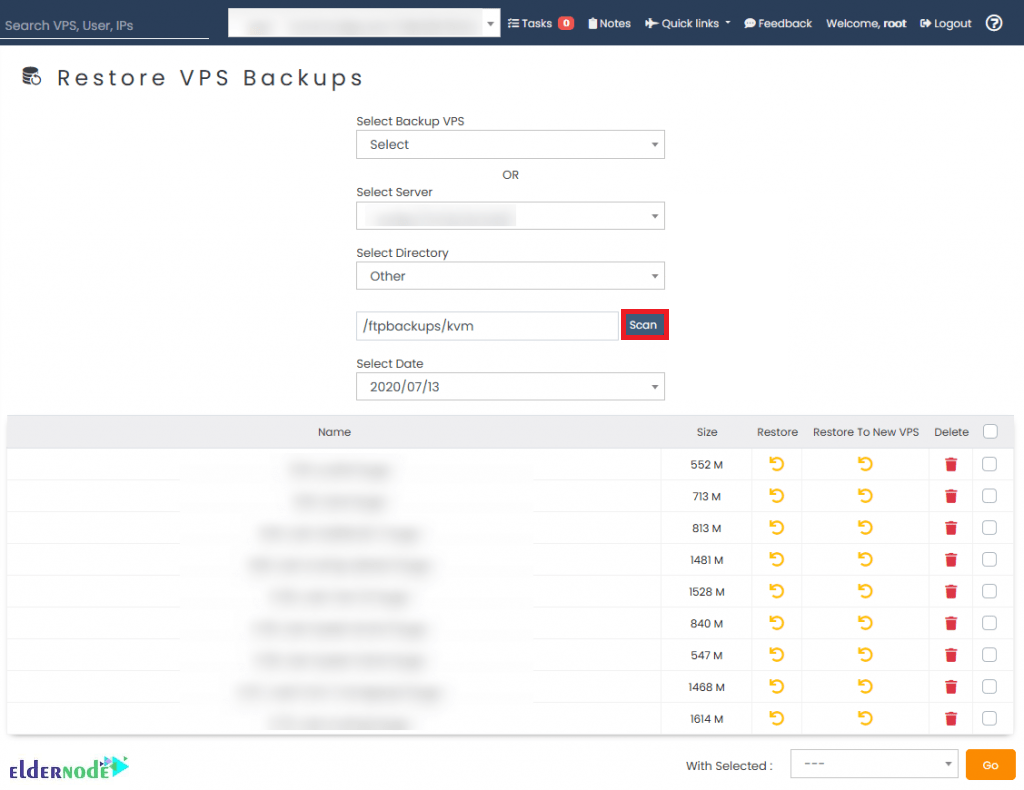
As you see, the first two fields are the same as the above ones. In the next field, provide the directory path and click the Scan button to scan that directory. And again, Select Date on which VPS backup is present.
Restore VPS types
There are three different types of restoring VPS. Let’s learn them in this section:
1- Restore
To restore the backup in the same VPS, click restore VPS.

2- Restore to new VPS
To restore the backup in a whole new VPS, click restore to new VPS. Also, you can select server on which VPS will be restored.

*
3- Restore to new Server
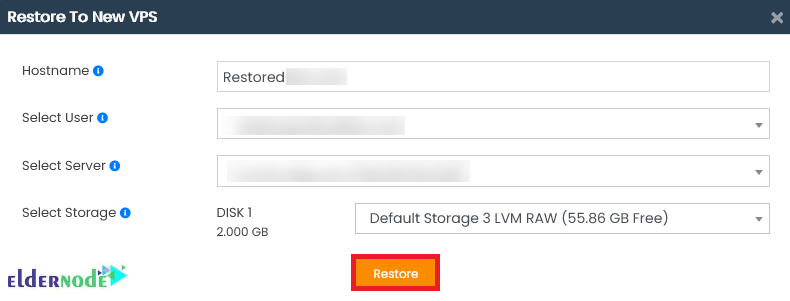
As you see in the image below, you can restore using the third type:

*

In the second field, select the user and then, select the server to which you want to restore the VM as a new VM. When you select the server, storage will be loaded from that server. Finally, click on the Restore button.
Conclusion
In this article, you learned How To Create And Restore Backup On Virtualizor. To get the backup information of the VPS and have the list of the backed-up file paths, you can use the Backup VPS Details API. In this way, you will review the data on which the backup of the VPS took place along with the size of the image in bytes.