Following the series of tutorials on WordPress and Ubuntu, in this article, we are going to Install WordPress with LEMP on Ubuntu 18.04. As many of our readers might want to test it on their own server, today we present how to setup WordPress with LEMP on Ubuntu 18.04. And you know that the LEMP is a popular combination of Linux, Nginx, MySQL/MariaDB, and PHP. If you want to purchase an Ubuntu VPS server, you can check out the packages offered on the Eldernode website.
In the continuation of this article from the Ubuntu training, we will teach you how to install WordPress with LEMP on Ubuntu 18.04.
Table of Contents
Requirements
– A dedicated server or a VPS (Virtual Private Server) with Ubuntu 18.04 minimal installation
Install WordPress with LEMP on Ubuntu 18.04
Let’s go to see how to install WordPress with LEMP on Ubuntu 18.04. Walk through this guide, to see the installation of all the required packages, create your own database, prepare a virtual host, and complete the WordPress installation via a browser.
Installing Nginx Web Server on Ubuntu 18.04
You need to set up the Nginx web server to install WordPress with LEMP on Ubuntu 18.04. First, update your system packages with the following command:
sudo apt update sudo apt upgradeNow install Nginx using the following command:
sudo apt install nginxsudo systemctl start nginxsudo systemctl enable nginxInstalling PHP on Ubuntu 18.05
Now you should install PHP and the required PHP packages to install WordPress with LEMP on Ubuntu 18.04, as WordPress is an application written in PHP:
sudo apt install php php-mysql php-fpm php-curl php-gd php-intl php-mbstring php-soap php-xml php-xmlrpc php-zip mariadb-server mariadb-client Start the php-fpm service and enable it, when the installation is complete:
sudo systemctl start php7.2-fpmThen enable it by entering the following command:
sudo systemctl enable php7.2-fpmInstalling MariaDB on Ubuntu 18.04
It’s time to install MariaDB. This step is needed for installing WordPress with LEMP on Ubuntu 18.04. To do this, enter the following command:
sudo apt install mariadb-server sudo systemctl start mariadb.serviceThen enable MariaDB using the following command:
sudo systemctl enable mariadb.serviceThen, use the following command to secure your MariaDB installation.
sudo mysql_secure_installation Creating a WordPress Database for Website
sudo mysql -u root -pCREATE DATABASE wordpress; GRANT ALL ON wordpress.* TO 'wp_user'@'localhost' ; FLUSH PRIVILEGES; EXIT;Creating Virtual host for WordPress Website on Nginx
sudo mkdir -p /var/www/html/wordpress.conf wget http://wordpress.org/latest.tar.gztar xfvz latest.tar.gzTill here, you would create your document root that we have set in the virtual host which is /var/www/html/wordpress. Next, you need to change the ownership of the files and folders within that directory with:
sudo chown -R www-data: /var/www/html/wordpress/ sudo chmod -R 755 /var/www/html/wordpress/sudo nano /etc/nginx/sites-available/wordpress.conf Add the following content:
server { listen 80; listen [::]:80; root /var/www/html/wordpress; index index.php index.html index.htm; server_name example.com www.example.com; client_max_body_size 100M; location / { try_files $uri $uri/ /index.php?$args; } location ~ \.php$ { include snippets/fastcgi-php.conf; fastcgi_pass unix:/var/run/php/php7.2-fpm.sock; fastcgi_param SCRIPT_FILENAME $document_root$fastcgi_script_name; } }sudo ln -s /etc/nginx/sites-available/wordpress.conf sudo ln -s /etc/nginx/sites-enabled/sudo systemctl reload nginxIn case you have used an unregistered/non-existing domain, you can configure your hosts /etc/hosts file, as you are ready to run the installation of your WordPress.
http://Server_IP/ Consider that your server’s IP address is 192.168.1.100 and the domain you are using is example.com as well your computer resolves example.com on the given IP address.
Load your domain into a browser to see the WordPress installation page:

Then, you can see the database credentials that we set up earlier:
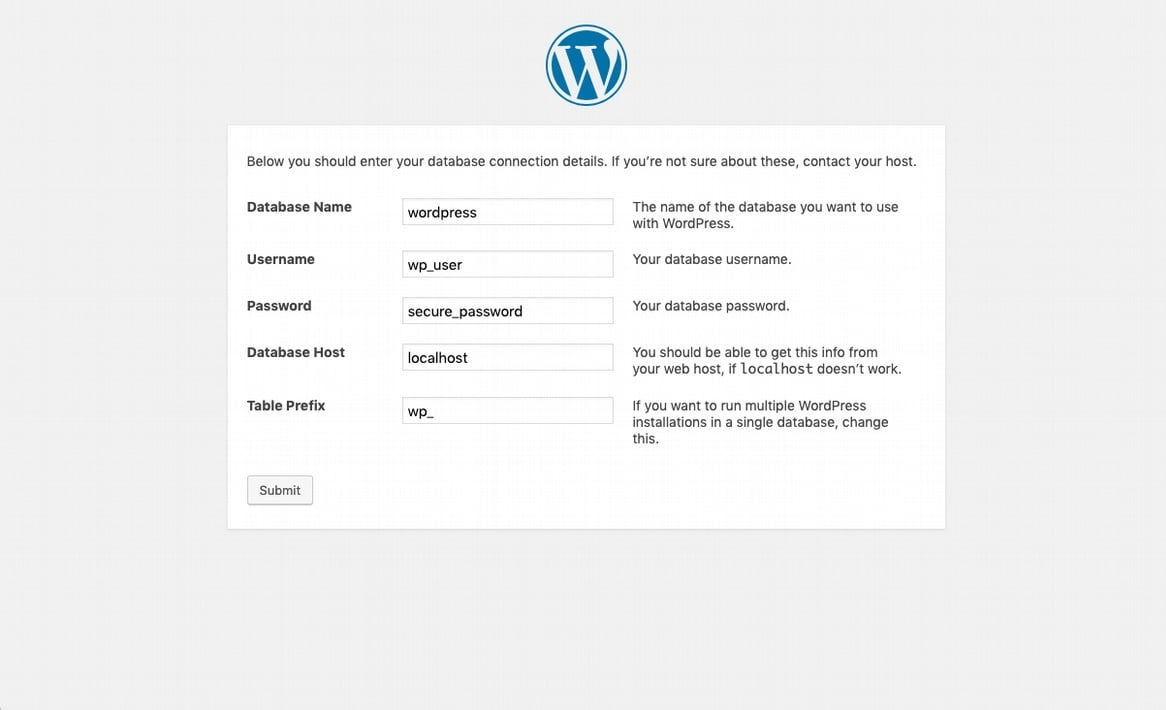
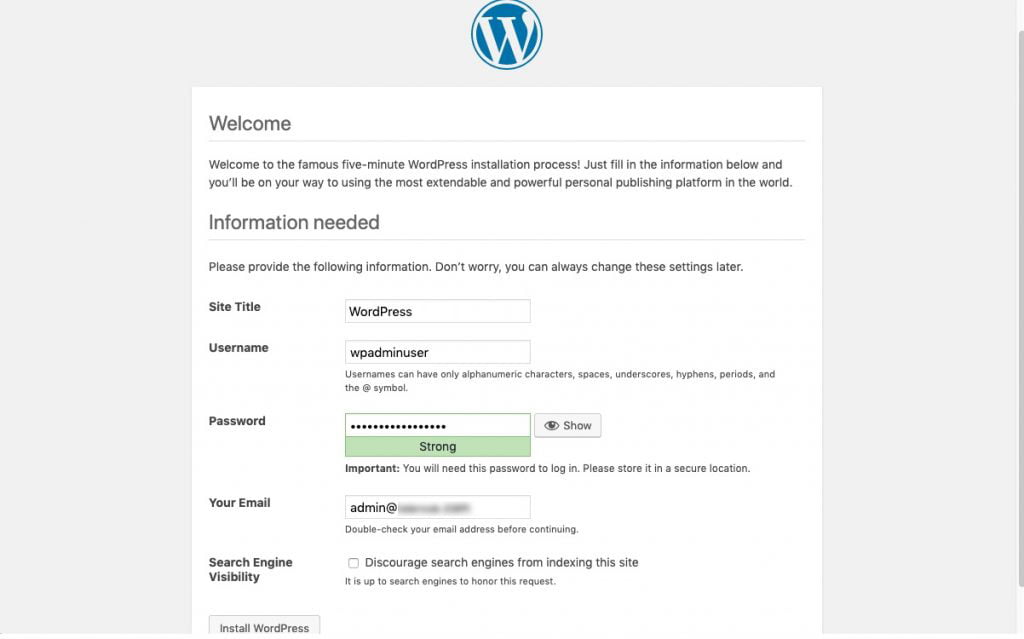
As you see below, you need to submit the form and on the next screen configure your website title, admin user, and email:
Good job! You finished the installation process of WordPress with LEMP on Ubuntu 18.04 and from now on you can start managing your WordPress website. we suggest you start by installing some fresh new themes or extending the site functionality via plugins.
Conclusion
In this article, we taught you how to install WordPress with LEMP on Ubuntu 18.04. We wish this tutorial install WordPress with Nginx, MariaDB, and PHP on Ubuntu 18.04 would be helpful for you, to ask any questions or review the conversation of our users about this article, please visit Ask page. Also to improve your knowledge, there are so many useful tutorials ready for Eldernode training.