Setting up OpenVPN on a MikroTik router allows you to create a secure Virtual Private Network (VPN) connection. OpenVPN offers several key features that make it popular and widely used. This article will teach you How to Configure OpenVPN on MikroTik. Eldernode offers an economically Mikrotik VPS Server, which you can check out the offered package to purchase it.
Table of Contents
Tutorial Configure OpenVPN on MikroTik VPS
OpenVPN is an open-source software application that provides secure virtual private network connections. It allows users to establish encrypted connections between their devices and a remote network over the internet. This application uses a custom security protocol based on SSL/TLS for secure communication. You can use OpenVPN to create secure remote access to a corporate network, connect branch offices in a secure manner, or provide secure access to home networks.
Configuring OpenVPN on MikroTik
In this section, you will learn how to configure OpenVPN on Mikrotik. To do this, open your Winbox and log in to your MikroTik server and follow the steps below.
Create New Interface
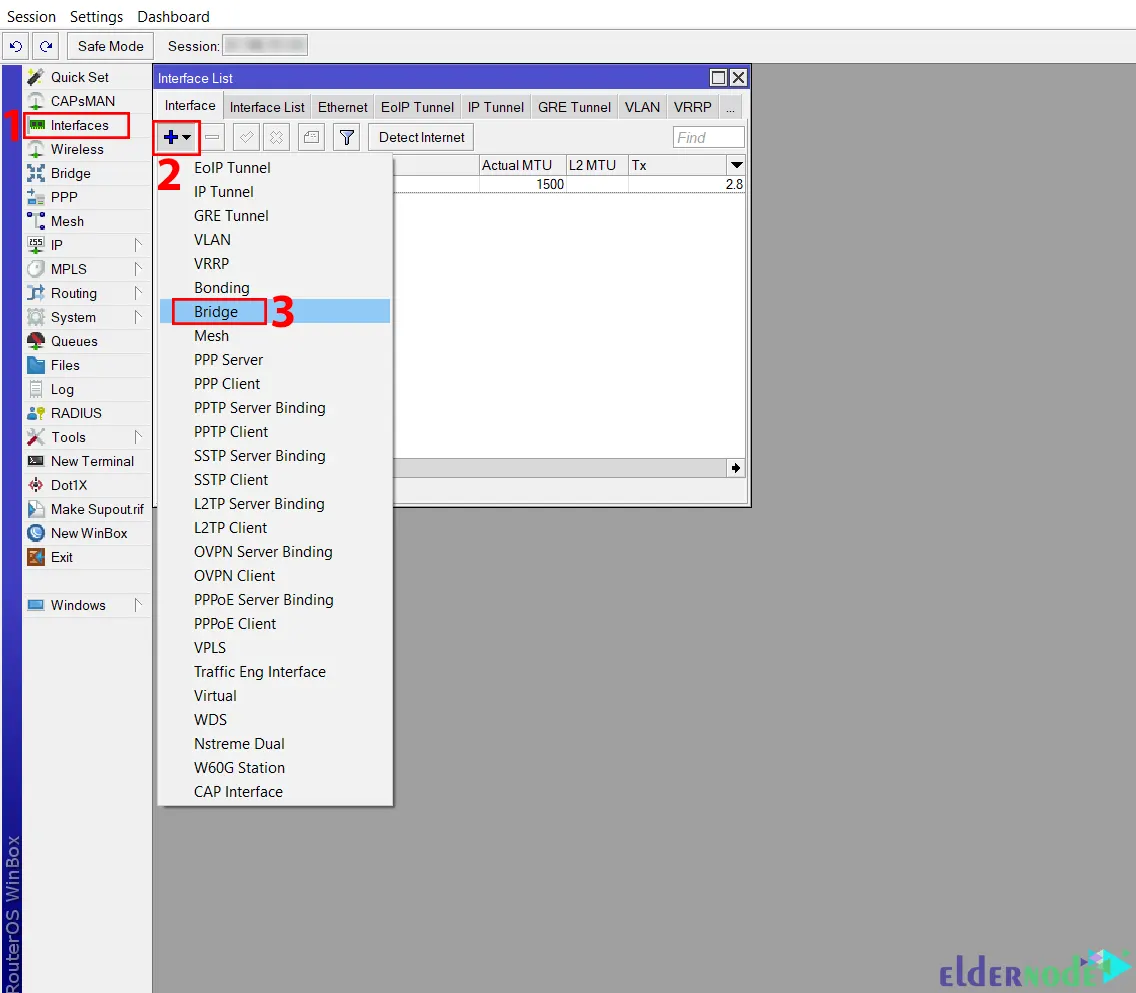
Now navigate to the Interfaces and click on the + dropdown menu and choose Bridge:
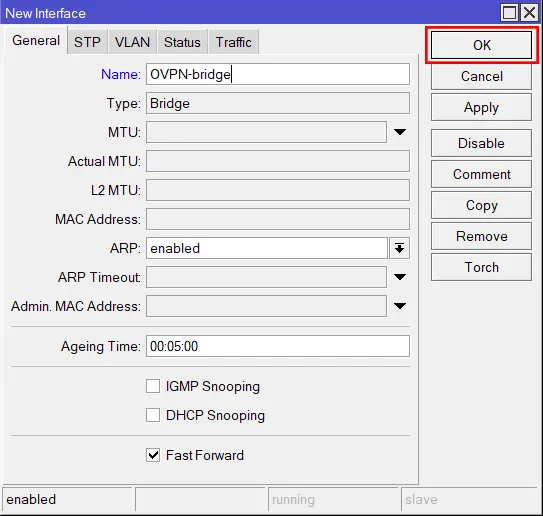
Fill in the required information and click on OK:
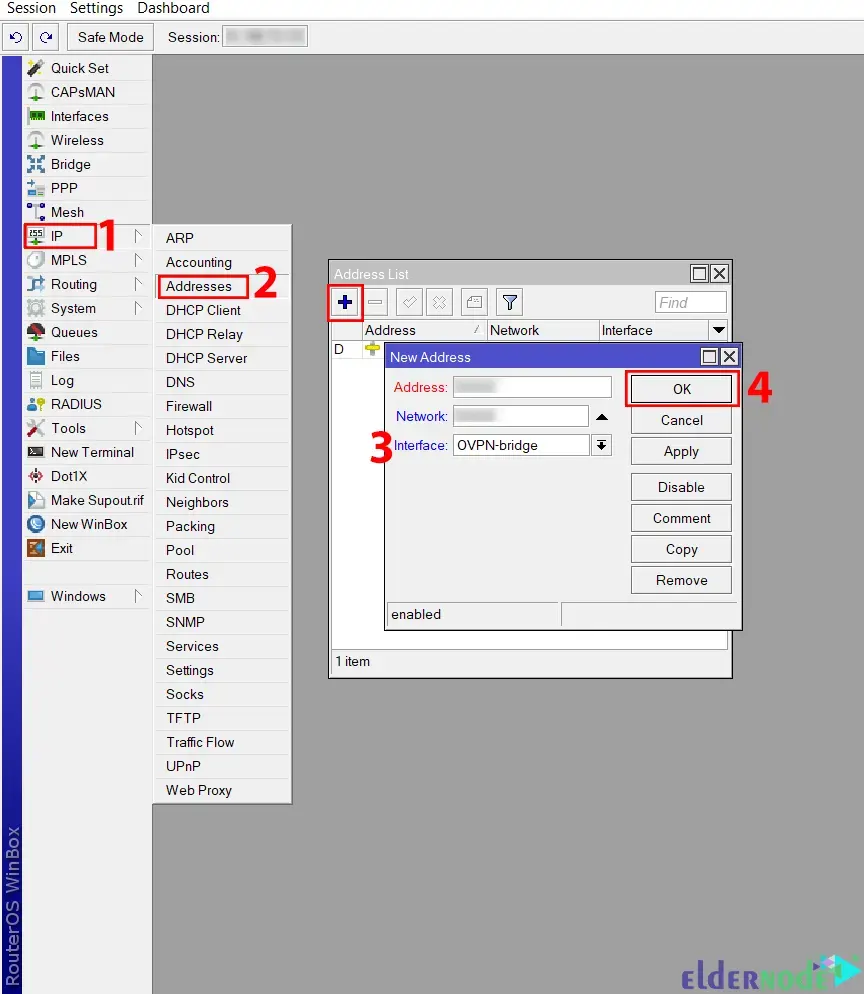
Now go to the IP >> Addresses path and click +. Set your IP as Address, choose the bridge you made earlier as Interface, and click OK:
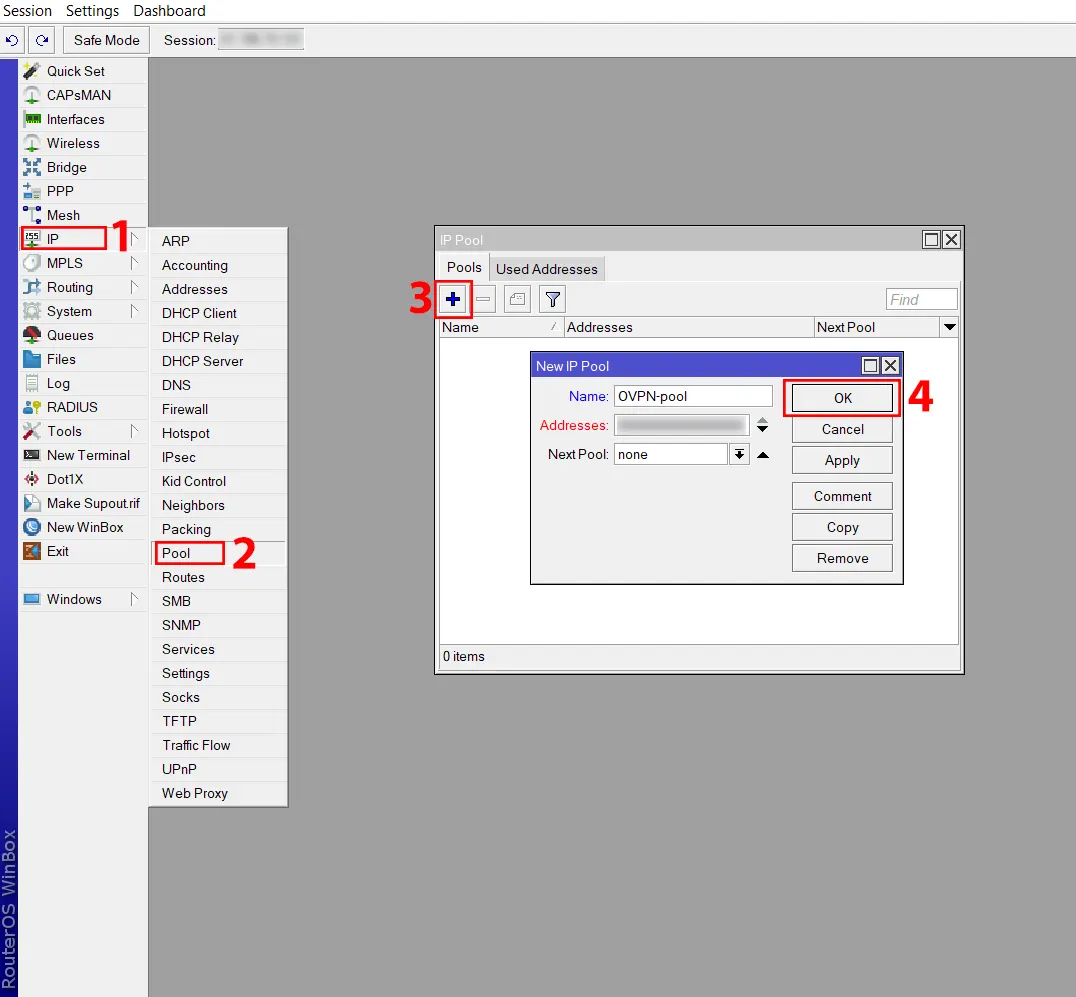
Once done, go to the IP >> Pool path and click on +. Next, choose the name for your IP Pool and enter the IP range, then click OK again:
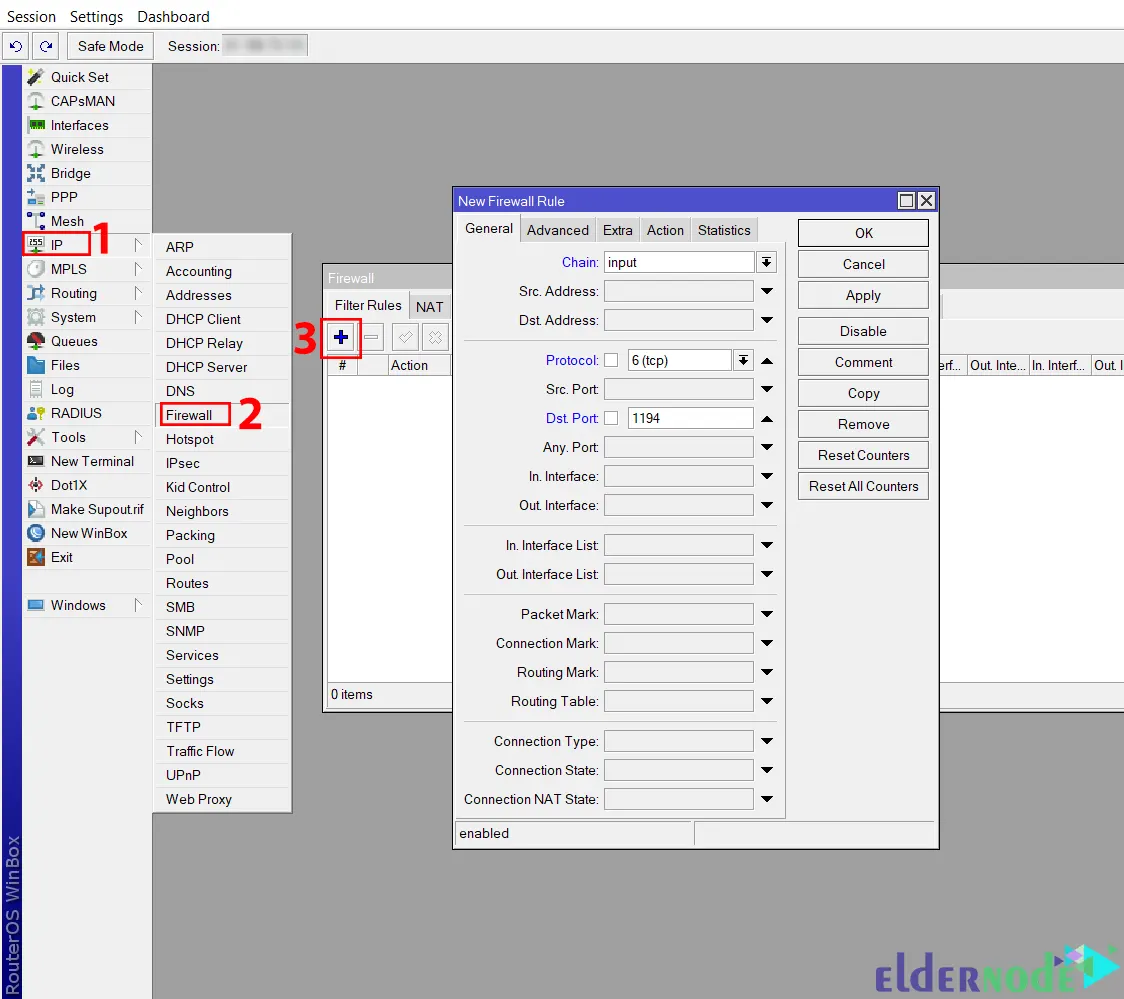
In this section, you should create rules in the Firewall and NAT. So, go to the IP >> Firewall path and click +. In the Windows that opens, go to the General tab and fill in the information:
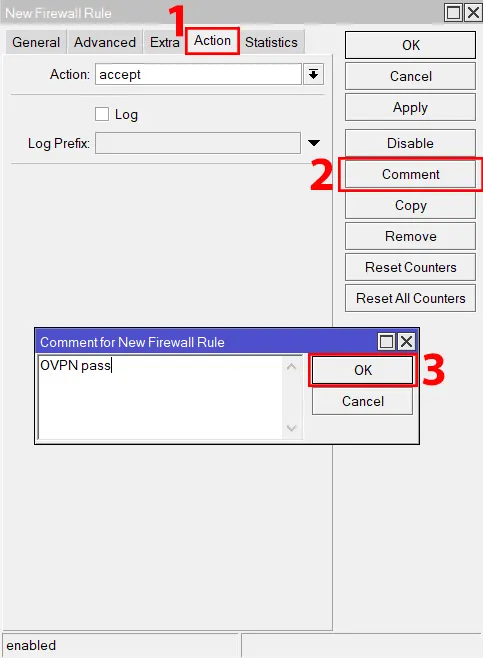
Then go to the Action tab and click Comment to comment it with an OVPN pass to find the rule faster:
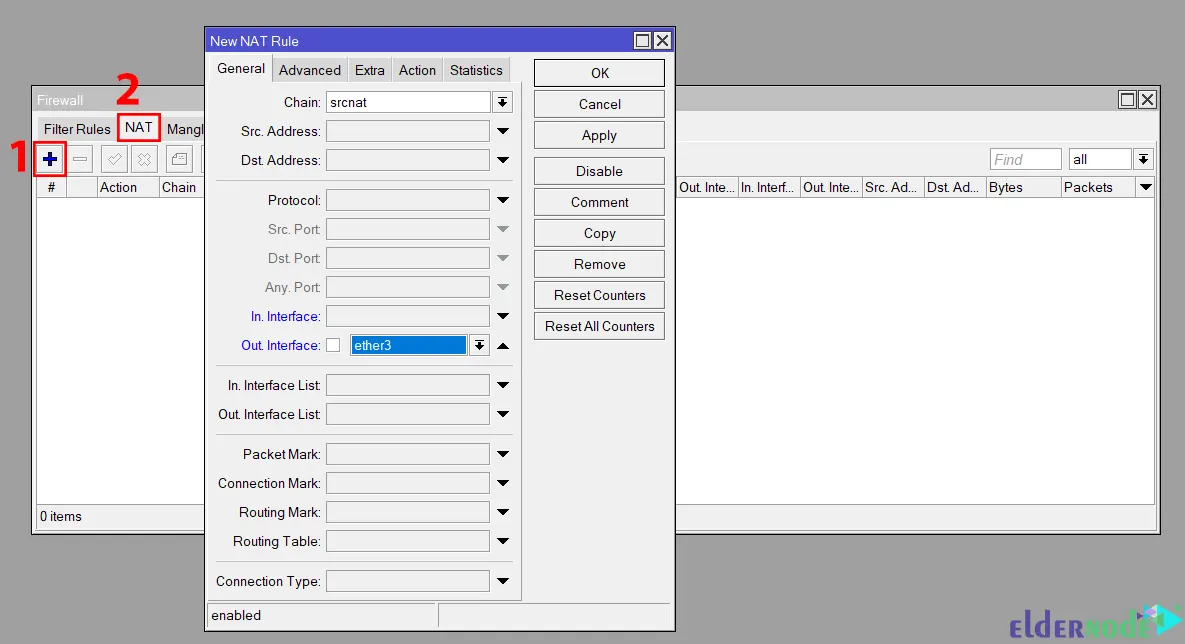
From the Firewall window, navigate to the NAT tab and click on +. In the window that opens, go to the General tab and fill in the required information:
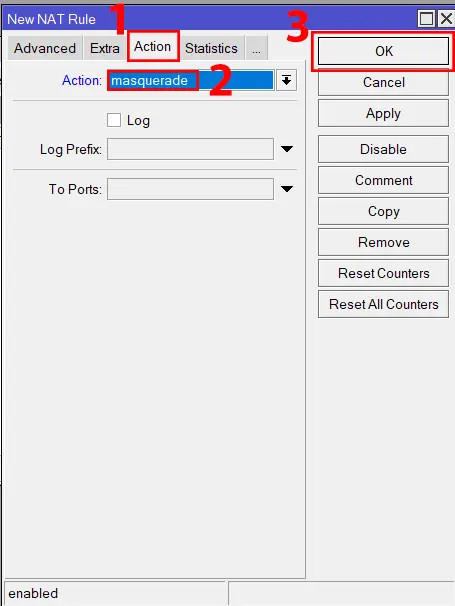
Then go to the Action tab and choose masquerade from the Action dropdown menu, press OK:
Create Certificate for User, Server, and Client
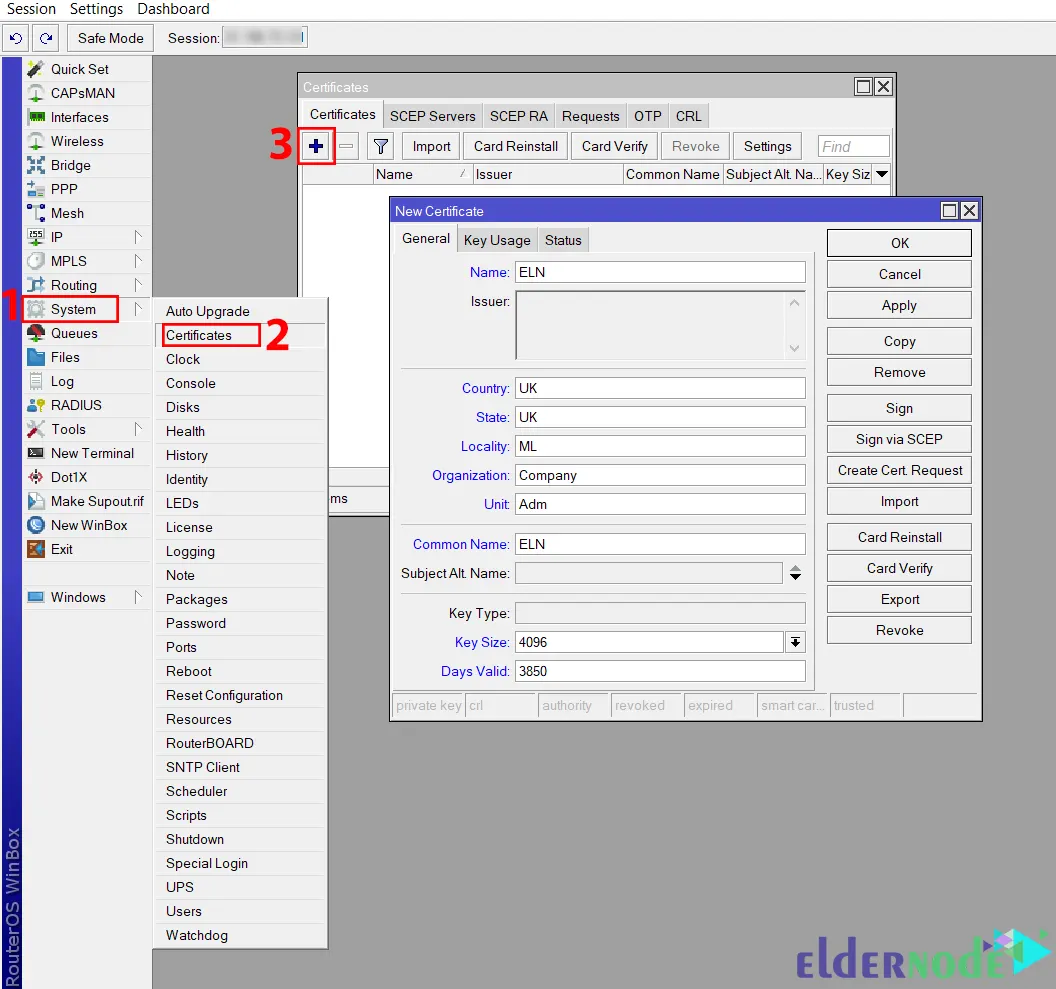
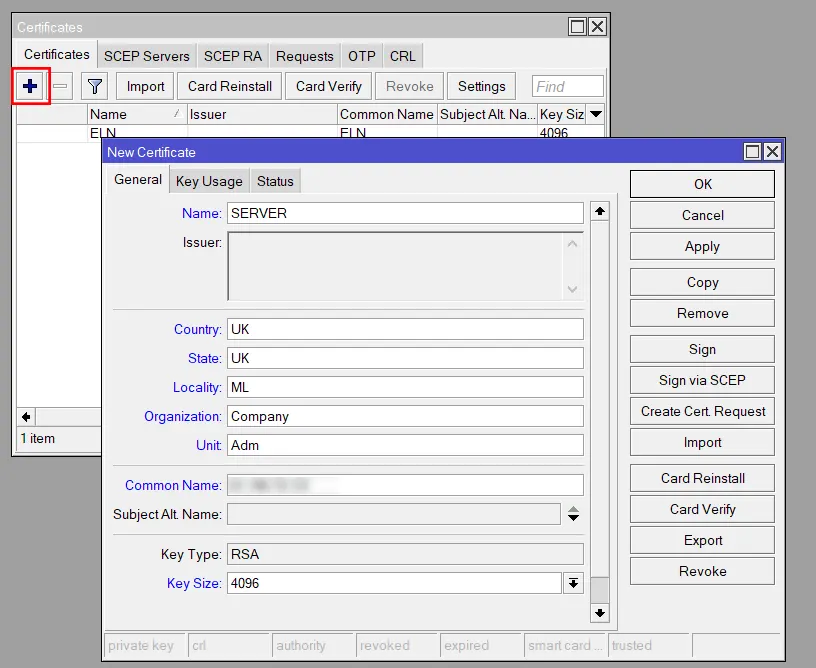
In this section, you will learn how to make certificates for the OpenVPN server. To do this, go to the System >> Certificates path and click on +. The first certificate will be for CA. Fill in the required information and set the Key Size to 4096 and Days Valid as long as you want:
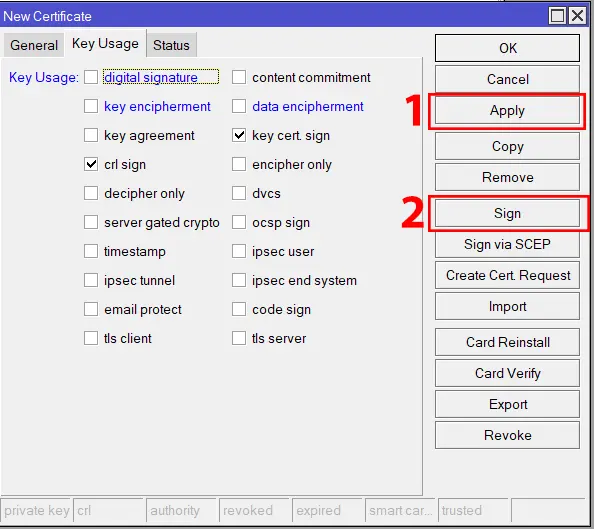
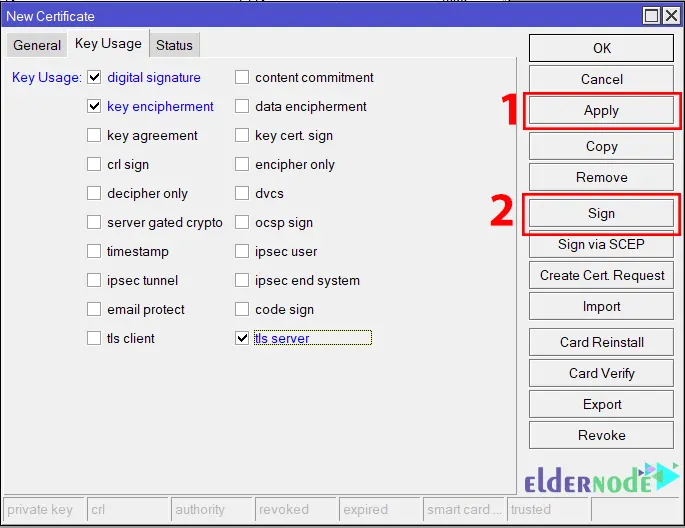
Now navigate to the Key Usage tab and check the ”crl sign” and ”key cert. sign” checkboxes only. Then click Apply >> Sign:
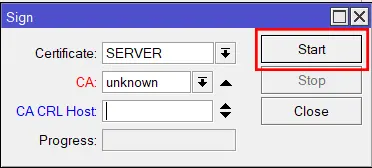
Now it’s time to sign the CA. To do this, enter the Public IP address of your MikroTik in the CA CRL Host section and click on Start:

It will show done in the Progress section when it is done.
In this section, you should create a certificate again for the Open VPN server. So, click on + and fill in the information. Remember to set the Public IP address of the router as a Common Name:
Navigate to the Key Usage tab and check the ”digital signature”, ”key encipherment”, ”tls server” checkboxes. Then click Apply >> Sign to sign it with the CA:
Now you should choose your newly created CA as CA and click Start:
Finally, you should generate certificates for the Clients. So, press + again and fill in the information in the General tab:
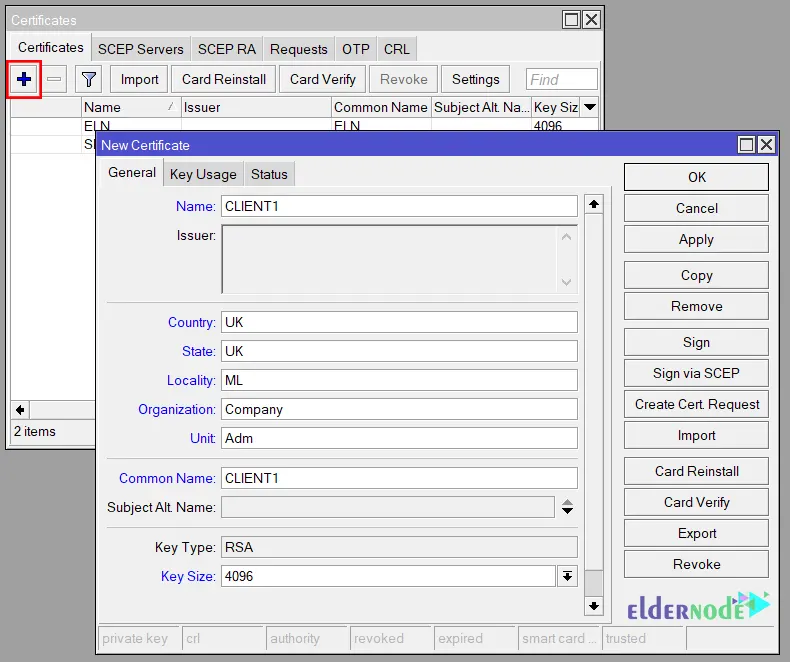
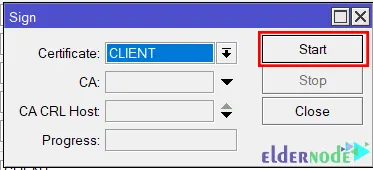
Then change the certificate and client names to CLIENT1 and click Apply >> Sign. From the Sign window, choose your newly created CA as CA and click on Start:
Now double-click on the server certificate, check the Trusted check box and click OK.
Note: The server certificate should have K, I, and T flags and the client certificate should have K and I flags.
Next, right-click on them and choose Export to export the CA certificate without a passphrase and the client certificate with a passphrase. You can find the exported certificates in Files. In this section, drag and drop them into a folder on your Desktop.
Enable OpenVPN Server
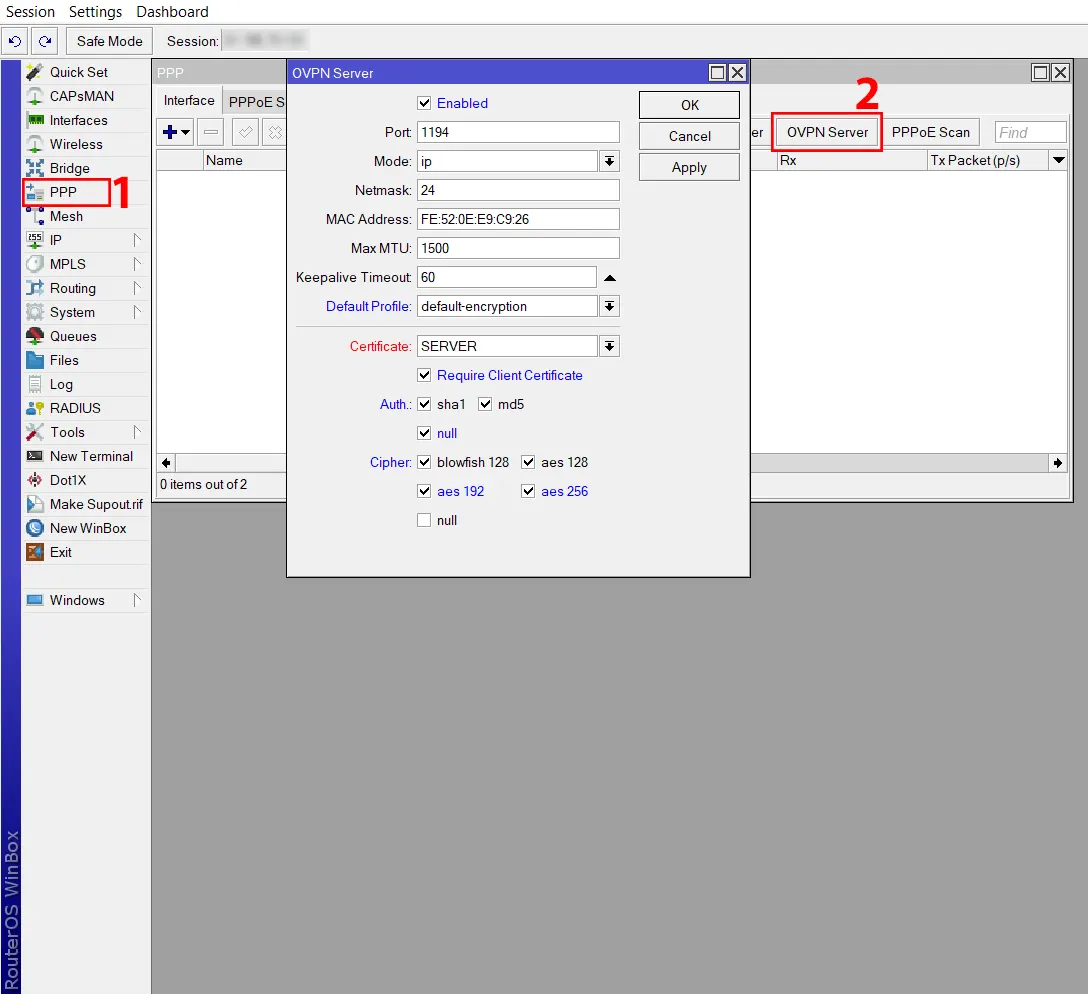
Now go to the PPP >> OVPN Server path to enable the OpenVPN server. Choose the Server certificate and check the ”Require Client Certificate”, all the ”Auth”, and all the ”Cipher” options except null. Then change the Default Profile to default-encryption and check Enabled:
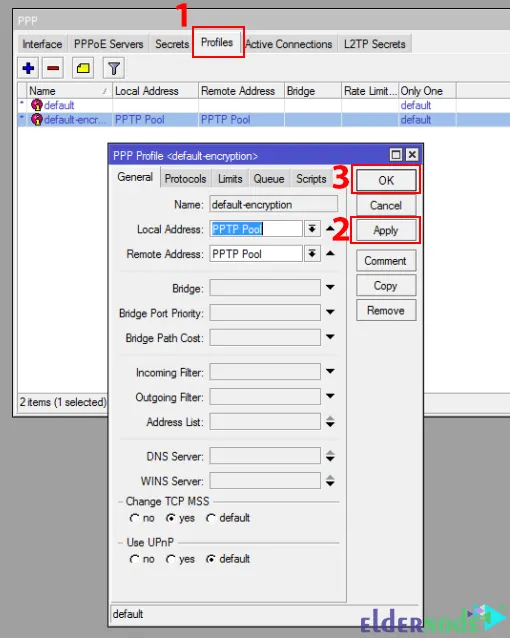
In this section, go to the Profiles tab and double-click on the default encryption profile. Then set the VPN Gateway address as Local Address, the IP Pool as the Remote Address, and the bridge you made as the Bridge. Remember to enter the DNS server’s addresses that you will use. Finally press Apply >> OK:
Create a User for VPN
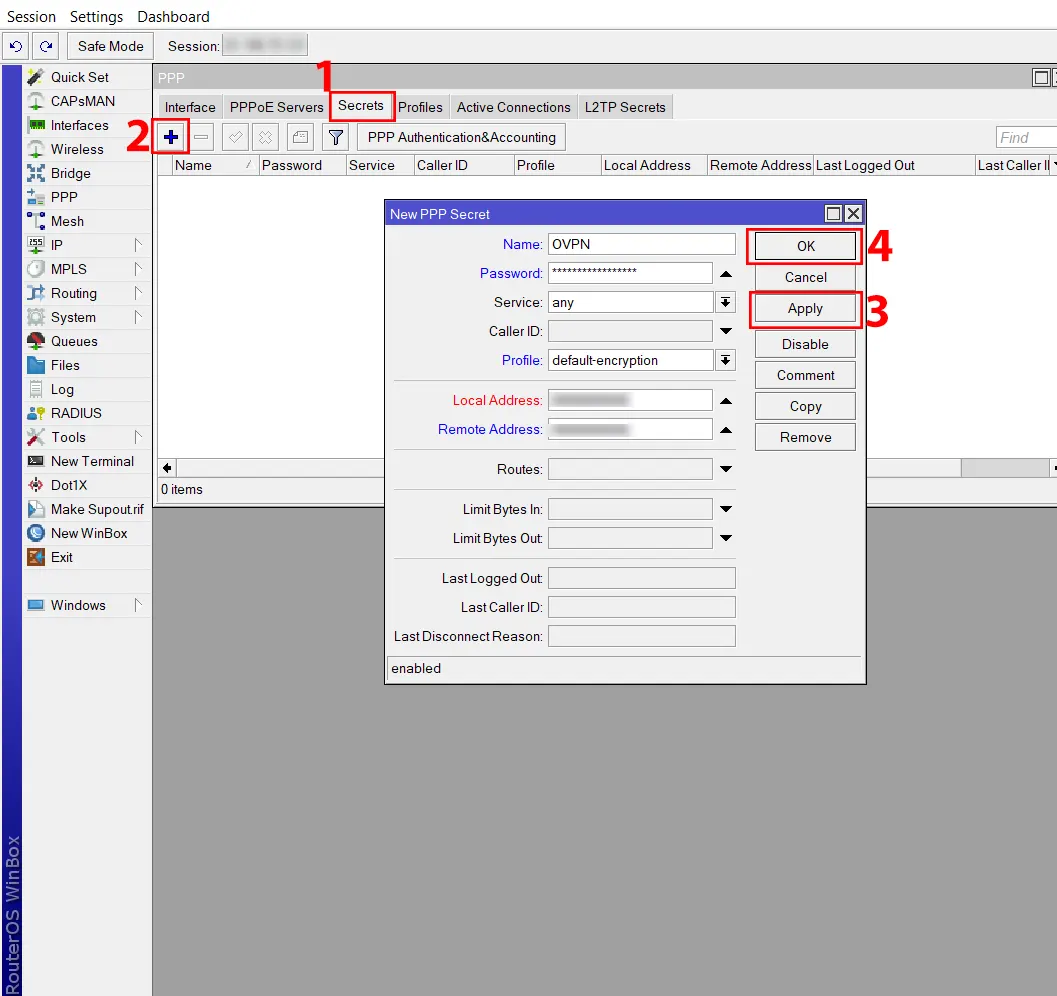
Firstly, go to the PPP >> Secrets tab and click on +. Now enter your desired credentials and choose the default encryption as the profile. Lastly click Apply >> OK:
That’s it!
Conclusion
OpenVPN is a VPN solution that provides a secure and encrypted VPN tunnel across Public Network. In this article, we taught you how to configure OpenVPN on MikroTik. I hope this tutorial was useful for you and that it helps you to setup OpenVPN on your MikroTik VPS server. If you have any questions or problems, you can contact us in the Comments section.