Each Email is transmitted to the intended recipient through a part of mail servers. Although a message seems to be sent immediately, a part of operations are performed with the help of the mail server. In this article, we are going to teach you how to configure Mail Server Settings on Plesk Control Panel. Also, you can visit the packages available in Eldernode if you wish to purchase a Linux VPS Hosting.
Table of Contents
How to Configure Mail Server Settings on Plesk
What is Mail Server?
A mail server is software that manages messages on the network and sends and receives emails. When you send an email, it passes through a series of email servers to reach its destination. The mail server acts like a computer network and its main job is to exchange electronic mail. The mail server has special features and services that are used to send mail from one server to other sites and emails.
Types of Mail Servers
Depending on whether the relevant mail server is in the role of sender or recipient of mails, it is considered as one of the following categories:
- Outgoing Mail Servers are also called SMTP Servers
- Incoming Mail Servers are two main categories that are POP3 Server and IMAP Server.
POP3 servers store incoming and outgoing messages on local PC drives and IMAP servers always store copy of emails on the servers.
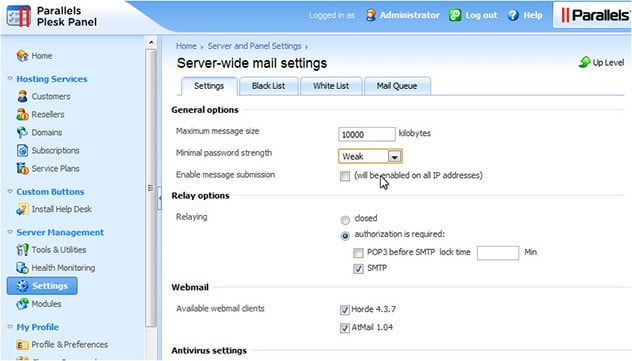
Configure Mail Server Settings on Plesk

Conclusion
In this article, we taught you how to configure Mail Server settings on Plesk. Mail Server is a provider of Mail exchange services and is used for sending mail. Email sending services and transactions are done through Webmail. I hope this tutorial was useful for you and that you enjoyed it.