Flameshot is an open-source screenshot tool that operates with both the graphical user interface as well as the command-line interface. Since the screenshot tool of Linux distributions is not perfect, you can use the functionalities of Flameshot. This powerful, simple, and easy-to-use screenshot software edits images instantly and is customizable. Join us with this article to review the Tutorial Configure Flameshot On Ubuntu 21.04. Choose your desired package on Eldernode to purchase your own Ubuntu VPS.
Table of Contents
Configure Flameshot On Ubuntu 21.04
Flameshot is written in C++ with the Qt5 framework. It is an annotation flexible tool designed for Linux, macOS, and Windows systems. You can take a screenshot in Ubuntu by pressing the ”Print Screen” button. But the built-in screenshot functionality does not exactly offer many options, but Flameshot lets you do more with your screenshots. In the following, you will learn how to install and configure Flameshot on Ubuntu 21.04.
Prerequisites to Install Flameshot on Ubuntu 21.04
To let this tutorial work better, please consider the below Prerequisites:
_ A non-root user with Sudo privileges. To setup, follow Initial server setup on Ubuntu 20.04.
How to Install Flameshot tool on Ubuntu 21.04
Not only Flameshot is easy to use, but also it has one of the easiest installation processes. Run the following commands to update your system and install the Flameshot tool on Ubuntu 21.04:
sudo apt updatesudo apt install flameshotHow to Configure Flameshot on Ubuntu 21.04
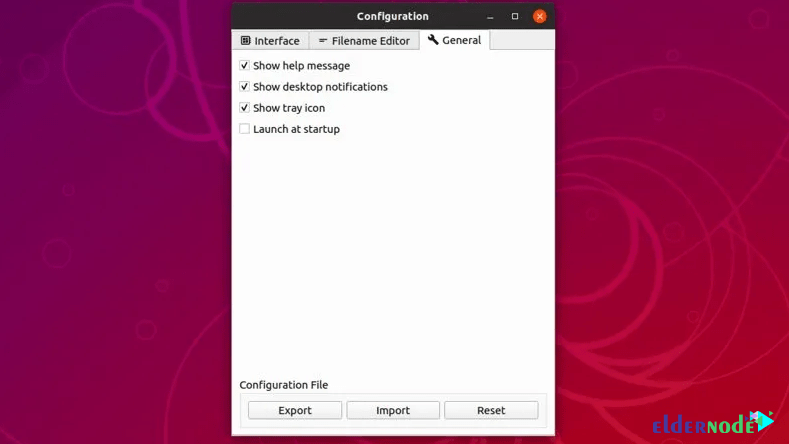
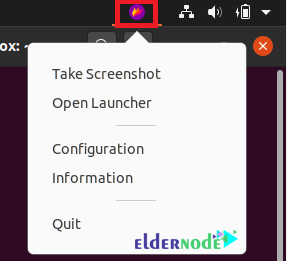
Now that you have installed and launched the app, you are ready to configure it. To configure Flameshot, you can type flameshot config or select Configuration from the tray icon menu.
In this way, you will be able to show the tray icon or Flameshot to launch at startup. Then also, you can select what buttons are shown in the GUI and what color you want the interface to be.
At the time of writing this article, it is not possible to use the Print Screen button to take a screenshot. But this functionality may be added in the future. So, override the Print Screen shortcut yourself.
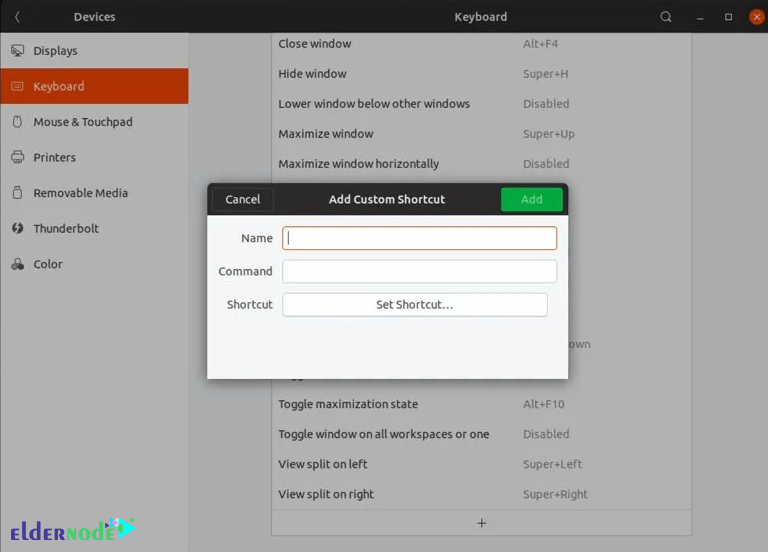
To disable the shortcut follow the below path:
1- Open the system settings app
2- Select Devices, then go to Keyboard.
3- Scroll down to Screenshots.
4- Select ”Save a screenshot to Pictures”
5- Hit Delete to disable the shortcut.
6- Scroll all the way to the bottom and hit the plus button.
Finally, give it a name, type the Flameshot command you want to bind to the shortcut, and set the shortcut as Print Screen.
How to Use Flameshot tool on Ubuntu 21.04
There are two different ways to use the Flameshot app. In this section, you will learn both of them to choose your favorite.
1- Using Flameshot in GUI mode
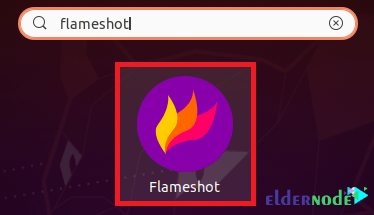
In the first method, you can launch it in Ubuntu 21.04 via the Applications menu. Search for Flameshot in the Activities search bar as shown in the image below:
Then, click on the search result to view the Flameshot icon on your Ubuntu 21.04 system’s taskbar. Click on this icon to launch a menu that will present you with various options for using this screenshot tool. Click on the icon and select ”Take Screenshot” to get started.
You will not be limited to one shot, select a portion of the screen to take a screenshot of. After selecting, refine it by dragging the different corners. When you have got your selection, you will be able to annotate the screenshot with arrows, draw on it, or blur out sections. Save your screenshot when marking up is finished. Also, you can copy it to the clipboard or open it directly in another application.
2- Using Flameshot from the Command Line
If you do not want the app running in your tray constantly, use this method. You can do all the things that you learned in GUI mode with CLI mode too. To launch flameshot simply run ”flameshot” from the terminal.
To take a screenshot of the entire desktop, run the following command. It will also ask you where to save it:
flameshot fullTo copy to the clipboard, use the command below:
flameshot full -cAlso, you can have some setup time. The command below will take a screenshot after 5 seconds:
flameshot full -c -d 5000Then, you can use the following command to save it to your desktop:
flameshot full -p ~/Desktop -d 5000Run the command below to launch the same interface that the full GUI version of the app uses:
flameshot guiIn this way, the app doesn’t need to run in the tray.
Conclusion
In this article, you learned How to Configure Flameshot On Ubuntu 21.04. Installing a screenshot tool is not necessary but will provide detailed screenshots to report bugs or presenting problems. You may prefer using Flameshot rather than taking a fullscreen screenshot and editing the resulting image in GIMP.