In this tutorial, we want to learn how to install and configure DNS on Windows Server 2016 step by step.
Note: Before installing DNS on your virtual server, you must set the IP address of your server statically, otherwise you will encounter an error during installation.
Table of Contents
Tutorial How to Install and Configure DNS on Windows Server 2016
DNS stands for Domain Name System, which in its general sense is responsible for translating domain names to IP addresses.
DNSs have zones within them that, when installed and configured by network administrators, make them use their network domain name and use them.
Install DNS on Windows Server 2016
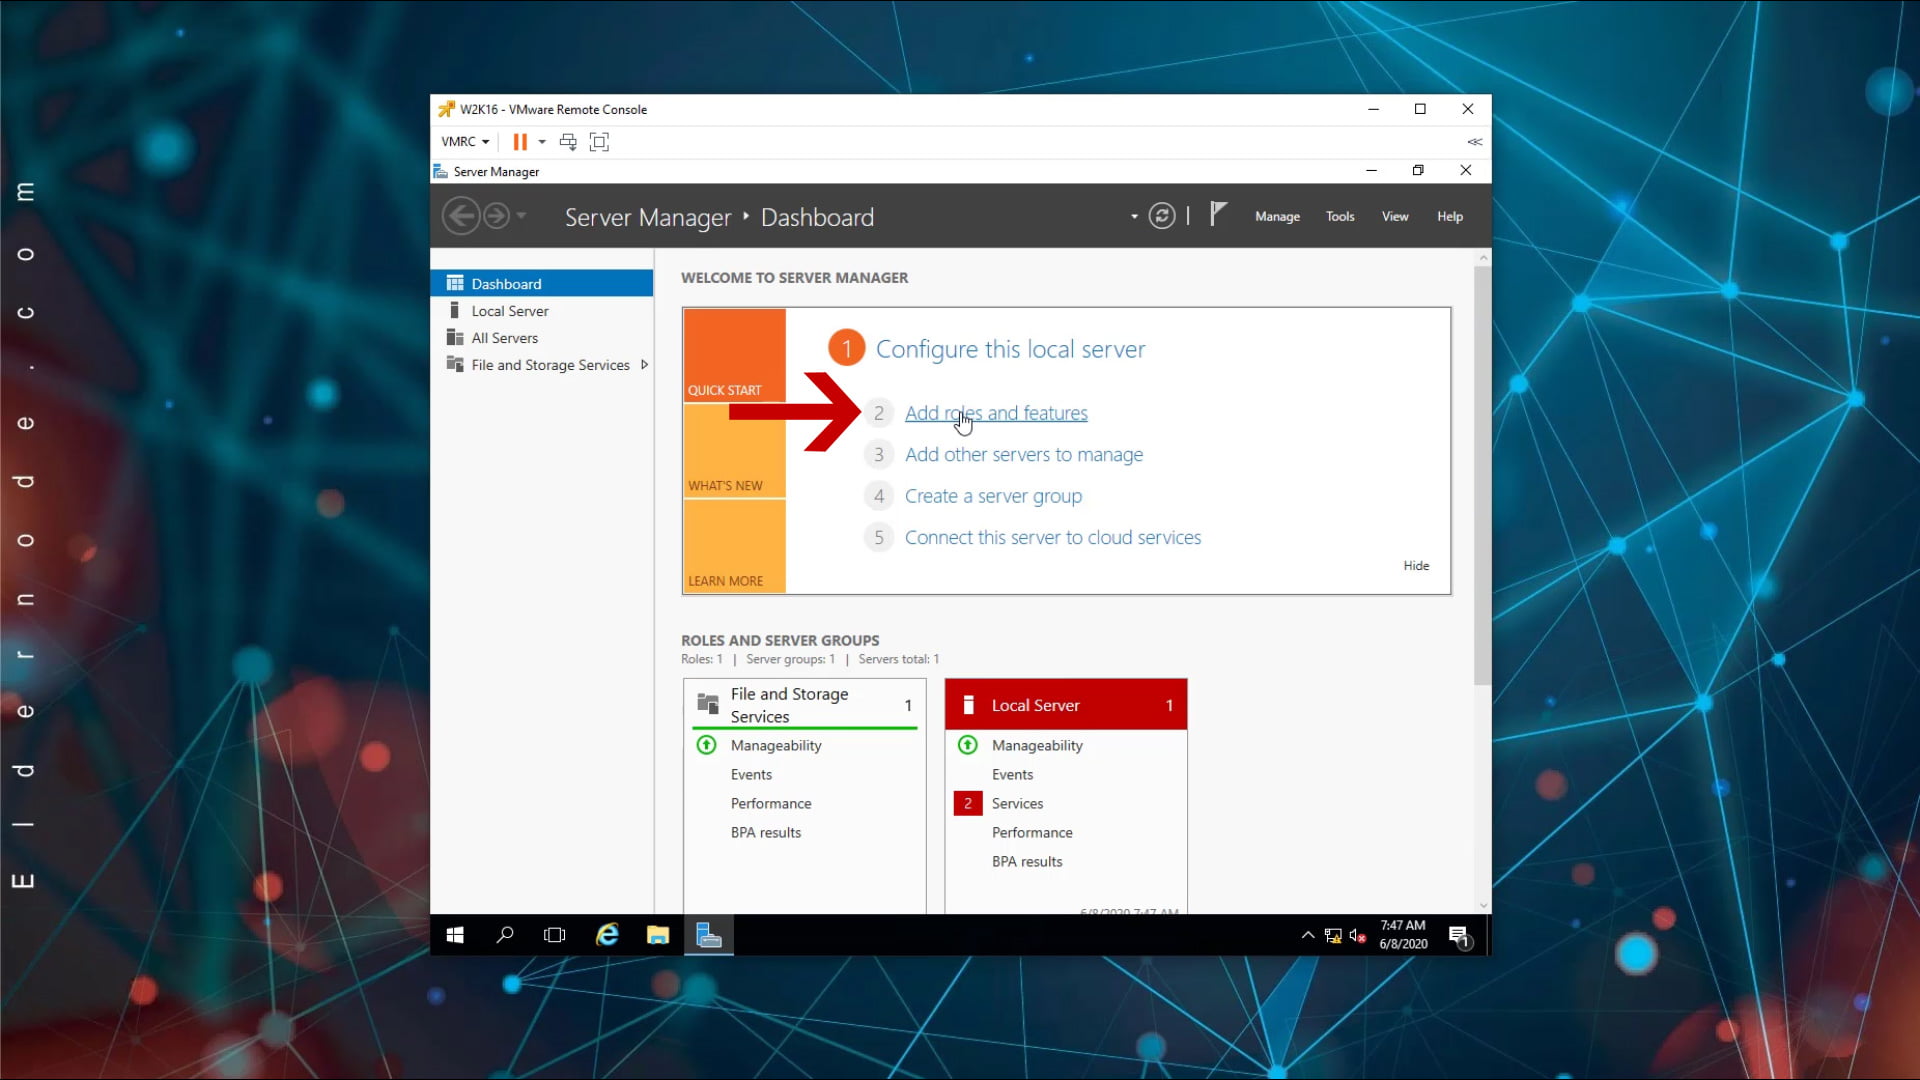
1- First open your Server Manager.
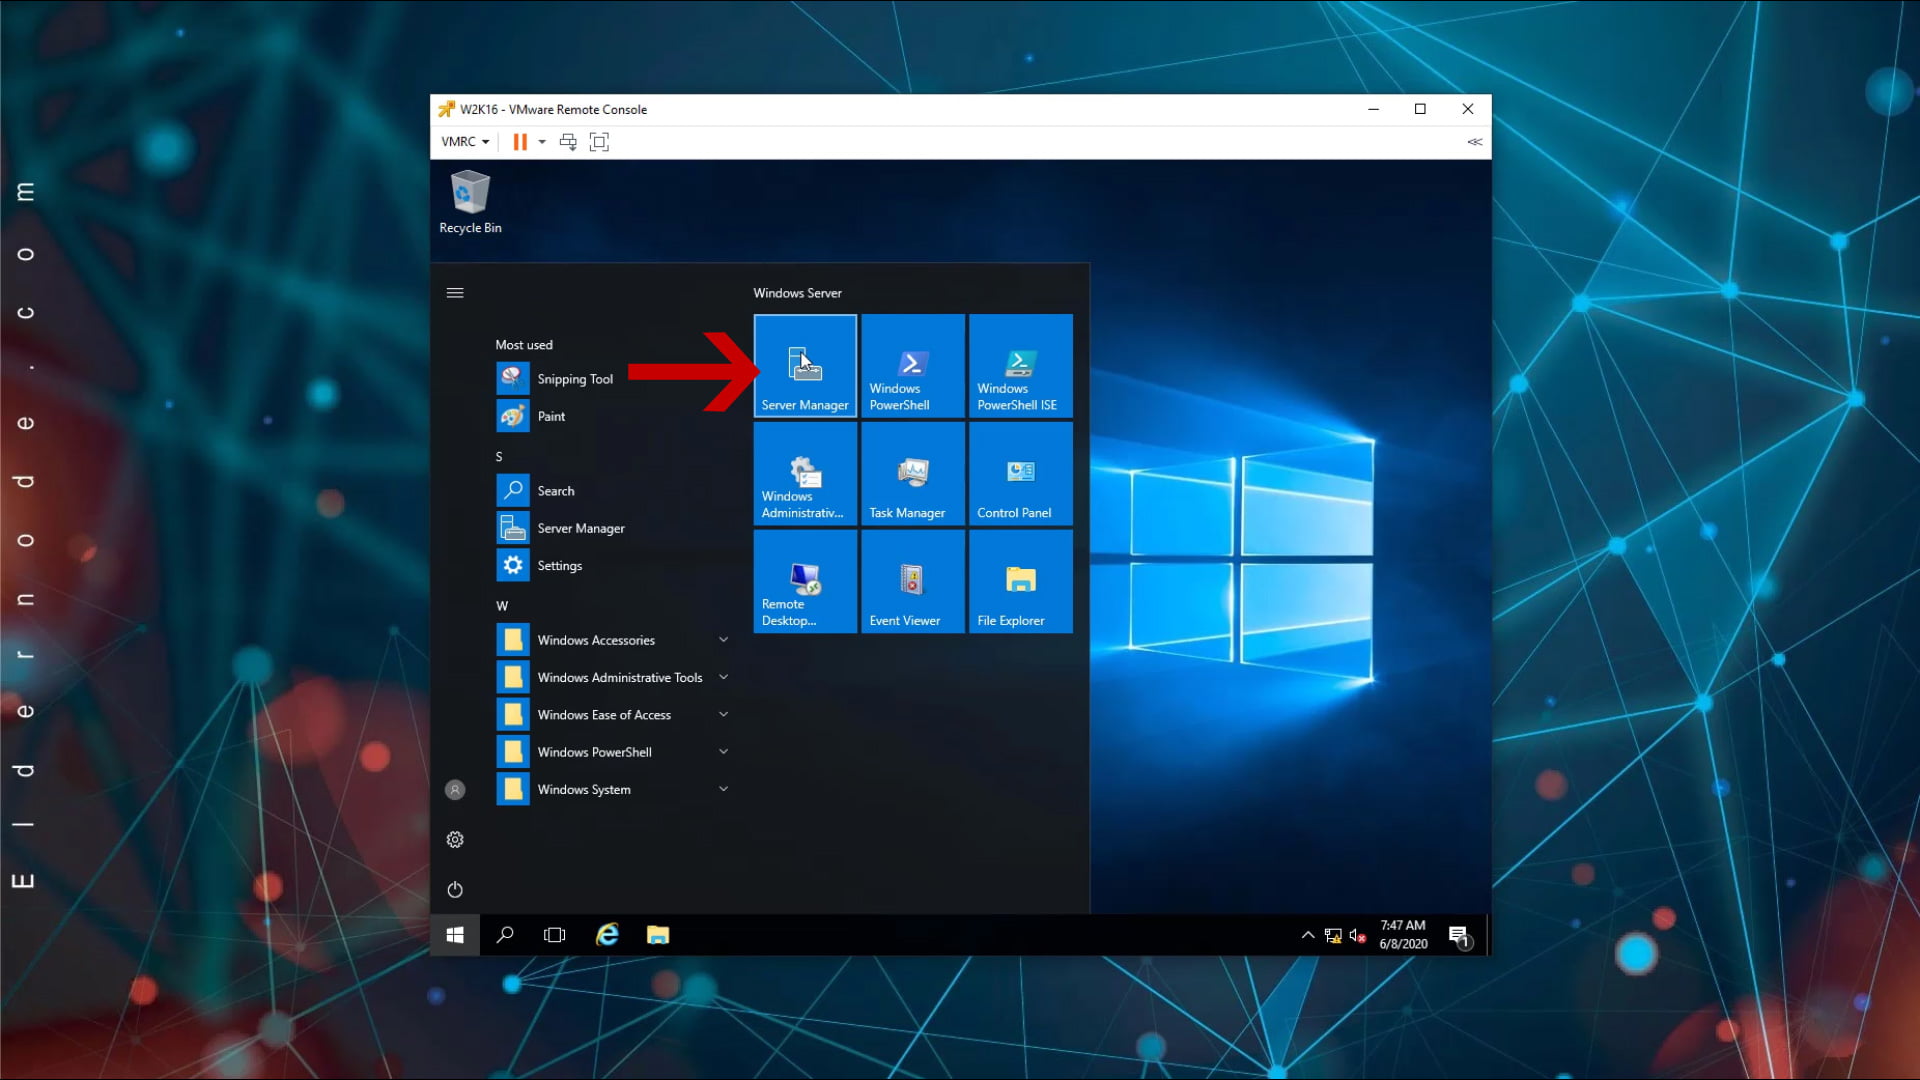
2. Click Add Roles and Features to open the Add Roles page.
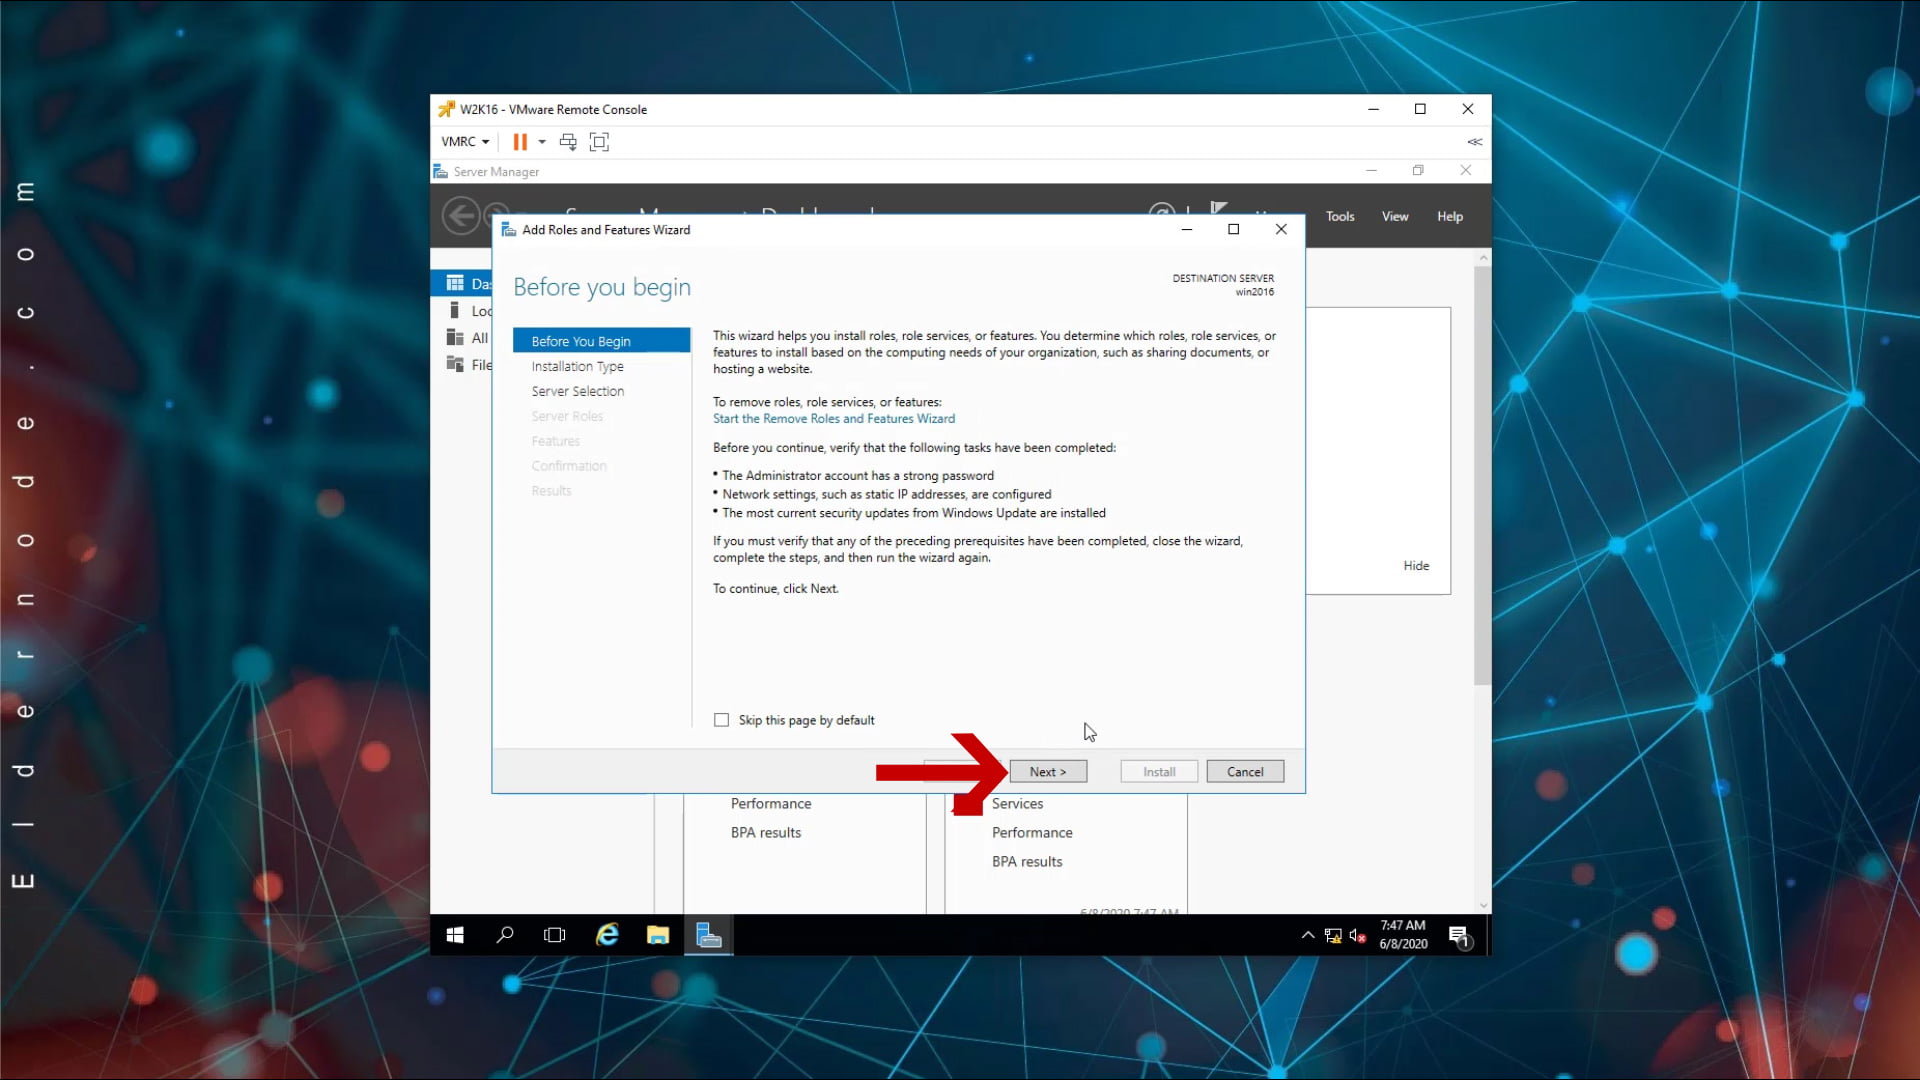
3. On the page that opens, click Next.
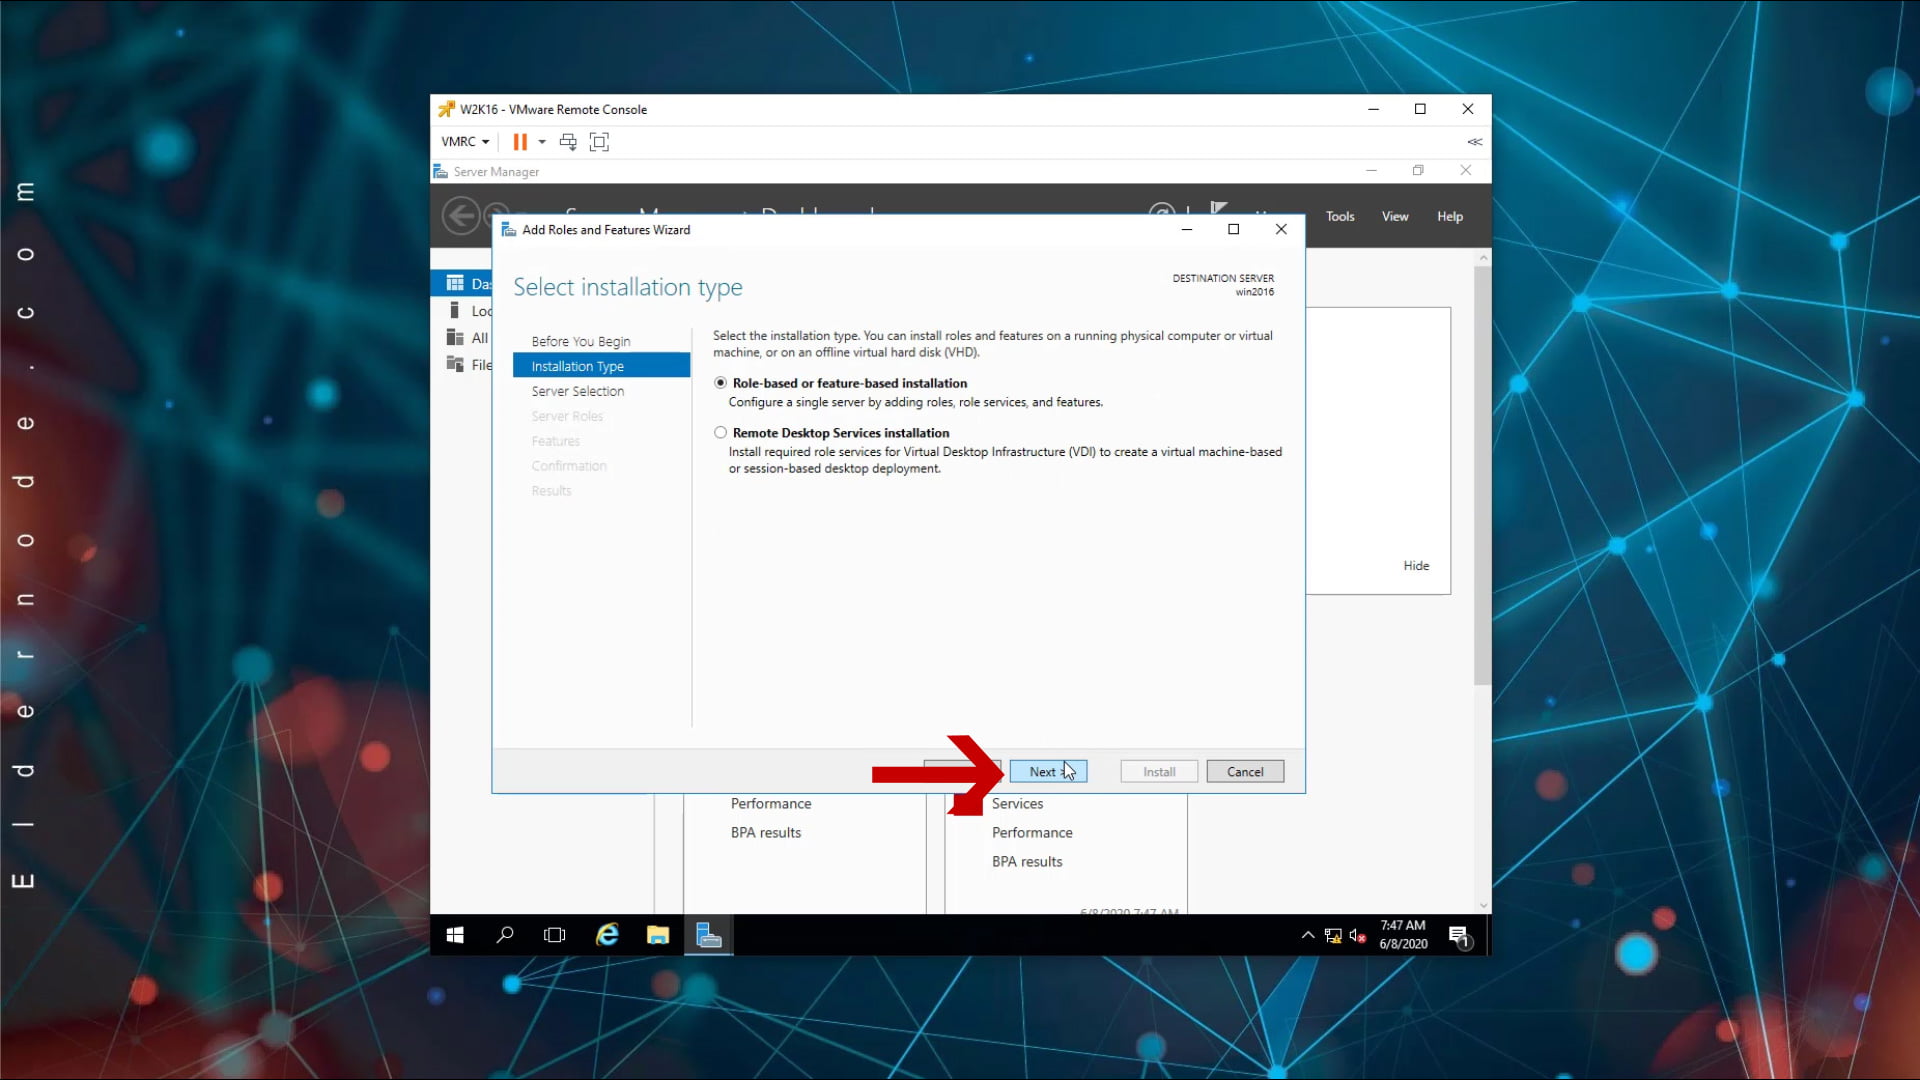
4. Then click on Role-based or feature-based installation and click Next.
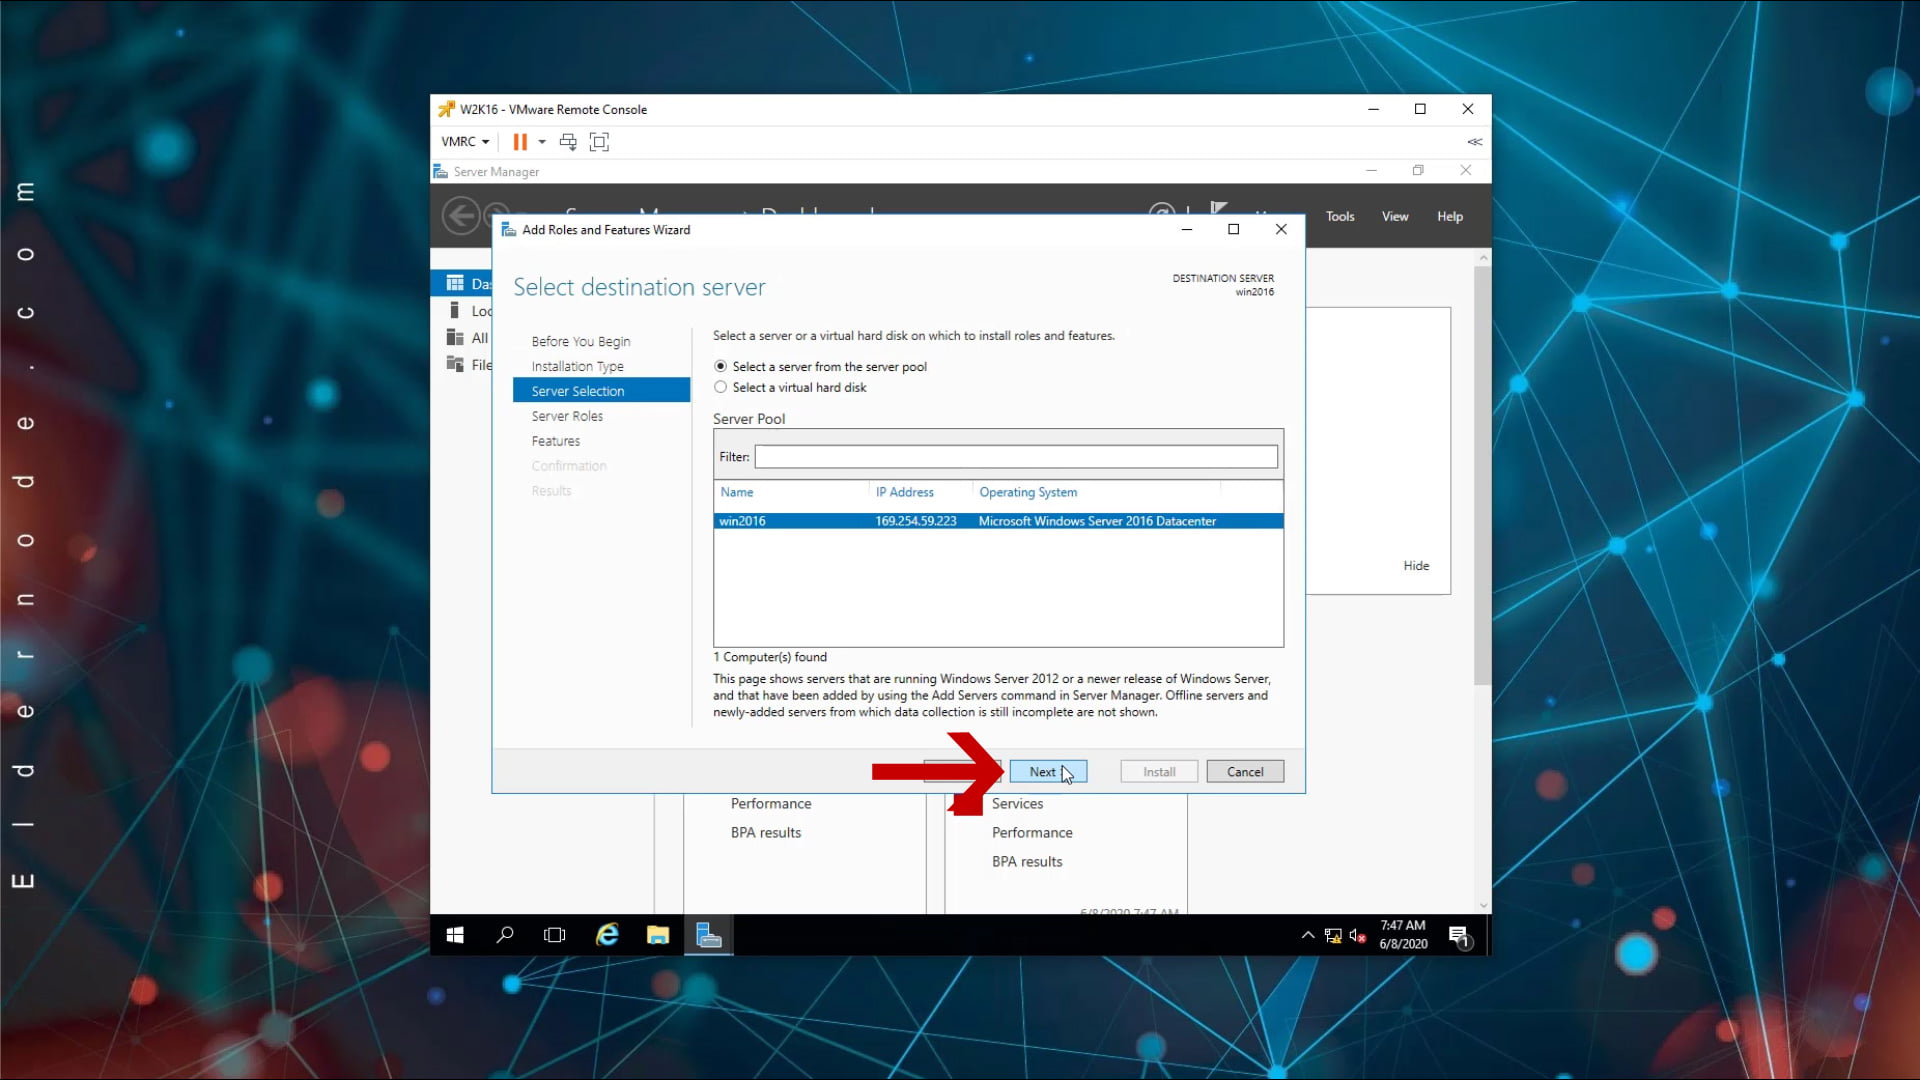
5- In this step, select Select a server from the server pool and select the name of your server in the box below, and finally click Next.
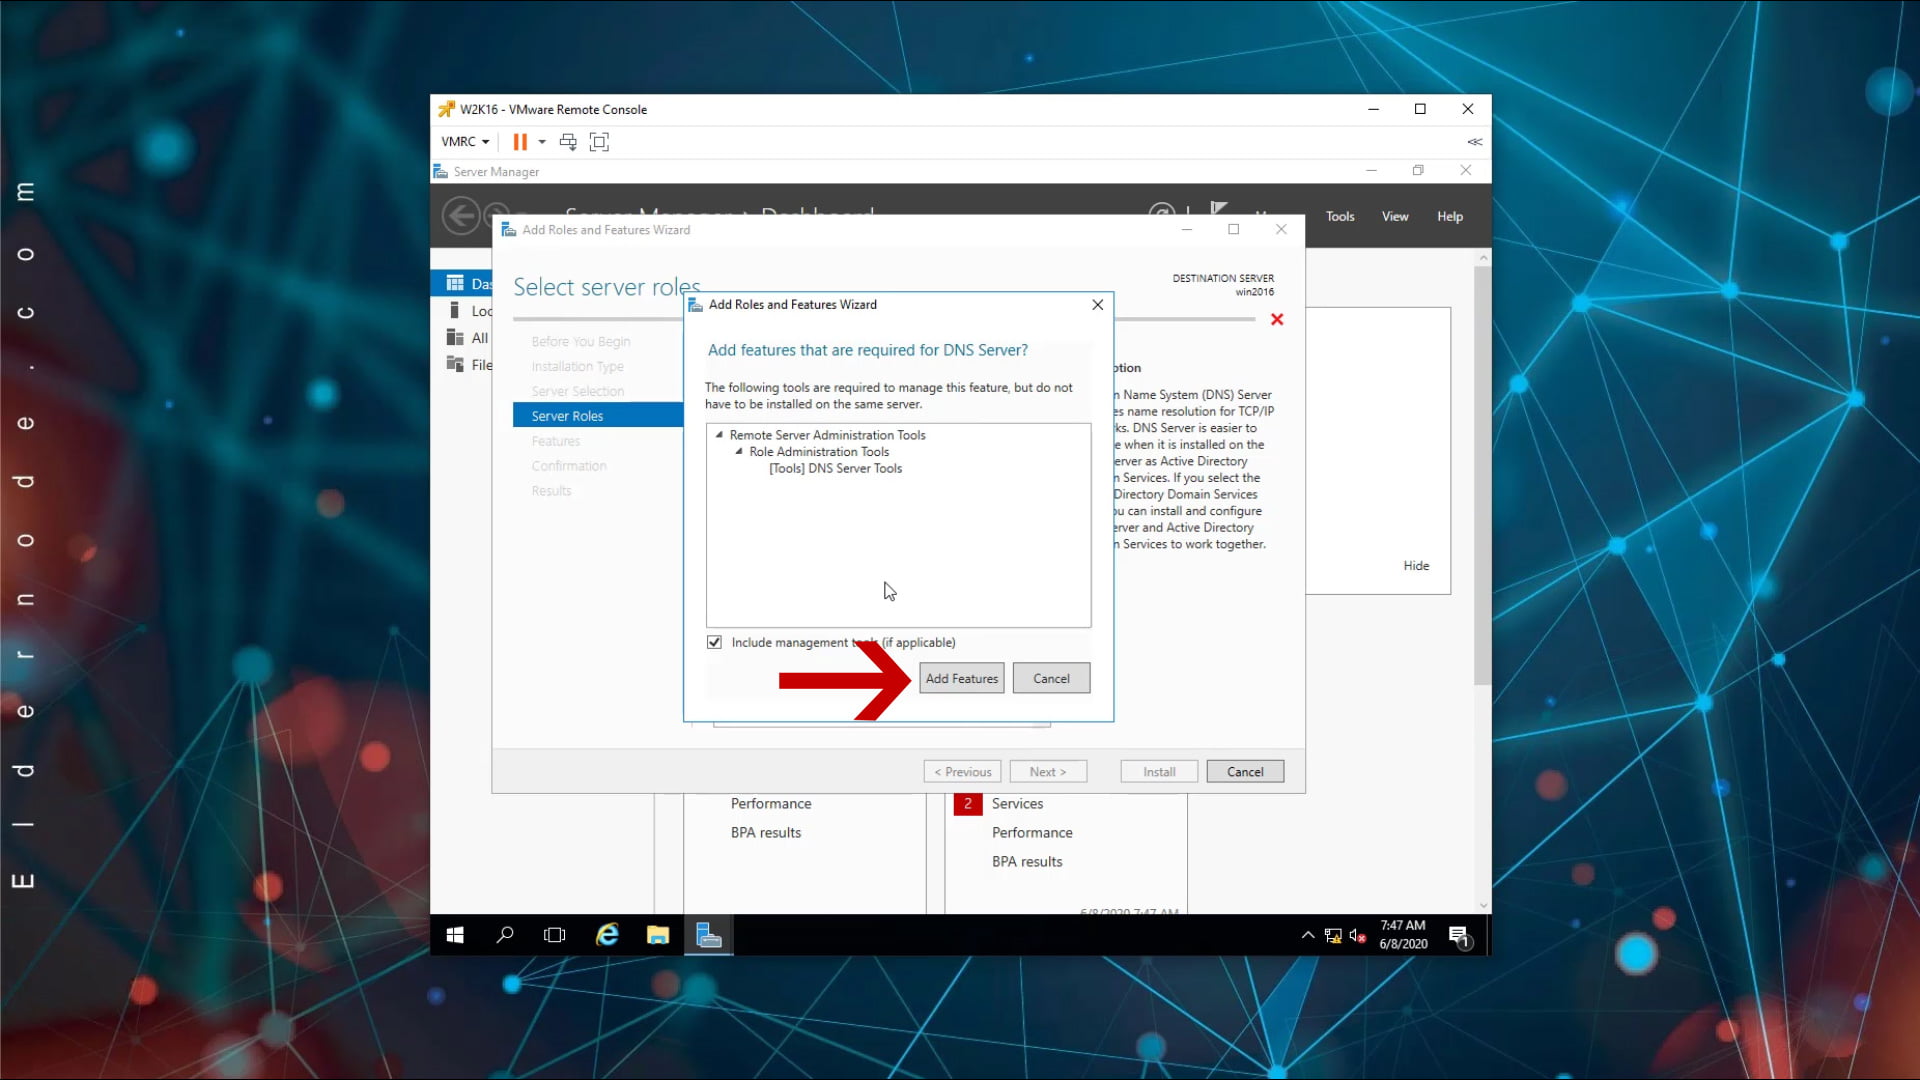
6- In this section, find the phrase DNS Server and check it.
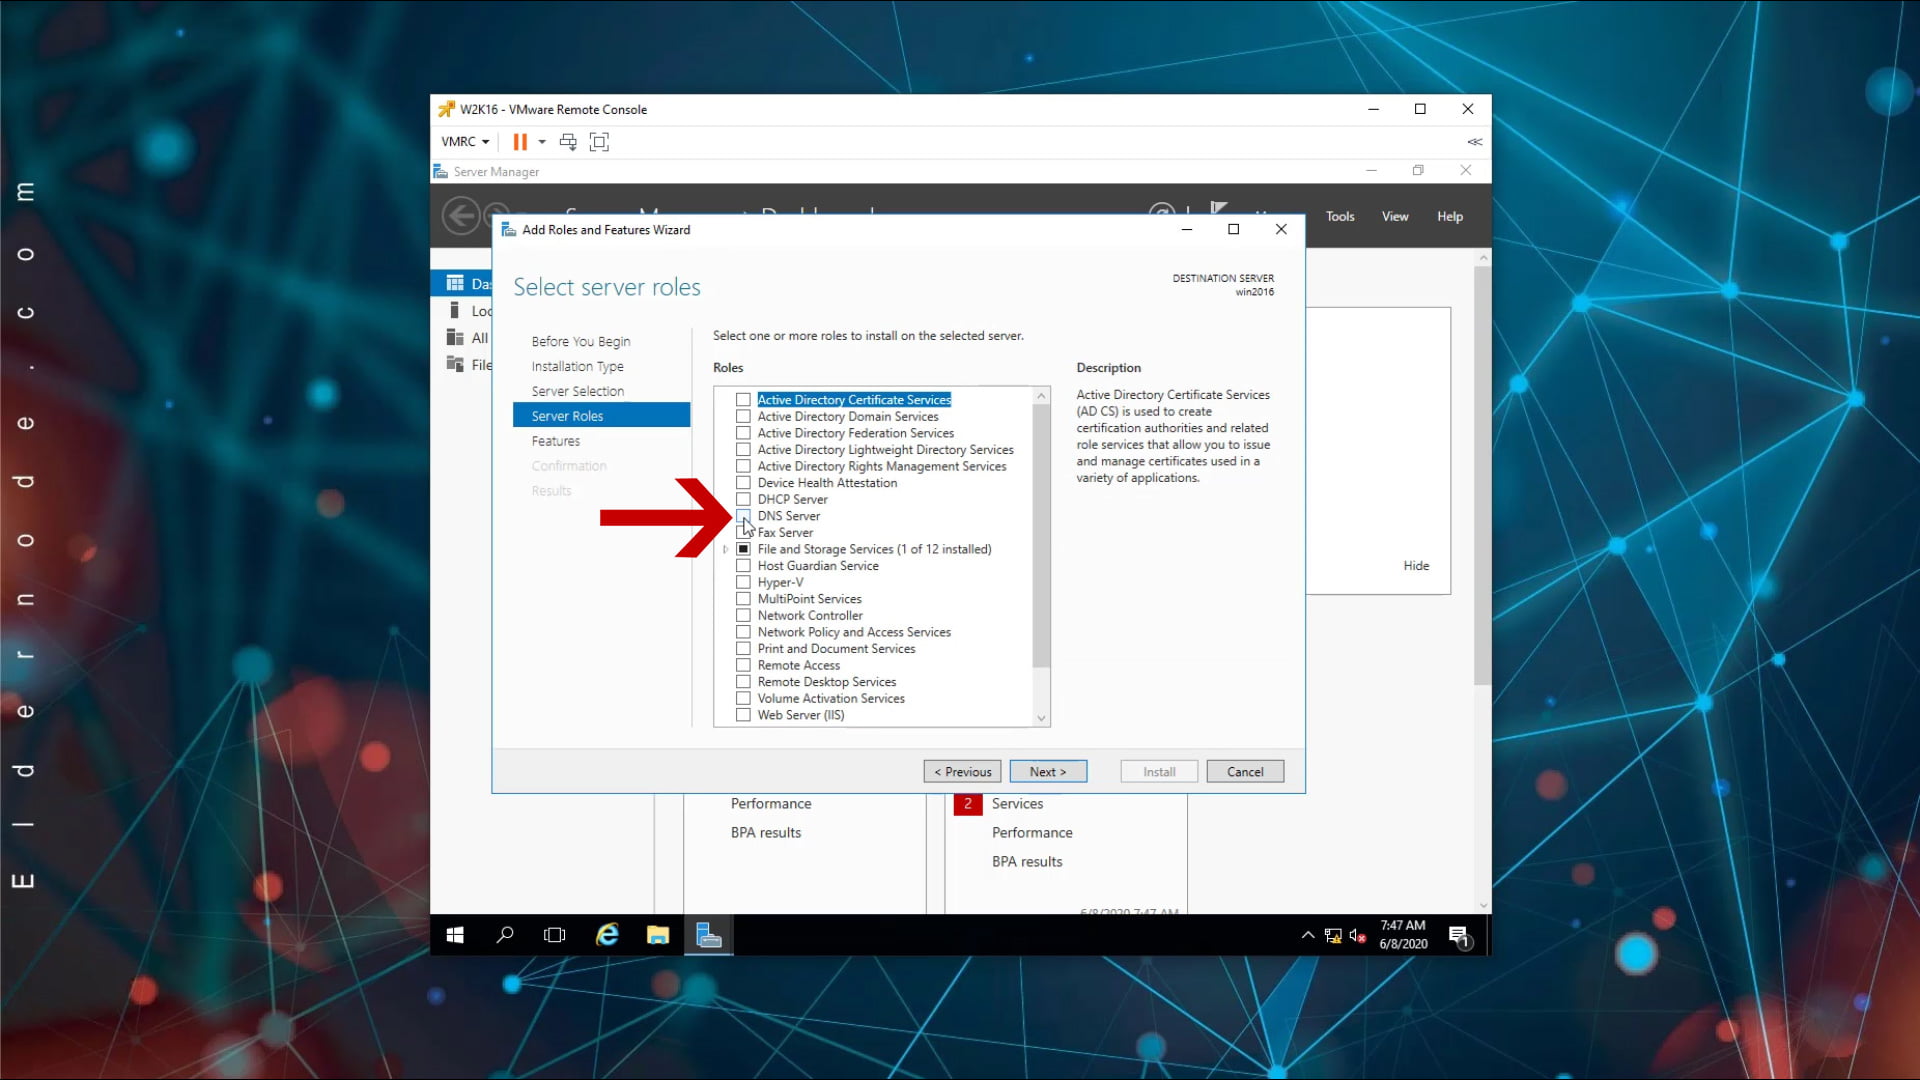
After checking DNS Server, Windows will give you a message stating that you need to install some necessary features to control DNS, in this section click on Add Features and click Next.
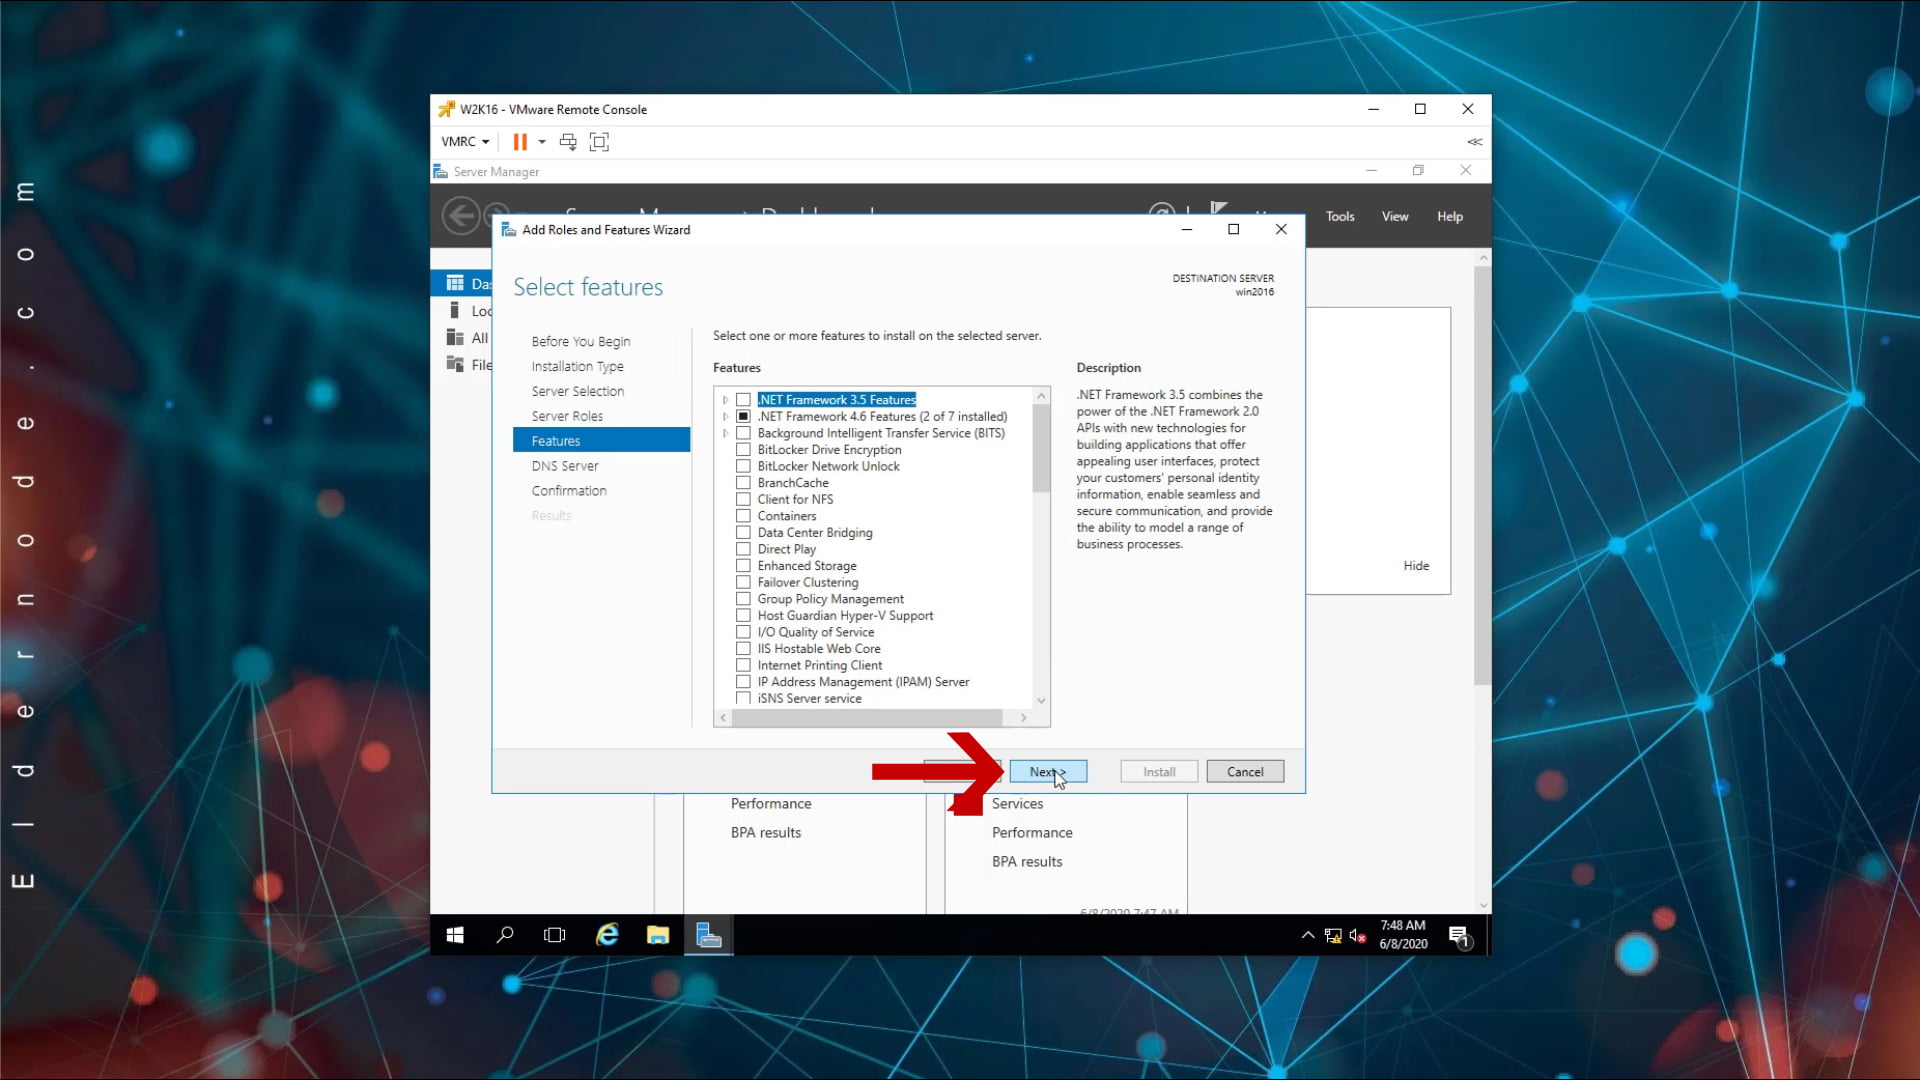
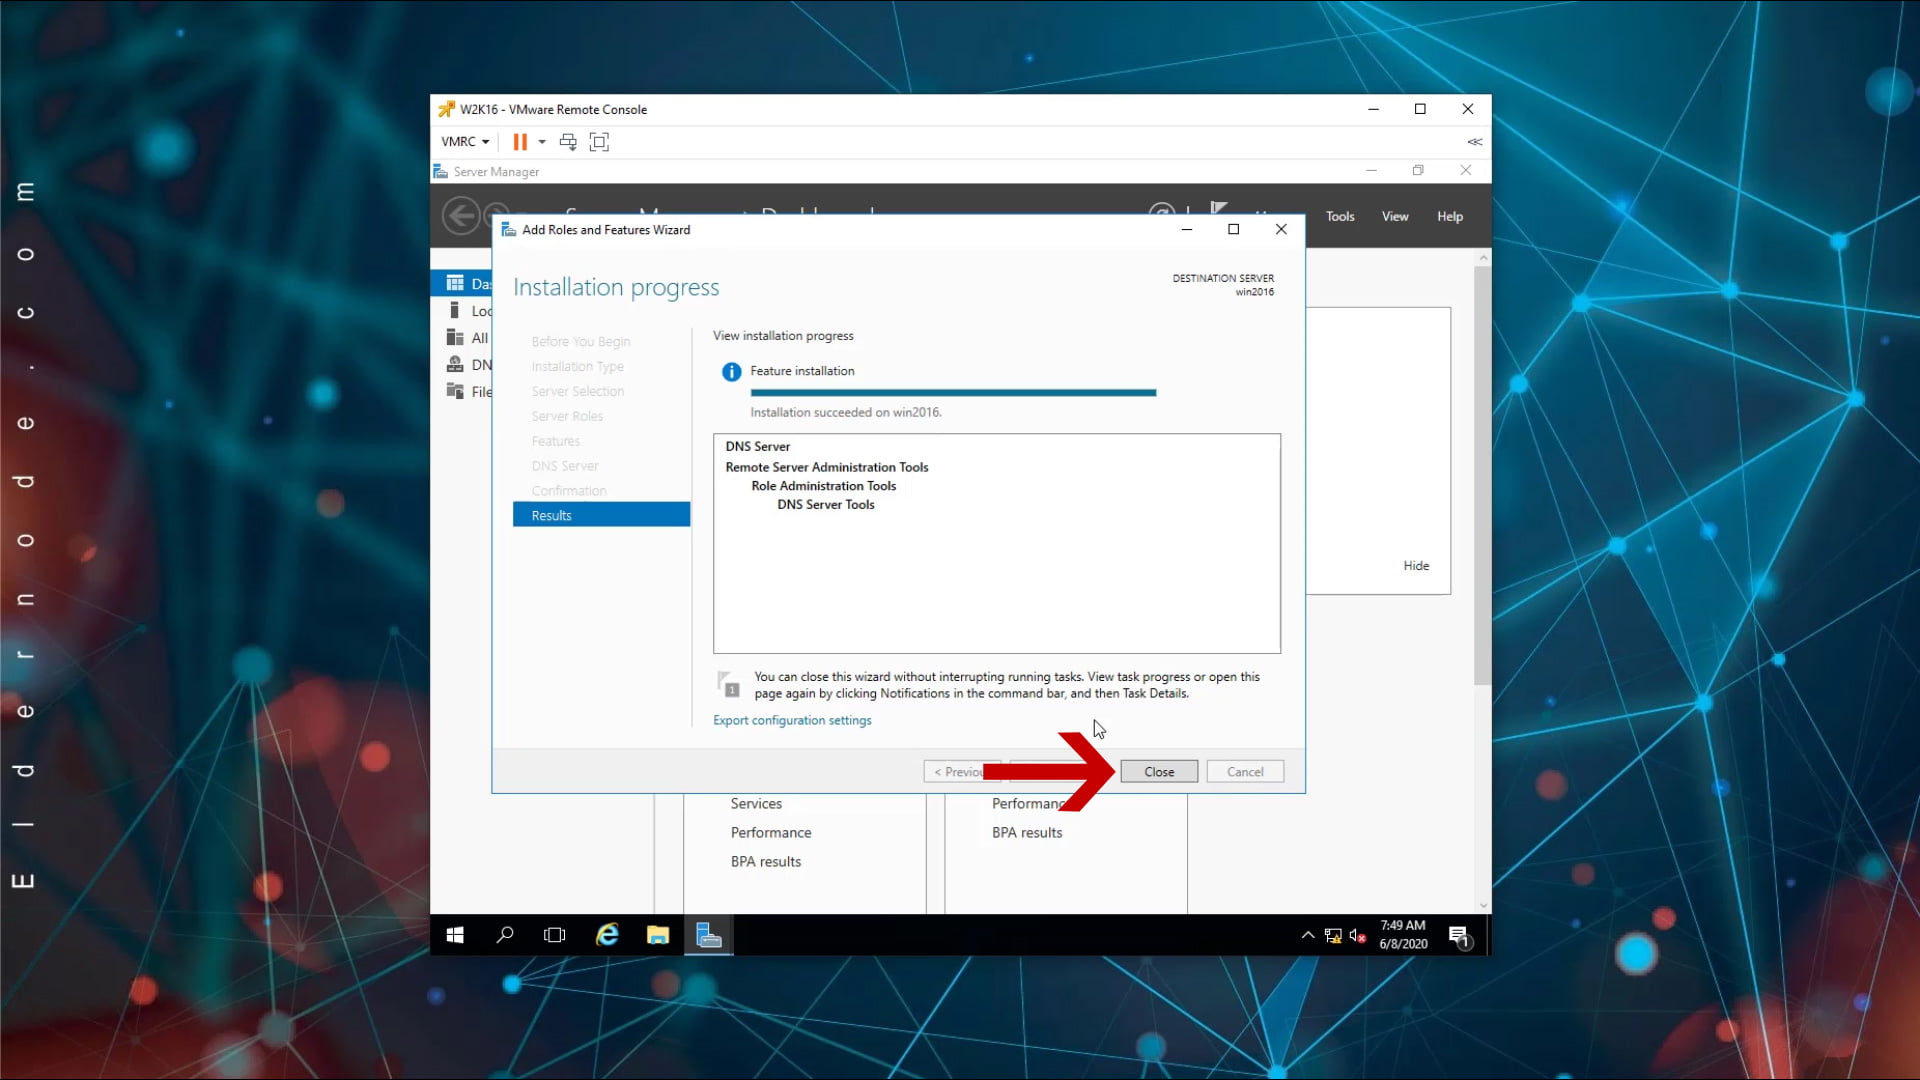
7- Pass the Features and DNS Server pages without changing and click on Install at the end.
Then wait for the DNS server to be installed on your server.
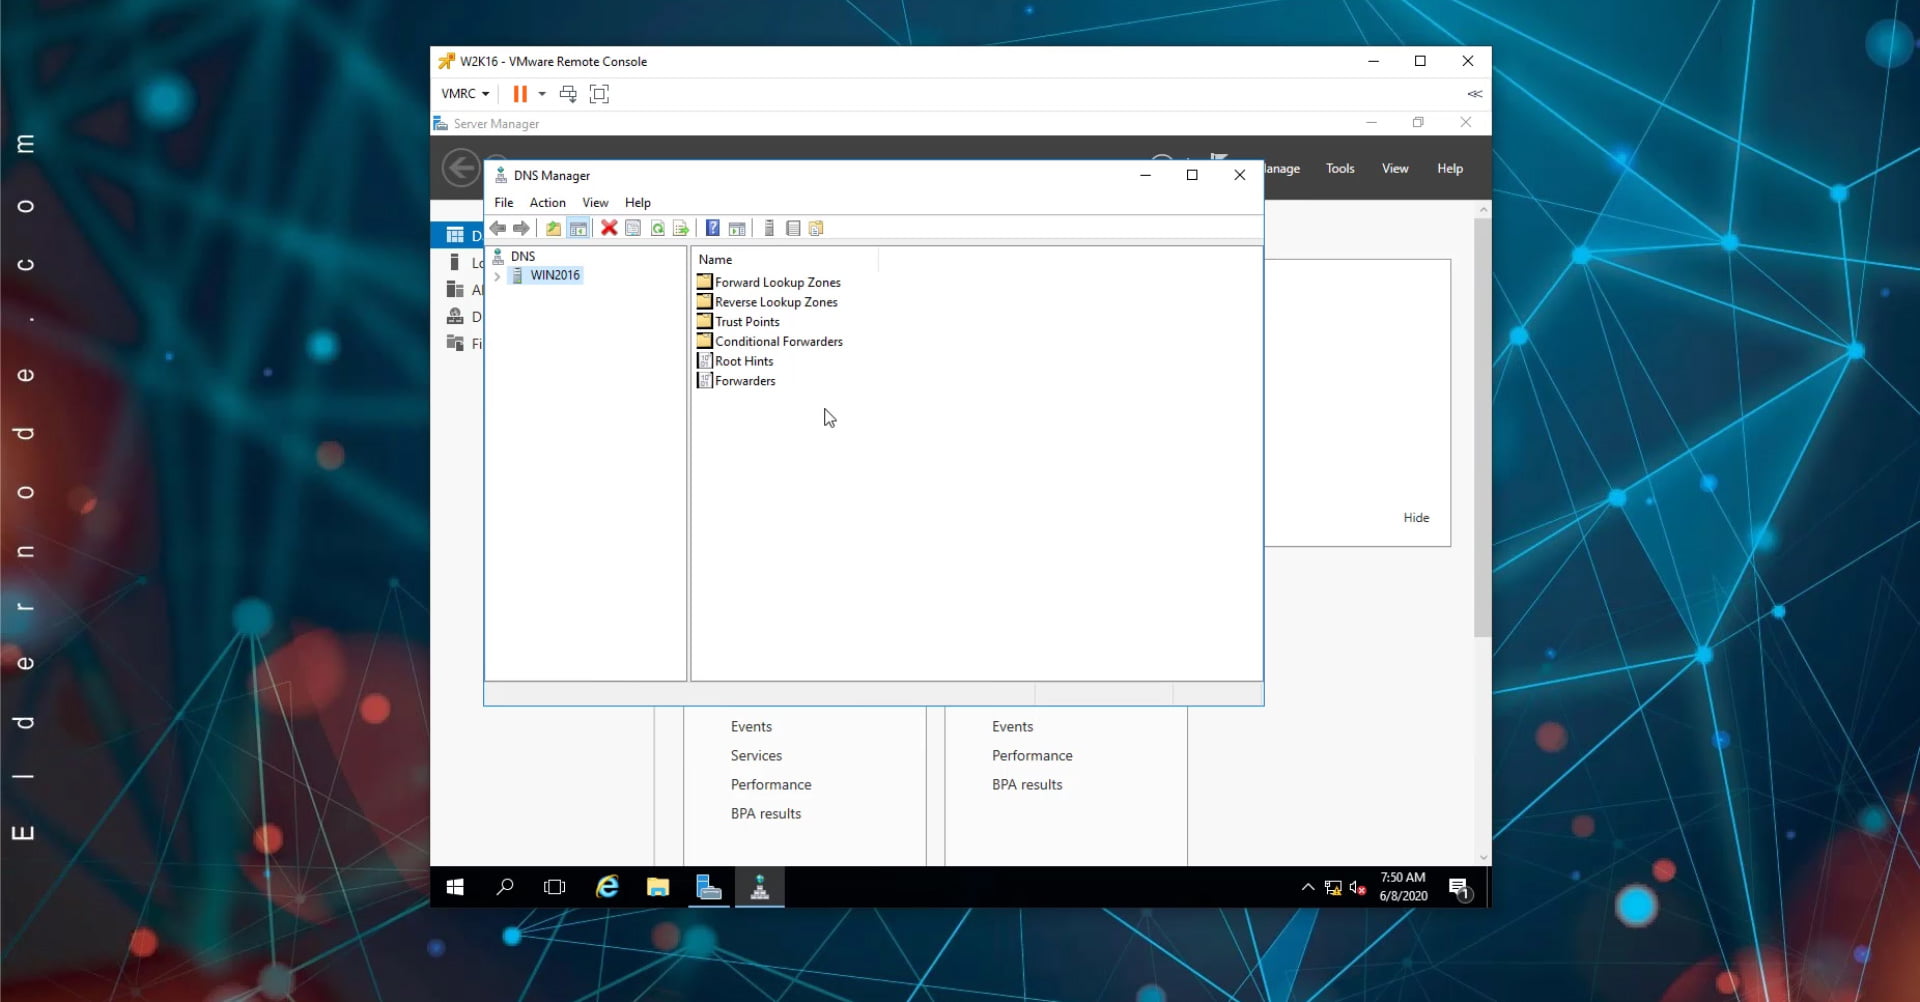
How to open DNS management console in Windows Server 2016
After installing the full DNS server roll on the Windows VPS, the 2016 server will explain how to open DNS Management, or DNS Management Console, in several different ways.
1: Open the DNS console from the Start menu
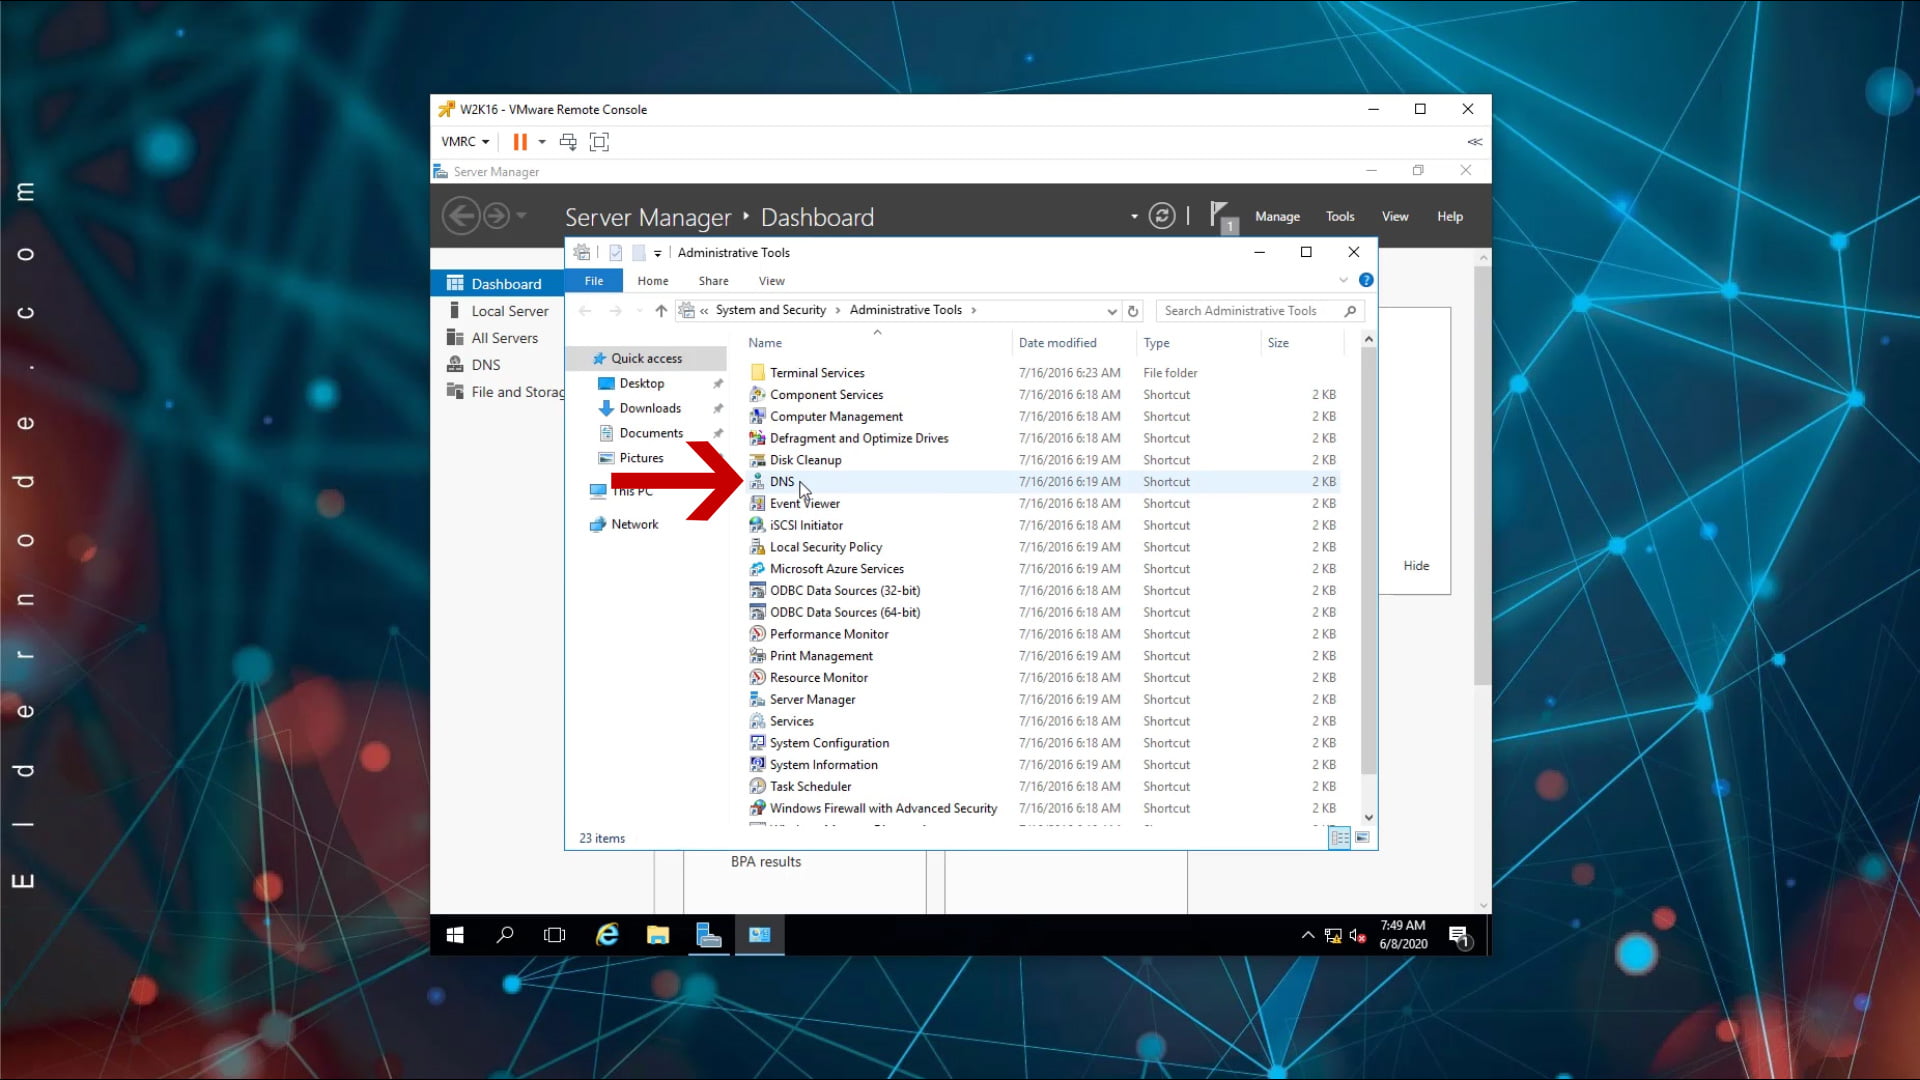
A) Open the Start menu and select Administrative Tools.
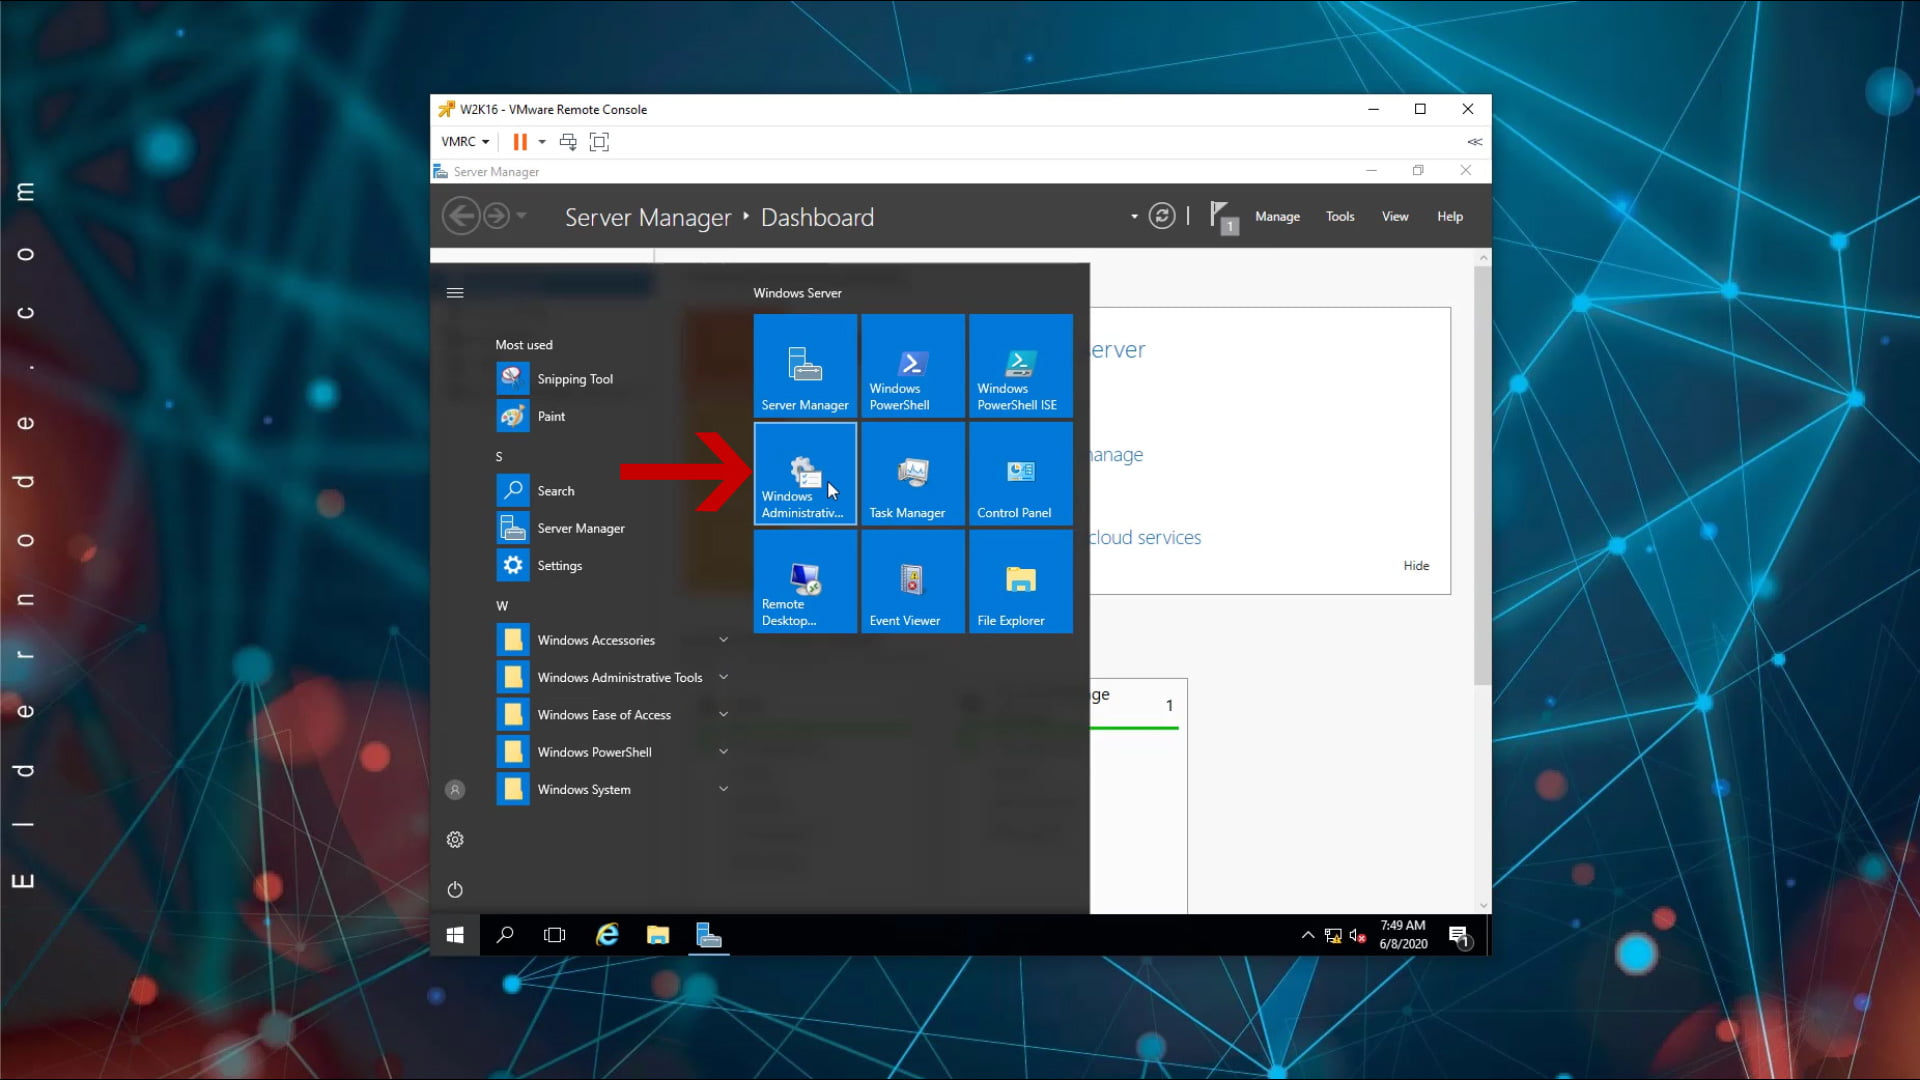
B) On the page that opens, click DNS to open the DNS management console.
2: Open the DNS management console from the Server manager
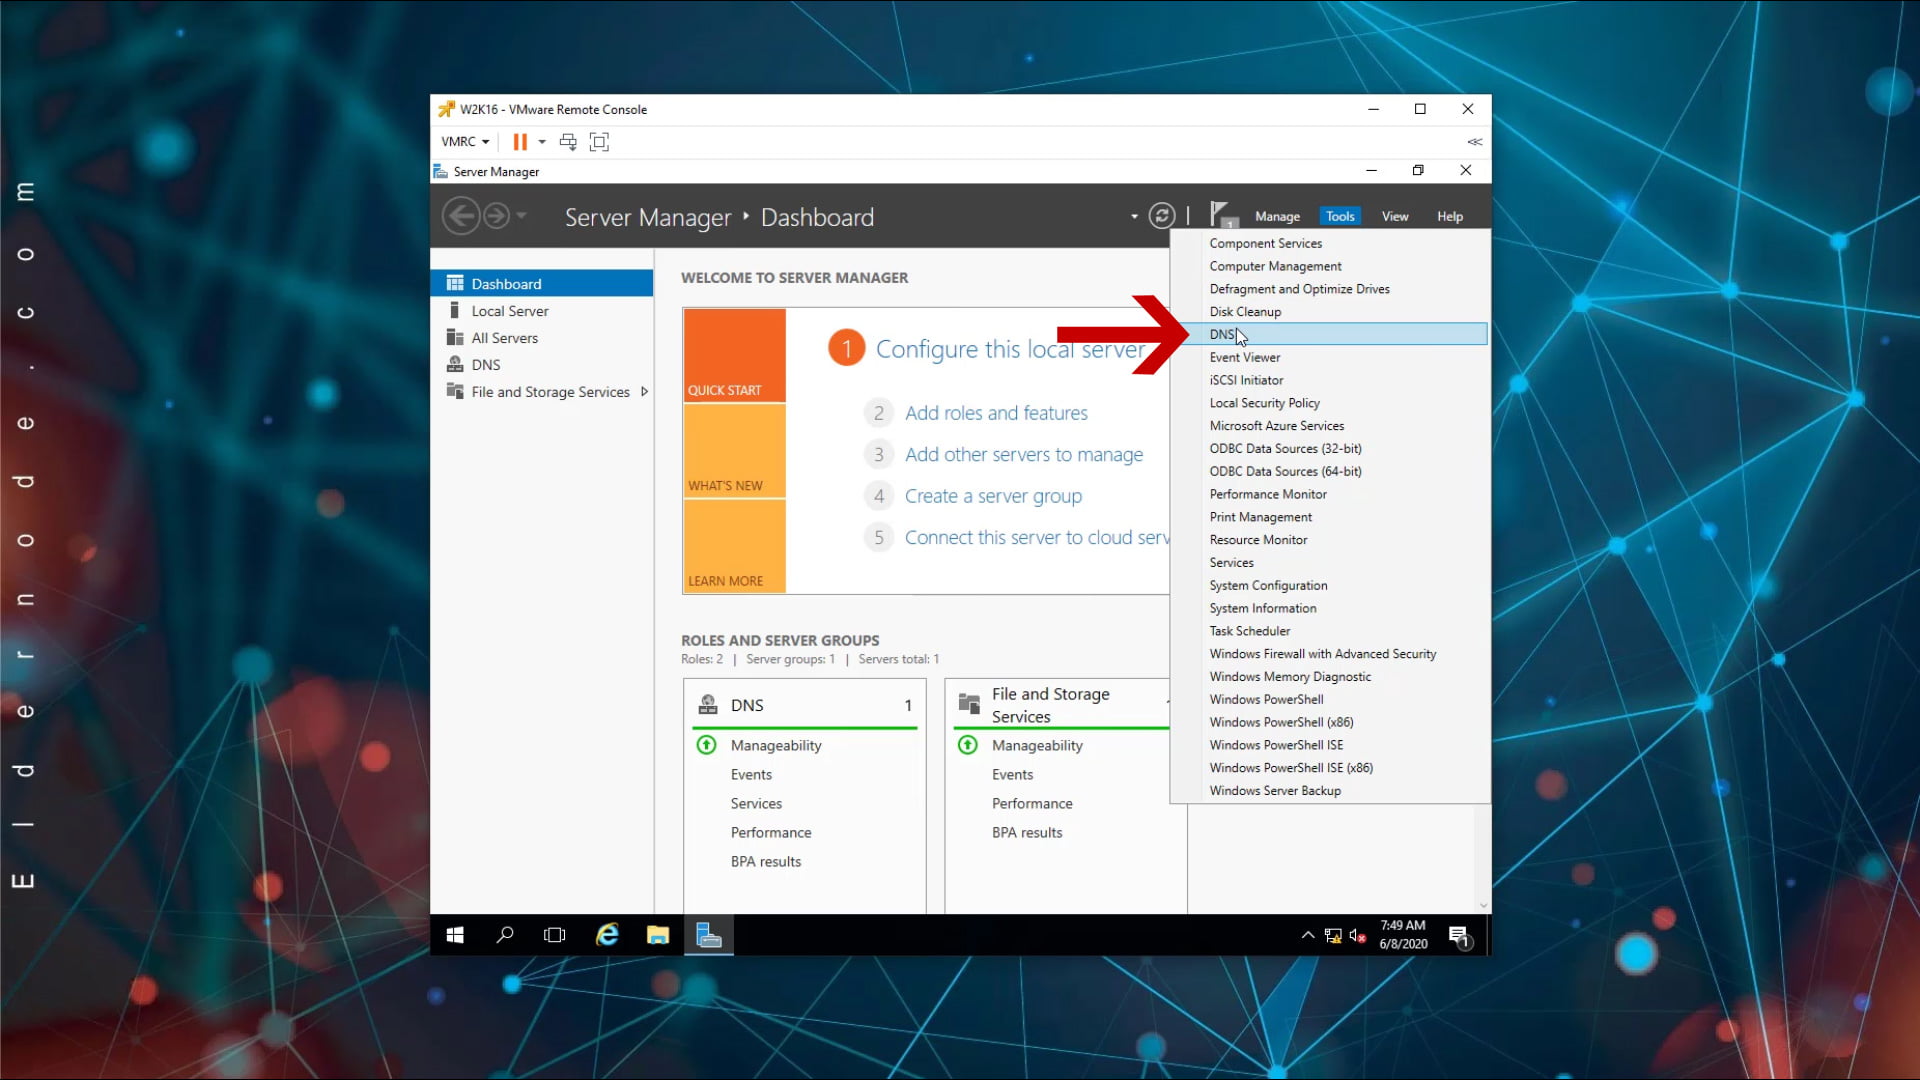
A) Open the Server Manager console.
B) From the Tools menu, click DNS Management to open the console.
3: Open the DNS management console from the Run window
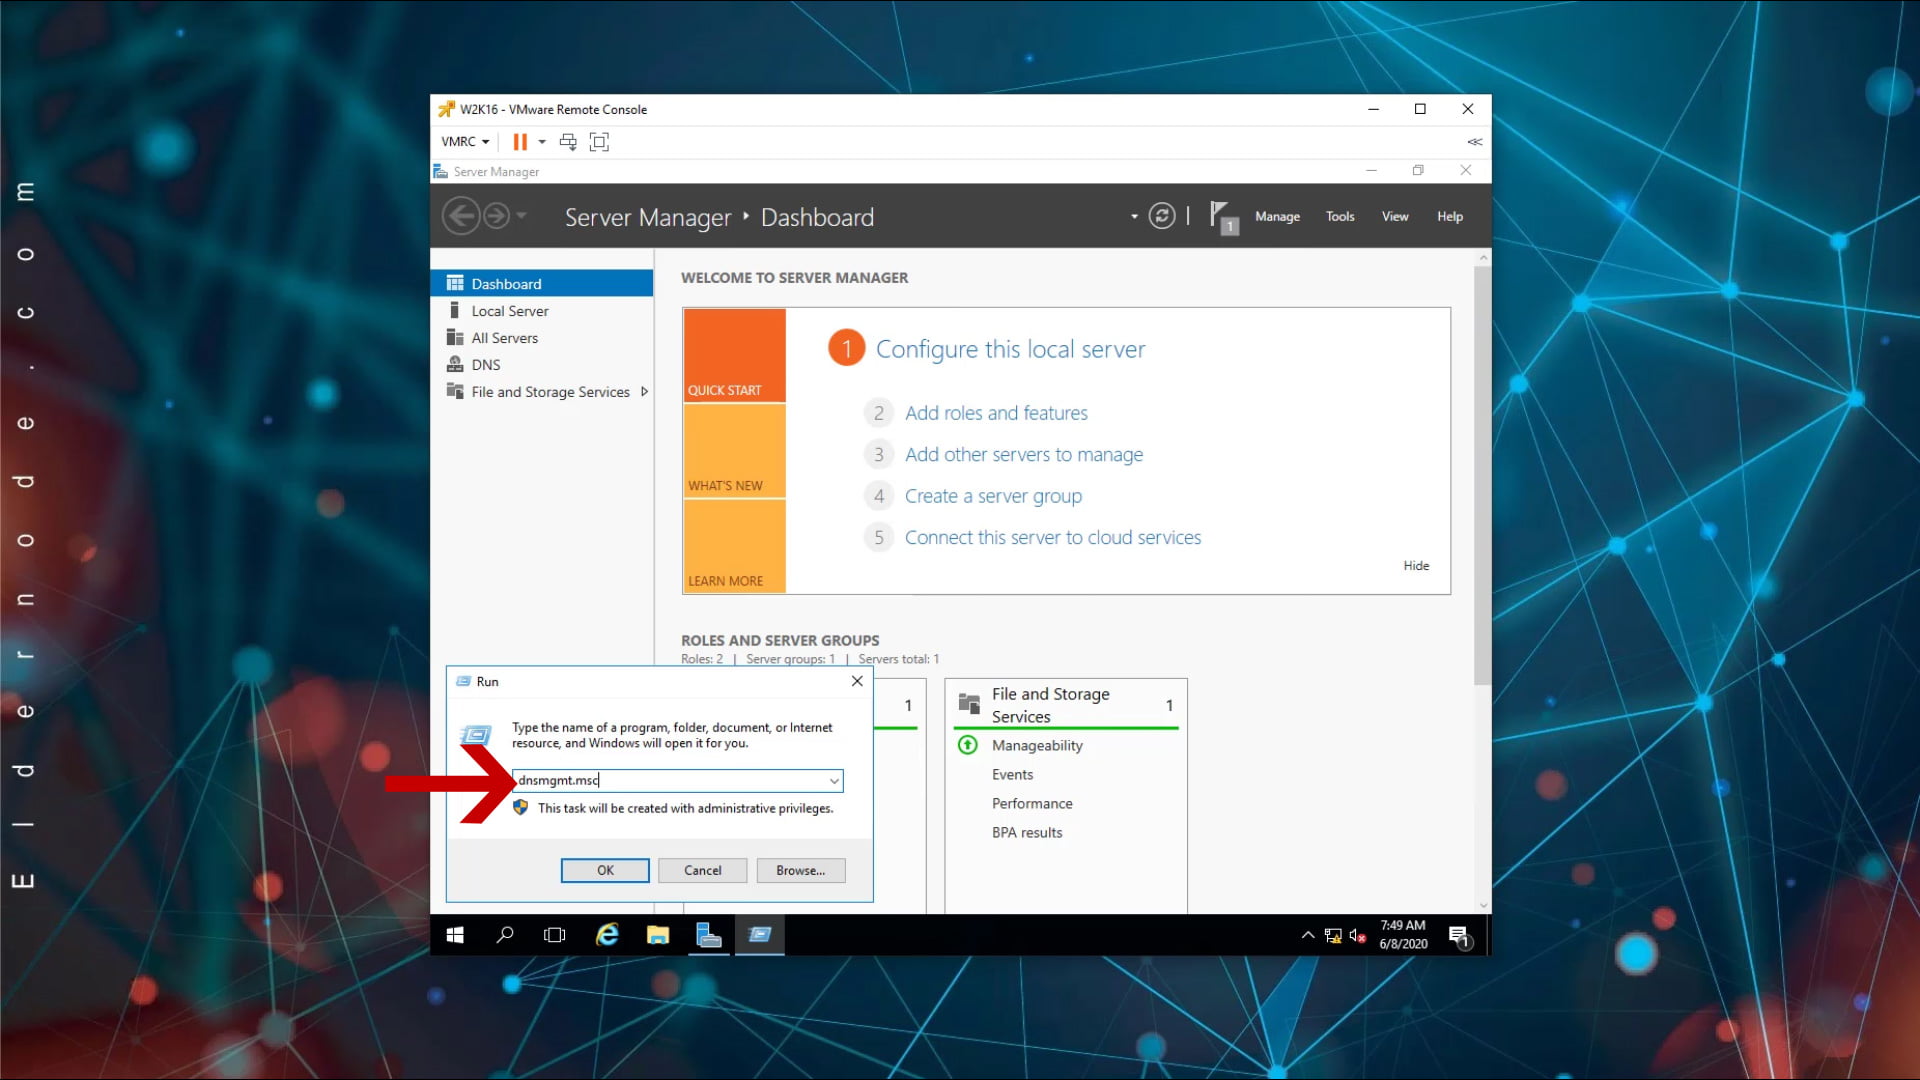
A) Open the Run window by pressing the Winkey + R key combination on your keyboard.
B) Type dnsmgmt.msc and click OK.
This will open the DNS management console in a variety of ways.