Burp Scanner automatically scans the content of websites for vulnerabilities. It should also be noted that depending on the configuration, the scanner can use the program to detect its content and functionality and control the program to detect vulnerabilities. Note that by default, all scans use the built-in Burp browser to ensure maximum coverage through browser-enabled scans. In this article, we are going to teach you How to Scan websites with Burp Suite. You can visit the packages available in Eldernode if you wish to purchase a VPS Hosting Server.
Table of Contents
Website Scanning Methods
Scans can be setup in several ways:
1. Ability to Scan Specific URLs
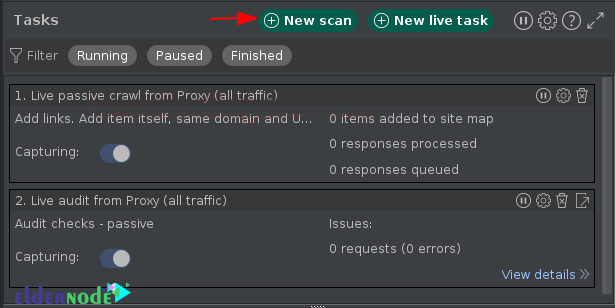
In this method, the scan is provided by crawling content in one or more URLs and examining the content of the truffle. To do this, you can go to Burp dashboards and click on the “New Scan” button. With this, the scan launch opens that allows you to configure scan details.
2. Ability to Scan Selected Items
By doing this, you can scan only audit (no crawl) from specific HTTP requests. To do this, select one or more requests anywhere in Burp and select “Scan” from the context menu. With this, the scan launch opens that allows you to configure scan details.
3. Live Scan
This method is used to automatically scan requests that are processed by other Burp tools, such as Proxy or Repeater tools. You can configure exactly which requests are processed and should be scanned for identifying content or examination of vulnerabilities. To do this, you can go to Burp Dashboards and click on the “New Live Task” button. This will open the launch of a live scan that lets you configure the details of the work.
4. Immediate Scan
You can use this method to perform immediate or inactive scans from the context menu. In other words, you can quickly scan for vulnerabilities without having to open a scan launcher. You can access these options by right-clicking on the request. You can also configure shortcuts to create instant scans.
Scan websites with Burp Suite
In the rest of this article, we are going to teach you how to crawl using the default configuration in the first step. Then we will deal with how to customize the crawler. Finally, we will fully introduce you to How to Scan websites with Burp Suite. Please join us.
How to Crawl Using the Default Configuration
The spider holds a special tab on the Burpsuite screen. But the burp crawler is already defined in the dashboard. This helps you control burp’s automated activities in a single location. So, to start working with the crawler, you need to open the Burpsuite and navigate to the Dashboard there.
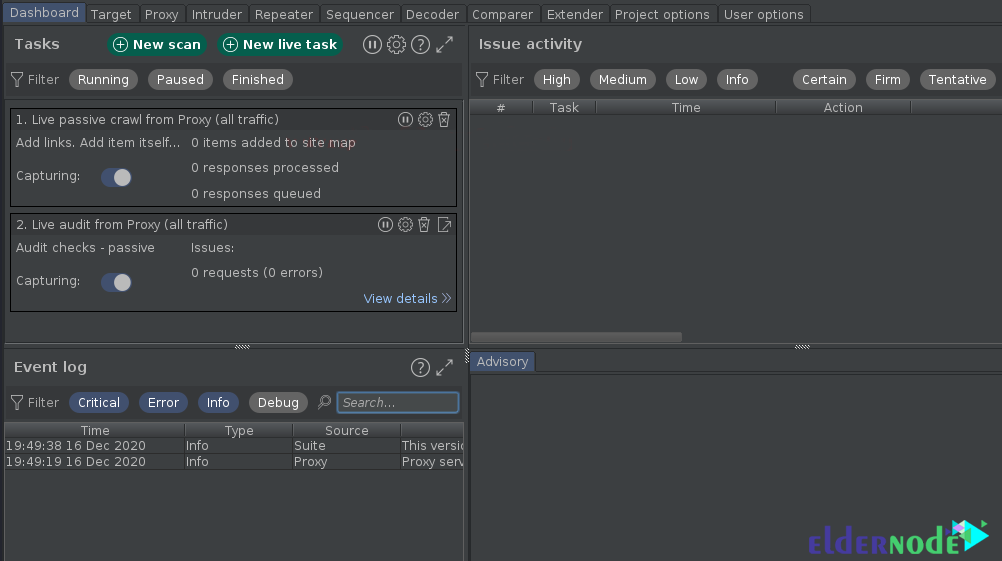
As soon as you land on the dashboard, you can see the specified number of subsets. Let’s look at their details:
1. Tasks
2. Event log
3. Issue Activity
4. Advisory
In this section, you have to click the “New Scan” button at the top of the Tasks section to scan the web application.
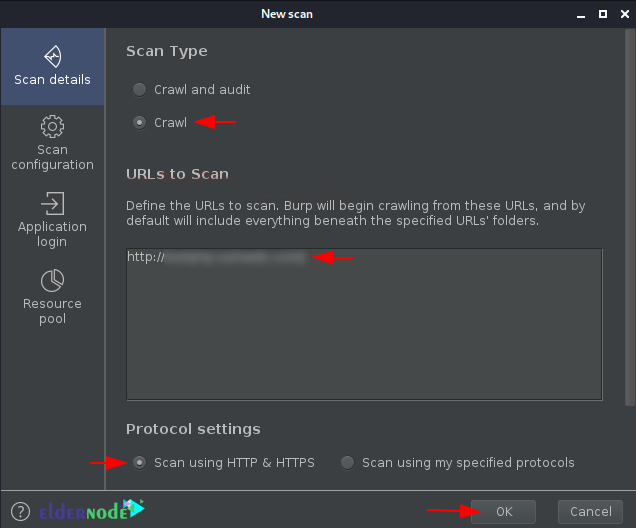
Doing so will take you to a pop-up window called “New Scan” which includes the following options:
1_ Crawl & Audit
2_ Crawl
As you can see in the image below, in this section you have to type the URL you want and then click “OK“.
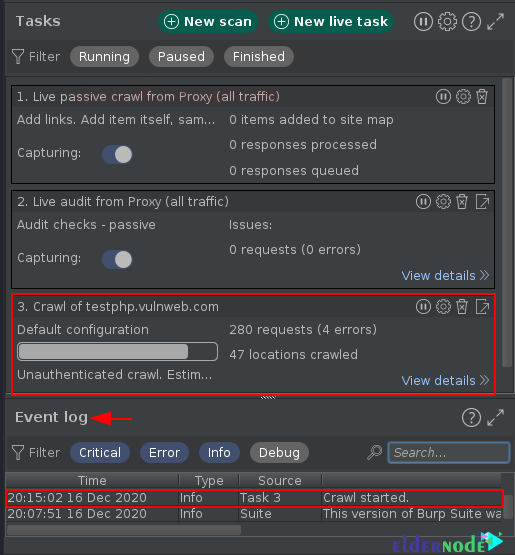
After doing this, the window will get disappeared and over in the dashboard your new task aligned. Then you will see in the event log that the event “Crawl started”.
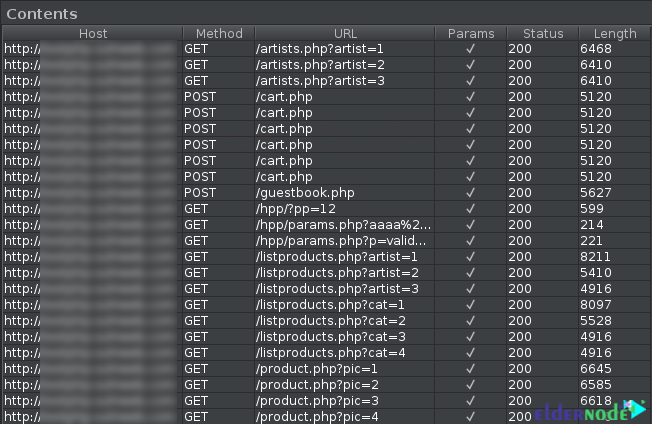
You can now see the result from the sitemap section of the Target tab:
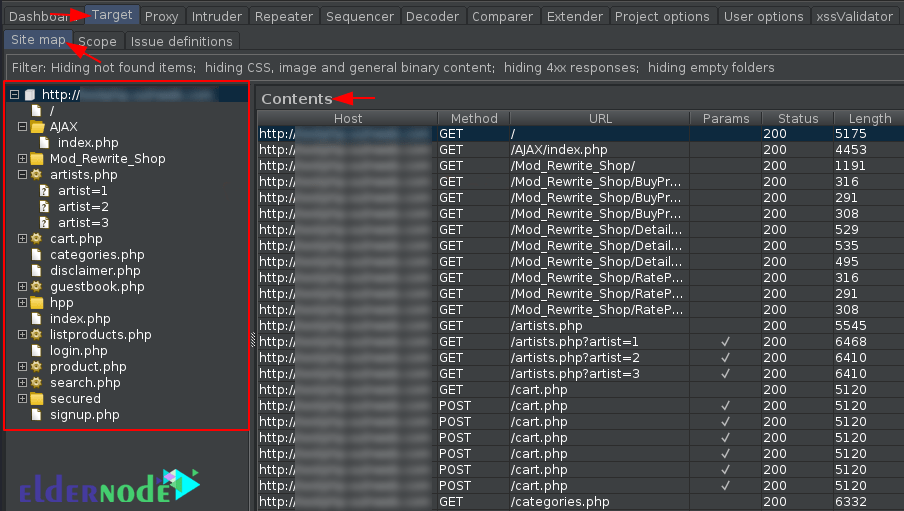
It should be noted that a number of major vulnerabilities exist due to the unsanitized input fields. With this dumped data you can simply segregate the URLs that contain the Input values which thus can be further tested on. For this, you can simply double-click the “Params” field.
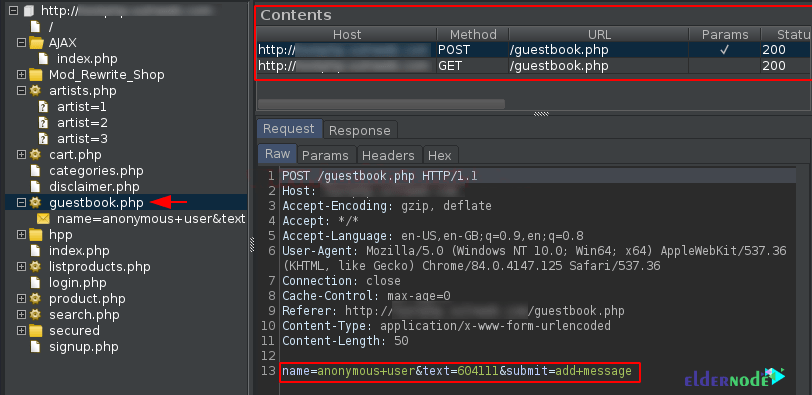
If you want to check the pages or a specific directory, you can simply navigate the left side of the below window and select your desired option there.
How to Scanning with an Advanced Scenario on Burpsuite
In this section, we are going to teach you how to Crawling & Scanning with an Advanced Scenario. Note that Burpsuite gives you the opportunity to scan end-to-end, where Burpsuite crawls the application and discovers its contents and features. In addition, it examines it for vulnerabilities. Thus, to do all this, everyone needs a “URL”.
Follow these steps to see how to do this:
1_ Back on the Dashboard.
2_ Select “New Scan“, and now this time opt “Crawl & Audit“, further mention the URL within it.
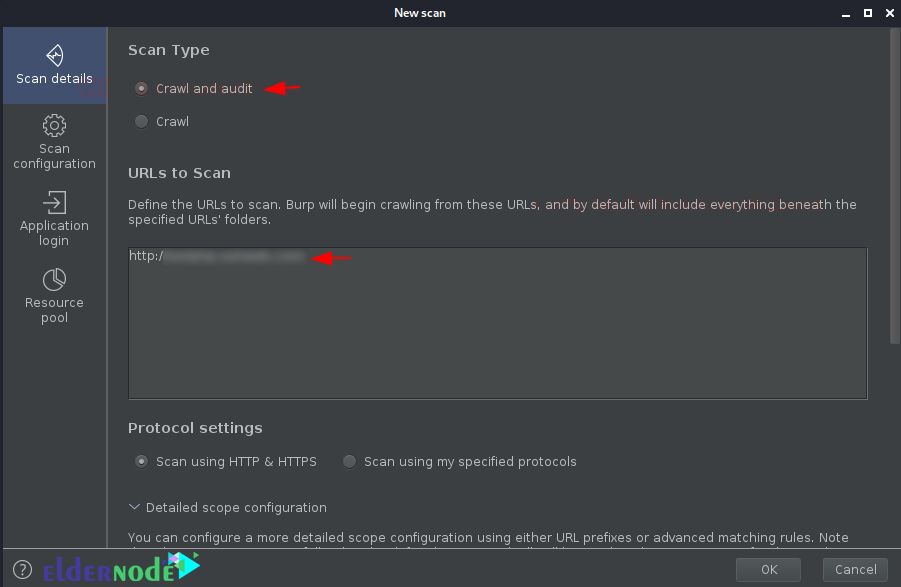
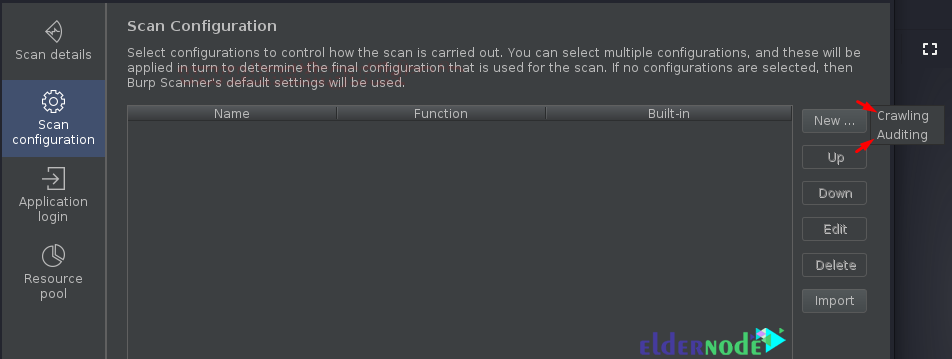
3_ Now you should check the Scan Configuration options, as you move there and when you click on the “New” button.
Rather than redirecting you to the customization menu, it asks you about where to go, for crawl optimization or audit configuration. It should be noted that all the internal options are the same.
Conclusion
By default, all scans will use Burp’s embedded browser to ensure maximum coverage through browser-powered scanning. You can also provide sets of user credentials so that Burp Scanner can discover and audit content that is only accessible to authenticated users. In this article, we first tried to fully acquaint you with the scanning methods in BurpSuite. Then we taught you how to Scan websites with Burp Suite.


